 User Help Manual
  Learn FAQ
  Send us feedback


Video Editor
Download and use the free video software to create and edit videos of any complexity from a family greeting card to a company presentation. Apply vsdc free video editor for light edit hdr-video, any raw-video formats from cams - BRAW, ProRes RAW, any high resolution 4k or more due to video proxies technologies in the editor.
Cut, merge video files, apply visual and audio effects, use filtration and image correction, make slideshows and add an appropriate soundtrack. Use multi-color Chroma Key and advanced parameters settings to give your video a professional look.
All popular video and audio formats are supported.
Video Converter
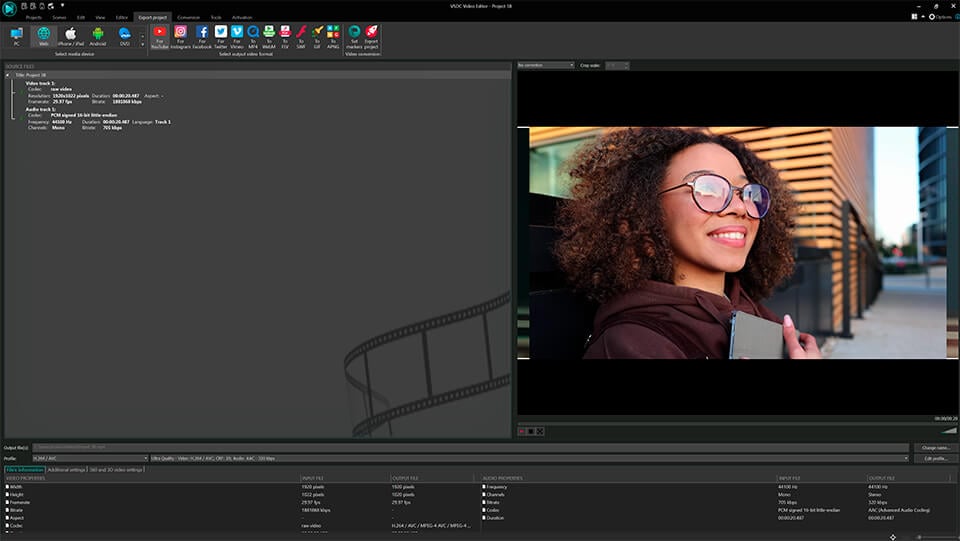
This program is intended for converting video files from one format to another. Nearly all popular video formats are supported (both reading and saving). In addition, the program drastically simplifies the task of converting videos for playback on specific multimedia devices, such as iPhone, Samsung Galaxy or Huawei P30 Pro. The program is extremely easy to use, has a modern interface and all necessary video processing functions.
Audio Converter
The audio converter will help you convert audio files from one format to another. All key audio formats and codecs are supported. The program also allows you to manage playlists and meta tags, extract audio from video files and save these tracks on your computer in any format.
Animated Intro & Title Templates
Explore the VSDC Template Store with ready-made video templates for intros, animated titles, lower thirds, logo reveals, slideshows, glitch transitions, LUTs, and color grading presets. Drop a template into the VSDC Video Editor timeline, edit text, timing, and colors, and finish professional video projects in minutes.
Choose from 300+ exclusive packs of video transitions, LUT packs, text effects, GPS telemetry widgets, animated elements, and animated backgrounds for VSDC. All templates are fully customizable, support up to 4K resolution in 16:9, and help you build intros, wedding slideshows, travel videos, and tutorials much faster.
VSDC Cloud - Online video management
Keep your work safe, organized and always accessible! Back up your video projects, store media files online and access them from any device. Enjoy collaboration, share project updates and exchange files easily.
 Video Editor
 Video Converter
 Audio Tools
 Templates store
 Cloud
Cloud

Multifunctionality
A wide array of multimedia processing tools in one free video software suite.

High speed
Our programs use fast
and high-quality algorithms optimized for single and multi-core CPU’s.

Affordability
VSDC video software is freely available for download to Windows OS-based PCs and laptops.
News:
How to blend clips or images in VSDC Free Video Editor
Using 'Blending Modes' you can create your own visual effects and filters. For example, let's see how to create the so-called Ghost Effect.
Add a video where you'd like to apply a Ghost Effect. To make it perfectly fit the scene, select "Yes" in the "Stretch Video" option.
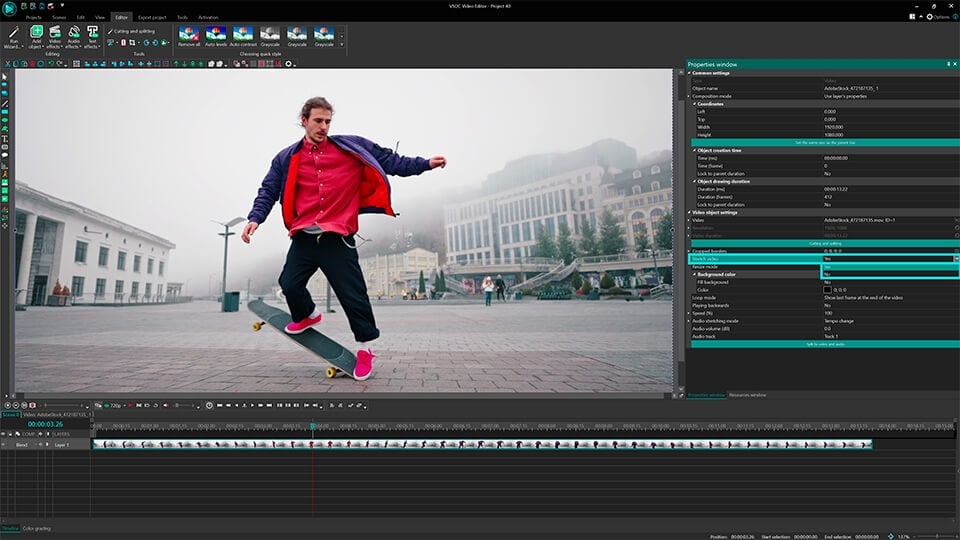
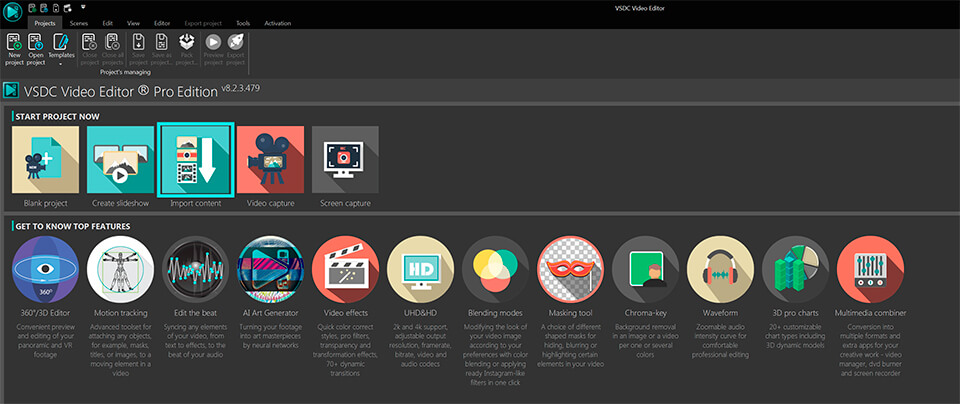
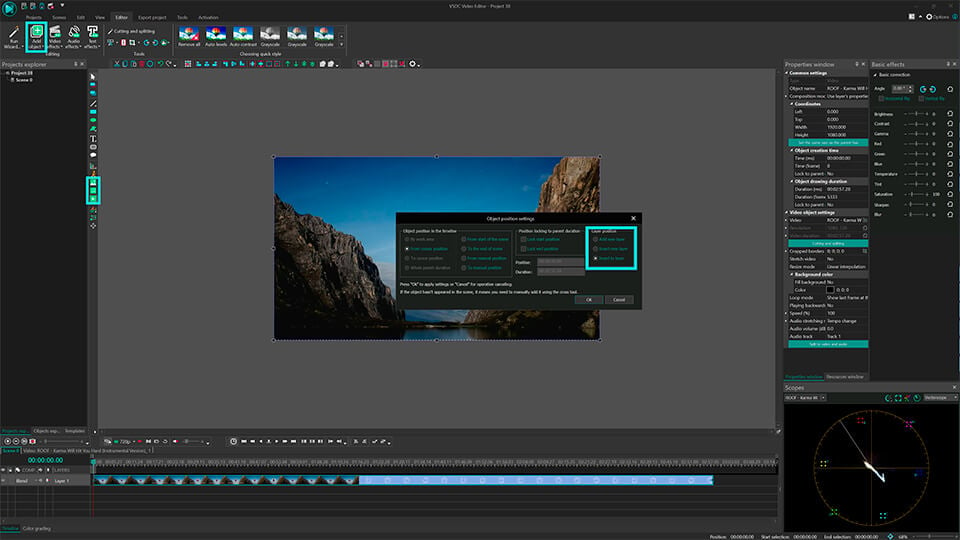
Tip: To make a video perfectly fit the scene size, add a video using the Import Content option
With the ghost effect, an object obtains several contours of different types and colors. To achieve this effect, we need to add as many identical video layers as the number of contours we want for our object.
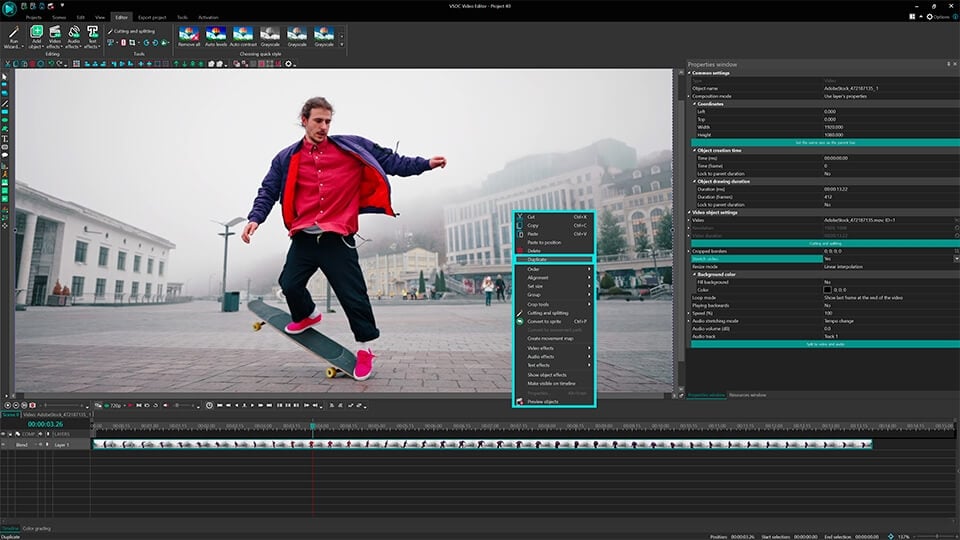
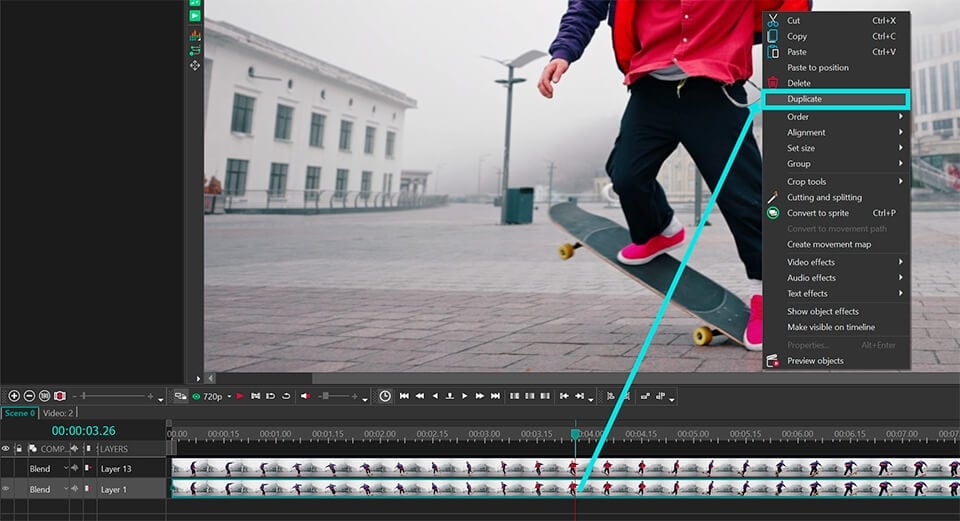
All added videos should be exactly the same size. For this reason, we recommend making a duplicate of every inserted video. Right-click the original video on the scene and select the "Duplicate" option. The duplicated layer will instantly appear on the timeline.
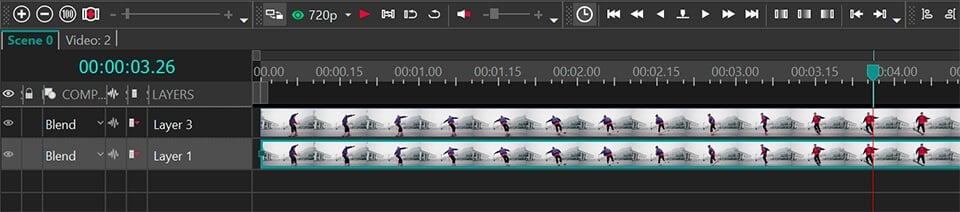
Now comes the most interesting part: we're going to apply a blending mode to one of our video layers. Double-click the layer you want to apply a filter to (on the timeline) and select the "Rectangle" tool.
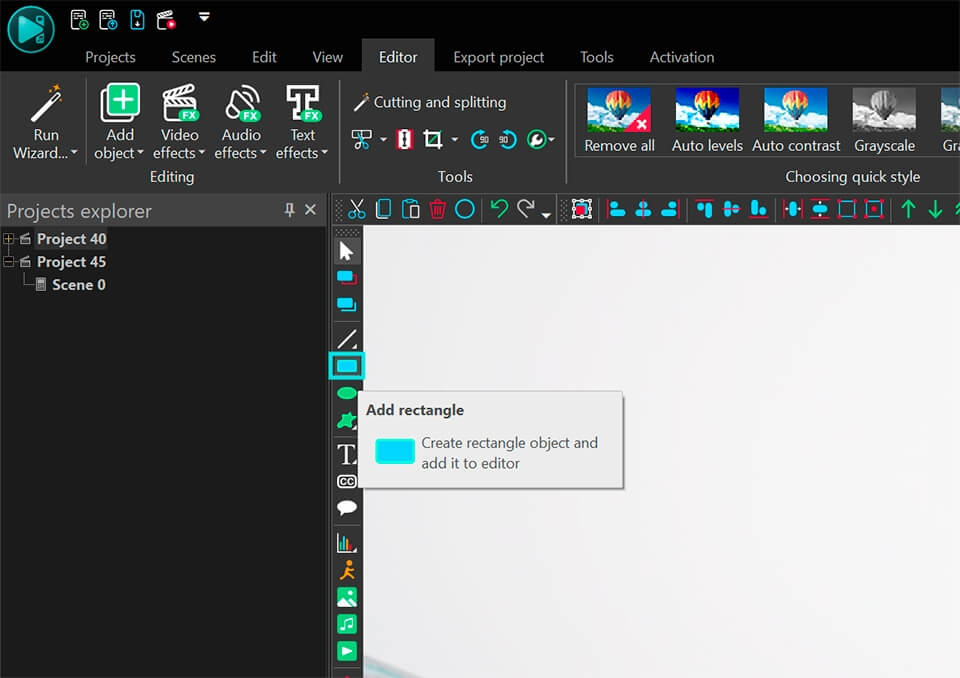
Place the rectangle over the entire scene
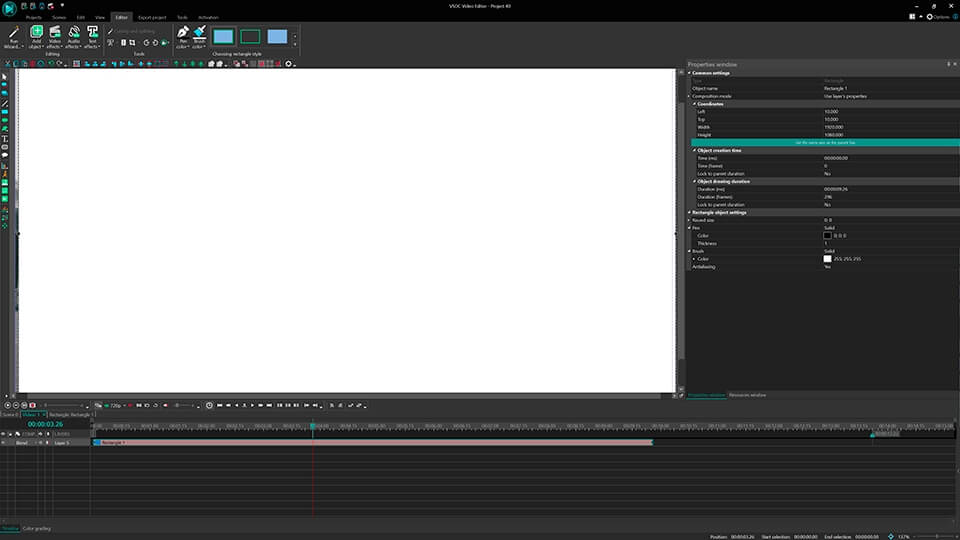
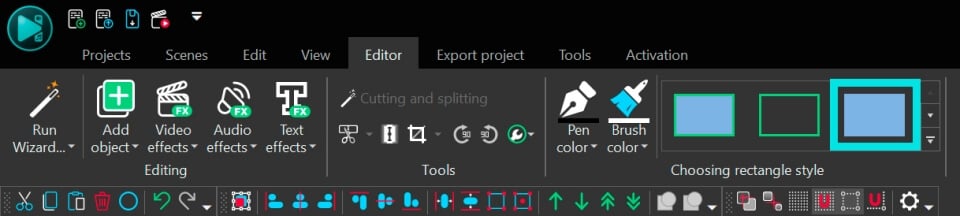
Tip: Choose a rectangle with no borders and filled with color (third type):
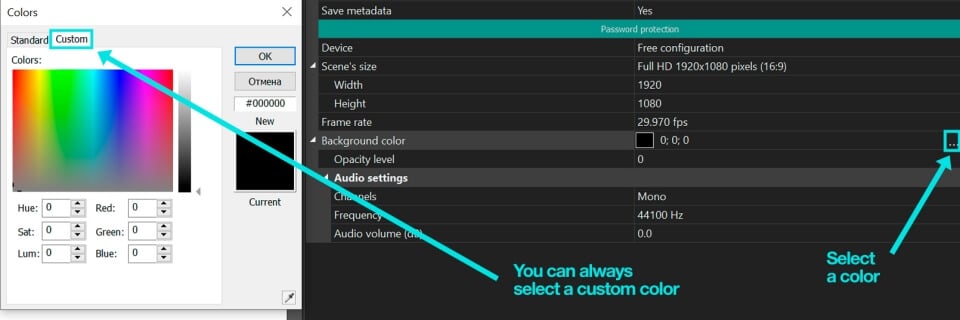
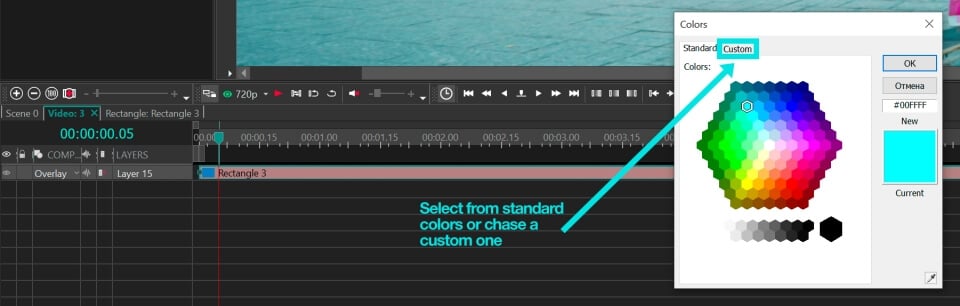
Go to the "Properties" window and choose a color for your rectangle.
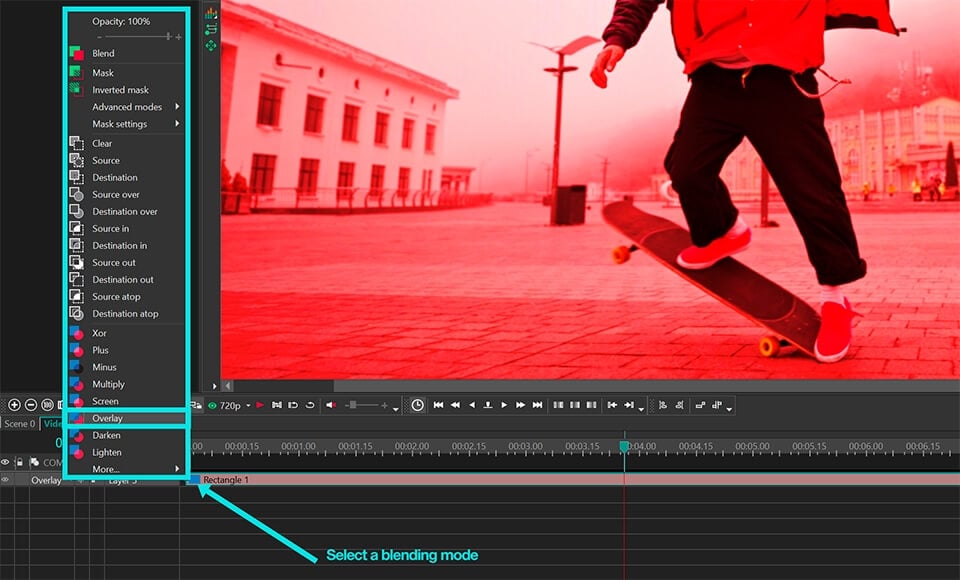
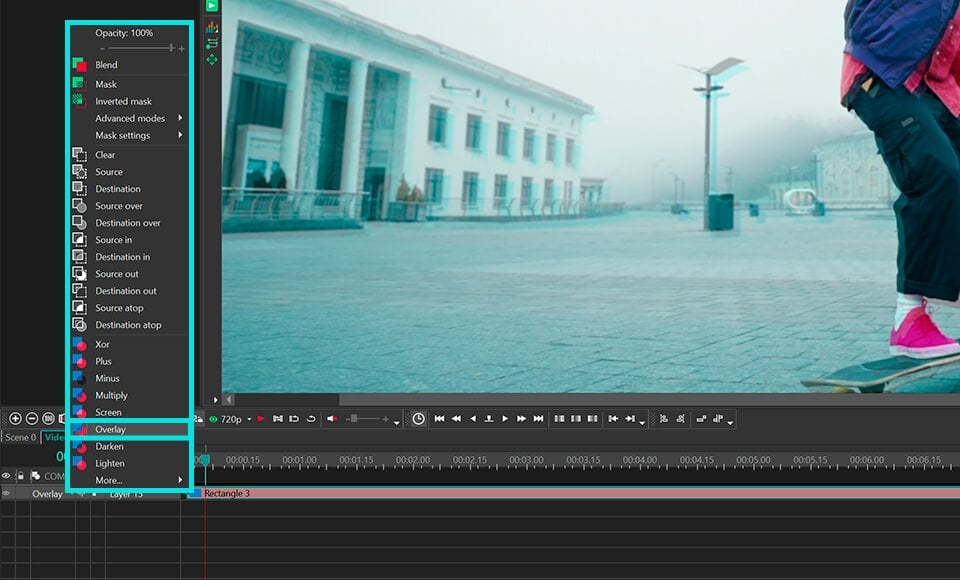
To change the blending mode type, select the appropriate blending type in the "Composition mode" tab.
To make the ghost effect more impressive, let's add one more layer (contour). Go to the main scene, make a duplicate of the blended layer and stretch it to match the scene size.
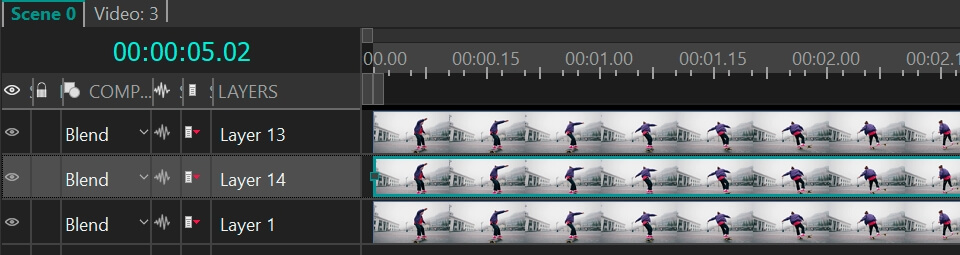
Double-click the duplicated layer and change the color of the rectangle. (Why do we have a rectangle here? That's simple – we made a duplicate of the blended layer where we previously added a rectangle)
Tip: Try using contrasting colors for different layers to achieve the best effect
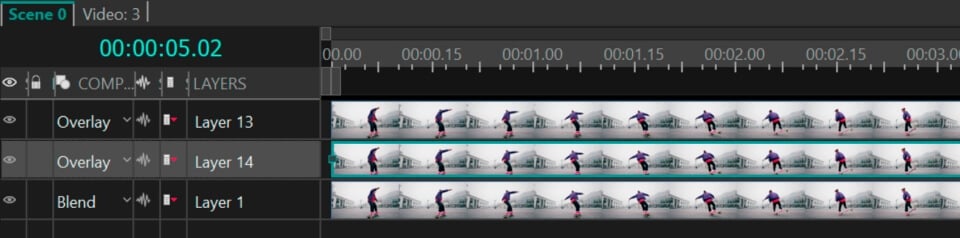
Select one of the blending modes from the "Composition mode" menu on the timeline:
To make our blended layers more phantom-like, let's adjust their transparency. Double-click one of the blended layers and decrease the opacity of the rectangle.
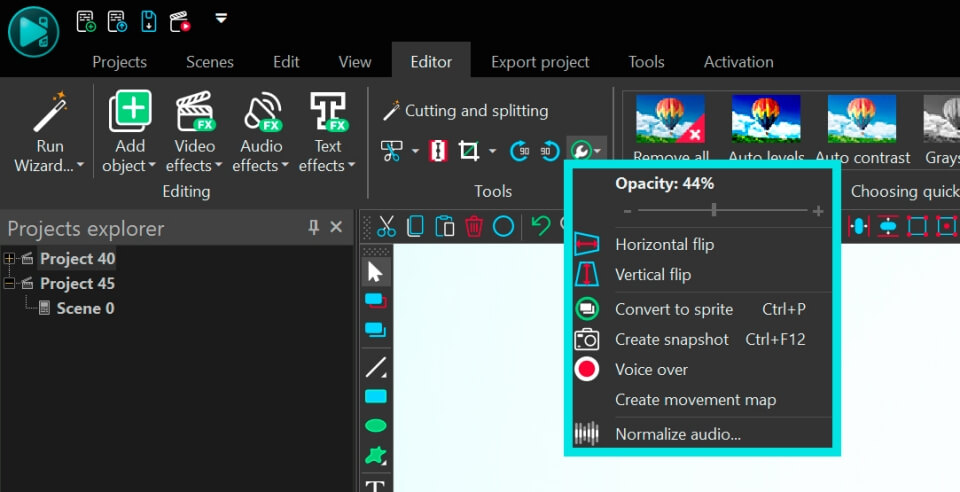
Now let's shift our blended layers to achieve a multi-contour effect for the main video. Go to the main scene and change layer positions by dragging and dropping layers with the mouse.
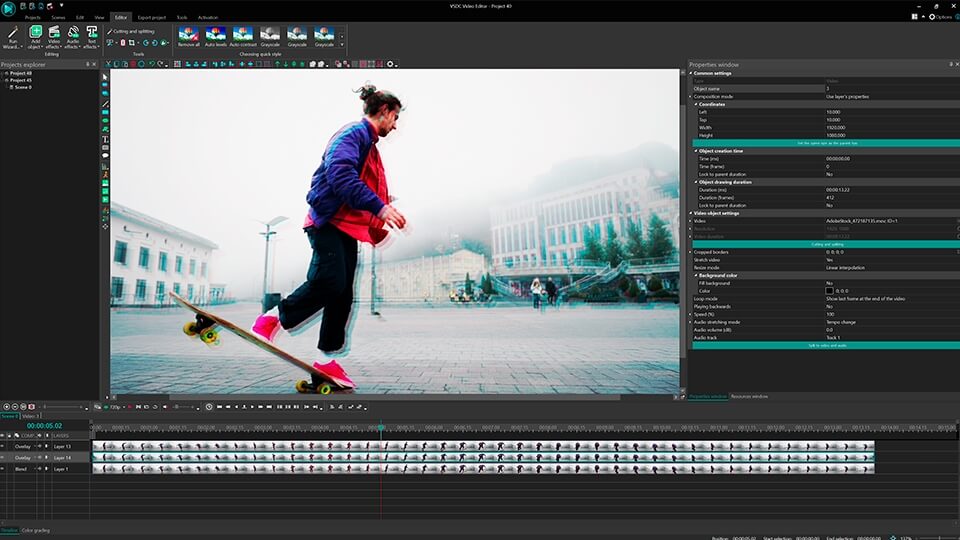
Tip: Vary blending modes and opacity on the main scene to achieve the best result.
Frequently Asked Questions
1. What is a blending mode?
A blending mode is a special effect that determines how the colors of an object on the top layer will interact (blend) with the colors of an object on the bottom layer. Without a blending mode the object on the top layer would simply cover the object beneath it.
For clarity, consider an example with paints: we draw a yellow sun, then we draw a blue sky over the sun. With a blending mode the yellow paint of the sun will mix with the blue paint of the sky. As a result, the sun will become green. Without a blending mode the blue sky would simply cover the yellow sun, and the sun would not be visible.
2. What is the difference between Opacity and Blending Mode?
The Opacity parameter is used when you need to make an object on the scene transparent or semi-transparent. In this case the colors of the transparent object and the object visible through it do not interact in any way.
Blending Mode is used when you need the colors of objects to interact with each other, creating a new color or effect in the process. It's less about transparency and more about the mixing of colors between layers.
3. Where exactly is the blending mode in VSDC?
To find the blending mode and apply it to an object (layer), please follow these steps:
Option 1: For an object
- Select the object on the timeline to which you want to apply the mode.
- Go to the properties window of this object and find the "Composition mode" parameter.
- Set the "Composition mode" parameter to the desired value.
Option 2: For a layer
- Locate the "Composition Mode" parameter for the desired layer on the timeline. By default, it is set to "Blend".
- Left-click on the arrow next to "Blend" to open the drop-down menu.
- Select the desired option in the drop-down menu.
4. I applied a blending mode, but nothing changed. Why?
Blending modes only work when objects overlap. If your object is on an empty or transparent background, you won't see the effect. Make sure there is another layer with video or image beneath your object.
Get VSDC Free Video Editor - powerful non-linear editing software with advanced features. Perfect for YouTube creators, social media videos, and professional projects. Learn more about features.
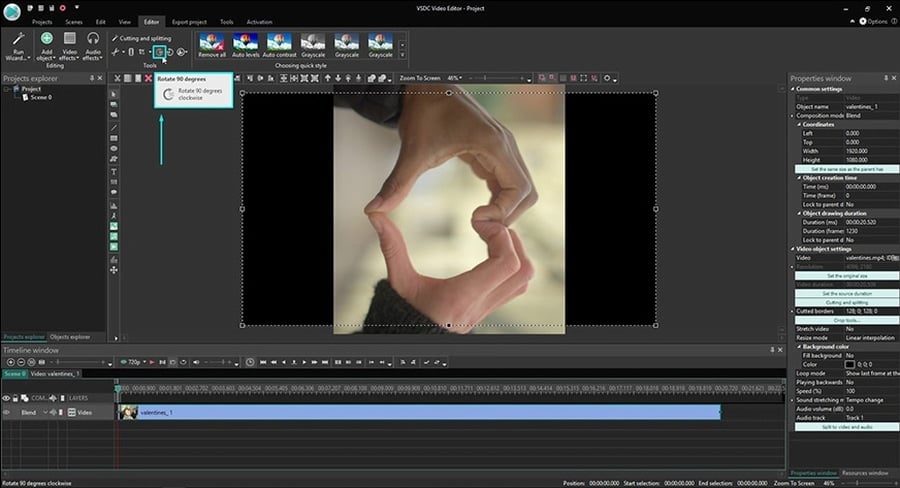
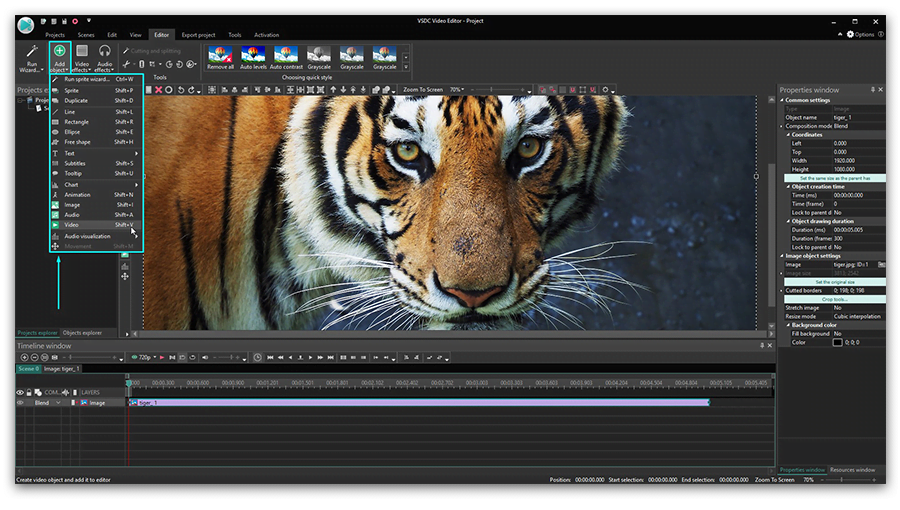
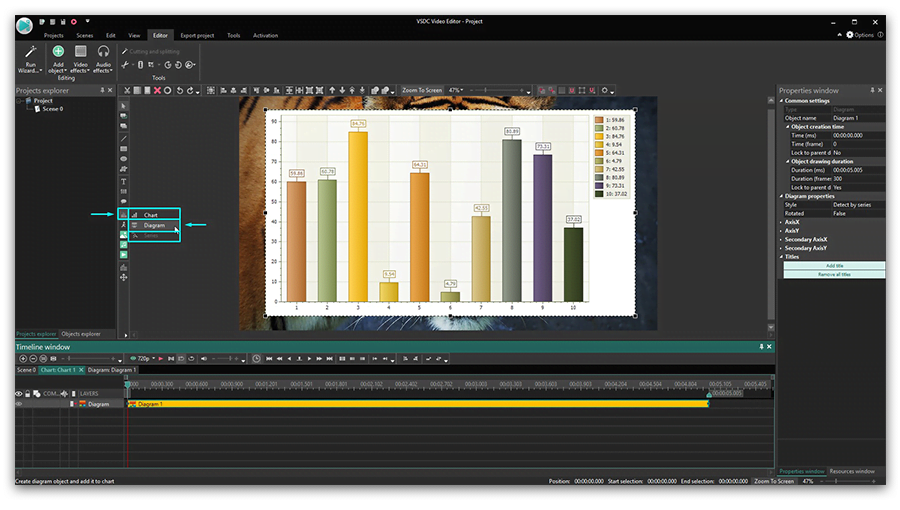
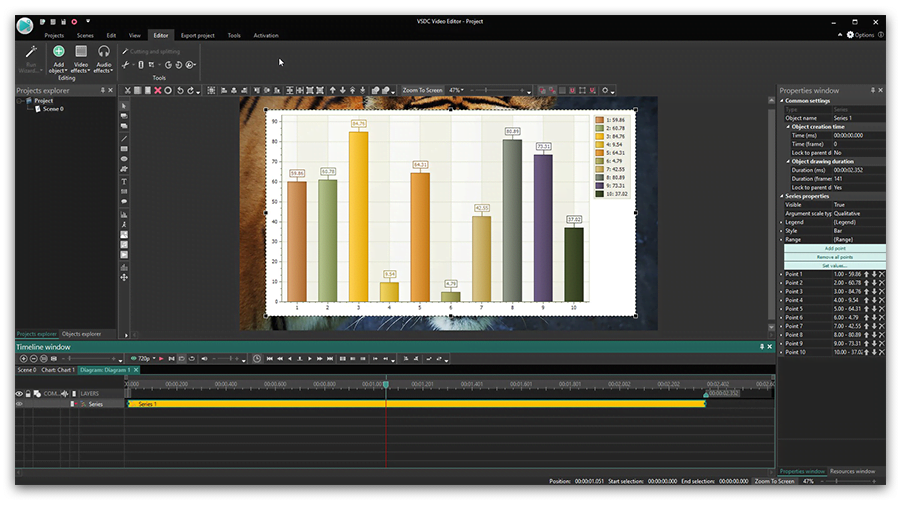
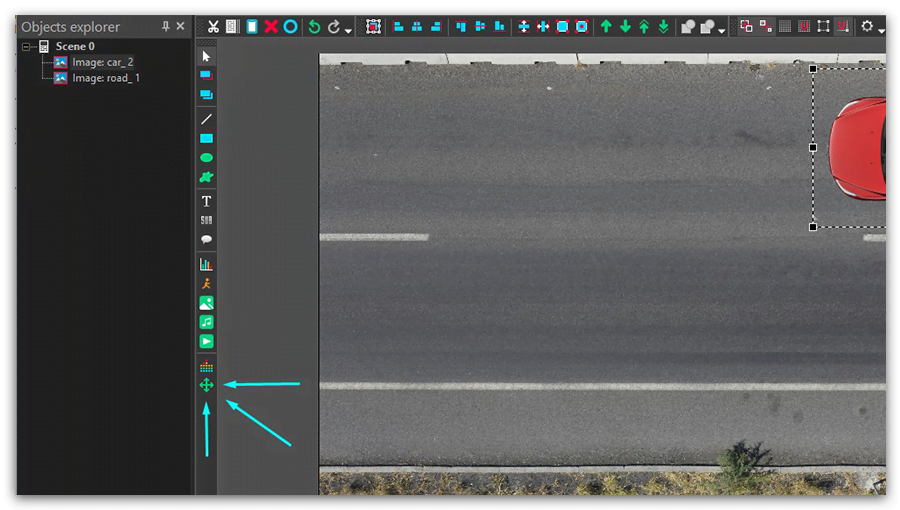
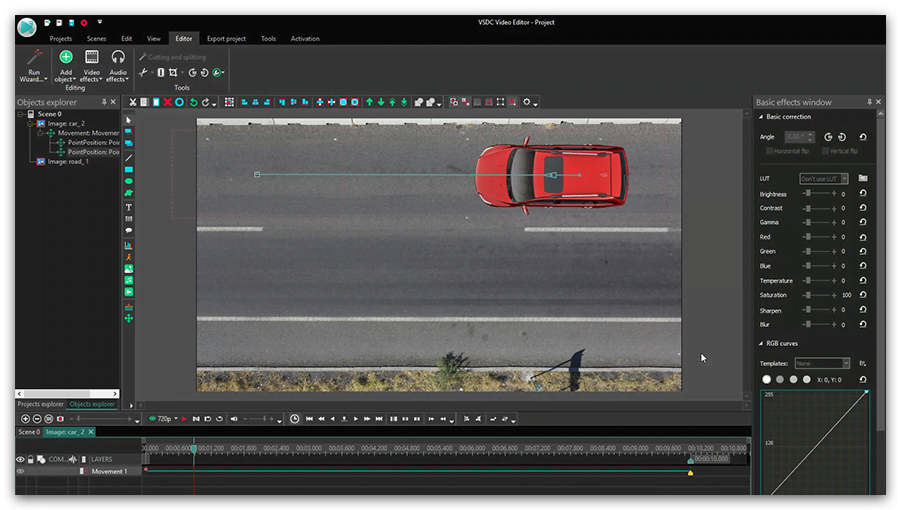
 button on the toolbar. Later you can change the Chart position adjusting the “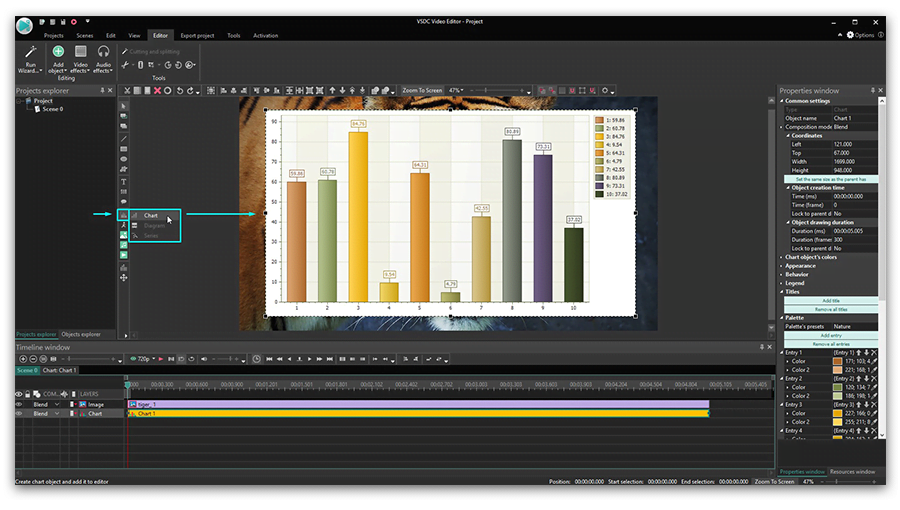
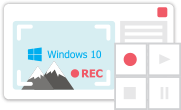
This program allows you to capture the video of your desktop and save it on your PC in various formats. Coupled with a video editor, the program is a great tool for creating presentations, tutorials and demo videos.

The program captures video from external devices and records it to computer in a free format. You can save video from video tuners, webcams, capture cards and other gadgets.
VSDC Video Editor Reviews & Ratings (Trustpilot, Capterra & Media)
VSDC Free Video Editor is rated 4.5/5 by real users on Trustpilot and Capterra. Here are a few reviews and quotes from creators and tech media.
Overall rating: 4.5/5 based on 200+ reviews on Trustpilot and 89 reviews on Capterra.
★★★★⯪
VSDC Free Video Editor is the best free video editor for Windows I’ve used, from color grading to picture-in-picture and cinematic results.
— Ejikeme Eloka Augustine
Source:Trustpilot
★★★★☆
Easy-to-use interface and quick export to social media make VSDC a versatile video editing tool for everyday projects.
— Karen C., E-Learning
Source:Capterra
★★★★☆
A feature-packed non-linear video editor for Windows that can compete with many paid video editing solutions.
— TechRadar
Source:TechRadar review
★★★★★
The free VSDC editor saved my YouTube channel – a powerful video editing software for chroma key, text effects and picture-in-picture.
— Paul Roberts
Source:Trustpilot
★★★★★
Fast and simple for YouTube videos with green screen, zoom, color tools and creative effects in one app.
— Marie R., Media Production
Source:Capterra
★★★★★
One of the best free video editor options for Windows users, ideal for GoPro, YouTube and family videos.
— VidProMom, YouTube creator
Source:Media reviews
★★★★★
I’ve been using VSDC for years; editing is easy and the final videos look great for my personal and professional projects.
— Long-time VSDC user
Source:Trustpilot
★★★★★
Great value and faster than many other free tools; I quickly create videos for YouTube, Instagram and Facebook with features my audience loves.
— Rabika B., Marketing & Advertising
Source:Capterra
★★★★★
VSDC offers many features you don’t usually find in free editors, including picture-in-picture, stabilization and modern codec support with no watermarks.
— Tech media review
Source:Media reviews
 Like us on Facebook
 Follow us on Twitter
Watch us on YouTube
 / @VSDCFreeVideoEditor
© 2011-2026, www.videosoftdev.com, FLASH-INTEGRO LLC. Privacy policy | Terms of use | About us
All trademarks referenced herein are the sole property of their respective owners.
Copying any materials from this site allowed only with written consent of Site Administration.