- published Amy Shao 11/19/25 Meet the long-awaited VSDC 10.2 update: a new ve...
- Hi, I'm Mattea Wharton, a travel videographer from Seattle. For three years I ba...
- published Amy Shao 6/10/25 The wait for something new and unusual is finally...
- This holiday season embraces new beginnings with the latest update of VSDC Video...
Use VSDC Free Editor for Cropping Video Borders
Accidentally recorded too much of the surrounding area? Need to focus on a particular object in the scene? Discovered a slip of your finger while previewing the footage? There can be many reasons you might want to crop a video or remove its borders. The important part is to be able to do it without losing quality, right?
While most mobile apps aren’t capable of fulfilling that task, most desktop video editors will help you crop video borders precisely, get rid of the black bars surrounding your video, and even set up particular width and length if needed. In this tutorial, we’ll show you how to crop video borders for free on a Windows PC using VSDC.

And if you’re into video editing, VSDC is capable of much more than just cropping. It provides you with a toolset for creating a movie of any complexity – be it a short clip based on your family vacation recordings, or a serious project involving video effects, color correction, and audio adjusting.
Download VSDC Free Video Editor
How to crop a video for free on a Windows PC
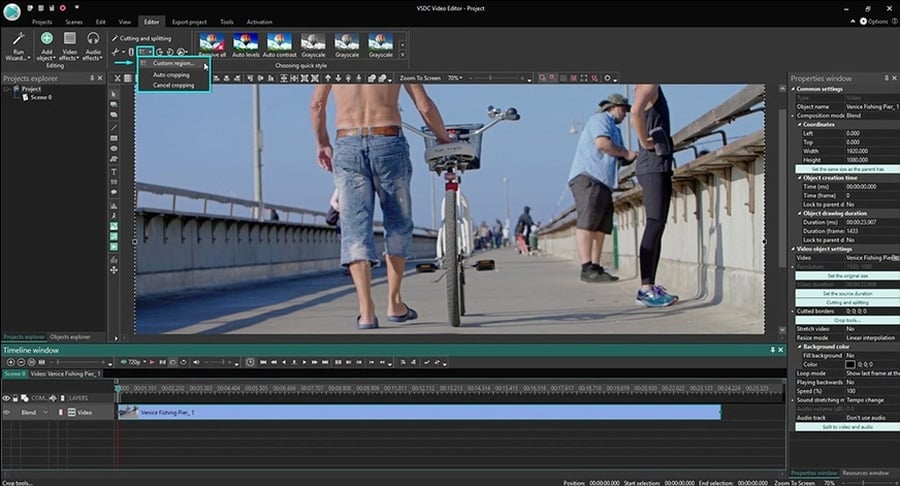
Once you’ve imported a video to VSDC, go to the top menu and click on the “Crop borders” icon located in the Cutting and Splitting menu as illustrated below. You can also access this menu by clicking the right mouse button on the video you need to crop.

As you may have noticed, you’re offered to crop a custom region of a video or use an auto-cropping feature. The latter means the video size will be automatically adjusted to the size of the scene. Most users, however, need to crop video borders using custom settings. Let’s see how to do that.
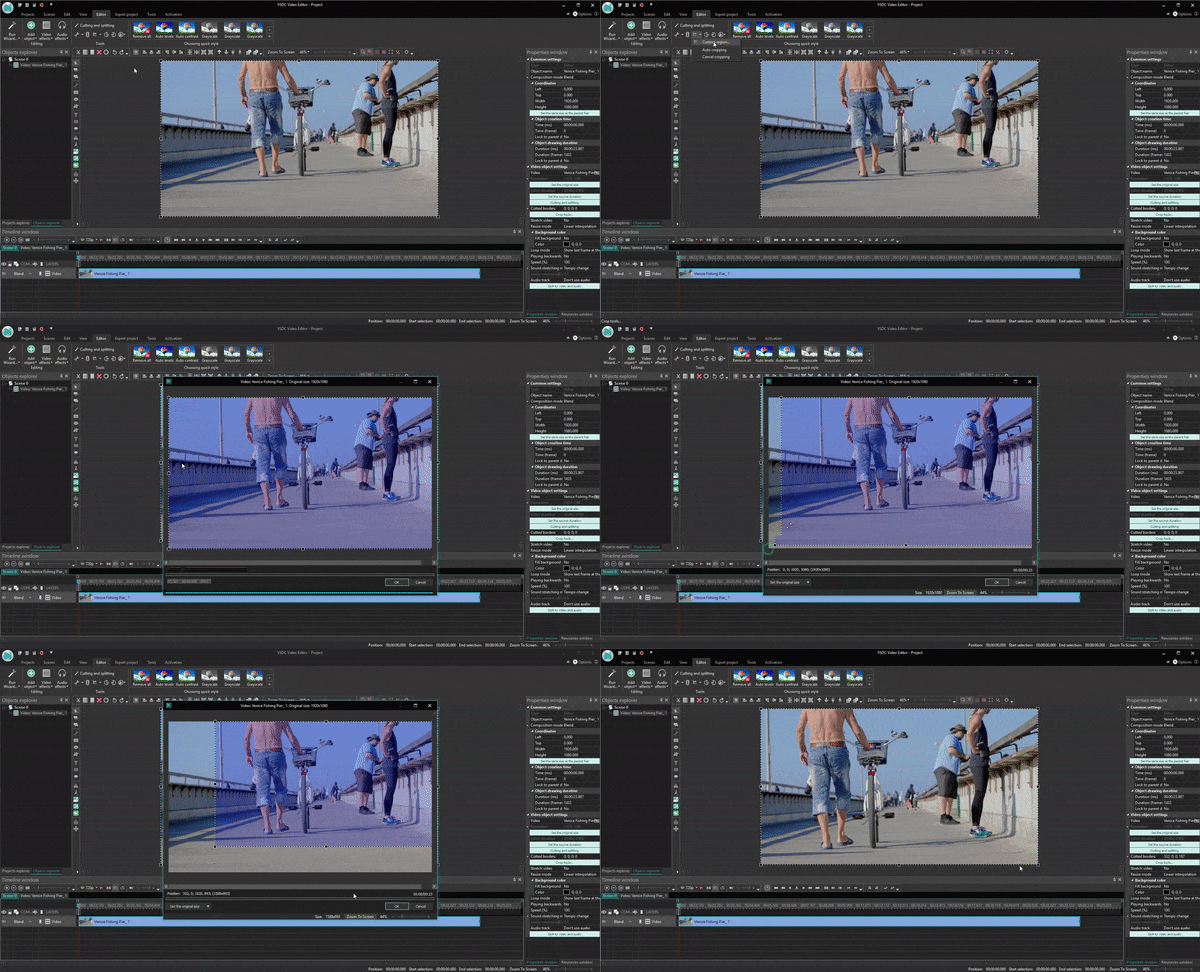
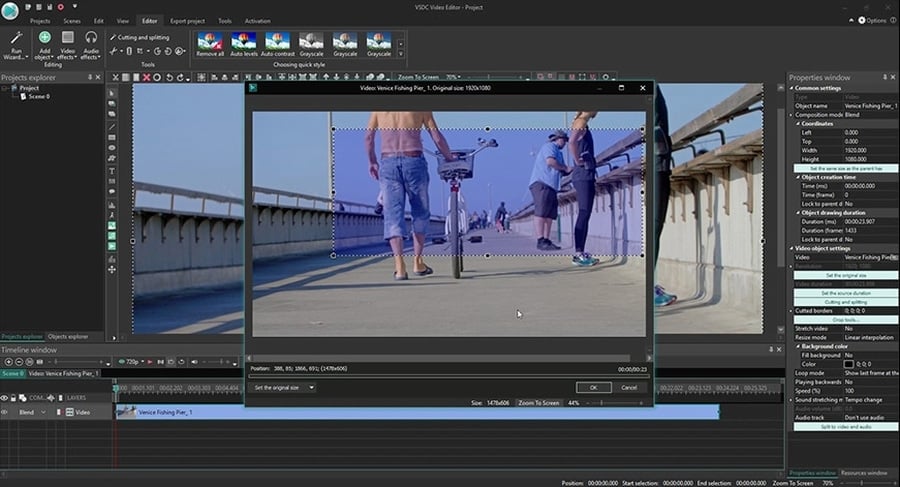
Once you choose “Custom region”, a new window will pop up for you to select the area on the video you want to crop. Here is what you can do there:
- Highlight, grab and drag a chosen region to define what will stay in the scene after cropping.
- Zoom in for higher precision when cropping a video with multiple objects.
- Scroll back and forward to see how the cropped area looks throughout the entire scene.
- Use the “Set the original size” button to apply alignment or set the size of a video in accordance with the scene’s, object’s, or image’s aspect ratio.

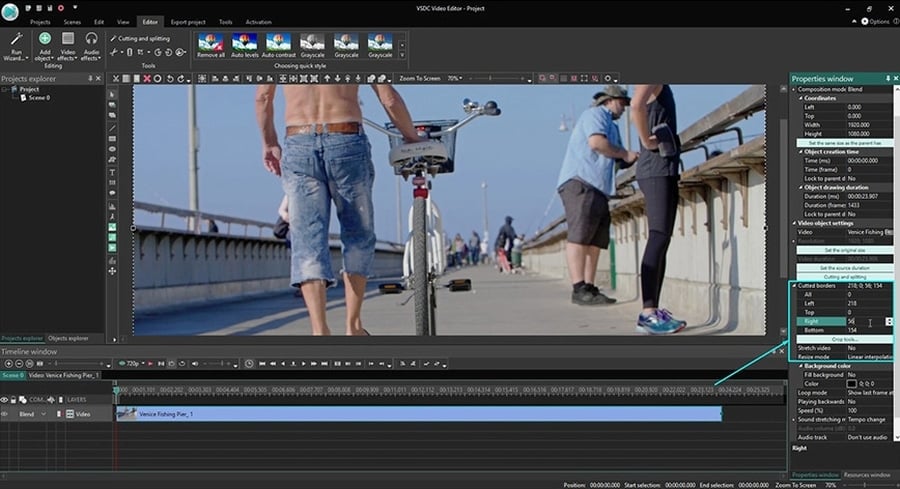
Finally, you can use the “Properties window” on the right to precisely crop each video border by manually changing their positions – see the illustration below. If the Properties window doesn’t appear automatically, use the right mouse button to click on the video and choose “Properties” from the menu.

Once you’re done cropping the video borders, proceed to the Export project tab (top menu) and choose the required format. Use the preview button to make sure that the output video only contains the part you’ve defined, and the aspect ratio is correct. Note that video quality, resolution, its width, and height can be changed if you choose to edit the export profile. If everything looks the way you want, simply click “Export project” to save the file to your PC.
Other video editing instructions you may be interested in:
- How to fix a vertical video
- How to add text objects, titles, and subtitles to a video
- How to rotate a video to any angle
Get VSDC Free Video Editor - powerful non-linear editing software with advanced features. Perfect for YouTube creators, social media videos, and professional projects. Learn more about features.