Video Editor

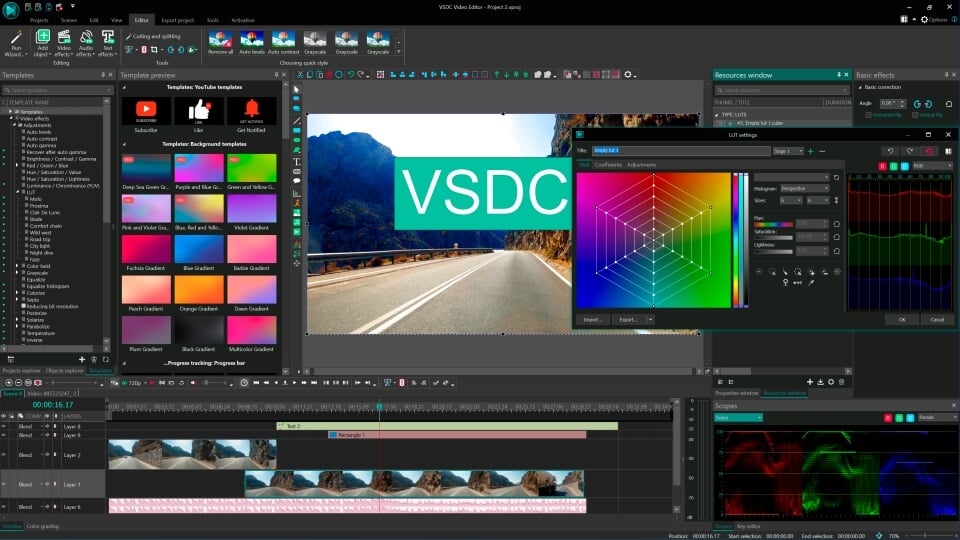
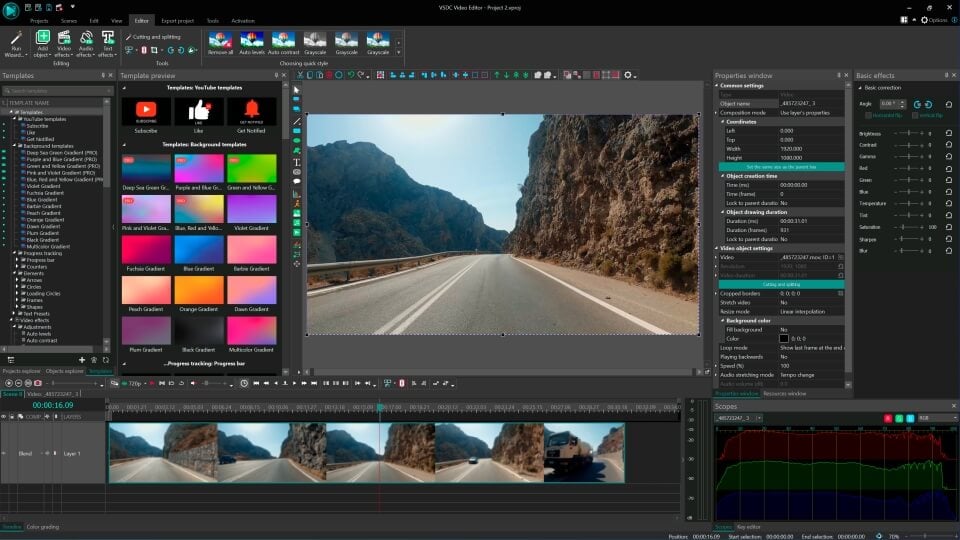
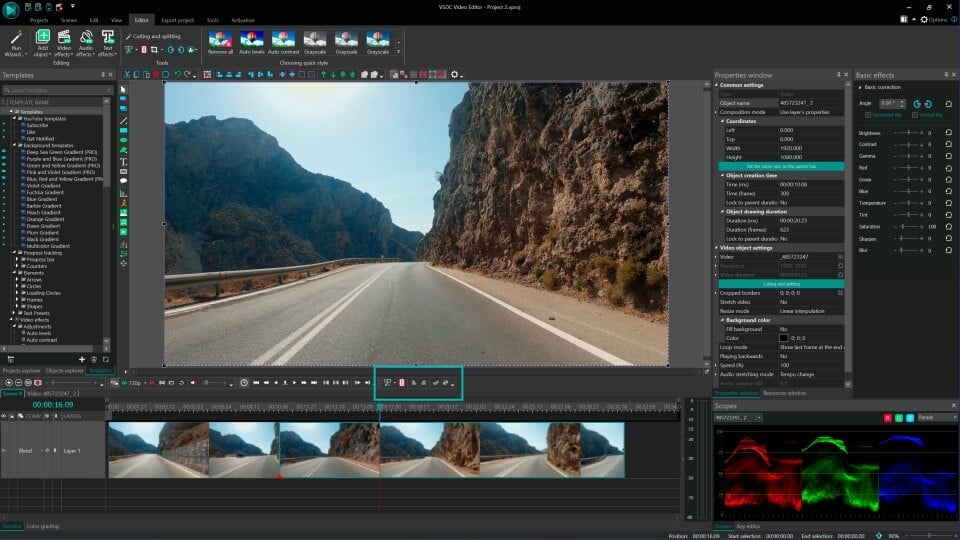
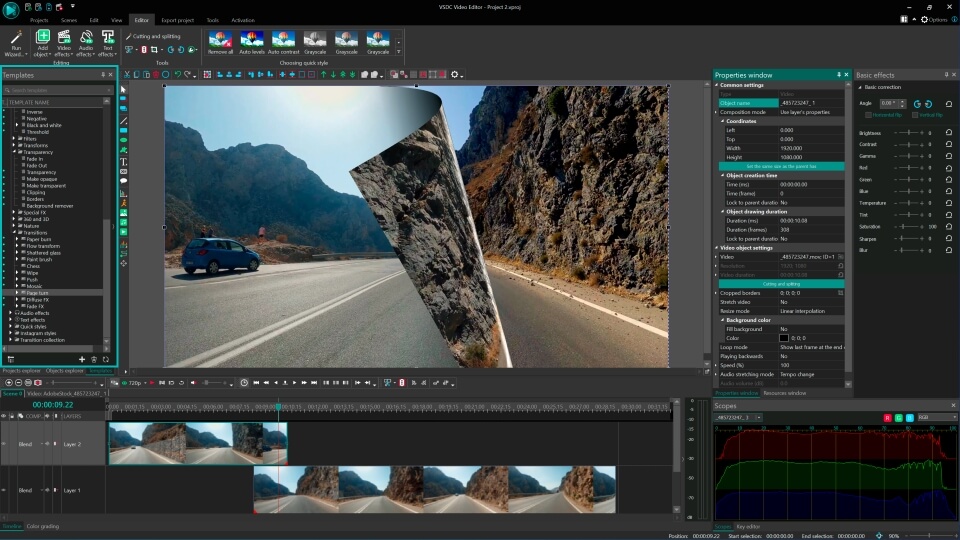
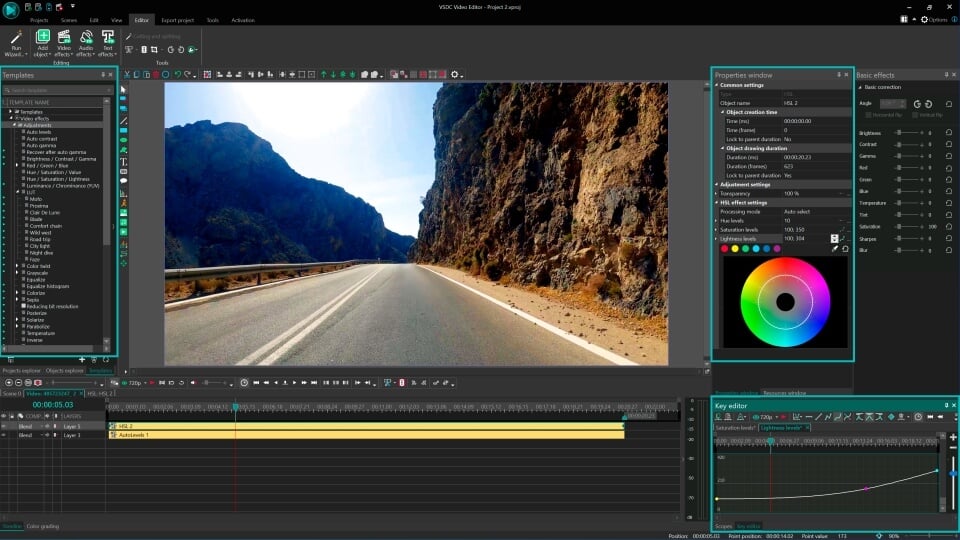
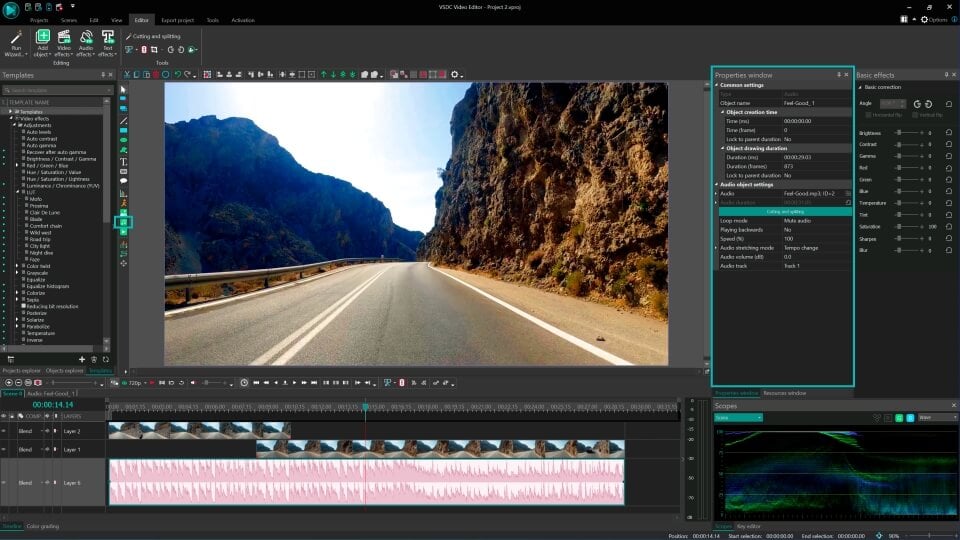
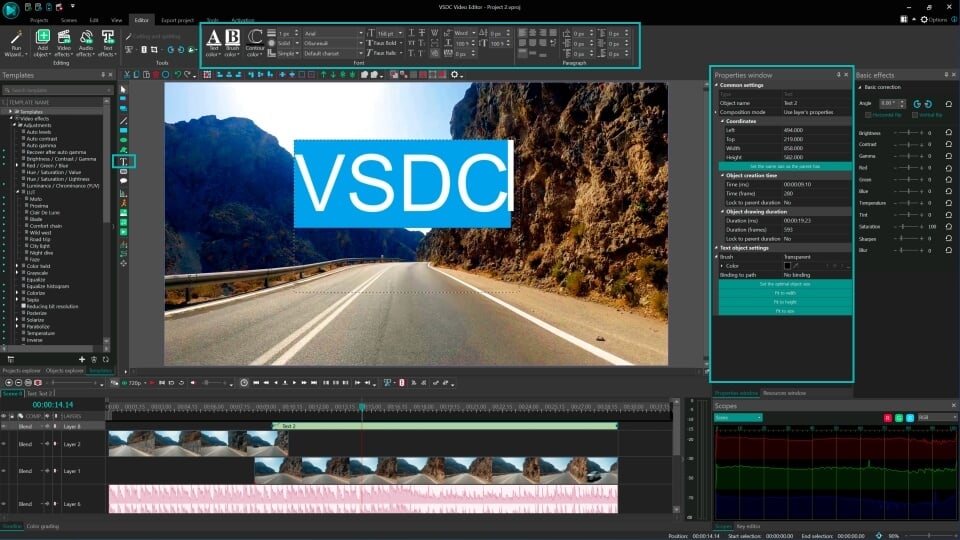
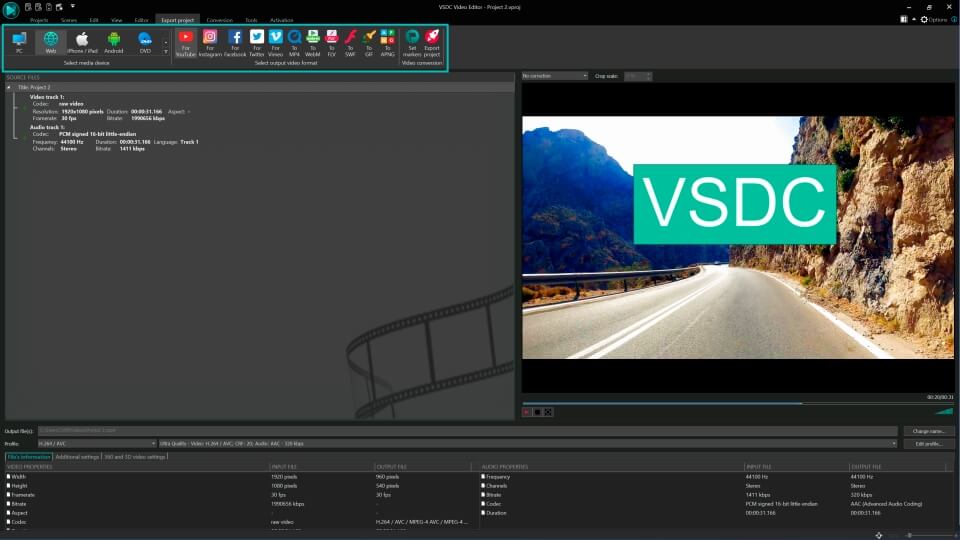
Use free video software to create and edit videos of any complexity from a family greeting card to a company presentation. Cut, merge video files, apply visual and audio effects, use filtration and image correction, make slideshows and add an appropriate soundtrack. Use multi-color Chroma Key and advanced parameters settings to give your video a professional look. All popular video and audio formats are supported.

Read more about Video Editor...

Video Converter

This program is intended for converting video files from one format to another. Nearly all popular video formats are supported (both reading and saving). In addition, the program drastically simplifies the task of converting videos for playback on specific multimedia devices, such as iPhone, Samsung Galaxy or Huawei P30 Pro. The program is extremely easy to use, has a modern interface and all necessary video processing functions.

Read more about Video Converter...

Audio Converter

The audio converter will help you convert audio files from one format to another. All key audio formats and codecs are supported. The program also allows you to manage playlists and meta tags, extract audio from video files and save these tracks on your computer in any format.

Read more about Audio Converter...

Audio CD Grabber

This audio tool is intended for grabbing audio tracks from compact discs and saving them to the user’s computer in any format. Nearly all popular audio formats and codecs are supported. The program can also extract track details from the FreeDB server for automatic file renaming and updating meta tags.

Read more about Audio CD Grabber...

Multifunctionality

Multifunctionality

A wide array of multimedia processing tools in one free video software suite.

High speed

High speed

Our programs use fast
and high-quality algorithms optimized for single and multi-core CPU’s.

Affordability

Affordability

VSDC video software is freely available for download to Windows OS-based PCs and laptops.

Use RAW And BRAW Files in VSDC, instruction for convert .BRAW to MP4

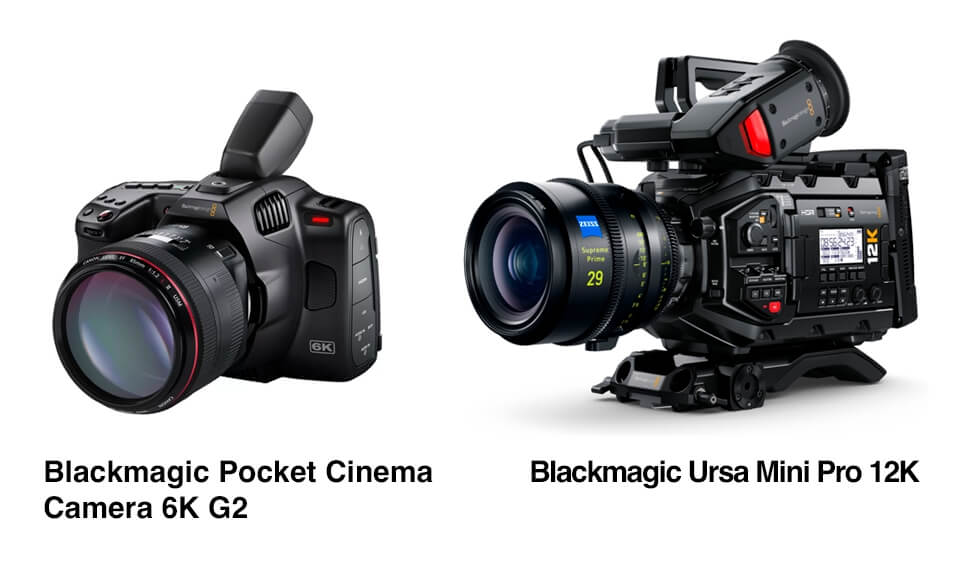
In the world of professional video content creation and YouTube blogging, Blackmagic cameras by Blackmagic Design have become increasingly popular due to their unique capabilities being well-known for their high-quality video output and versatility compared to other professional-grade cameras. Most favored Blackmagic Ursa Mini Pro 12K and Blackmagic Pocket Cinema Camera 6K G2 have proved to be an excellent combination of value and quality.
RAW braw camera

All models of Blackmagic Camera record files in the Blackmagic RAW format which offers the same quality, bit depth, dynamic range and controls as the well-known RAW format, but with better performance and smaller file sizes. Apart from Blackmagic, just recently, the ability to shoot in RAW format has been added to DJI drones for capturing best-quality footage. In fact, dealing with both RAW and BRAW formats can be a bit challenging since they require specialized software such as Adobe Premiere Pro, DaVinci Resolve or Final Cut Pro. Now, VSDC Video Editor has finally integrated long-awaited support for RAW and BRAW files as well. And the best part - it's free of charge!

RAW format

What Is RAW Format?

RAW files are a file format that captures videos of high quality. The primary purpose of a RAW file is to preserve the image as true to life as possible without any alterations made after the video is shot. This way users can manipulate the video's exposure, white balance, and other parameters - this is because the RAW files contain more detailed, high-quality information, making them perfect for professional video editing. Color grading, exposure adjustments, and correcting balance issues can be done more effectively without degrading the quality of the footage. What raw video formats are available and their comparison.
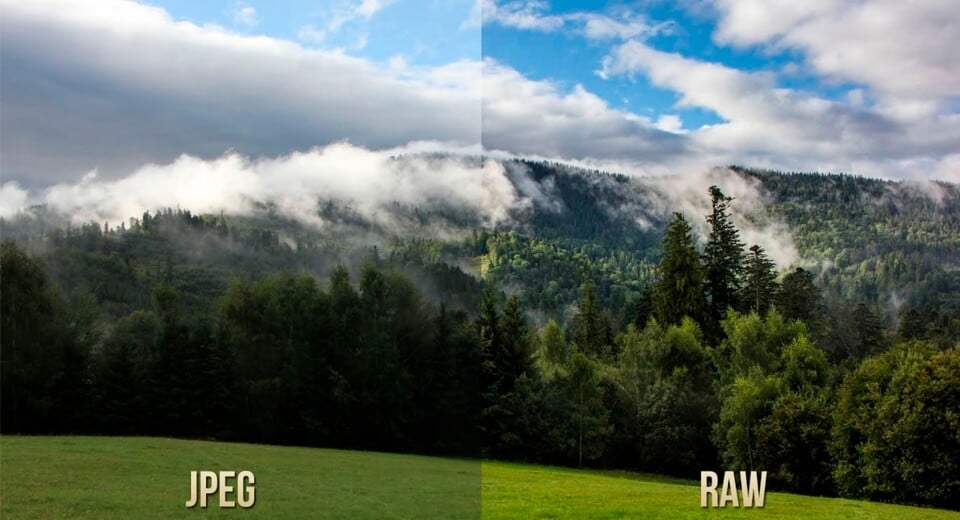
RAW file format

Why Opt for BRAW Files?

As for BRAW files, they are a type of digital video file format associated directly with Blackmagic RAW. Blackmagic RAW (BRAW) stands out as a cutting-edge codec, surpassing traditional video formats in quality suitable for capture, post-production, and finalizing. It integrates modern technologies, including advanced algorithms (like noise management, sensor profiling and new edge reconstruction) to deliver video files that are virtually lossless. This makes it perfect for workflows that demand high resolution, fast frame rates, and wide dynamic range.

  • BRAW files maintain high video quality and offer smaller file sizes, faster playback, and easier cross-platform compatibility compared to standard RAW files.
  • BRAW format compresses videos captured with Blackmagic cameras while preserving all the intricate details, resulting in stunning and true-to-life videos.
  • BRAW video files have a higher dynamic range and color fidelity compared to other formats. This means they capture more details in the highlights and shadows, and offer a broader spectrum of colors.
DAV

Working With RAW And BRAW Files in VSDC

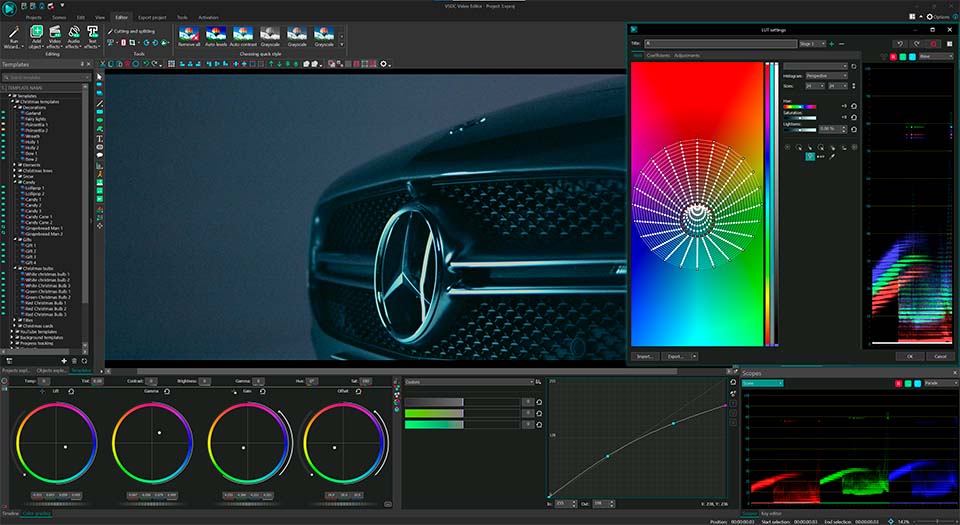
VSDC now proudly supports RAW and BRAW formats, streamlining your project workflow from shooting to completion. Adjustments and settings made in the camera are transferred to VSDC Video Editor through metadata and are fully editable. You can modify the RAW and BRAW settings in VSDC, and then export them in any popular formats supported by PCs and online-players.

For its part, VSDC comes with a number of possibilities to edit RAW and BRAW footage, such as advanced color grading to fine-tune colors, adjust exposure and manipulate shadows, applying LUTs to quickly achieve a specific look in your video, visual effects, converting and more.
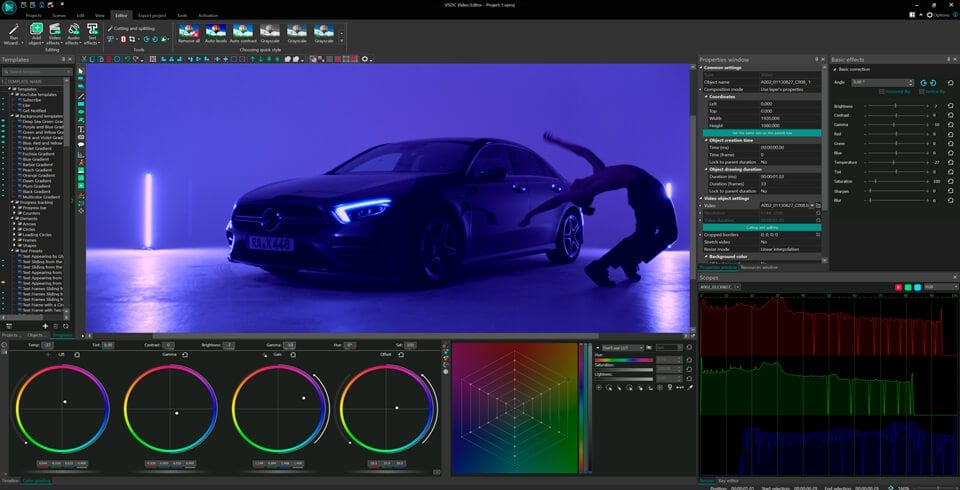
RAW and BRAW color grading

Adding RAW and BRAW Files

As you probably know, there are several ways to import files to VSDC. Adding RAW and BRAW Files is not at all different from adding regular files:

Option 1. Blank project

Click on the Blank project icon on the start screen to create your own project. Adjust project’s settings in the pop-up window (if necessary) and click Finish. Then choose a RAW/BRAW file in the file explorer, drag it to the scene and drop the mouse button.

Option 2. Import content

So, click on the Import content icon, choose a RAW/BRAW file on your PC and adjust parameters in the pop up window appearing automatically (if necessary). Once ready, hit Finish. This option is quite convenient since VSDC can automatically detect all the parameters of your video (height, width and framerate) and adjust the project parameters accordingly.

Applying LUTs to RAW and BRAW Files

LUT, or a Look-up Table, is a set of values defining how the color tones should be modified. Applying a LUT involves comparing and modifying the original color values of a video based on this set. This process is similar for both RAW and standard files in VSDC, while Blackmagic RAW files come with some new features.

When shooting with Blackmagic cameras, LUTs can be embedded directly into BRAW files as metadata. This feature simplifies the process of achieving the desired visual style, as these LUTs are readily accessible for editing and color correction alongside the original file. After importing your BRAW file to VSDC, the embedded LUT will be displayed in the Properties window. Depending if you want to work with the footage with enhancements applied or disable the LUT to maintain the original color profile, select Apply embedded LUT >> YES/NO. This option is available for free.
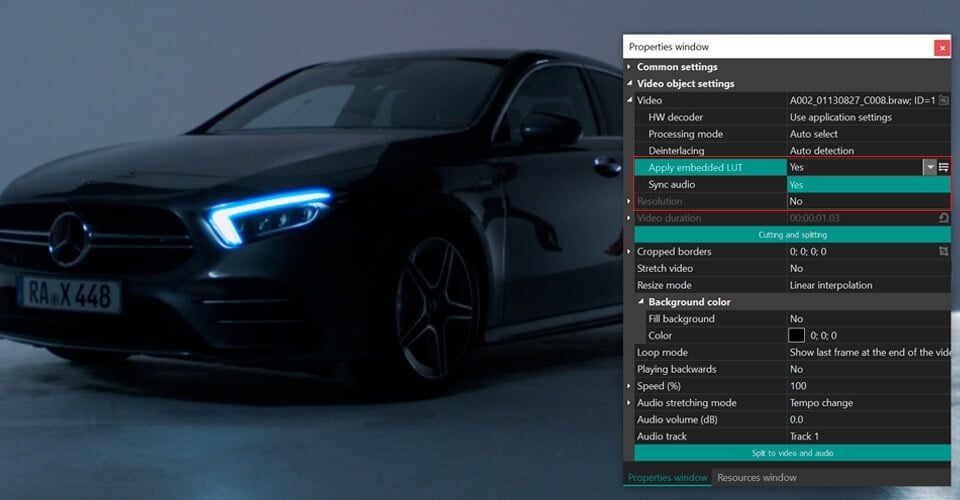
Applying LUTs to RAW and BRAW Files

There’s another feature for VSDC PRO users who are seeking to refine their footage further and need to edit the original Blackmagic LUT. For this, click the Export embedded LUT button to save the LUT to PC in CUBE format. Then import it back into the Resources window for standard LUT editing. For a comprehensive guide on editing LUTs in VSDC, we recommend viewing our detailed video tutorial.

Color Grading RAW and BRAW Files

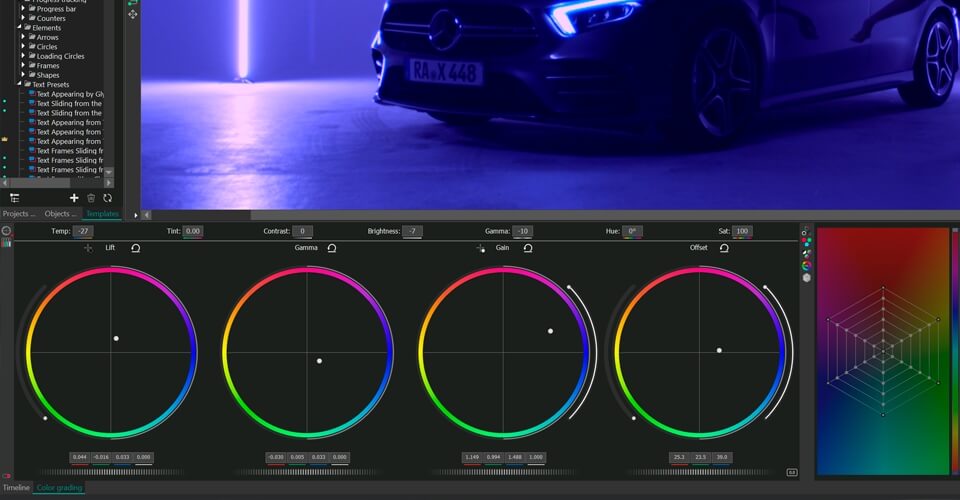
VSDC offers a wide range of instruments and features you can use for color correction that can be easily applied to RAW and BRAW files. These tools allow you to adjust color and lighting of your footage to enhance its overall appearance.

If you want to edit video colors manually by adjusting its brightness, temperature, contrast, and other parameters, simply go to the Video Effects menu on the Editor tab, scroll down to Adjustments and select the set of parameters you need to change. E.g, you want to change hue or saturation levels. Once you select the option Hue/Saturation/Value from the dropdown menu, you’ll notice a new tab with an HSV 1 layer on the timeline. Click the layer with the right mouse button and select Properties from the menu. The Properties window will slide in from the right-hand side. Find HSV effect settings and manually change the levels.

If you are new to VSDC color grading tools, learn how to work with Lift, Gamma & Gain color wheels and RGB curves, apply color correction or recreate stunning cinematic effects like in Barbie or Oppenheimer movies and other useful features that can be applied to RAW and BRAW files on our YouTube channel.
Color Grading RAW and BRAW Files

Converting RAW and BRAW to MP4

The BRAW format is advanced and new, and even though it offers high quality, you need to convert it e.g. to MP4 or other popular formats.

Converting RAW and BRAW to MP4

To do this, upload your file, make edits (if necessary) and go to the Export project tab on the ribbon command bar to choose one of the available formats and configure parameters. Here you can choose a device on which you want to play the video, and a format supported by the chosen device. Click the arrow specified on the image above to see the whole list of supported devices.

After you have chosen a video format, you need to choose a profile which sets the quality of the resulting video. Click the arrow next to the Profile field below and select one of the available profiles from the drop-down list. You can configure your own profile by clicking the Edit profile… button and setting properties of video and audio codecs. Use the Apply profile button to save changes. You can also indicate the path to the resulting video on your computer. Finally, click the Export project button to start the exporting process. To see how it works, follow our video guide.

Wrapping Up

VSDC's incorporation of support for RAW and Blackmagic RAW marks a significant point in video editing, particularly for users of Blackmagic cameras. This integration not only simplifies the editing process but also enhances the overall post-production workflow, ensuring high-quality output consistent with the original footage. With VSDC, your possibilities of working with RAW and BRAW files are unlimited, so you can bring your most creative ideas to life and experiment with different tools and techniques that can help you develop a unique style and produce high-quality, engaging videos.

For any additional queries or assistance, VSDC support team is readily available via This email address is being protected from spambots. You need JavaScript enabled to view it. or through Facebook and Twitter. Stay tuned!

Editing Video Footage from a Dashboard Camera: Tips and Tricks

Can you imagine a car without a dashboard camera? While their primary purpose is to provide evidence in the event of accidents or disputes, the recordings from dashboard cameras can also serve as a creative and insightful way to document your journeys or to make funny short videos that get millions of views on social media just in no time. In this article, we'll guide you through the process of editing video footage from a dashboard camera.

Choose Video Editing Software

Choose video editing software

Selecting the right video editing software is crucial for a smooth editing process. Choose one that suits your needs and level of expertise. Our choice is VSDC Free Video Editor – a simple and convenient video editor with a wide range of features for creating videos of any complexity.

Retrieve the Footage

Retrieve the Footage

Before you start editing, you need to retrieve the video footage from your dashboard camera. Most modern dashcams store video files on microSD cards or internal storage, so remove the microSD card or access the internal storage using a USB cable, and import your footage to the editing program. Typically, dashcam footage is stored in a format such as .MOV or .MP4.

Trim and Cut

Trim and Cut

Most dashcam recordings capture a continuous stream of video, so the first step in editing is to trim and cut the footage. Use the editing software's tools to cut out any unnecessary parts, like long stretches of uneventful driving or footage of your car parked.

Add Transitions

Add Transitions

To make your video more engaging, consider adding transitions between clips. Transitions can be used to smooth out cuts, provide context, or simply add a stylistic touch to your video.

Enhance Video Quality

Enhance Video Quality

Dashboard camera footage might not always be of the highest quality, especially in low-light conditions. You can enhance your video quality by adjusting brightness, contrast, saturation, and sharpness. Be careful not to overdo it, as excessive editing can make your video look artificial.

Add Music and Sound

Add Music and Sound

You can elevate your video by adding music and sound effects. Choose music that suits the mood of your video, whether it's a relaxing drive, an adventurous road trip, or a suspenseful moment. Ensure that the audio levels are balanced and not overpowering.

Add Text and Captions

Add Text and Captions

Use text and captions to provide context or narration in your video. You can include location information, timestamps, or personal comments to make the video more informative or funny.

Export and Share

8Export and Share

Once you're satisfied with your edited video, it's time to export it. Most editing software offers various export options, including different video formats and quality settings. Choose the settings that best match your intended use, whether it's sharing on social media, saving for personal archives, or showcasing to a wider audience.

Editing video footage from a dashboard camera can be a fun and creative way to capture moments behind the wheels and share your experiences with others. With the right video editing software and some patience, you can turn raw dashcam footage into compelling and captivating videos. So, go ahead, edit your dashcam footage, and share the excitement of your travels with the world!

Removing Watermarks and Hiding Logos from a Video in VSDC

In today's digital landscape, watermarks and logos serve as both protective measures against unauthorized use and symbols of brand identity. Yet, there are legitimate circumstances for removing watermarks and hiding logos from a video, whether for aesthetic reasons, content reusability or to avoid native advertising. So, as you see, knowing how to efficiently eliminate or conceal watermarks becomes essential, and VSDC Free Video Editor emerges as a powerful tool in this domain. This article provides solutions on how to effectively tackle these marks using VSDC. Dive in to master this art and elevate your video editing skills!

DeLogo Filter

Offered in the free version of VSDC, the DeLogo filter presents a straightforward approach to remove watermarks, obscure unwanted logos or other overlay graphics from videos. It can be applied the following way:

  • Start by launching VSDC Free Video Editor. Click on the Blank project button to create your own project.
  • Then choose a file in the file explorer, drag it to the scene and drop the mouse button. If you are new to VSDC and want to learn more about how to get started with VSDC, we advise you to watch our comprehensive video guide.
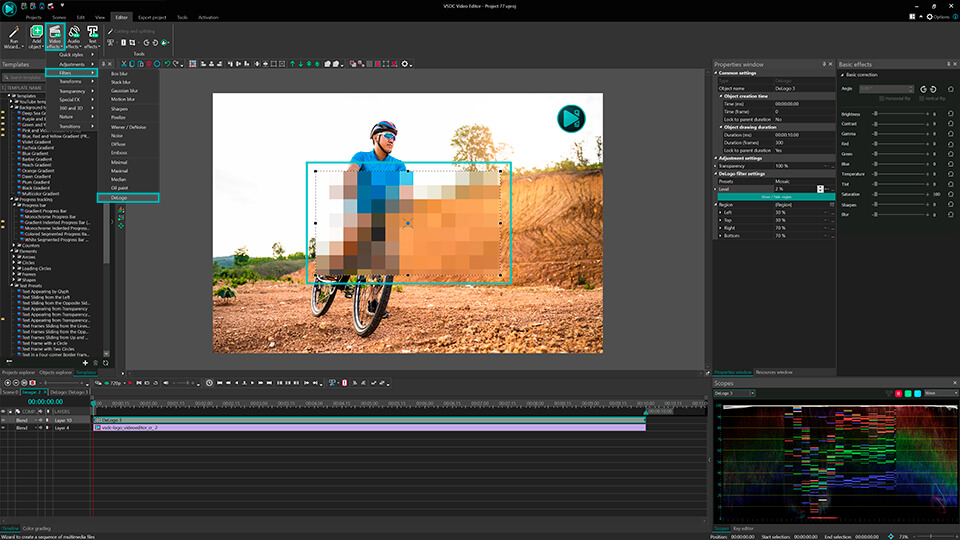
  • To access the DeLogo filter, make sure your video file is selected on the timeline. Then head to the Video Effects tab located on the Ribbon, opt for Filters from the dropdown menu and choose the DeLogo option.
  • After selecting an object, a pop-up window will emerge, allowing you to define the exact timing for when the effect should be visible and when it should disappear. As soon as you're satisfied with the configurations, click “Ok” to confirm changes. Then you'll observe a pixelated rectangle in the video's center. Simultaneously, DeLogo filter will appear on the timeline.

Removing Watermarks

If the default settings aren't ideal:

  1. Click on the DeLogo filter on the timeline and navigate to the Properties window on the right side of the scene. If it isn't immediately visible, right-click on the DeLogo filter and select Properties. In the Properties window you can adjust the size and position of the pixelated rectangle, ensuring it effectively covers the watermark or logo.
  2. Within the settings, you have a choice of five presets: Pixelate, Box blur, Lens blur, Mosaic, and Gaussian blur. Choose one that best fits your needs.
  3. Below, there's an option to adjust the intensity level to fine-tune the appearance.

Now the logo is covered by a blurred rectangle and successfully hidden from your video. If you are satisfied with the result, export your project. This way you can easily remove watermarks, logos, GPS details, vehicle registration numbers and more. So, you see that the DeLogo filter is quite handy, allowing for performing different tasks. But if you are looking for an even more refined appearance, Telea mode is your go-to.

Telea Mode

For those desiring a highly discreet and sophisticated watermark hiding technique, Telea mode is the answer. Unlike basic blurring or pixelation methods that might leave visible traces, the Telea method is based on an algorithm that fills in the unwanted region by analyzing and replicating the surrounding pixels, allowing for a more seamless and discreet removal. However, this feature requires an upgrade to VSDC Pro, which unlocks a world of advanced video editing capabilities. So, this is how to use the Telea mode:

  • Again, start by uploading your video into VSDC Free Video Editor. To do this, follow the steps described above.
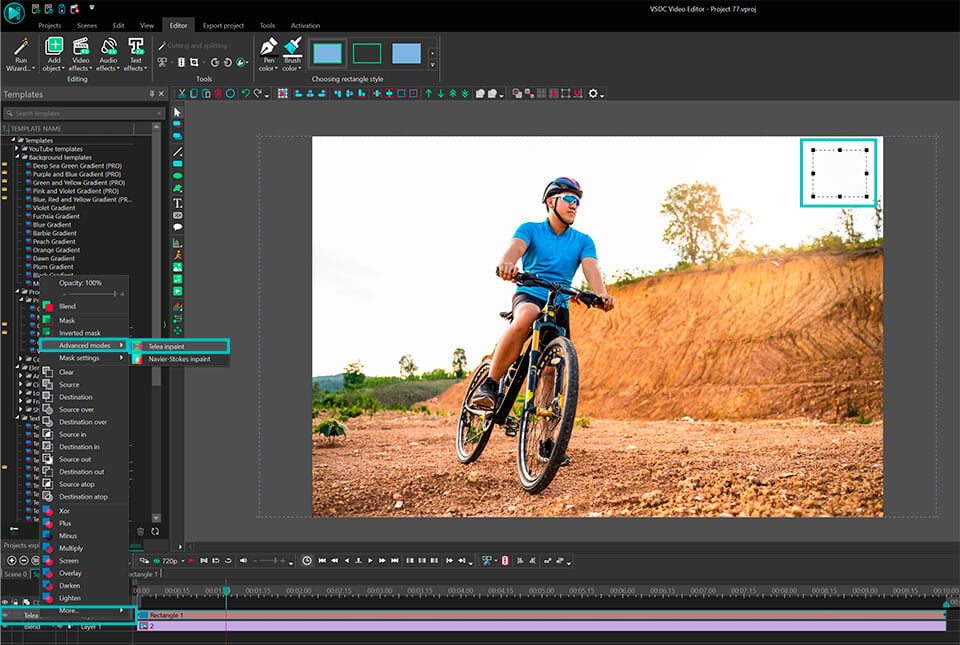
  • Navigate to the vertical tab on the left of the scene and choose the Rectangle tool.
  • Use this tool to craft a rectangle that matches the size of the object you wish to conceal, positioning it accordingly.
  • Select the Rectangle on the timeline and navigate to the Blend menu on the left of the timeline.
  • In the Blend menu find Advanced modes >> Telea inpaint in the drop-down menu and click on it. That’s it!

Removed the watermark

As a result, Telea mode has removed the watermark by replacing it with the existing parts of your video. So, the area's edges are almost invisible and a bit more subdued than with the DeLogo filter.

Please, note, that when you apply Telea mode in a video editor and launch the preview, you might notice a slowdown. It occurs because both the video and the mask are being processed simultaneously. To optimize the editing process and prevent such delays, we recommend you to convert the original video into a proxy format.

Wrapping up

Removing or hiding watermarks and logos can be a challenging task. VSDC Free Video Editor has proved to be an effective tool for this purpose. Whether you opt for the straightforward DeLogo filter or the more refined Telea Mode, it's crucial to use these instruments responsibly and ethically, always respecting the original content creators' rights and intellectual property.

As you continue your video editing journey, subscribe to VSDC YouTube channel to receive instant notifications about new tutorials published. And if you have any questions or need assistance, you can reach our support team via email at This email address is being protected from spambots. You need JavaScript enabled to view it. or through Facebook and Twitter.

How to Use the Stabilization Tool

Have you ever captured great footage, only to find it ruined by shakiness? Shakiness in videos can be caused by many things when using handheld devices like smartphones or GoPro cameras when you don’t have a portable stabilizer to set your camera on during recording. That’s why VSDC's Stabilization tool is here to rescue your videos from unwanted jitters. It allows you to remove the effect of camera shake from captured videos, transforming shaky shots into polished, professional-quality content.

The stabilization process involves examining the shaky footage and making frame-by-frame adjustments. This may include cropping the edges, rotating or shifting frames, and using advanced algorithms. The outcome is a smoother, stable video that's visually appealing. Continue reading to learn about this useful tool and watch our video tutorial to see everything with your own eyes.

Getting started

First, launch VSDC and navigate to the Tools tab on the Ribbon command bar in VSDC and select Video stabilization. Please, note that this is an advanced feature and is only available to PRO users.

After selecting Video stabilization, a pop-up window will appear warning you that the stabilization tool does not have a real-time preview. This means that the effects of the settings you apply will only be visible after you export your video. Click OK to start working with the tool.

To get started, you need to add your footage. Use one of the following options above the Source files panel:

  • Open files: Use it to select one or multiple files from your computer. Note, that if you already added files to the Source panel, this option will delete them and replace them with the ones you select.
  • Add files: Use it to add files to previously added items.
  • Add folder: Use it to add all files from the selected folder.
  • Add DVD: Use it to add files from a DVD or from an HDD.

If you made a mistake in file selection or want to remove the entire list, use the options Close files or Close all files. To access information about the properties of a specific file in the Source files pane, use the File's information option on the same panel.

Adjust stabilization settings

Stabilization settings are located on the upper toolbar of the video stabilization window. In the Stabilization tab you can smoothen the video and ensure the most optimal stabilization result. Let’s review it in more detail.

Shakiness

Shakiness setting controls how much the video stabilizer corrects the shakiness in your video. Imagine, you’re recording holding the camera in your hands or moving quickly, and the video looks shaky or unsteady. This setting will help to make it smoother.

This is how it works:

  • You can select the value of shakiness correction from 1 to 10.
  • If you set it to a minimum, the stabilization will be gentle. It’ll fix some shakes but still keep some of the original movement. It will result in a more natural look of the video like in a documentary.
  • If you set the value to 10, the stabilization will be strong enough to fix even really strong shakes. This option is great for a video with much action or movement.
  • The default value is 5. If you set it like this, it will smoothen the shakes but still keep some natural motion. It’s a good starting point for most videos.

Accuracy

The Accuracy setting controls how carefully the video stabilizer looks for shaky movements in your video.

This is how it works:

  • You can set the value of accuracy from 1 to 15.
  • If you set the value to a minimum, the stabilizer will operate faster but it may miss some shakes. It is suitable for videos where speed is essential and minor camera shakes can be tolerated.
  • The default value is 15. If you keep it, the stabilizer will analyze the video very carefully and catch even tiny shakes. This will make your video look really smooth, but it might take longer to process. So, choose the value that matches your video's complexity and how perfect you want it to be.

Step Size

The Step Size setting determines the interval in pixels at which the video stabilizer scans the region for the best way to fix shaky footage.

This is how it works:

  • You can set the value of step size from 1 to 32 pixels.
  • If you set the value to a minimum, the tool will analyze each pixel in the frame to look for unstable footage. This can make the fix very accurate, but it might take longer to process.
  • If you set a value closer to maximum, the tool will use a bigger step size, jumping over pixels. As a result, fewer spots will be checked, but the scanning process will be much faster.
  • We recommend using the default step size (6). It is a good balance between being accurate and not taking too long to fix the video.
  • Smoothing

    The Smoothing setting applies a denoise filter to the camera movements resulting in a smoother and more stable video output. This setting refers to the number of frames (forward and backward) used for filtering.

    This is how it works:

  • If you set it to 0, the smoothing filter will not be applied. The camera movements will stay as they are in the original video without any changes.
  • If set at larger values, like 20 or more, it’ll make the video very smooth, but may slow down the way how quick the camera can move around. It is useful when you want gentle and slow camera motions, like in slow and steady shots.
  • We recommend setting the default value (15). It means that 15 frames before and 15 frames after the current frame will be used for smoothing. It’s an optimal value for most of the videos to get rid of shaky and jumpy motions.
  • Max Shift

    The Max Shift setting determines by how many pixels the frames in the video can move to fix the shaky camera movement.

    This is how it works:

  • If you pick the default value (-1), you set no limits to how far the frames can move. This helps the video stabilizer do whatever it takes to fix the shakiness without being restricted.
  • If you set another custom value, for instance 5, it will limit the tool in terms of how far the frames can move. The stabilizer will still do its job but make sure that the frames do not move more than 5 pixels in any direction. This is useful when you want to fix shaking but still want to keep the video looking natural.
  • Max Angle

    The Max Angle setting determines how many degrees the frames in a video can be rotated to fix shaky camera movement.

    This is how it works:

  • If you set the default value (-1), it means that there is no limit on how much the frames can be rotated. This lets the stabilizer rotate the frames as much as needed to fix the shakiness without any restrictions.
  • If you set a positive value, for instance, 10, it will limit the stabilization tool in rotation. It means that the stabilizer will work on fixing the shakiness while making sure the frames don’t rotate more than 10 degrees. This is helpful if you want to avoid frames being turned too much and keep the video looking as close to the original as possible.
  • Contrast Threshold

    The Contrast Threshold setting determines how noticeable objects should be in the frame for the stabilizer to catch it and fix it. This parameter sets the contrast threshold that the program takes into analysis during the stabilization process.

    This is how it works:

  • You can set the value of contrast threshold from 0 to 1.
  • If you set the default value (0.25), it means that the stabilizer will work only on areas that have a clear difference in color or brightness. This helps make sure that the tool fixes things that are easy to see in the frame.
  • If you set it lower, like 0.1, the stabilizer will extend the analysis and work on the objects that have a less clear difference in color or brightness. This may help to capture more details, especially if the video has lower-contrast scenes or subtle movements. The downside is that the video may look a bit messy if the stabilizer catches on objects that are unclear within the frame.
  • If you set a higher value, like 0.5, the stabilization tool will only work on areas with a very clear brightness difference. This can make the video look smoother, but it might miss some subtle details. This setting will work perfectly well with a high-contrast video and well-defined features.
  • Zoom

    The Zoom setting specifies by how many percent the image will be enlarged or reduced during stabilization. This means you can either zoom in (make things bigger) or zoom out (make things smaller) in the video. The Zoom effect can be cool for focusing on details or creating a specific look.

    This is how it works:

  • If you set the default value (0) there will be no zoom effect. The video keeps its original size without any changes.
  • When you set a positive value (like 10), it will hide the video boundaries, making it less noticeable that stabilization has been applied. A negative value (like -5) will allow stabilizing the video without losing important areas at the edges.
  • Zoom Speed

    The Zoom Speed setting controls how fast the zoom changes from frame to frame during stabilization. This option helps you control how quickly the video zooms in or out from one frame to the next. It's great for making engaging and dynamic videos.

    This is how it works:

  • The default value is set to 0.25, indicating that each frame can be maximally zoomed in or out by 0.25% during stabilization. This setting provides a gradual and moderate zoom effect over time.
  • You can pick a different number from 0 to 5. Smaller numbers (closer to 0) make the zoom change slowly, like a gentle transition. Bigger numbers (closer to 5) make the zoom change faster, which can create a more noticeable effect.
  • Optimal Zoom

    The Optimal Zoom setting controls how the video stabilization handles zooming to avoid empty borders.

    The following options are available:

  • Without zoom. The video will retain its original scale.
  • Static zoom (default setting). The stabilizer picks the best zoom value to minimize empty borders. This works for most cases.
  • Adaptive zoom. The stabilizer adjusts zooming for each frame to ensure no black borders are visible. The Zoom Speed affects how fast this happens.
  • It's important to note that the Optimal Zoom value interacts with the Zoom parameter, where the value set for Zoom is added to the optimal zoom value determined by this setting.

    Smooth Zoom

    The Smooth Zoom setting controls how zoom adjustments are handled.

    The following options are available:

  • Without smoothing. Zoom changes happen directly, suddenly. This might work for artistic effects.
  • Use the smoothed zoom. Zoom changes gradually and smoothly.
  • Interpolation

    The Interpolation setting allows you to specify the type of interpolation used during the video stabilization process. Interpolation is a crucial aspect of video stabilization, determining how frame adjustments are made to reduce jerky motion and ensure seamless transitions between frames.

    The following options are available:

  • Without interpolation. This means no smooth connection between frames. The adjustments might look abrupt as if frames are changing suddenly.
  • Linear. Only smooths things horizontally, like left to right. It helps make horizontal movements smoother.
  • Bilinear (default setting). This is the default option. It smooths both horizontally and vertically, making the changes between frames look smoother and more pleasing.
  • Bicubic. This is a higher-quality option that smooths both horizontally and vertically too. It gives even smoother results, but it takes more time to process.
  • Camera

    The Camera setting allows you to choose the algorithm to optimize the camera movement to reach a smoother video representation.

    The following options are available:

  • Optimal (default setting). The algorithm determines the best way to adjust the camera movement to make videos look steady and high-quality.
  • Gaussian. The algorithm applies a Gaussian filter to the camera motion. It helps smooth out the camera's path and makes the transitions between frames look more pleasing and stable.
  • Average. The algorithm blends the camera motions with neighboring frames to achieve smoother transitions and enhance overall stability.
  • Crop

    The Crop setting allows you to define how to handle empty frame borders or gaps formed during stabilization.

    The following options are available:

  • Keep border (default setting). The gaps are replaced with the content from the previous frame.
  • Crop border. The gaps are filled with black, making the edges clear. It means that you may lose some content from the edges.
  • Invert

    The Invert setting determines how the position of the pixel in the image will be adjusted during stabilization. There are 2 options: based on the previous frame and based on the next frame.

    The following options are available:

  • Forward transforms (default setting). It adjusts the pixels' positions in each frame based on how the previous frames moved. This helps make your video steady by making sure each frame is aligned with the ones before it.
  • Invert transforms. It adjusts the pixels' positions in the current frame based on how the future frames will move. This can have artistic or technical effects, but it might not make your video as steady as the default forward choice.
  • Relative

    The Relative setting lets you choose whether to adjust frames based on their differences from the previous frame or independently without considering the previous frame.

    The following options are available:

  • Relative transforms (default setting). Each frame will be adjusted based on how it's different from the previous one. This helps make your video look smoother as frames align with each other.
  • Absolute transforms. Each frame is adjusted without considering the one before it. It might make transitions between frames less smooth, but it can have artistic or technical uses.
  • Motion

    When you're fixing a shaky video, you need to know how the camera moved overall in each frame. This is called "global motion." The "Motion" setting lets you choose how to figure out this movement. There are two choices:

    The following options are available:

  • Accurate method (default setting). It uses a precise method to detect how the camera moved. This gives you high-quality stabilization results.
  • Fast method. It detects camera movement rather fast, but it might not be as precise as the default method. It's useful when you want your stabilization done quickly and you don't need super accurate results.
  • That’s it! Now you are ready to proceed to the next step and see the result. In case you want to reset all settings to default values, simply click the Reset to defaults button next to the Export project button.

    Preview and Partial Video Export

    As we’ve already mentioned, the stabilization tool does not have a real-time preview. This means that the effects of the settings you apply will only be visible after you export the stabilized video. Therefore, if you are satisfied with your current settings adjustments, you can proceed to exporting by clicking on the Export project button right in the stabilization window.

    However, if your video is lengthy, and you would like to assess the impact of the applied settings before exporting the entire file, you have the option to export only a shorter segment of your video. To do this, navigate to the Editor tab located on the right to the stabilization window. Here, you can use the cutting and splitting tools available to shorten your video and focus on specific sections. To learn more about cutting and splitting tools, we recommend you to watch our video tutorial.

    Wrapping up

    In the world of video creation, shaky footage can be a real downer, but with VSDC's Stabilization tool in your arsenal, those worries are a thing of the past. By offering a range of powerful settings that cater to your specific needs, VSDC empowers you to transform amateur videos into professional-looking masterpieces.

    Whether you're a content creator sharing memories, a social media enthusiast, or a professional working on important projects, the Stabilization tool enhances your videos' quality and elevates the viewing experience. Remember, while mastering the tool might take a bit of practice, the results will undoubtedly speak for themselves. So go ahead, dive into the world of smooth, polished videos, and unlock the full potential of your creative vision with VSDC's Stabilization tool. Happy editing!

    Hotkeys VSDC Free Video Editor

    hotkey for vsdc

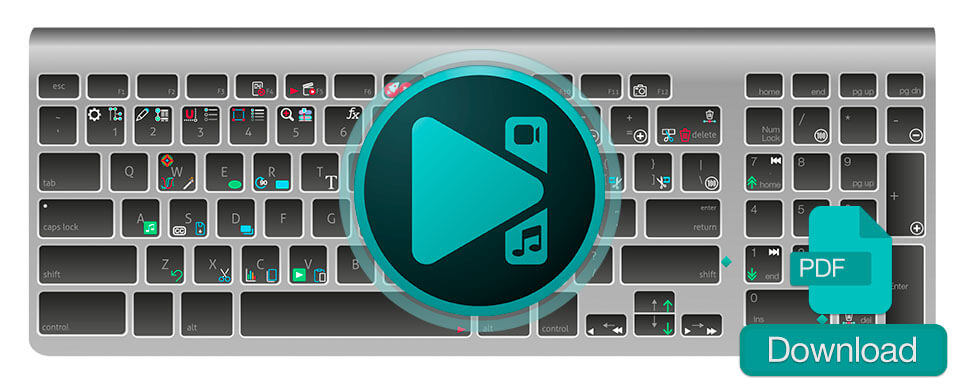
    Boost your productivity and enhance editing efficiency with our extensive collection of keyboard shortcuts tailored for VSDC Free Video Editor. Download the convenient PDF file and swiftly navigate through various features and commands, streamlining your workflow and elevating your video editing skills to new heights!

    download windows versionDownload hotkeys map for VSDC video editor

    Additionally, VSDC Free Video Editor allows you to customize your desired hotkeys. To do so, simply access the Options menu and navigate to the Keyboard Shortcuts tab.

    In this section, you will discover the available keyboard shortcuts in the editor and learn how to reassign them or create your own combinations. The first field, Keyboard Scheme, is designed for users transitioning from different video editing software. You'll find four pre-defined keyboard shortcut schemes there: Default, Adobe Premier, Filmora, and HitFilm.

    A comprehensive list of all available hotkeys can be found in a table at the center of this window. To quickly find the desired keyboard shortcut, use the Shortcuts filter option.

    Selecting any command from the table will display its assigned hotkey in the Shortcut for selected commands field. If necessary, you can remove the assigned hotkey using the option of the same name or reassign it in the Press shortcut keys field.

    Be cautious that if the new combination is already being used by another action, you will receive a warning in the Shortcut currently used by field.

    If you wish to reset the keyboard shortcuts to their default settings, simply click the Reset button next to the Keyboard scheme.

    To make this process even more accessible, we have provided a helpful video below, illustrating the entire customization process.

    News

    New Transition Addition Methods, RAW/BRAW Files Support and Free Waveform

    Welcome to the next level of video editing with VSDC's latest release, Version 9.1! Packed with an array of fresh features and enhancements, this update is designed to make your video editing experience...

    VSDC 8.3 – 100+ New Templates, Key Editor Window, AV1 and Enhanced GUI

    Welcome to the latest VSDC update, Version 8.3! We've been working hard and we’re ready to present a feature-packed release for you to discover an exciting array of over 100 fresh free video templates,...

    Free video editing in 2023: Unlock Your Creativity without Breaking the Bank

    In today's digital world creativity reigns supreme. It offers endless possibilities for individuals and brands to captivate audiences and leave a lasting impression. With social media platforms at the...

    The Best Online Video Editors in 2023: Benefits and Drawbacks

    In today’s digital landscape, the popularity of video content is gaining momentum, with users increasingly turning to video creation both for personal advantage and professionally. When searching for...

    VSDC 8.2 – Proxy File Support, Color Keyframes and Vectorscope

    We are thrilled to unveil the highly anticipated VSDC video editor 8.2 update. Our team has been hard at work, ensuring that this release is packed with exciting features and enhancements to elevate your...

    VSDC 8.1 Brings Multicam, Curve Line Object, Scrolling Text Effect, and More

    We’re thrilled to introduce VSDC 8.1. The new version primarily caters to professional videographers, graphic designers, and artists, however, everyday video creators will benefit from the update as...

    VSDC 7.2 Takes Its Color Correction Toolset to the Next Level (Plus, Other Updates)

    It has been another productive couple of months for the VSDC team, and we’re thrilled to announce the release of VSDC 7.2 – the new version of our video editing suite. Although the majority of updates...

    5 Free Pieces of Software for Video Color Correction

    If you’re a video creator, there are three reasons why it’s crucial to learn color correction. First, it will help you enhance your videos and make them look professional. Second, it will allow you...

    VSDC 7.1 Upgrades GUI and LUT Editor, Adds New Effects and Custom Shortcuts

    The new version of VSDC includes two new video effects, expands the functionality of the LUT editor, and makes video editing more convenient by bringing an improved interface, optimized timeline, and custom...

    10 Pieces of Truly Free Video Editing Software (with No Watermarks)

    Seeing a watermark on your video after spending hours editing it feels infuriating. Yet a few video editing software developers are still using this practice to limit the free usage of their products....
     

    Screen Recorder Box

    This program allows you to capture the video of your desktop and save it on your PC in various formats. Coupled with a video editor, the program is a great tool for creating presentations, tutorials and demo videos.

    Read more about Screen Recorder...


    Video Capture Box

    The program captures video from external devices and records it to computer in a free format. You can save video from video tuners, webcams, capture cards and other gadgets.

    Read more about Video Capture...


    Reviewed by


    "VSDC Free Video Editor is a surprisingly powerful, if unconventional video editor"

    - PC Advisor


    "This video editor gives you tons of control and editing power"

    - CNet


    "The editor handles many common formats and boasts a good deal of capabilities when it comes time to alter lighting, splice video, and apply filters and transitions in post production"

    - Digital Trends