 User Help Manual
  Learn FAQ
  Send us feedback
 ")


How to Use Multicam Editing Mode in VSDC
Multi-camera editing, also known as multicam, is a technique that allows video editors to combine footage from multiple cameras and audio sources into a single, cohesive video clip. This technique was originally developed for television but it has become increasingly popular among professional video creators.
In response to the popular request, multicam has been added to the VSDC video editing suite starting version 8.1. This means VSDC users can upload footage shot with several cameras and easily switch between angles while maintaining audio and video synchronization on the timeline.
To learn how to work with the Multicam feature, you can either watch a video tutorial below or follow the three easy steps described in the article.
Step 1. Upload the files
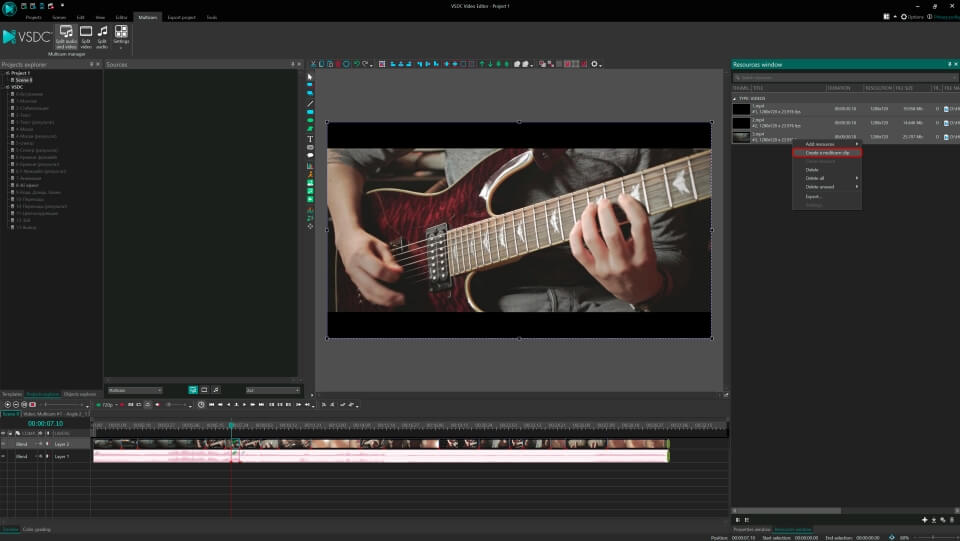
To get started, open the Resources window on the right. If you can't find it, go to the View tab at the top, select Resources, and click View/Hide window. Once ready, drag files from your desktop into the resources section. Next, select the files you want to include in your multicam clip, right-click on them, and choose Create a multicam clip.
Step 2. Adjust multicam clip settings
After creating a multicam clip, you can start adjusting its settings. A pop-up window will appear providing several options to choose from including sync mode, camera name, and default track. Let's explore these options below.
Sync mode
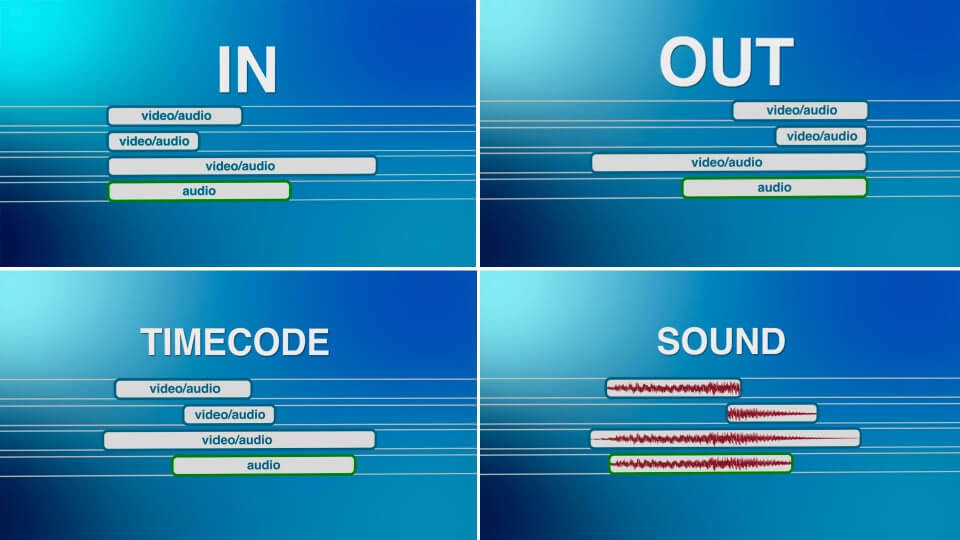
The Sync mode algorithm helps you define the way your video clips will be synchronized.
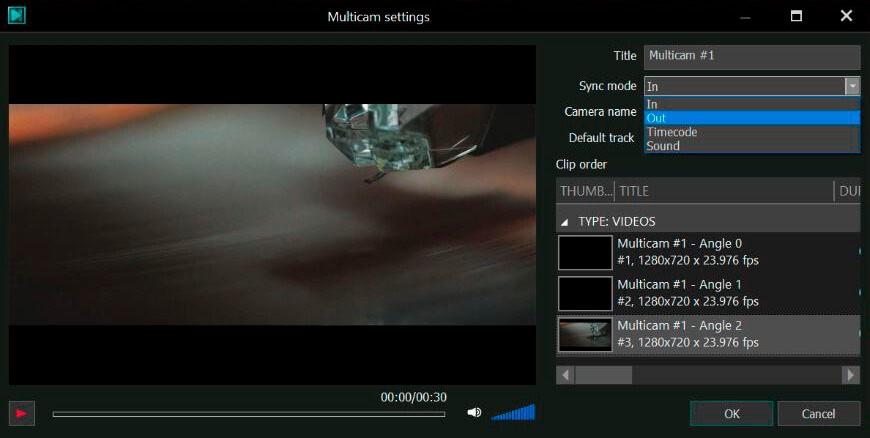
There are four synchronization options available in the menu:
- In — for synchronizing videos based on their beginnings
- Out — for synchronizing videos based on their endings
- Timecode — for synchronizing videos according to their timecodes
- Sound — for synchronizing videos based on the audio tracks
We recommend using the Sound mode as it simplifies the process of aligning media from all sources. This method allows you to use audio tracks for accurate matching of video files and provides more precise synchronization.
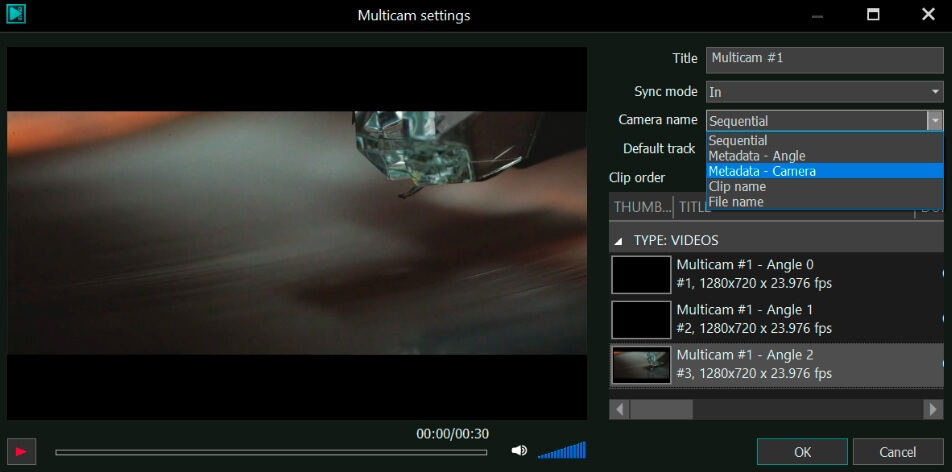
Camera name
The Camera name menu provides options to name video files in the Source window by using a sequential, angle, camera metadata or other approach. Feel free to choose any preferred option, as their only purpose is to help you quicker understand which footage you are currently using.
Default track
The Default track menu helps you choose the default audio track for the multicam clip from the selection of available files.
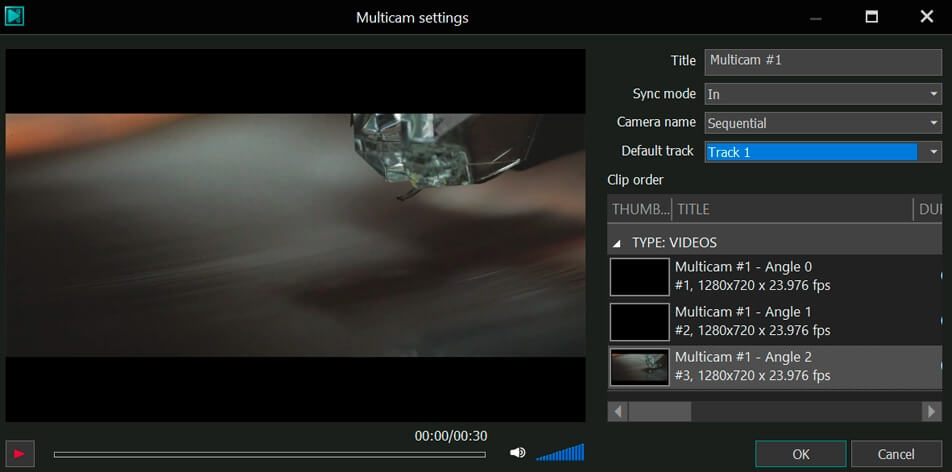
Once you have finished with the settings, click OK to apply the changes and proceed to the next step to begin working with your newly created multicam clip.
Step 3. Edit multicam clip
After applying the settings, return to the Resources window. Find the new multicam clip among resources and drag it onto the timeline.
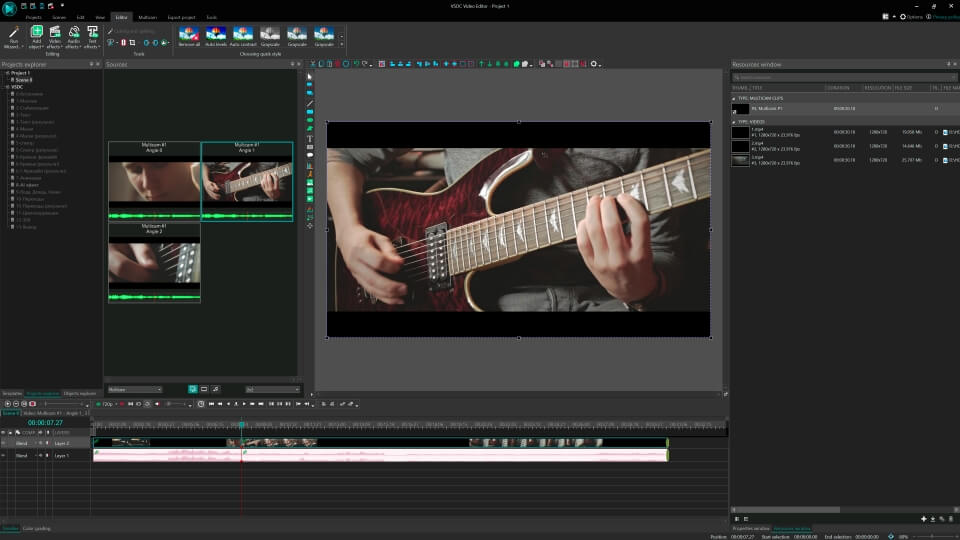
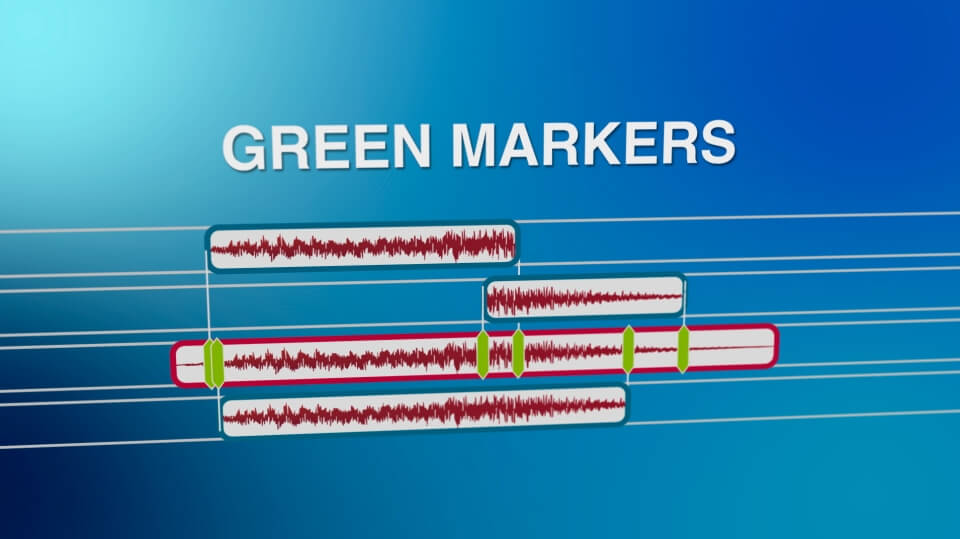
On the timeline your multicam clip will look like a regular video with just one difference: there will be green markers indicating the beginning and ending of each file.
Keep in mind that your multicam clip contains all the video and audio files you've added within a single track. VSDC 8.1 does not yet allow you to double-click the multicam clip and manually edit the tracks within it. However, this feature will be available in the next update, so stay tuned.
If you need to switch video angles or edit the tracks in the multicam clip, go to the View tab and open Sources. This panel contains all the camera angles and audio files you've added to the multicam clip.
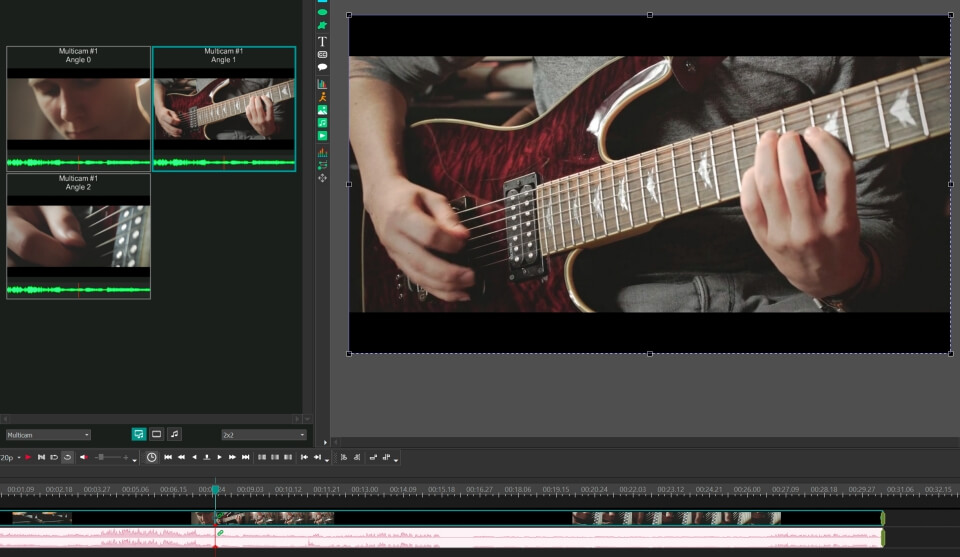
To switch between angles, select the desired file, and the audio or video file will adjust accordingly on the timeline. You can do it both during the playback and when the playback is paused.
To edit tracks within the clip, you have 3 options:
- Choose Split audio and video to edit both video and audio tracks simultaneously
- Choose Split video to edit video tracks independently from audio tracks
- Choose Split audio to edit audio tracks independently from video tracks

The same set of tools is also available in the Multicam toolbar (see Multicam tab), so feel free to use it wherever is more convenient for you.

Wrapping up
Now that you know how to use the multicam editing mode in VSDC, you can start creating more dynamic videos that will impress your audience.
If you’re using the free version of VSDC, you can create multicam clips with up to two camera angles. To use more than two angles, upgrade to VSDC Pro.
Should you have any questions or concerns, don't hesitate to email us at This email address is being protected from spambots. You need JavaScript enabled to view it. or message us on Facebook and Twitter. Our team is always here to help you make the most of your editing experience.
Get VSDC Free Video Editor - powerful non-linear editing software with advanced features. Perfect for YouTube creators, social media videos, and professional projects. Learn more about features.
Watch us on YouTube
 / @VSDCFreeVideoEditor
© 2011-2026, www.videosoftdev.com, FLASH-INTEGRO LLC. Privacy policy | Terms of use | About us
All trademarks referenced herein are the sole property of their respective owners.
Copying any materials from this site allowed only with written consent of Site Administration.