Video Editor

Download and use the free video software to create and edit videos of any complexity from a family greeting card to a company presentation. Apply vsdc free video editor for light edit hdr-video, any raw-video formats from cams - BRAW, ProRes RAW, any high resolution 4k or more due to video proxies technologies in the editor.
Cut, merge video files, apply visual and audio effects, use filtration and image correction, make slideshows and add an appropriate soundtrack. Use multi-color Chroma Key and advanced parameters settings to give your video a professional look.
All popular video and audio formats are supported.

Read more about Video Editor...

Video Converter

This program is intended for converting video files from one format to another. Nearly all popular video formats are supported (both reading and saving). In addition, the program drastically simplifies the task of converting videos for playback on specific multimedia devices, such as iPhone, Samsung Galaxy or Huawei P30 Pro. The program is extremely easy to use, has a modern interface and all necessary video processing functions.

Read more about Video Converter...

Audio Converter

The audio converter will help you convert audio files from one format to another. All key audio formats and codecs are supported. The program also allows you to manage playlists and meta tags, extract audio from video files and save these tracks on your computer in any format.

Read more about Audio Converter...

Animated Intro & Title Templates

Explore the VSDC Template Store with ready-made video templates for intros, animated titles, lower thirds, logo reveals, slideshows, glitch transitions, LUTs, and color grading presets. Drop a template into the VSDC Video Editor timeline, edit text, timing, and colors, and finish professional video projects in minutes.

Choose from 300+ exclusive packs of video transitions, LUT packs, text effects, GPS telemetry widgets, animated elements, and animated backgrounds for VSDC. All templates are fully customizable, support up to 4K resolution in 16:9, and help you build intros, wedding slideshows, travel videos, and tutorials much faster.

Store catalog

VSDC Cloud - Online video management

Keep your work safe, organized and always accessible! Back up your video projects, store media files online and access them from any device. Enjoy collaboration, share project updates and exchange files easily.

Online video editing management capabilities

Multifunctionality

Multifunctionality

A wide array of multimedia processing tools in one free video software suite.

High speed

High speed

Our programs use fast
and high-quality algorithms optimized for single and multi-core CPU’s.

Affordability

Affordability

VSDC video software is freely available for download to Windows OS-based PCs and laptops.

How to Use Tracking Point Animation

Tracking point is a tool that allows you to apply movement to coordinate-based effects in VSDC, such as Lens flare, God rays, Shattered glass, Text animation, and many more (at the end of this tutorial, you’ll find the complete list of effects you can animate). With tracking points, you can easily create a custom movement trajectory and pin the desired effects to it. As a result, the effect will move along the trajectory at the speed of your choice.

Below, we’ll walk you through the steps of setting up a tracking point and show you examples of what you can achieve with it. Feel free to watch the video below to see how different effects look when bound with tracking points.

Download the latest version of VSDC

Step 1. Import your content

To get started, import your footage to the editor using the Import content option on the start screen. Then place the playhead on the timeline, where the animation should start.

Step 2. Add a tracking point to the scene

Go to the left-side toolbar and select Tracking point. Then click on the scene to indicate the starting point for the movement trajectory.

Step 3. Сreate a movement trajectory

Double-click on the tracking point block on the timeline and go back to the left-side toolbar to select the Movement tool. Then create a movement trajectory using vectors.

If you’ve never used the Movement tool in VSDC, and you need a more in-depth walkthrough, read this tutorial. Keep in mind that you can also apply ready-made movement trajectories created via the Motion tracking module.

Step 4. Select an effect to bind with the tracking point

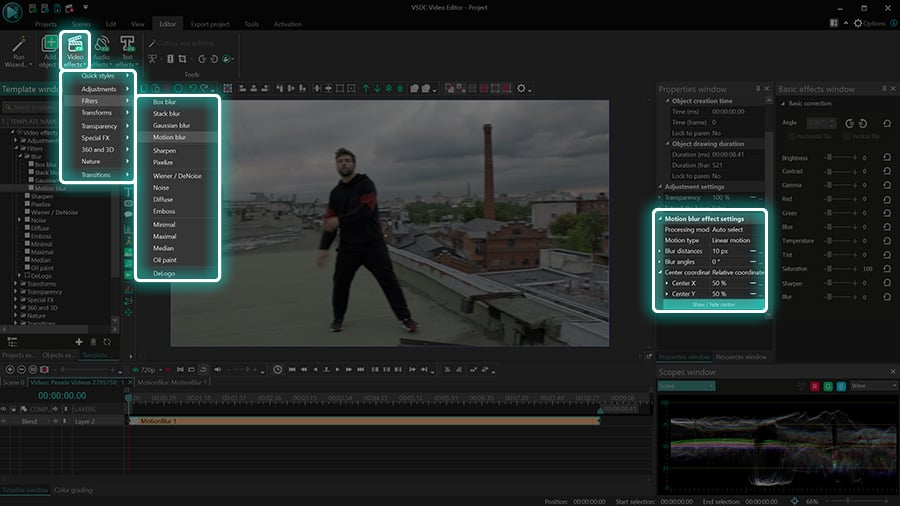
Now that the path for the tracking point is ready, it’s time to select the effect you want to bind with it. Go back to the main timeline tab, select your footage, then open the Video effects menu and choose one of the effects eligible for binding. Here is a list of those effects:

  1. Motion Blur (Filters)
  2. Shattered glass (Transitions)
  3. Lens flare (Nature)
  4. Bokeh glare (Nature)
  5. God rays (Nature)
  6. Shadow (Nature)
  7. Distort (Transforms)

For our example, we’ll use Lens flare.

Step 5. Bind the effect coordinates with the tracking point

Once you’ve applied the effect to the footage, make a right mouse-click on it and select Properties. In the Properties window, find the following settings:

  1. Center coordinate type -> Tracking point
  2. Tracking point binding -> Select the tracking point you created earlier

Then activate the Preview mode to see what the result looks like. The effects should be moving along the trajectory you’ve created:

Notice that even after applying the effect, you can change the movement trajectory by going back to the Tracking point tab and adjusting the movement vectors. You can also speed up or slow down the movement by shifting the yellow control points on the timeline.

Binding several effects with the same tracking point

Now that you have an idea of how tracking points work, you can create unique animations by binding several effects together. There are no rules for which effects to combine, so feel free to experiment with the options listed at the end of the article.

To bind an additional effect with the tracking point, apply it to the main footage first. Then open the Properties window and find the parameter defining the type of coordinates (it might have a slightly different name for different effects). Select Tracking point and apply “binding” using the same approach we described earlier.

Here is an example of the Lens flare effect combined with the Fish eye effect:

If you have a text object in your video, such as a title, you can bind it with the tracking point or with another effect as well. All you have to do is apply the Text Shift Position effect to the text, then move to the Properties window, find Initial glyph position, and select Tracking point; then apply the binding.

As a result, the text will be appearing on the screen, letter by letter, coming from the tracking point, as illustrated below:

List of coordinate-based effects you can animate with tracking points

Only few effects in VSDC can be bound with tracking points. To help you identify these effects as well as the binding settings, we’ve put together a table. Consider checking it out before applying this animation type.

Name of the effect
Parameter in the properties window
Text shift position (Text effects)
Initial glyph position
Motion blur (Filters)
Lens Flare (Nature)
Bokeh glare (Nature)
God rays (Nature)
Shattered glass (Transitions)
Center coordinate type
Shadow (Nature)
Shadow coordinate type
Distort (Transforms):
- Polar
- Fish eye
- Lens
- Z-drop
- Polar Coordinates
Center coordinate type, Inner/Outer coordinates.


Got any questions? Email us at This email address is being protected from spambots. You need JavaScript enabled to view it. or tweet us at Flashintegro.

DOWNLOAD FREE NOW

How to Make a Visual Echo Effect

The video echo effect can help you visualize a trail of movement in a video where it wasn’t originally present. You can think of it as an imitation of the long exposure effect or an unnaturally fast object movement.

Want to know how to make this effect within minutes using VSDC Video Editor? Then check out the tutorial below.

Download VSDC Free Video Editor

Step 1. Upload your video to the editor

Launch VSDC on your computer and upload your video using the Import content option on the start screen or by dragging the file directly to the scene.

Step 2. Convert the video into a sprite and activate the Echo filter

In VSDC, the Echo filter is only available under the sprite properties menu, so you’ll need to convert the video into a sprite first. You can either use the Ctrl + P hotkey combination or make a right-button mouse click on the file and select Convert to sprite.

How to convert a video file into a sprite in VSDC Free Video Editor

Once ready, go to the Properties window on the right and select the following options:

  • Use as container – No
  • Show effects – Yes
  • Fill background – No
  • Use echo filter – True

Activate the video preview to see what the default visual echo filter looks like:

In the next section, we’ll walk you through the filter settings and show how to use them to adjust the effect.

Step 3. Adjust the visual echo effect

To produce the echo effect, the software stacks frames from different times into a single layer and gradually fades the trail as new frames appear. As a creator, you can change the number of remaining visible frames and the way they blend on the screen.

Echo strength

Echo strength affects the speed of trail fading. The higher this value is, the stronger the echo effect appears: for example, at 100, there’s no fading and each frame is visible until the moving object reaches the end of the screen.

Notice that you can expand the Echo strength parameter and set the initial and final values to be different – so the effect increases or decreases over time.

Blending mode

Blending modes define the way the frames are blended, and therefore – the way the effect looks.

Three blending modes are available for the echo filter:

  • Overlay – each new frame is overlaid on the previous one; this mode produces the mildest visual effect
  • Streak – the values of the current and the previous frames are maximized; this mode produces the strongest visual effect
  • Blur – the current and the previous frames are mixed based on the alpha channel; this mode produces a smearing echo effect

Here is how different blending modes work for the same video, at the same echo filter strength:

The first two modes are optimal for video effects and videos with transparent backgrounds. The third mode is optimal for non-transparent videos featuring moving objects.

Pro tip: you can apply the echo filter to any of the VSDC effects that include moving objects. Such effects are Particles, Raindrops, or even the Shadow effect when it’s pinned to a moving object.

However, for the filter to work, the effect must be a part of the sprite, too.

Echo filter is available in VSDC, starting with version 7.2

Visual echo is a simple and beautiful effect that will look great in music videos as well as sci-fi shorts. And the best part? It’s available in the free version of VSDC Video Editor. Download it to your PC and try it for yourself! If you have any questions, feel free to email us at This email address is being protected from spambots. You need JavaScript enabled to view it. or tweet us at @Flashintegro.

DOWNLOAD FREE NOW

How to Make a Video Grid by Using Multi-Layer Editing

We’ve talked about the advantages of using non-linear video editors a lot in our guides. One of their biggest benefits for creators is the ability to place several pieces of footage in the same scene and edit them simultaneously. The video grid effect is an excellent example of that.

Since VSDC’s timeline provides an unlimited number of video tracks, you can easily make a video grid that consists of 4, 9, 16 – or any other number of sections. In this tutorial, we’ll show you exactly how to make a video grid for your project, step by step. This effect is also commonly known as a video wall or a video collage. Feel free to watch the video tutorial first and then jump to the text version.

DOWNLOAD VSDC FREE VIDEO EDITOR

Step 1. Create a project of the required size

Launch VSDC Video Editor on your PC and use the Blank project option to create a new project. For a 2x2 or a 3x3 video grid, we recommend using the following project settings: Full HD 1080p or UHD 4K resolution and 16:9 aspect ratio.

The footage you’ll import at the following step will automatically stretch to the aspect ratio you’ve just set up, although, ideally, you want to have videos recorded with the same settings. If most of your footage is of different aspect ratios – for example, if you have vertical videos – and you want to maintain it, feel free to use different settings for the project. Just keep in mind that your grid size calculations will differ from our example.

Step 2. Place all your footage on the timeline

The next step is to import all the footage – ideally, 4 or 9 files – to the editor. You can add it to the Resources window first or just drag everything directly to the timeline. Once ready, place video files on different tracks, one after another, and align them to the left side.

Step 3. Adjust video duration (optional)

To set the same duration for all videos in the grid, select them all on the timeline and either manually type the desired duration in the Properties window, or place the playhead at the right moment, make a cut using the razor tool at the top, and delete the unwanted parts.

Quick tip: Another bulk adjustment you can make use of is color filters. For example, if you want all the videos in the grid to be black-and-white, select them on the timeline, make a right mouse-click, and select Quick styles >> Grayscale.

Step 4. Apply the required size to videos

It’s time to start forming the grid.

Select all the videos on the timeline and head to the Properties window. Find Coordinates → Width. For a 2x2 video grid, type 960; for a 3x3 video grid, type 640. Then make a right mouse-click on the video stack right on the timeline and select Set SizeSet height in accordance with the image’s aspect ratio. Finally, drag each video to its position on the scene using mouse or arrow keyboard keys.

You might be wondering how we calculated the width of the videos for the grid. It’s simple! All you need to do is divide the scene width into the number of videos you’ll have lined up horizontally. For example, if you have 4 videos, that’ll be 2; if you have 9 videos, that’ll be 3; if you have 16 videos, that’ll be 4, and so on.

Our scene width is 1920 pixels, so 1920/2 = 960 pixels. If you have a different scene width, you’ll need to recalculate accordingly.

Quick tip. Even if some of your videos have a different resolution or aspect ratio originally, they’ll stretch to the default size of the scene when you add them to the timeline. However, if you notice that some videos have black lines on the sides, make a right mouse-click on those files and select Crop tools → Auto cropping to fix that.

Step 5. Add the outline effect (optional)

To make videos within the grid pop, consider adding a contrasting border outline. To create borders, click on any video, then open the Video effects menu, and proceed to Transparency → Borders. Next, go to the Properties window and select the following settings:

  • Mode → Solid
  • Position →All rect
  • Border size → 3px (you can choose a smaller or a higher value, depending on how thick you want the outline to be)
  • Color → White

If you’re happy with how the outline looks, copy the Border effect’s layer, double-click on the next video in the grid, and paste the effect. Repeat these steps for all the videos in the grid.

Step 6. Export your project

When you’re done editing, go to the Export project tab. If the video is intended to be watched on PCs, select PC and the desired format; if you’re planning to publish it online, select Web and the social media platform.

If you need to change the codec, resolution, framerate, or any other parameters, use the Edit profile menu under the preview window. Otherwise, leave the settings unchanged and hit Export project.

Wrapping up

Video grid is a popular effect used in music videos, TV shows, commercials, and vlogs. With a bit of imagination, you can make it look even more interesting by applying color filters, distortion effects, or by delaying the appearance or disappearance of some of the videos.

Got any questions? Email us at This email address is being protected from spambots. You need JavaScript enabled to view it., DM us on Facebook, or leave a comment on YouTube.

Guide to Lift, Gamma, and Gain Color Wheels in VSDC

The Lift, Gamma, and Gain color wheels are designed to help video creators perform professional-level color correction. Starting version 7.2, Lift, Gamma, and Gain have become available in VSDC Video Editor, so in this tutorial, we’ll talk about their purpose and show you how to use them, step by step.

What is Lift, Gamma, Gain?

Lift, Gamma, Gain is a set of color wheels designed for primary color correction. Unlike secondary color correction, which involves working with isolated colors, primary color correction helps you change the entire color tone composition of the video. This means fine-tuning dark tones (Lift), midtones (Gamma), bright tones (Gain), or the entire image altogether (Offset).

The tricky part is that by using either of these controls, you aren’t only correcting shadows, highlights, or midtones: the changes made with the Lift, Gamma, and Gain wheels affect the entire spectrum of tones. Feel free to watch this video explanation before continuing.

How to work with Lift, Gamma & Gain color wheels

How to access Lift, Gamma, Gain wheels in VSDC

When speaking about color correction, a picture is always worth a thousand words, so below, we’ll have a detailed visual walkthrough of the new tool.

First of all, switch to the Color grading panel in the bottom left corner to access the Lift, Gamma, Gain color wheels.

Lift, Gamma, Gain color wheels in VSDC

Each wheel controls a range of tones. Lift primarily adjusts dark tones; Gamma primarily adjusts midtones; Gain primarily adjusts bright tones, and Offset adjusts the entire image.

Changing color values for dark tones, bright tones, and midtones

To correct colors for a selected range of tones, use the control point in the center of the wheel. By dragging it towards a certain color range of the spectrum, you can change the temperature or overall aesthetics of the video.

For example, here is what happens when you make changes in the Lift color wheel: the lightest areas remain almost unchanged, while the dark areas change depending on where on the color spectrum you’re moving the control.

Notice that as you’re moving the control point of the selected wheel, the RGB color values under that wheel are automatically changing, too. If you’re more comfortable changing color values manually, feel free to do so by either typing them or using the Up and Down arrow keys on your keyboard.

Now, what’s the difference between applying changes to dark tones, bright tones, and midtones? To help you answer this question, we’ve prepared a visual comparison. Here’s what the blue color increase looks like for dark tones, midtones, bright tones, and the entire range of tones:

Although it’s the same color component, the results vary significantly because the changes apply to different ranges of tones. Again, you should notice that bright tones are barely affected when you’re working with Lift; dark tones are barely affected when you’re working with Gain, and both bright and dark tones are barely affected when you’re working with Gamma.

Pro tip: the little tumbler in the bottom left corner is called Maintain luma level, and it keeps the overall level of brightness, regardless of the changes you make. We recommend keeping this mode on because it makes color adjustments smoother and more gradual.

Dark tone pivot, bright tone pivot, and B/W threshold

In addition to color values, you can change the brightness and contrast values in the video using the following sliders:

  • Dark tone
  • Bright tone
  • Black & white (B/W) threshold

Here is how they work. When you toggle the dark tone slider, all the dark tones below the selected value become darker. Naturally, when you push this control to the maximum, everything except for the brightest areas in the video becomes dark.

Similarly, the bright tone pivot dims all the color tones and reduces the number of bright tones in the video, until the image becomes completely dark.

Finally, the black & white threshold sliders decrease the level of contrast and saturation in the video. The slider on the left dims dark tones until the image becomes white, while the slider on the right decreases the contrast until the image becomes black.

Keep in mind that you can always undo changes by using the Reset buttons above each wheel.

Black point & White point

The next important part of the toolset is the Black point and White point. These controls can help you quickly fix overexposed and underexposed videos.

For example, if you have an overexposed image, it usually means that all colors are too bright, and there’s a lack of contrast. To fix that, select Black point from the panel and click on the object or area that’s supposed to be black. The program will apply black color to the selected area and recalculate the rest of the color tones accordingly:

Similarly, if your video is way too dark, select White point and click on the area that’s supposed to be white to rearrange all values.

Correcting isolated areas

If you need to perform color correction for an isolated area in the video or image, you can use the eyedropper tool in the bottom right corner of the Color ranges menu.

Click on the eyedropper icon and select the area you’d like to work on. To make sure the program has selected the right area, tick the Show corrected area box at the bottom.

You can start applying changes right away or use additional tools to expand or contract tone selection, in case the original selection was slightly incorrect.

Notice that by default, the eyedropper selects a range of tones, not an exact color (the long white extension tails on the Hue graph visualize exactly that). If you want to do the opposite and select a specific color with no range, press and hold the Ctrl key while using the eyedropper. In that case, the Hue graph will have no white extensions:

You can increase, decrease, or shift the selected range of colors by manually typing the desired values or using the handles as illustrated above.

Time to practice color correction

If you want to master the art of color correction, it’s crucial to have the right tools to practice. With the Lift, Gamma, Gain color wheels being added to VSDC, you now have everything you might need to perform both primary and secondary color correction. But most importantly, this toolset is available in the free version of VSDC and it works even on computers with limited processing power. Our team remains determined to make video editing available and affordable to anyone.

Got any questions? Email us at This email address is being protected from spambots. You need JavaScript enabled to view it. or send us a direct message on our Meta page.

DOWNLOAD FREE NOW

How to Add Subtitles to a Video in VSDC

Subtitles and captions are essential for making videos accessible, engaging, and easy to follow. They help deaf and hard-of-hearing viewers, people who watch social media videos without sound, and international audiences understand your message. VSDC Video Editor gives you a complete professional workflow for importing SRT files, creating subtitles manually, fine-tuning timing, styling the text, and exporting a polished video.

In this tutorial, you’ll learn how to add subtitles to a video in VSDC, edit subtitle text and timing, generate timeline markers from subtitle cues, customize marker settings, format the subtitle design, and export the finished video with burned-in subtitles that display consistently on any device.

Watch the video tutorial first, then use the detailed instructions below to complete the entire subtitle workflow in VSDC.

Download VSDC Free Video Editor for WindowsDOWNLOAD VSDC FREE VIDEO EDITOR

Step 1. Add or create subtitles

VSDC lets you begin with either a ready-made SRT file or a new subtitle object created directly in the editor. First, import your video using the Import content button on the start screen. Then choose the method below that best fits your project.

If you have an SRT subtitle file

Importing an existing subtitle file is the fastest way to add professionally timed subtitles in VSDC. Use a file with the .srt extension and the standard SubRip structure.

You can create an SRT file in Notepad or use a dedicated subtitle editor, such as Open Subtitle Editor or Jubler. If you download subtitles from YouTube or another platform, check the file extension first. If the file is in VTT, SBV, or another format, convert it to SRT before importing it into VSDC.

When saving an SRT file in Notepad, select UTF-8 encoding. This helps preserve accented characters and non-Latin alphabets correctly.

Once the file is ready, click the CC button on the left-hand toolbar and select the SRT file.

Import an SRT subtitle file using the CC button in VSDC

In the pop-up Object position settings window, click OK. Then draw or position the subtitle area on the scene. The subtitle object will appear on the timeline, and the subtitle text will be displayed in the preview window.

If you don’t have an SRT subtitle file

VSDC also lets you create subtitles from scratch without leaving the editor. Click the CC button on the left, select Cancel when the file selection window opens, and click OK in the Object position settings window. Draw the subtitle area on the scene, then open Edit subtitles in the Properties window.

Enter the subtitles phrase by phrase using the standard SRT structure:

1
00:00:06,107 --> 00:00:08,534
Subtitle text
2
00:00:10,234 --> 00:00:18,530
Subtitle text

The first line is the subtitle sequence number. The second line contains the exact time when the subtitle appears and disappears. The third line contains the subtitle text. Leave an empty line between subtitle blocks.

Always use the standard SRT timestamp format: HH:MM:SS,mmm --> HH:MM:SS,mmm. Use two hyphens followed by the greater-than sign between the timestamps, and use a comma before milliseconds.

If a subtitle contains two lines of text, enter both lines below the timestamp before adding the empty line that separates it from the next subtitle block.

Step 2. Generate subtitle markers and adjust the timing

VSDC can automatically generate timeline markers from subtitle cues. Each marker identifies the beginning of a subtitle phrase, giving you precise visual reference points for synchronizing video clips, audio, animations, transitions, and effects with the narration.

To generate the markers, select the subtitle object on the timeline and open the Properties window on the right. Then click Add markers. The result will look like this:

Generate precise timeline markers from subtitle cues in VSDC

Edit subtitle text or timing and regenerate the markers

If a subtitle appears too early or too late, or if the text is incorrect, select the subtitle object and open Edit subtitles in the Properties window.

Edit subtitle text and timestamps in VSDC

To correct the text, select the required subtitle phrase and type the new text. To change the timing, find the moments when the subtitle should appear and disappear, then update the timestamps in the subtitle editor. You can use the time indicator in the upper-left corner of the timeline to identify the required position.

Keep the standard SRT format when editing timestamps: HH:MM:SS,mmm --> HH:MM:SS,mmm. Otherwise, the subtitle cue may not be displayed correctly.

When you have finished editing, click OK. If markers have already been generated, click Add markers again so that the timeline markup reflects the updated subtitle timing.

Customize individual subtitle markers

In addition to changing marker positions through subtitle timestamps, you can change marker colors, assign names, add comments, select marker types, and configure marker visibility. Double-click the subtitle layer, then double-click the marker you want to edit.

Open marker settings and change a subtitle marker color in VSDC

Using the Marker settings window, you can:

  • Name the marker
  • Add a comment to the marker
  • Change the marker color
  • Change the marker type
  • Change the marker visibility

The first three options make markers easier to identify. The marker name and comment appear when you hover over the marker on the timeline. To keep the name visible, enable Show name in timeline. A custom marker color makes the marker easier to recognize across the timeline levels where it is visible.

Display a marker name and comment on the VSDC timeline

The Marker type option allows you to use selected markers for splitting the exported project into separate files. Change a marker from Comment marker to Segmentation marker. During export, enable Split by markers, and VSDC will create multiple video files according to the segmentation markers.

Split an exported VSDC project using segmentation markers

The marker editing menu also includes the Visibility area setting. It determines the timeline levels where the marker, its name, and its comments are visible.

There are three visibility levels:

  • Visible on all scopes — the marker is visible on all timeline levels
  • Visible in self scope and child object — the marker is visible on the current level and all levels below it
  • Visible only in self scope — the marker is visible only on the current level

For example, if you choose Visible on all scopes, you can return to the main timeline tab and still see the marker above the timeline.

Control subtitle marker visibility across VSDC timeline levels

With the other two options, the markup remains limited to the subtitle layer or its related child levels.

Step 3. Format the subtitles

VSDC provides flexible professional controls for designing subtitles that remain clear and consistent throughout the video. Select the subtitle object on the timeline and use the Editor tab and the Properties window to adjust the subtitle area and configure the following parameters:

  • Font family, style, and size
  • Text color and opacity
  • Outline color and thickness
  • Horizontal and vertical alignment
  • Text position within the subtitle area
  • Line spacing and other paragraph settings
  • Subtitle background and background color

Keep the subtitle area inside the visible frame and preview several cues before export. The text should remain readable over both bright and dark parts of the video. A contrasting outline or background can improve readability when the footage changes frequently.

For more advanced styling and animation, right-click the subtitle object on the timeline and select Convert to text. VSDC will turn every subtitle cue into an editable text object, allowing you to apply professional text effects, animate individual phrases, and fine-tune each object separately.

Step 4. Export a polished MP4 video with subtitles

When the subtitle text, timing, and formatting are ready, preview the project from beginning to end. VSDC renders the subtitle object directly into the video image during export, creating burned-in or hardcoded subtitles. This approach ensures that your subtitles display consistently on any device or media player without requiring a separate subtitle file or player-specific settings.

To export the project, open the Export Project tab on the ribbon. Select PC or Web as the target device and choose MP4 as the output format. Then select a suitable profile for the required resolution and quality.

Check the Input file and Output file parameters at the bottom of the window. Use Change name if you need to select another output folder or filename. For more detailed control over the codec, resolution, frame rate, bitrate, and audio settings, click Edit profile.

When the settings are ready, click Export Project on the ribbon to start rendering. After the process is complete, open the MP4 file and check several subtitle cues to make sure the text is readable and synchronized correctly. For more information about export profiles, see the VSDC project export guide.

Create professional subtitles with VSDC

VSDC brings the complete subtitle workflow into one powerful video editor: import SRT files, create subtitles manually, adjust timing with precision, generate timeline markers, customize text design, apply effects, and export a finished MP4 with burned-in subtitles. Whether you are producing social media videos, tutorials, presentations, interviews, or international content, VSDC gives you the tools to create accessible, polished, and professional-looking results for free.

Frequently Asked Questions

1. How do I change the font, size, and color of subtitles in VSDC?

Select the subtitle object on the timeline, open the Properties window, and find the Subtitle object settings section. VSDC gives you full control over the font, size, text and outline colors, alignment, text position, and subtitle background.

2. How do I match SRT timestamps with the VSDC timeline?

Open the editor settings using the gear icon in the upper-right corner, go to Editor options, and set Timeline time format to hh:mm:ss:ms. This makes it easier to match timeline positions with subtitle timing, while the SRT file continues to use the standard HH:MM:SS,mmm --> HH:MM:SS,mmm format.

3. How do I add a shadow to subtitles in VSDC?

Duplicate the subtitle object, place the copy on a layer below the original, choose the desired shadow color, and offset its position slightly. For more precise control, apply Video effects > Transforms > Skew to adjust the shadow angle and displacement.

4. How do I animate subtitle characters one by one in VSDC?

Right-click the subtitle object on the timeline and select Convert to text. VSDC will convert every subtitle cue into an editable text object, giving you access to text effects and character animation controls. More information is available in the VSDC text effects tutorial.

5. How does VSDC include subtitles in an exported MP4?

VSDC renders the subtitle object directly into the video image during export. This creates burned-in subtitles that display consistently in the finished MP4 on any device or media player without requiring a separate subtitle file.

Ready to improve your videos with professional subtitles? Download VSDC Free Video Editor and start creating. For product questions, email us at This email address is being protected from spambots. You need JavaScript enabled to view it. or send us a message on Facebook.


Get VSDC Free Video Editor — professional non-linear video editing software for Windows with powerful tools for subtitles, text effects, social media videos, YouTube content, and advanced creative projects. Explore professional features.

News

VSDC 11.2: Smart search for lost files, GPS data and video sync, H.266 (VVC), accelerated proxy generation even for 4K/8K, keyframe support for shapes and brand-new designer templates

Published by Amy Shao on June 30, 2026 Meet the new major update to VSDC Free Video Editor: version 11.2! Remember how much time you used to spend hunting for lost files in your projects?...

VSDC 11.1 Adds Direct Insta360 Video Editing, GPS Overlays and Auto-Save

Published by Amy Shao on March 11, 2026 What is the best gift for a creative person? New possibilities, of course. With the VSDC 11.1 update, editing footage from Insta360 cameras becomes...

VSDC 10.2: GPS Gauges for GoPro and Other Action Cameras, Selective Export, Metadata Editing, Extended Codecs and Smarter Workflow

published Amy Shao 11/19/25 Meet the long-awaited VSDC 10.2 update: a new version packed with incredible features and significant enhancements designed to empower all of you, from hobbyists to professionals. GPS...

Major VSDC 10.1 Update: Advanced HDR, GPS Telemetry, New Effects, Great Variety of New Templates and Tools For Different Needs

published Amy Shao 6/10/25 The wait for something new and unusual is finally over! The update is here and it isn’t just another version: it’s VSDC 10.1! VSDC 10.1 Update: Advanced HDR, GPS Telemetry,...

VSDC Christmas Update 9.4: Enhanced Effect Management, 100+ Background Templates and Streamlined Editing

This holiday season embraces new beginnings with the latest update of VSDC Video Editor! We’ve listened to your feedback and decided to focus on enhancing the tools you love most—all while laying the...

How VSDC Free Became My Secret Weapon for Watermark (Free 4K Editing in 2025)

Hi, I'm Mattea Wharton, a travel videographer from Seattle. For three years I battled with video editors that slapped ugly watermarks on my videos until I found VSDC. This free no-subscription editor completely...

VSDC 9.3: 150+ Templates, Text Transformer, Sprite Auto-Detect and GUI Update

Change is all about improvement, and this process wouldn't be possible without your input. After carefully reviewing your feedback, we’ve addressed several key issues and introduced updates designed...

Best Special Effects Software

Intro In 2024 the options range for creating visual effects is incredibly diverse and it becomes more and more challenging to identify the top choices. Here you can find a guide to the top visual FX...

VSDC 9.2: AI Segmentation Models, 300+ Transitions, VSDC Cloud and New Templates Pack

Are you ready to explore new heights with the latest major VSDC update? Finally, Version 9.2 is here! Packed with groundbreaking features, including the new AI-powered Segmentation tool, this update offers...

How Black and White Movies Were Colorized

Are you a fan of classic black and white films? Ever been curious about how they would appear if they were in color? Many filmmakers have pondered the same, leading to numerous classic movies being colorized....
 

Screen Recorder Box

This program allows you to capture the video of your desktop and save it on your PC in various formats. Coupled with a video editor, the program is a great tool for creating presentations, tutorials and demo videos.

Read more about Screen Recorder...


Video Capture Box

The program captures video from external devices and records it to computer in a free format. You can save video from video tuners, webcams, capture cards and other gadgets.

Read more about Video Capture...

VSDC Video Editor Reviews & Ratings (Trustpilot, Capterra & Media)

VSDC Free Video Editor is rated 4.5/5 by real users on Trustpilot and Capterra. Here are a few reviews and quotes from creators and tech media.

Overall rating: 4.5/5 based on 200+ reviews on Trustpilot and 89 reviews on Capterra.

★★★★⯪

VSDC Free Video Editor is the best free video editor for Windows I’ve used, from color grading to picture-in-picture and cinematic results.

— Ejikeme Eloka Augustine

Source:Trustpilot

★★★★☆

Easy-to-use interface and quick export to social media make VSDC a versatile video editing tool for everyday projects.

— Karen C., E-Learning

Source:Capterra

★★★★☆

A feature-packed non-linear video editor for Windows that can compete with many paid video editing solutions.

— TechRadar

Source:TechRadar review

★★★★★

The free VSDC editor saved my YouTube channel – a powerful video editing software for chroma key, text effects and picture-in-picture.

— Paul Roberts

Source:Trustpilot

★★★★★

Fast and simple for YouTube videos with green screen, zoom, color tools and creative effects in one app.

— Marie R., Media Production

Source:Capterra

★★★★★

One of the best free video editor options for Windows users, ideal for GoPro, YouTube and family videos.

— VidProMom, YouTube creator

Source:Media reviews

★★★★★

I’ve been using VSDC for years; editing is easy and the final videos look great for my personal and professional projects.

— Long-time VSDC user

Source:Trustpilot

★★★★★

Great value and faster than many other free tools; I quickly create videos for YouTube, Instagram and Facebook with features my audience loves.

— Rabika B., Marketing & Advertising

Source:Capterra

★★★★★

VSDC offers many features you don’t usually find in free editors, including picture-in-picture, stabilization and modern codec support with no watermarks.

— Tech media review

Source:Media reviews