How to Transform and Animate Text with VSDC
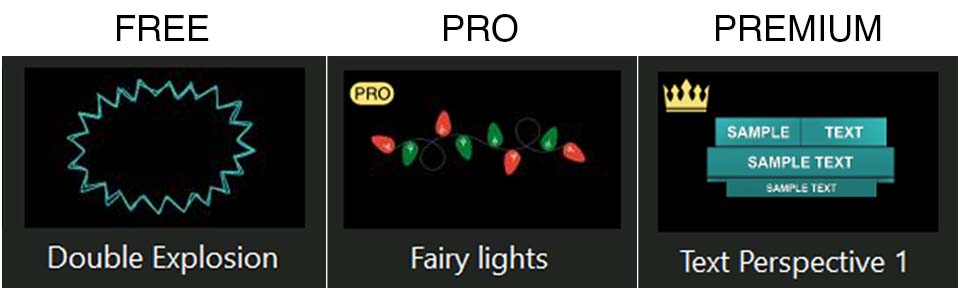
If your titles need a visual boost to grab attention, this article is for you. We’ll show you how to achieve striking results with our text conversion tool, first introduced in VSDC 9.3. With this powerful feature you can design a variety of text animations, including letter morphing, text reveals, stroke effects, light animations, and beyond. The possibilities are endless, driven by your creativity and how you tweak the settings. Prefer a quicker route? Try our presets and skip the adjustments altogether.
Ready to dive deeper? Keep reading for detailed descriptions.
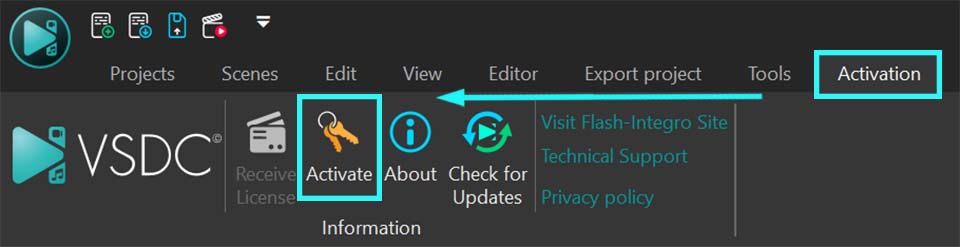
Make sure you have the latest version of VSDC Video Editor installed!
Getting Started
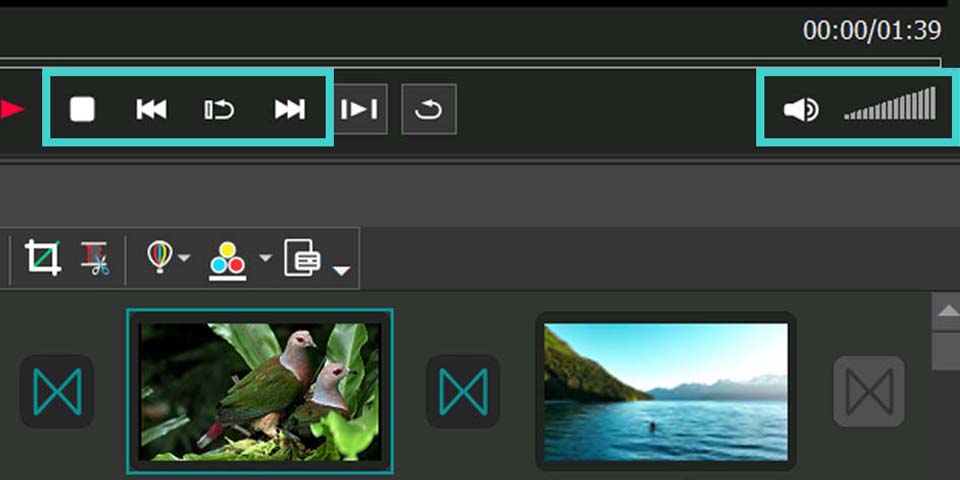
To begin, launch VSDC Video Editor and create a new project by selecting the “Blank Project” option on the start page or by choosing “New Project” from the top horizontal menu. A pop-up window will appear, allowing you to set the desired resolution and frame rate. You can also rename your project if needed. Once you've configured all the settings, click on “Finish” and start adding a text object.
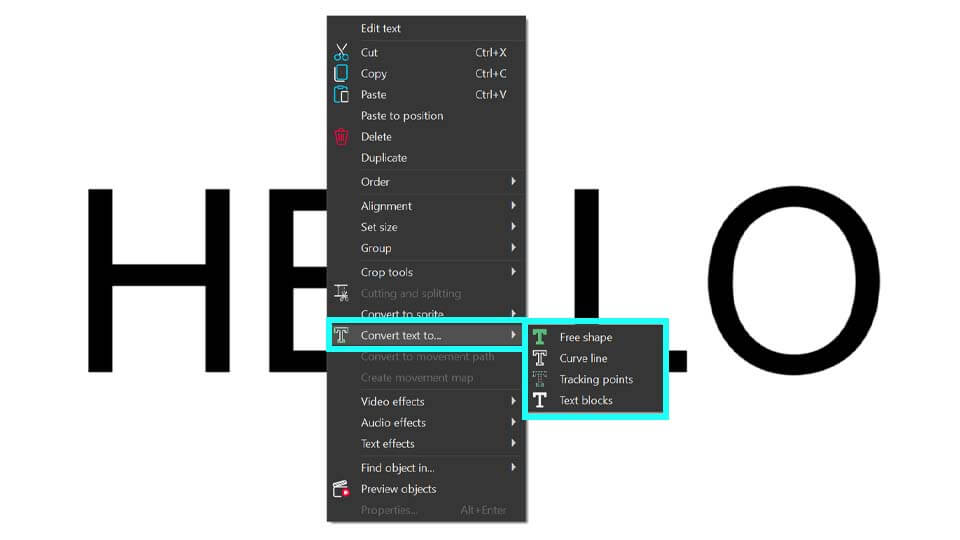
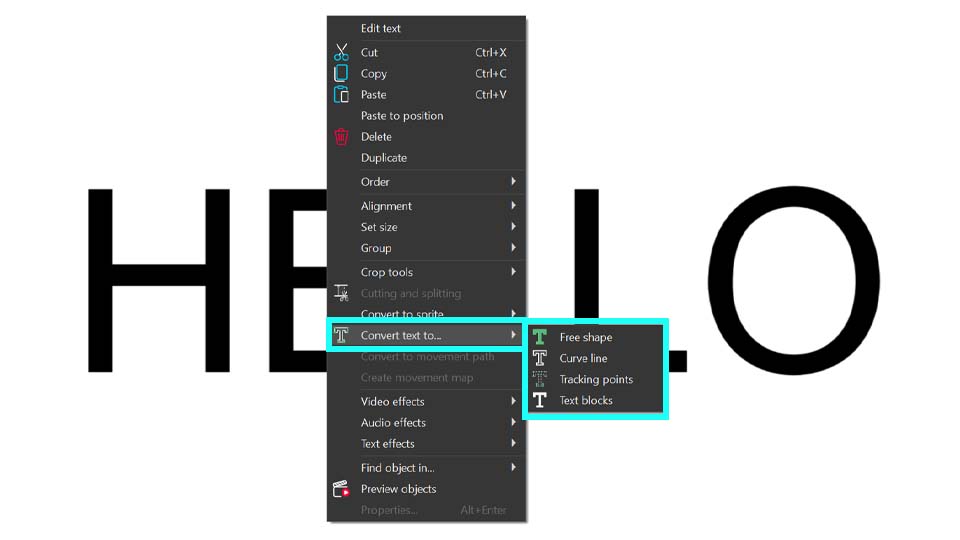
Press the ESC key to remove the blinking text cursor, then right-click on your text either on the scene or on the timeline and navigate to “Convert the text to”. Here you'll find four conversion options:
- Free Shape
- Curve Line
- Tracking Points
- Text Blocks
Once you've chosen your desired conversion mode, a settings window tailored to that mode will appear. Details about this window are provided in the next paragraph.
Text Conversion Tool Window
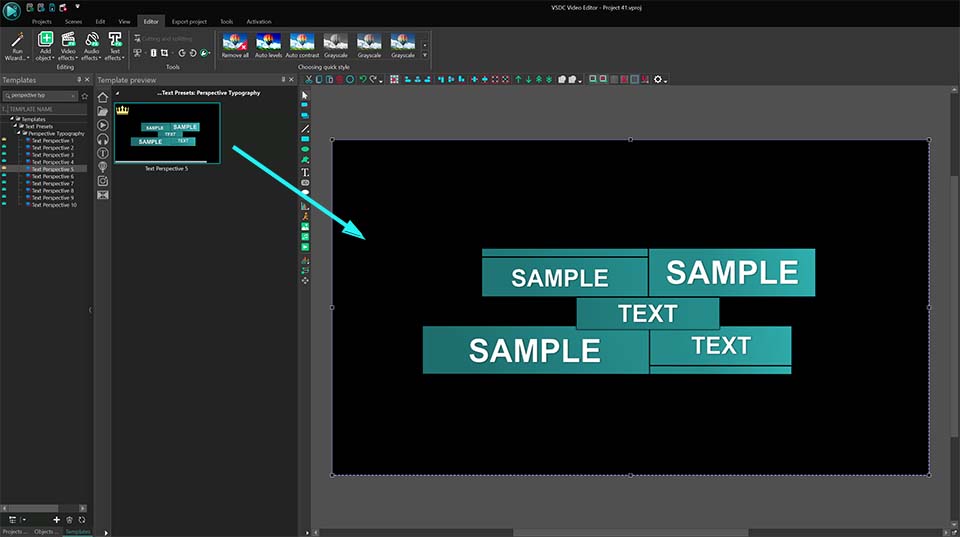
Let’s explore the interface of the Text Conversion Tool. While specific settings vary depending on the selected mode, the layout remains nearly identical across all of them. For instance, let’s have a look at the "Text Blocks" mode. To open it, right-click on your text object (make sure there is no blinking cursor—press ESC if needed), navigate to "Convert text to..." and select "Text blocks". The settings window will open, displaying its interface.
In the center you’ll find all the necessary settings for your text effects. In the following paragraphs you will learn how to work with them. On the left you’ll see the template window, where templates applicable to your text are listed. Remember that the template window is available only for “Text Blocks” and “Free Shape”.
On the right there is the preview window, allowing you to see how your text animation and the templates from the template window work. When you choose a template from the template window, it automatically appears in the preview. The text with applied templates and settings will only be visible after clicking on the “Preview” button located in the left corner of the central window. You can also use this button in case you accidentally close the preview area. Just click on it, and this area will be displayed again.
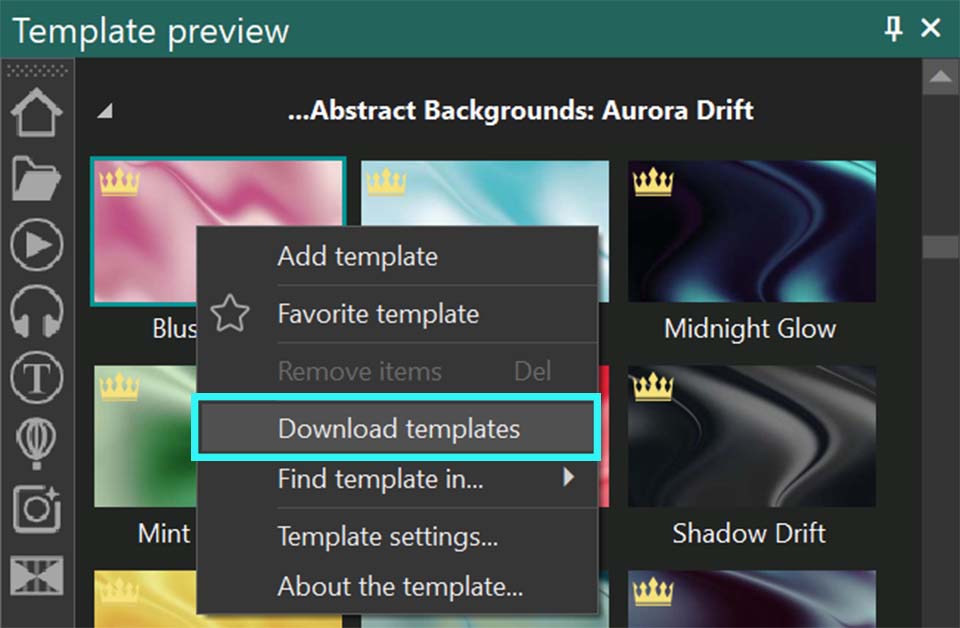
Note: To quickly access frequently used templates you can add them to your list of favorites. To do this, right-click the template you like and select the “Favorite template” option in the main template window. It will then appear under Favorite in the top-right corner, marked by the star-icon.
When you click on the same star-icon in the text conversion window, the templates you chose (effects or transitions) that can be applied to text will be displayed there.
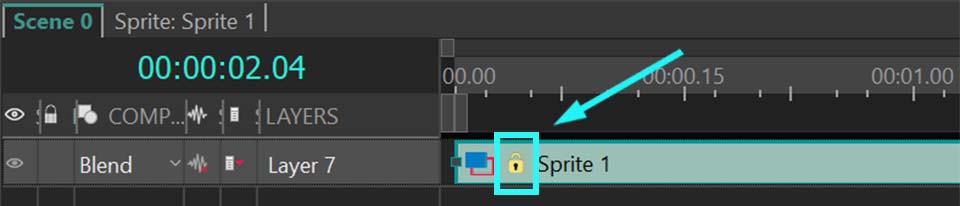
Next to the “Preview” option you can see three buttons. The first one, "Move to sprite", automatically groups all objects created during the conversion into a single sprite. This is very useful when working with large amounts of text, as it prevents new objects from occupying too much space on the timeline and worsening navigation. If you need the objects to remain on the main timeline, simply click on the middle button, "OK". If you decide not to convert the text, click on the third button, "Cancel", or just close the window.
One more important option is the "Hide text afterwards" checkbox. If checked, your original text layer will be hidden after you click on “OK” or “Move to sprite” finishing the conversion process. If you prefer to keep it visible, simply uncheck this option. If you've already closed the settings window and want to adjust this, you can return the visibility of this layer by clicking the "eye" icon on the left side of the timeline.
Now let’s delve into the specific settings for each mode, guide you through the configuration process and demonstrate how to create simple text animations.
Text Reveal with the “Text Blocks” mode
After selecting the “Text Blocks” mode in the previous section, we’ll continue working with it. The settings window for this mode is already open, so let’s explore the purpose of each option.
The first one is the "Preset" feature, designed for users who prefer not to adjust numerous settings. Simply select a preset by clicking the arrow next to this option. For example, choose "Paint Brush - Words" from the drop-down menu.
If you want to see all of the presets one by one, make sure that you have the “Auto preview” checkbox enabled. This way you can view each preset without having to click the Preview button each time.
Once you’re satisfied with the result, choose between "Move to sprite" or "OK", depending on how you prefer to organize the objects on the timeline.
If you want to create your own text animations, it's essential to understand how the various settings work. Mastering these settings allows you to craft thousands of unique text animations, including the popular Typewriter effect, which requires adjusting only two parameters in this window: “Split by” and “Fade in”.
If you've experimented with presets before, it’s necessary to clear the automatically applied values in the fields to input your own settings. Simply close and reopen the text conversion window.
Let’s see the "Split by" option located under the “Preset”. It allows you to specify the elements into which the text object can be divided:
- Characters: Splits the text into letters.
- Words: Splits the text into words.
- Sentences: Splits the text into sentences.
Selecting "Characters", for example, will transform each character into a separate text object on the timeline, giving you the flexibility to position them and apply effects to them individually. To see how your objects locate on the timeline, click on OK to go out from the text conversion window.
A better result can be achieved in combination with other settings. For example, with the “Fade-in” option that configures how your text blocks will appear on the scene. There are several variants for it:
- Don't use: No fade-in effect is applied.
- All at once: All text blocks appear simultaneously.
- One by one: Text blocks appear sequentially from the first to the last.
- One by one reversed: Text blocks appear sequentially from the last to the first.
- Random order: Text blocks appear in a random sequence.
Let’s choose “One by one” and see the result. The text objects are automatically placed on the timeline so that they appear on the scene one by one. Isn't the result similar to the Typewriter effect?
If the fade-in seems to be too fast, you can improve it with the "Fade-in duration" option that sets the time interval during which all text blocks appear. This setting can be activated when "one by one", "one by one reversed" or "random order" Fade-in values are set.
For example, if we set “Fade-in” to "One by one" and “Fade in duration” to 3000 ms (3 seconds), all text blocks should appear within three seconds one by one. The timeline will automatically shift the time of appearance of each text block and you’ll get such result:
If you want the first character not to be on the screen immediately, but to appear a little later, e.g. a second after the beginning of the video, use the option "Fade-in overlap" that allows a simultaneous shift of the beginning of displaying all text blocks on the timeline. This parameter works together with Fade-in duration.
- If we set Fade-in overlap to a value greater than 0, all text blocks shift to the left on the timeline, meaning they start appearing earlier.
- If we set Fade-in overlap to a value less than 0, all text blocks shift to the right on the timeline, meaning they start appearing later.
As we want our text to start a bit later, we need to set this parameter to a value below 0 to delay the start of the text appearance, shifting it to the right. Let’s set it to -1000 ms, so the text appears one second after the video begins. Click on “Preview” to make sure of it and see how it looks on the timeline.
The highlight of this process is the Fade-in effect, which brings your text to life beautifully. You can select a template from the drop-down list or drag and drop it from the template window into the dedicated cell labeled “drag and drop effect here” (available only for "Free Shape and "Text Blocks"). When you select a template in the template window, its preview automatically appears on the left of the text conversion window. To see how this transition applies to your text, simply click on the "Preview" button.
For example, let’s choose the "Paint Brush: Top-Right Corner" effect and see the result—it’s stunning, isn’t it?
If you find that your text reveals too quickly, you can adjust the "Fade-in effect duration" to control the timing of its appearance. For example, set the duration to 3000 ms and you’ll notice that the animation becomes much smoother and more gradual.
Now that we’ve covered the Fade-in settings, let’s move on to the Fade-out parameters.
The "Fade-out" option is similar to the "Fade-in" parameter but controls the disappearance of text blocks:
- Don't use: No fade-out effect is applied.
- All at once: All text blocks disappear simultaneously.
- One by one: Text blocks disappear sequentially starting from the first one.
- One by one reversed: Text blocks disappear sequentially in reverse order.
- Random order: Text blocks disappear in a random sequence.
In the video below you can see the text animation combined with all the previously configured settings and the “One by one reversed” option. With this effect all the letters of your text will disappear rapidly, creating a dynamic transition.
If you add the value for "Fade-out duration" that is similar to "Fade-in duration", but specifies the time interval during which all text blocks should disappear from the scene, the text disappearance will be smoother.
For example, if “Fade-out” is set to “one by one reversed” and “Fade-out duration”to 2000 ms, all text blocks will disappear within two seconds by the end of the playback.
Let’s move to the next option in the settings window, Fade-out overlap, that is similar to Fade-in overlap, but adjusts the simultaneous time shift of disappearance of all text blocks on the timeline. This parameter works in combination with Fade-out duration.
- If the value of this parameter is greater than 0, the shift is performed to the right toward the end of the timeline.
- If the value is less than 0, the shift is performed to the left, toward the beginning of the timeline.
Adding a transition from the "Fade-out effect" is a sure way to captivate your audience! You can easily apply the same effect used for Fade-in by clicking “Copy from fade-in” or choose a different effect from the drop-down list. Alternatively, you can drag and drop a new effect from the template window. So you can create a unique finishing touch for your text.
For our example we’ll use the "Paint brush: top-right corner" transition. However, feel free to select any other transition that suits your desired effect.
If your text vanishes too quickly, you can adjust the "Fade-out effect duration" to prolong the disappearance time. For a balanced animation, try setting it to 3000 ms, the same value as the “Fade-in effect duration”.
In this example we achieve an impressive reveal effect where the text is displayed with a brush stroke that also fades away in the same manner. By exploring the numerous options available, you can mix and match effects, unlocking over a thousand unique text animations!
Text Morphing with the "Free shape" mode
When for the "Convert text to" option the "Free shape" mode is activated, the text object you add to the scene is transformed into a group of free shapes. This type of conversion is especially useful for creating animations where letter shapes morph from arbitrary forms. It also allows you to work in greater detail with the color of each letter — as individual freeform objects — so you can adjust color gradients or set color changes using keyframes.
We start the same way we do in other modes: right-click on your text object and navigate to "Convert text to...". Select "Free Shape" here. You can choose from the same presets available for “Text Blocks” or input your custom values to create a unique effect.
For example, you can replicate the values shown in the video below to create a stunning Burning Text Reveal effect, complete with a matching disappearing effect.
But as we convert our text in Free shapes, we can do lots of other things. For example, we can create the Morph Text animation. We don’t need any preset here, so please male sure that you have nothing chosen for this option. Let’s set the "split by" parameter to "by character", "Fade-in" to "one by one" and choose the desired fade-in duration and fade-in overlap (we set them to 3000 ms and -1000 ms accordingly).
For completing your work with this window we recommend clicking on "Move to sprite". The “Free shape” mode often creates many objects on the timeline, so organizing them all in one place is preferable.
To achieve morphing letter animations, create duplicates of each free shape on the timeline and adjust them gradually so that the shape transforms into a recognizable letter over time. It means that for each character you need to create several free shapes differently located on the timeline so that it gradually turns from a shape into a letter. In this way you’ll get frame-by-frame animation of your letters appearing from shapes.
The possibilities with free shapes don't end there. For example, you can also design impressive animated gradient logos and texts. For a detailed guide on creating them and exploring the various settings in the properties window to experiment with your text, watch our tutorial video.
Stroke Text with the “Curve Line” mode
The next mode we are going to discuss is "Curve line". When for "Convert text to" the "Curve line" mode is activated, the text object you add to the scene is transformed into a group of curves. This conversion is ideal for creating animations that outline the appearance of letters.
In the conversion settings window you'll find parameters that differ from those we discussed previously. Before analyzing these settings, note that each character may consist of multiple curves and the number of them can vary depending on the font and is determined by the font creator, not the video editor.
When you open this window, you'll notice right away that the template window is absent, unlike in the two previous modes. That is why, you won’t find any transitions in the fields for Fade-in and Fade-out effects. Keep in mind that it is not available for this mode and for the next one, "Tracking Point". So, don’t be surprised if you don’t see them while working with these options.
Let’s move on to the settings window for this conversion type, starting with the "Preset" parameter. Here, you'll find a variety of templates specific to this mode, different from the previous two modes. These include options for Stroke animations, allowing you to choose how your letters appear (one by one, random or all at once) and control the speed of the effect (slow, medium, fast).
If you want to create your own text effect, use the options available here. You’ll notice a new option—the "Mode" parameter—which wasn’t available in the two previous modes. This setting allows you to specify which curves to edit:
- Both: Manipulate all curves of each letter in the source text object.
- Even: Work with all even-numbered curves of each letter.
- Odd: Focus on all odd-numbered curves of each letter.
If you want to work with the whole text, the best option is "Both", as it allows you to see all the curves of your characters. Choosing "Even" or "Odd" will only display some curves, which do not fully represent your letters.
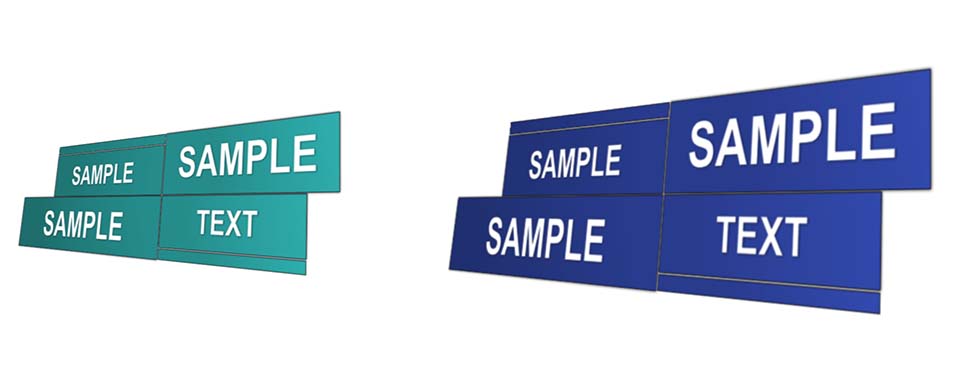
In result when you select "Both", we have our text outlined:
You can add a smooth animation to it, making each letter appear one by one on the screen. To achieve this, use the settings you already know: set "Fade in" to "one by one" and choose "Duration" for the Fade-in effect. The timing of the Fade-in and effect duration parameters will depend on how long you want the full text to take to appear. We set them both to 3000 ms.
Just look at this! After adjusting three settings your own Stroke Text animation is ready!
Light Text Animations with the "Tracking points" Mode
The fourth type of conversion, Tracking points, is used to create animations that highlight letters along their contours, such as a running light effect.
Before we show you the effect, please note that, unlike other conversion types, conversion objects of this mode are created within the original text on the timeline and don’t make the text object itself invisible. That’s why the "Move to sprite" and "Hide text afterwards" options are disabled.
The settings in this mode differ slightly: parameters related to object fade-out, such as "Fade-out", "Fade-out duration", and "Fade-out overlap", are disabled. Additionally, the "All at once" option is not available for "Fade-in", and it’s not possible to view the "Fade-in effect" or its associated settings, as well as those connected to the "Fade-out effect". Presets are also disabled. These changes highlight the specific features of this mode.
Here, as in the previous section, curve lines are essential because the number of curves determines the number of effects applied to the text. So it is important to set the "Mode" parameter, which, as in the previous section, includes the following options:
- Both: All curves of each letter in the original text object are used to create the highlighting effect.
- Even: Only the even-numbered curves of each letter are highlighted.
- Odd: Only the odd-numbered curves of each letter are highlighted.
Only in this mode can you find the "Effect" parameter. It determines the effect used to highlight the outlines of letters. The available options in it are:
- None: No effect is applied.
- LensFlare: Applies a sun glare effect to highlight the letter outlines.
- BokehGlare: Uses a bokeh glare effect to highlight the letter outlines.
By adjusting all these settings, you will already get a perfect Light animation.
For example, let’s set "Mode" to "Both", "Effect" to "LensFlare", "Fade-in" to "One by one" and "Fade-in duration" to 10000 ms. This high value for the duration is necessary because the example phrase below is quite long, and the animation needs enough time to play out. Setting it to a lower value would make it too fast.
As a result, we have the following:
A more mysterious animation can be achieved if we change some parameters for LensFlare effects we have inside our text object. To do this, select all of them on your timeline and go to its properties window. Here you can adjust the flare intensity, light ray strength, color tone of your flares, visible area, etc. to enhance the visual impact.
By decreasing the value for the "Visible area" option, we create text that is highlighted with a glow in the dark.
That's only a small honor of what can be done with this tool!
Don’t hesitate to explore these modes and their properties window to uncover a variety of additional animations and effects.
We hope you found this article helpful and that you've explored all the linked resources to fully understand this new tool. To discover more possibilities, be sure to check out our tutorial video on our YouTube channel.
Do you still have questions? Let us know!
Feel free to contact us via email at This email address is being protected from spambots. You need JavaScript enabled to view it. or connect with us on our social media: Facebook, X, Reddit or Discord.
 User Help Manual
  Learn FAQ
  Send us feedback
 ")


 Video Editor
 Video Converter
 Audio Converter
 Audio CD Grabber


 Download Video Editor 10