How to Make Dynamic Curve Lines with Variable Thickness, Gradients and Animation in VSDC
One of the most exciting upgrades in VSDC 10.1 is the enhanced Curve Line tool, now featuring variable line thickness, rounded edges, soft borders, customizable blur settings and many more. This combination lets you achieve great effects from natural-looking handwriting with adjustable thickness to professional glows, smooth light trails and depth effects (similar to 3D) using soft edges and blur. Want to discover how these improvements can transform your videos? Keep reading for all the details!
New Curve Line Properties
Let's begin by exploring the upgraded curve line functionality. First, add a curve line to your scene and select it on the timeline to view all available properties in the right-hand panel. Among the familiar options (if you need more details, please, check out this article again), you'll find several new settings under the "Curve Line Extra Settings" section in the Properties window. These are what we'll focus on today.
If this section is inactive, toggle the nearby slider to enable it, then expand the section by clicking on the left arrow.
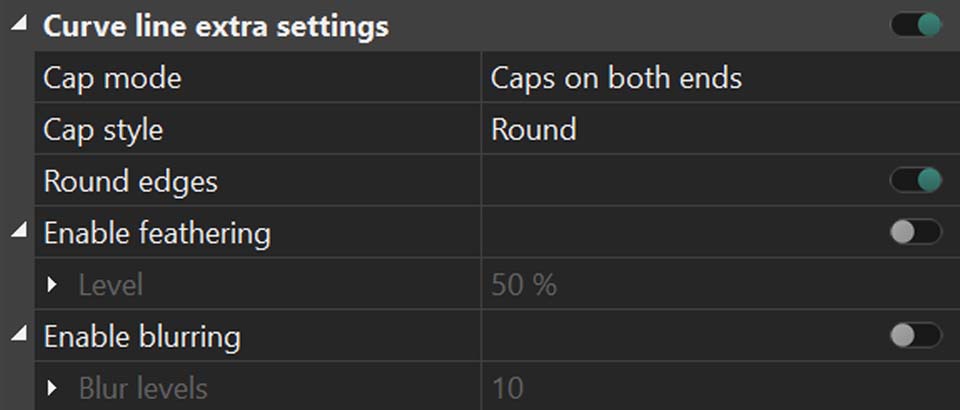
The first property you'll see is "Cap mode" that is useful for customizing your curve line's ends. Click on the arrow to reveal four options: "Caps on both ends" adds smoothing caps to all open ends, "Start cap only" or "End cap only" applies the effect to just one side and "No caps" keeps ends unmodified. Choose the one which is better for your needs.
Tip: for organic, hand-drawn effects, "Caps on both ends" typically works best. "Start cap only" is ideal for directional elements like growing lines, while "End cap only" works well for flowing designs like light trails. For sharp technical precision in UI/UX designs, choose "No caps".
This setting directly relates to the next one: "Cap style". Here you'll find three ways to display stroke ends: "Round" creates smooth semicircular caps ideal for organic shapes, "Square" extends the cap by half the stroke width for technical designs and "Rectangle" stops strokes precisely at endpoints for clean cuts.
Enabling the next option, "Round Edges", automatically softens your curve line by rounding all sharp corners into smooth arcs, creating natural-looking shapes.
For finishing touches, don’t forget to try two key smoothing options. The first one, Feathering, creates gradual transitions between your curve and background: adjust its intensity for anything from subtle glows to fully blended edges. The second one, Blurring, offers even softer results, giving your lines an ethereal quality. Its intensity is adjustable too.
Let's explore how much creative potential they unlock and create a project together.
How to Change Line Width Dynamically
Now that you're familiar with the new curve line settings, let's put this knowledge into practice. A frequently requested feature, dynamic line thickness, is finally here, and we're about to explore exactly how it works.
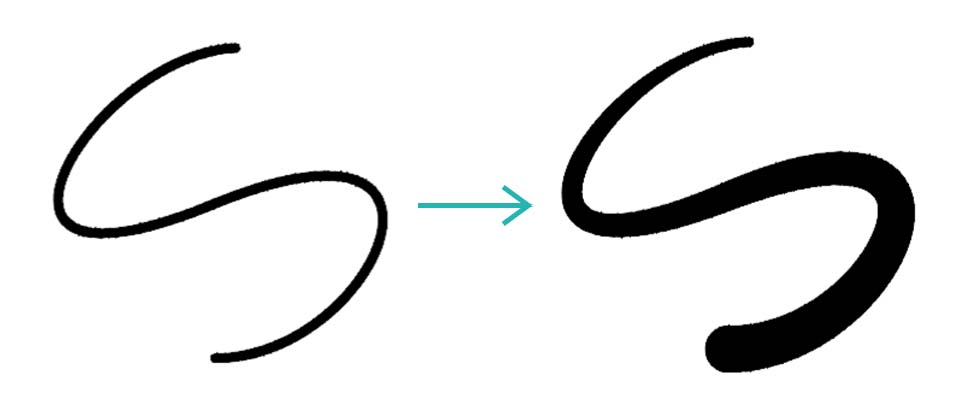
Simply try setting different values for the Thickness parameter of each point of your curve line. When each point has a different value for this setting, the editor automatically creates smooth transitions between them, producing gradual tapering effects along the curve segment.
To adjust the line thickness at a specific point, simply click on the desired one along the curve with CTRL pressed, and the Properties window will immediately display all customizable parameters for that selected point. Just enable the “Curve line thickness settings” and assign your desired value in the Thickness option.
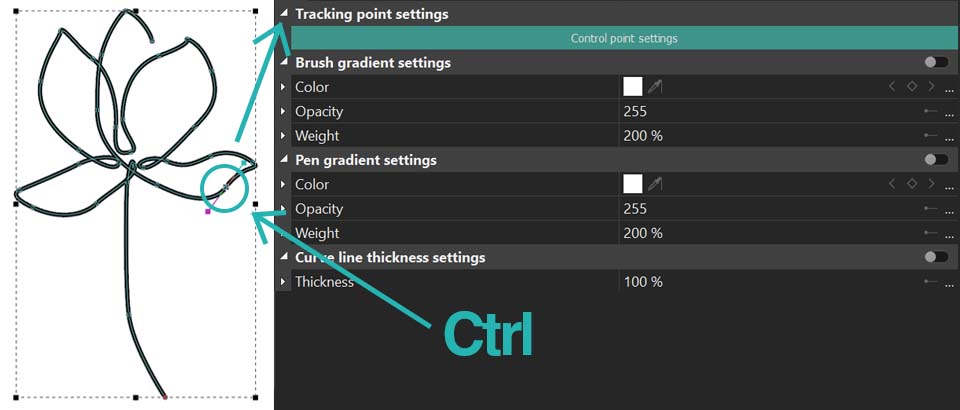
Need more control points? Select the Curve Line tool, choose "Insert point", then click anywhere along your curve to add new points. Remember that holding CTRL while dragging point handles lets you fine-tune your curve's smoothness using Bezier vectors.
Let’s see this in action: create a сurve line with three points, setting the thickness to 100 at the first point, 300 at the second and 500 at the third. Notice how the line tapers, mimicking natural brushstrokes or calligraphy. This smooth interpolation between values becomes even more eye-catching when combined with rounded caps for polished endings, soft blur and thickness for self-drawing effects.
Design Challenge
Let’s dive into a creative experimentation and see how its variable thickness capabilities work in action. We’ll choose a reference image and try to recreate it inside the VSDC video editor.
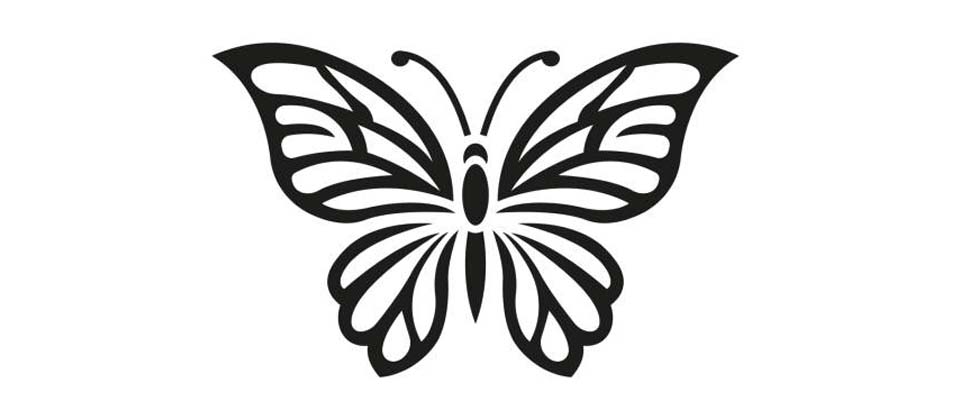
The image we’re working with is not only based on the use of variable line thickness, but it’s also perfectly symmetrical, this detail plays to our advantage. Start by adding the reference image to the scene as a visual guide. Then carefully trace one of the portions (for example, just the left side) of the design and plot each curve point manually while assigning specific thickness values. As you work, you'll immediately see these tapered variations create flowing movement along the lines. Once satisfied with your traced section, simply toggle the eye icon on the timeline to hide the reference layer or remove it entirely.
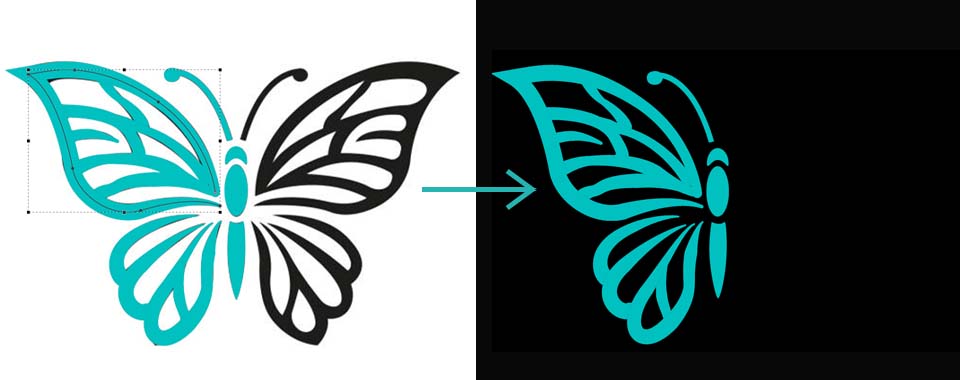
After that, to organize the drawing, group all created curve lines into a sprite: select them on the timeline, right-click and choose “Convert to sprite” from the menu.
![]()
The next step is to create a mirrored version of the sprite to complete the right half of the image. Make a copy of the sprite, click on it and apply the Flip effect from the “Video effects” >> Transforms” to it. This effect will be added to your duplicate sprite on the timeline. Click on it to open the Properties window and choose the type of flip depending on your image. For our experimentation, we choose the horizontal flip for the Direction option . Align the two halves on the scene to achieve a reflection.
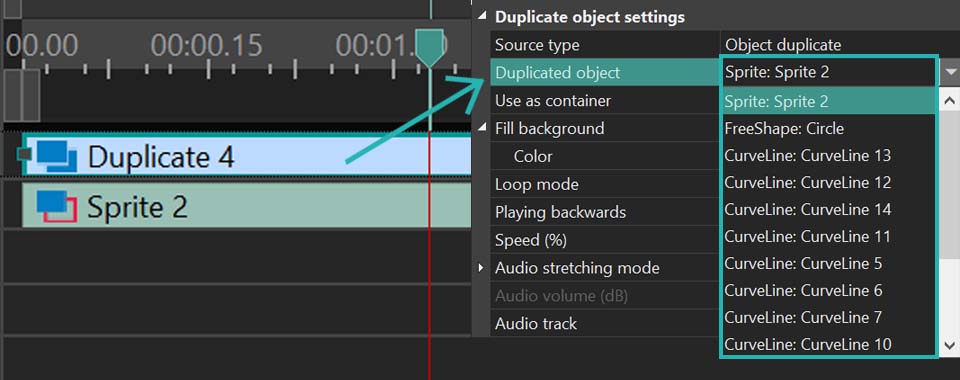
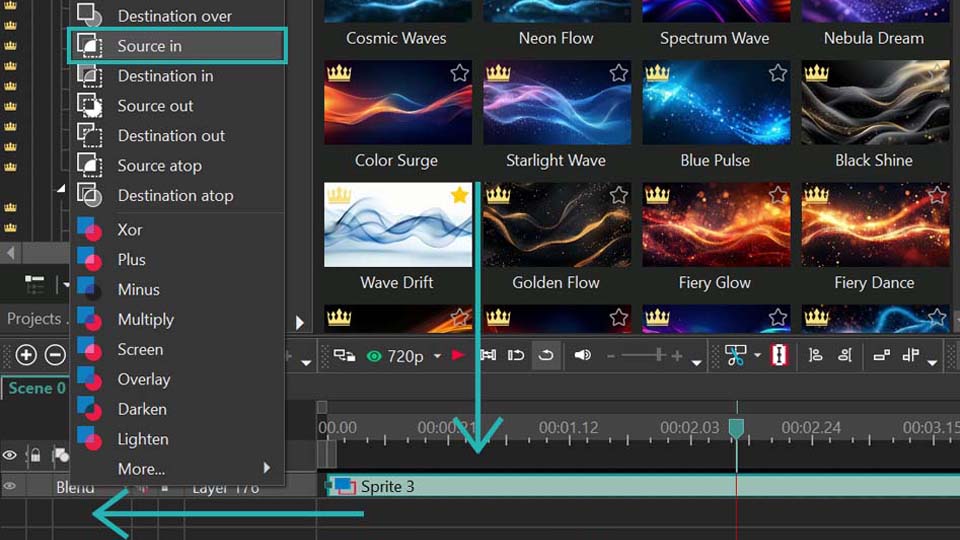
With both halves in place, you can now enhance the look by applying a color scheme. If you want to shift the overall mood of the image, consider using one of the gradient background templates available in VSDC. To do that, first convert the two mirrored sprites into one unified sprite using the same method as before. Then go to the Templates window and find the “General backgrounds” section under “Background templates”. For this example, we’ll use the “Fuchsia Gradient” template. Drag the template into your unified sprite either directly on the timeline or by dropping it onto the scene. Ensure it's placed on the top layer for proper compositing and make sure the “Use as container” parameter is set to “No, use effects and clipping” for it in the Properties window. Then change the composition mode of the layer with gradient template to “Source in”. You can do it in the left part of the timeline under the Composition mode section.
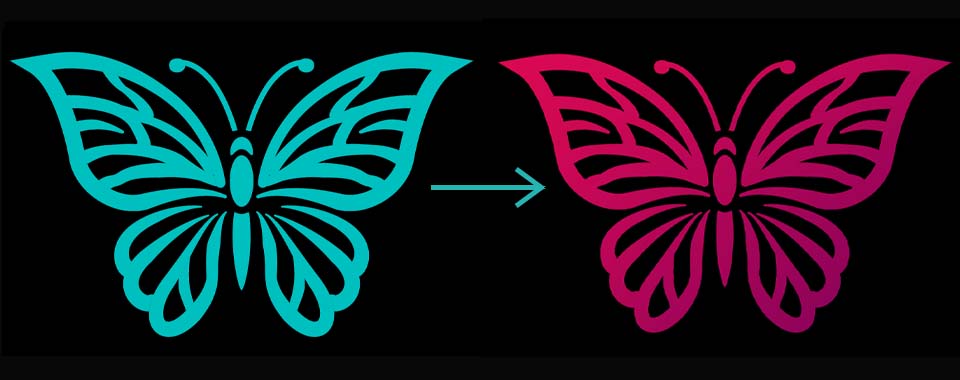
The result is a stylized symmetrical artwork elevated by rich gradient tones.
You can choose from free, PRO or premium templates (learn more about each category in this article).
If you're after something even more dynamic, try animating the lines. The Curve Line tool includes a parameter called “Visible length”, which allows you to simulate the effect of a line being drawn in real time. This opens up opportunities for creating impressive visuals where the image gradually appears as if sketched by an invisible hand. All you need is just click on your curve lines on the timeline, expand this option for each of them and set Initial and Final values as needed.
In just a few steps, VSDC lets you recreate complex illustrations, mirror them with precision, apply vibrant gradients and animate every stroke.
Do you like the result?
We hope you enjoyed exploring these settings with us! Don’t stop here: keep experimenting with your own projects. We’re sure you’ll achieve even better results that you’ll want to share.
If you have questions or creative ideas to share, we'd love to hear from you at This email address is being protected from spambots. You need JavaScript enabled to view it. or through our social networks: Facebook, X, Reddit or Discord. And remember to check out our YouTube channel for more inspiration!