 User Help Manual
  Learn FAQ
  Send us feedback
 ")


Video Editor
Download and use the free video software to create and edit videos of any complexity from a family greeting card to a company presentation. Apply vsdc free video editor for light edit hdr-video, any raw-video formats from cams - BRAW, ProRes RAW, any high resolution 4k or more due to video proxies technologies in the editor.
Cut, merge video files, apply visual and audio effects, use filtration and image correction, make slideshows and add an appropriate soundtrack. Use multi-color Chroma Key and advanced parameters settings to give your video a professional look.
All popular video and audio formats are supported.
Video Converter
This program is intended for converting video files from one format to another. Nearly all popular video formats are supported (both reading and saving). In addition, the program drastically simplifies the task of converting videos for playback on specific multimedia devices, such as iPhone, Samsung Galaxy or Huawei P30 Pro. The program is extremely easy to use, has a modern interface and all necessary video processing functions.
Audio Converter
The audio converter will help you convert audio files from one format to another. All key audio formats and codecs are supported. The program also allows you to manage playlists and meta tags, extract audio from video files and save these tracks on your computer in any format.
Audio CD Grabber
This audio tool is intended for grabbing audio tracks from compact discs and saving them to the user’s computer in any format. Nearly all popular audio formats and codecs are supported. The program can also extract track details from the FreeDB server for automatic file renaming and updating meta tags.
 Video Editor
 Video Converter
 Audio Converter
 Audio CD Grabber

Multifunctionality
A wide array of multimedia processing tools in one free video software suite.

High speed
Our programs use fast
and high-quality algorithms optimized for single and multi-core CPU’s.

Affordability
VSDC video software is freely available for download to Windows OS-based PCs and laptops.
News:
- published Amy Shao 6/10/25 The wait for something new and unusual is finally...
- This holiday season embraces new beginnings with the latest update of VSDC Video...
- Change is all about improvement, and this process wouldn't be possible without y...
- Intro In 2024 the options range for creating visual effects is incredibly dive...
How to Make God Rays Effect in a Video – Step-by-Step Tutorial
God rays, also called 3D light rays, are a beautiful illusion you can see in nature when direct light pierces through gaps in the clouds or a surface that contains holes. Because of their volume and shape, these light rays resemble torches or columns coming straight from the sky – hence the name of the artistic effect.
If you want to add the God rays effect to your video, VSDC Pro can help you achieve that within minutes. You’ll be able to use the effect on added objects, such as titles, shapes, logos, and images with a transparent background, as well as on videos. But most importantly, you’ll be able to make the effect dynamic as if the light source is moving around the scene.
This is what it’s going to look like:
In the tutorial below, we’ll walk you through the effect setup and show you how to change the length, brightness, and color of the light rays. Plus, you’ll learn how to achieve a stunning look by gradually increasing or decreasing the intensity of the effect over time!
Before getting started, make sure to download the latest version of VSDC Video Editor.
Apply the God rays effect to the object
For this tutorial, we’re going to apply the effect to a piece of text – however, the principles of working with other image and video files are exactly the same.
For starters, import your media file to the editor or create a blank project and add an object to the scene. Click the object using the right mouse button and proceed to Video effects. Select Nature - God rays.

Once you make the selection, an Object position settings window will pop up indicating that the effect will be applied to the file starting from the cursor position. Later, you’ll be able to manually change the duration of the effect and shift its position on the timeline if you want to.
Access the Properties window
As soon as you apply the effect, you’ll be prompted to the second tab of the timeline where the “Godrays” layer is located. Click it with the right mouse button and select Properties. The Properties window housing the effect settings will slide in from the right side.

The Properties window contains three groups of settings:
- Common settings
- Adjustment settings
- God rays effect settings
Each group allows you to fine-tune the effect on different levels. Let’s have a more in-depth look at what you can do at each level.
Common settings overview
The first group is called Common settings and it lets you do the following:
- change the name of the layer on the timeline
- set up the moment when the effect appears in the scene – by typing the exact second or frame
- define how long the duration of the effect should be – by typing the exact number of seconds or frames
If you’re happy with the default settings of the effect, feel free to skip this group and move on to the next one.
Adjustment settings overview
The second group is called Adjustment settings. It allows you to change the level of effect transparency, extend the boundaries of the effect area, and select presets.
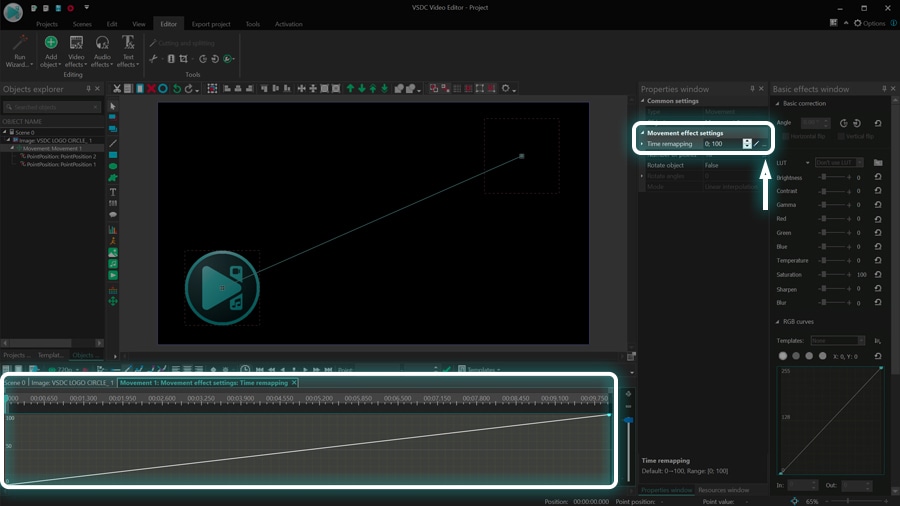
The Transparency parameter defines the level of visibility of the effect. The higher the Transparency value is, the more visible the effect. You can set a constant Transparency value or make it change over time using the parameters called Initial value and Final value. To give you an idea of how it looks, below is a gradual Transparency increase from 0% to 100%
The next parameter in the group is called Extend boundaries, and it only makes sense to change it if you’re applying the God rays effect to an object smaller than the scene size – such as an icon, a piece of text, or an image.
By default, the length of the light rays is defined by the object’s borders. For example, if you’re applying it to a piece of text, we’re talking about the frame where the text is located. This way, if the Extend boundaries parameter is deactivated (set to False), the light rays will be cut by the frame. If the Extend boundaries parameter is activated (set to True), the light rays will extend to their natural length.

Finally, the third parameter in the group allows you to select one of the effect presets from the menu. To continue with the manual setup, leave the ‘Custom’ option selected.
God Rays effect settings overview
The last group of settings is designed to help you achieve a more precise, custom look of the effect. We’re going to show you what each parameter means, and how it changes the overall appearance of the rays.
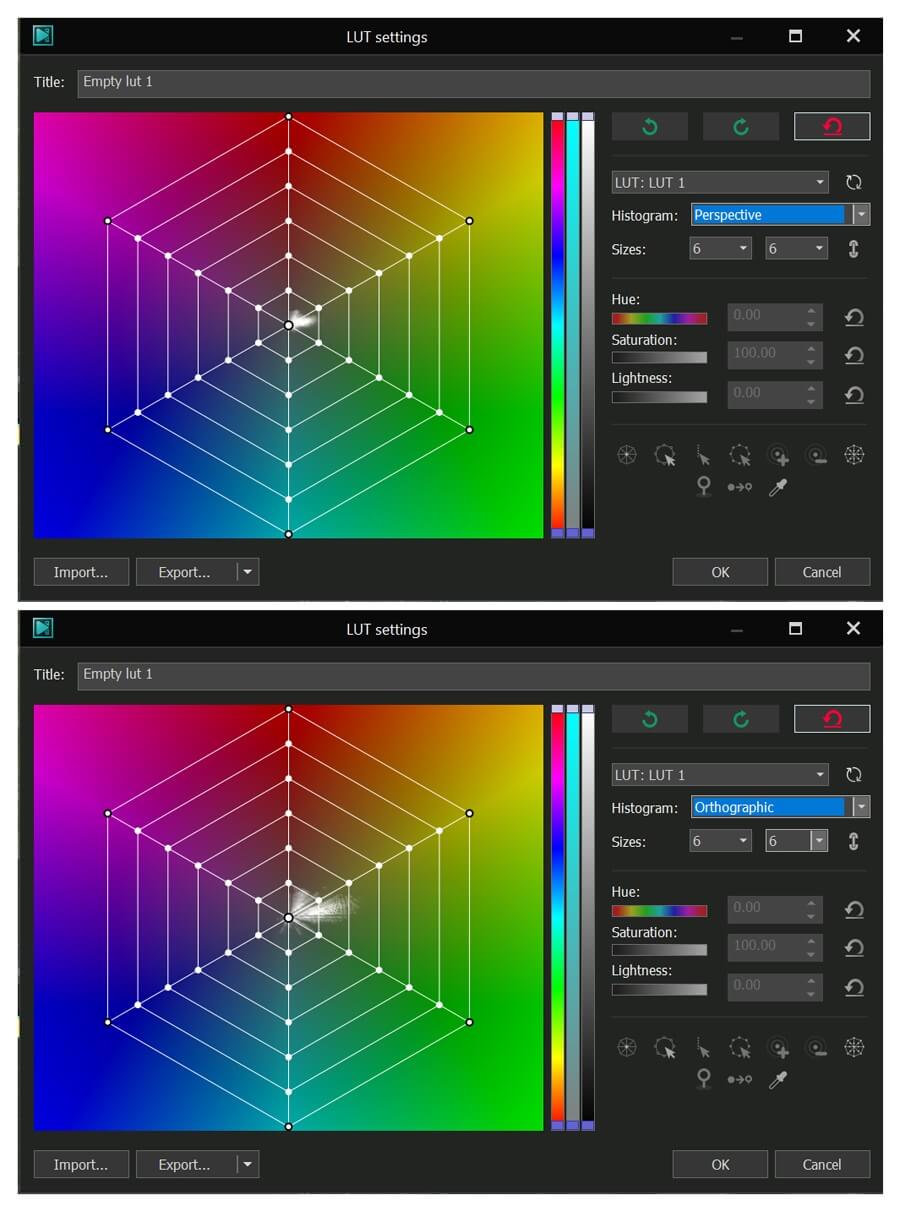
Polar coordinates
The first parameter is called Polar coordinates, and it only makes sense to pay attention to it if you are creating a dynamic effect where the source of light will be moving around. If you keep the Polar coordinates mode activated (set to True), you’ll be able to make the light source move around the polar system of coordinates.
If you deactivate the mode (set it to False), you’ll be able to make the light source move around the XY system of coordinates.
In both cases, to imitate the light source movement, you’ll need to expand the parameters and type the Initial value and Final value for the coordinates. For example, if you’re using the Polar coordinate system, you can type the light source angle and distance from the object for the beginning of the effect and the end of it. When you do that, the light source will be moving from the initial point to the final point throughout the duration of the effect, as illustrated above.

Similarly, if you’re using the XY coordinate system, you’ll be able to set the XY coordinates for the beginning and the end of the effect.
Show/hide center
If you want to keep the effect’s position constant, ignore the previous parameter and click the Show/hide center button to make the center of the effect visible and manually place it in the scene.
Tip: if you are using the coordinates to create a dynamic effect, you can check its position at any given moment on the timeline by moving the playhead and using the Show/hide center button.
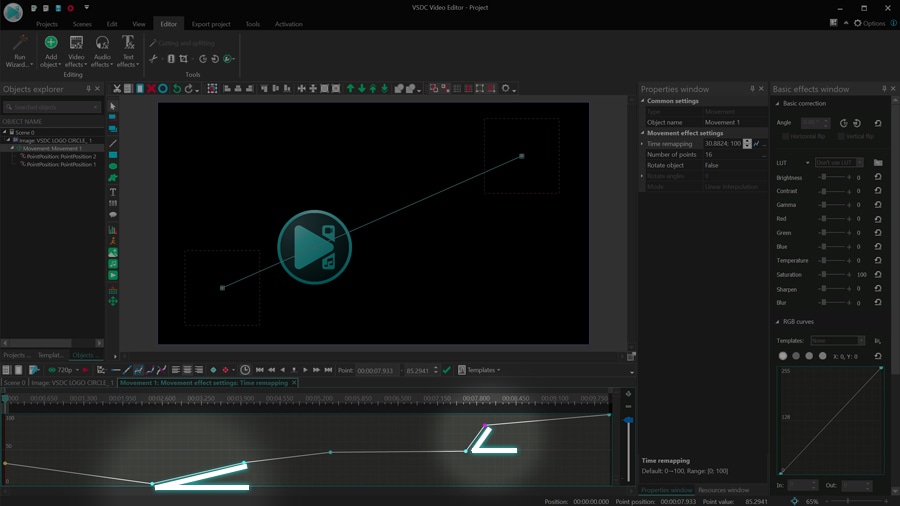
Light intensity and Brightness
Light intensity and Brightness directly affect the look of the light rays. As the names of these parameters suggest, the former defines how powerful the light source is, and the latter defines the brightness of the light.
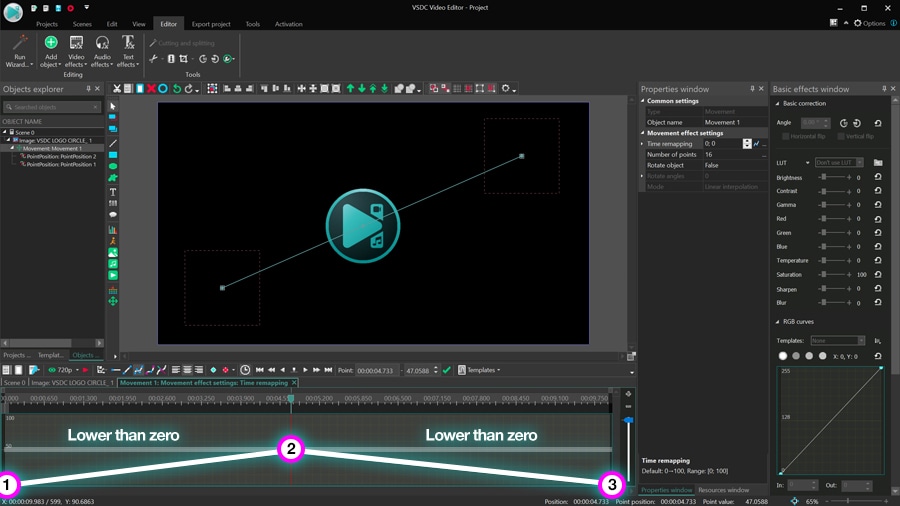
By default, both parameters are set to 100%, and as you start decreasing this value, you’ll notice how the look of the effect gradually changes. See what going from 100% to 0% looks like for both parameters:
As you can see, for Light intensity, 0% means the full absence of the light rays; meanwhile, for Brightness, 0% means the full absence of light (and therefore, disappearance of the object).
Mode
Mode helps you smoothen the light rays and make them look more natural. To see the difference between the two modes, just switch from ‘Normal’ and ‘Smooth’ and look at how the rays change.
Keep in mind that the ‘Smooth’ mode requires a bit more PC resources, so it may work a little slower on your PC.
Ray length
This parameter is also self-explanatory. As you change its value, you also change the length of light rays.
Although this parameter directly affects the length of light rays, it’s important to note that other parameters, such as Brightness and Light intensity, may indirectly affect the length of light rays as well. For example, high brightness or a very powerful light source will visually extend rays.
Noise strength
The Noise strength parameter adds fractal noise to the effect and can also be set up dynamically – through the Initial and Final values.
Chromatic shift
The last parameter is designed to add a touch of color to the God rays effect. By default, it’s set at 0% which means the light rays are white. As you start increasing the Chromatic shift value, you’ll notice how light rays start taking color, based on the Channel order selected in the dropdown menu below.
The default channel order is RGB, which means the effect will contain Red, Green, and Blue – in that sequence precisely. The rest of the channels are abbreviated with the same logic: for instance, GBR means Green, Blue, Red; GB means Green and Blue; B means Blue. This way, you can apply a single color or multiple colors to the effect.
Time to practice
Now that you know how to work with the God rays effect in a video, it’s time to practice. Go ahead and try to use it in your next project. It’s easy to apply, and it works especially well for transitions, intros, and outros.
Got any questions about the effect? Email us at This email address is being protected from spambots. You need JavaScript enabled to view it.
Looking for inspiration for your next video? Check our YouTube channel.


This program allows you to capture the video of your desktop and save it on your PC in various formats. Coupled with a video editor, the program is a great tool for creating presentations, tutorials and demo videos.

The program captures video from external devices and records it to computer in a free format. You can save video from video tuners, webcams, capture cards and other gadgets.

"VSDC Free Video Editor is a surprisingly powerful, if unconventional video editor"
- PC Advisor

"This video editor gives you tons of control and editing power"
- CNet

"The editor handles many common formats and boasts a good deal of capabilities when it comes time to alter lighting, splice video, and apply filters and transitions in post production"
- Digital Trends
© 2011-2025, www.videosoftdev.com, FLASH-INTEGRO LLC. Privacy policy | Terms of use | About us
All trademarks referenced herein are the sole property of their respective owners.
Copying any materials from this site allowed only with written consent of Site Administration.