How to Use Bezier Curves for Drawing Shapes
Bezier curve is a tool that lets you draw odd shapes with precise accuracy. In video editing, it’s one of those rare features that are easy to use and hard not to. Below, we’ll show you how to use Bezier curves in VSDC Free Video Editor for creating shapes you can later use for clipping or inverted masks. For the sake of this tutorial, we’ve selected a heart shape as an example to practice on; once you get the hang of it, you’ll be able to draw any other shape quickly and effortlessly.
Bezier curves are available in VSDC starting version 6.8. Make sure to download it before getting started.
Step 1. Launch VSDC Free Video Editor and import your content
First, boot up VSDC Free Video Editor. On the main screen, there are different options for importing your content. You can create a blank project with custom parameters, or you can simply click Import content and select your video files from the computer. If you decide to do the latter, VSDC Free Video Editor will automatically change the project’s parameters to the parameters of your video.
Step 2. Draw the foundation of your shape
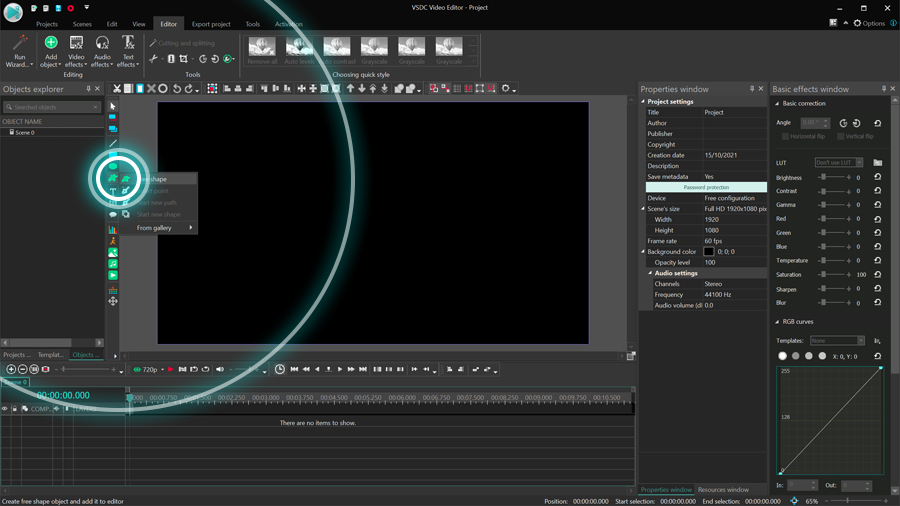
Once you access the project’s scene, go to the left-side menu and select the Add free shape tool:

A window called Object position settings will pop up to indicate the position of the shape you’re creating on the timeline – just click OK.
Now, as an easy demonstration of what the Bezier curve is capable of, let’s draw a heart shape. In the previous versions of VSDC, you would have to create up to 100 control points just to draw a smooth-looking heart. However, now you’ll be able to make do with only a couple of control points, even if you have little to no vector drawing experience. The Bezier curves will practically draw the shape for you!
To get started, click anywhere on the scene and while holding the mouse button, drag it to the side. Once you do that, you’ll see two vectors that will start forming the shape. Leave them as they are and repeat your steps to create another control point above the first one: now you have half of the shape! Okay, it may not look like half of a heart shape, but that’s temporary.
Now all you have to do is close the shape before we start turning it into a heart. There are two ways to do that. You can either select the first control point and press the Closed Free Shape button in the Shape Point Settings, or simply hold the Ctrl key and click on your first control point.
Step 3: Adjust the vectors to achieve the desired shape
Vectors determine the shape of your figure; therefore, you can tweak the shape just by dragging them in the desired direction. For instance, to turn the circle into a heart shape, press the Ctrl key and drag one of the vectors at a 45-degree angle. Keep in mind that if you forget to press the Ctrl key, both vectors will be moving along, staying parallel to each other. Once you’re finished with one vector, drag the second one at the same angle but in the opposite direction. Repeat the process with the vectors from the second control point, and voila – you have a heart. You always had.
Make use of your shape
Drawing shapes with the Bezier curve is this easy. You can add as many control points as you want: each will have two vectors to help you form the shape more precisely. Whether you want to create a clipping mask, hide an object behind a shape, or just practice vector drawing – now it’s much easier. We’re excited to see what uses you’ll find for this tool!
Now, if you’d like to continue exploring the power of Bezier curves, go ahead and read our guide to using them for creating smoother, custom-paced transitions.