 User Help Manual
  Learn FAQ
  Send us feedback
 ")


Use RAW And BRAW Files in VSDC, instruction for convert .BRAW to MP4
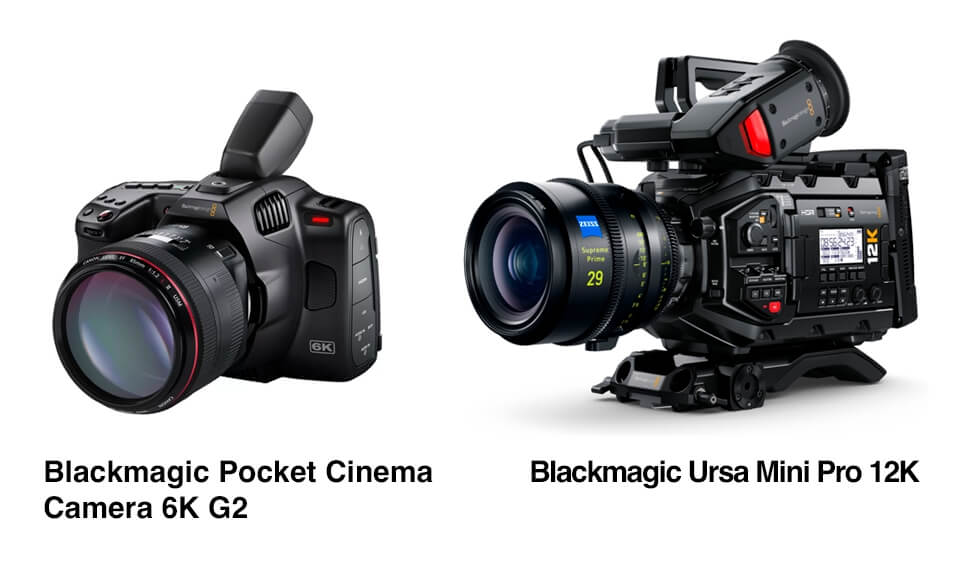
In the world of professional video content creation and YouTube blogging, Blackmagic cameras by Blackmagic Design have become increasingly popular due to their unique capabilities being well-known for their high-quality video output and versatility compared to other professional-grade cameras. Most favored Blackmagic Ursa Mini Pro 12K and Blackmagic Pocket Cinema Camera 6K G2 have proved to be an excellent combination of value and quality.
All models of Blackmagic Camera record files in the Blackmagic RAW format which offers the same quality, bit depth, dynamic range and controls as the well-known RAW format, but with better performance and smaller file sizes. Apart from Blackmagic, just recently, the ability to shoot in RAW format has been added to DJI drones for capturing best-quality footage. In fact, dealing with both RAW and BRAW formats can be a bit challenging since they require specialized software such as Adobe Premiere Pro, DaVinci Resolve or Final Cut Pro. Now, VSDC Video Editor has finally integrated long-awaited support for RAW and BRAW files as well. And the best part - it's free of charge!
![]()
What Is RAW Format?
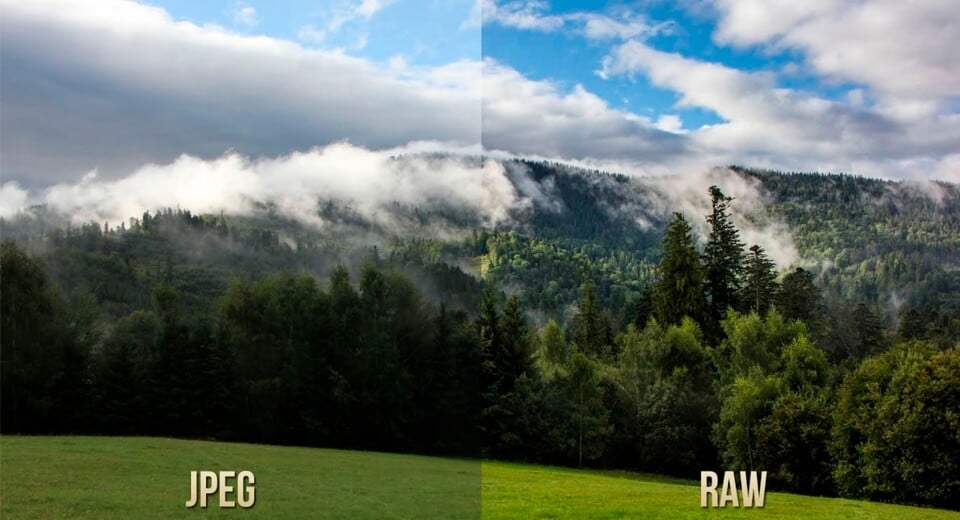
RAW files are a file format that captures videos of high quality. The primary purpose of a RAW file is to preserve the image as true to life as possible without any alterations made after the video is shot. This way users can manipulate the video's exposure, white balance, and other parameters - this is because the RAW files contain more detailed, high-quality information, making them perfect for professional video editing. Color grading, exposure adjustments, and correcting balance issues can be done more effectively without degrading the quality of the footage. What raw video formats are available and their comparison.
Why Opt for BRAW Files?
As for BRAW files, they are a type of digital video file format associated directly with Blackmagic RAW. Blackmagic RAW (BRAW) stands out as a cutting-edge codec, surpassing traditional video formats in quality suitable for capture, post-production, and finalizing. It integrates modern technologies, including advanced algorithms (like noise management, sensor profiling and new edge reconstruction) to deliver video files that are virtually lossless. This makes it perfect for workflows that demand high resolution, fast frame rates, and wide dynamic range.
- BRAW files maintain high video quality and offer smaller file sizes, faster playback, and easier cross-platform compatibility compared to standard RAW files.
- BRAW format compresses videos captured with Blackmagic cameras while preserving all the intricate details, resulting in stunning and true-to-life videos.
- BRAW video files have a higher dynamic range and color fidelity compared to other formats. This means they capture more details in the highlights and shadows, and offer a broader spectrum of colors.
Working With RAW And BRAW Files in VSDC
VSDC now proudly supports RAW and BRAW formats, streamlining your project workflow from shooting to completion. Adjustments and settings made in the camera are transferred to VSDC Video Editor through metadata and are fully editable. You can modify the RAW and BRAW settings in VSDC, and then export them in any popular formats supported by PCs and online-players.
For its part, VSDC comes with a number of possibilities to edit RAW and BRAW footage, such as advanced color grading to fine-tune colors, adjust exposure and manipulate shadows, applying LUTs to quickly achieve a specific look in your video, visual effects, converting and more.
 Download VSDC Free Video Editor for Windows
Adding RAW and BRAW Files
As you probably know, there are several ways to import files to VSDC. Adding RAW and BRAW Files is not at all different from adding regular files:
Option 1. Blank project
Click on the Blank project icon on the start screen to create your own project. Adjust project’s settings in the pop-up window (if necessary) and click Finish. Then choose a RAW/BRAW file in the file explorer, drag it to the scene and drop the mouse button.
Option 2. Import content
So, click on the Import content icon, choose a RAW/BRAW file on your PC and adjust parameters in the pop up window appearing automatically (if necessary). Once ready, hit Finish. This option is quite convenient since VSDC can automatically detect all the parameters of your video (height, width and framerate) and adjust the project parameters accordingly.
Applying LUTs to RAW and BRAW Files
LUT, or a Look-up Table, is a set of values defining how the color tones should be modified. Applying a LUT involves comparing and modifying the original color values of a video based on this set. This process is similar for both RAW and standard files in VSDC, while Blackmagic RAW files come with some new features.
When shooting with Blackmagic cameras, LUTs can be embedded directly into BRAW files as metadata. This feature simplifies the process of achieving the desired visual style, as these LUTs are readily accessible for editing and color correction alongside the original file. After importing your BRAW file to VSDC, the embedded LUT will be displayed in the Properties window. Depending if you want to work with the footage with enhancements applied or disable the LUT to maintain the original color profile, select Apply embedded LUT >> YES/NO. This option is available for free.
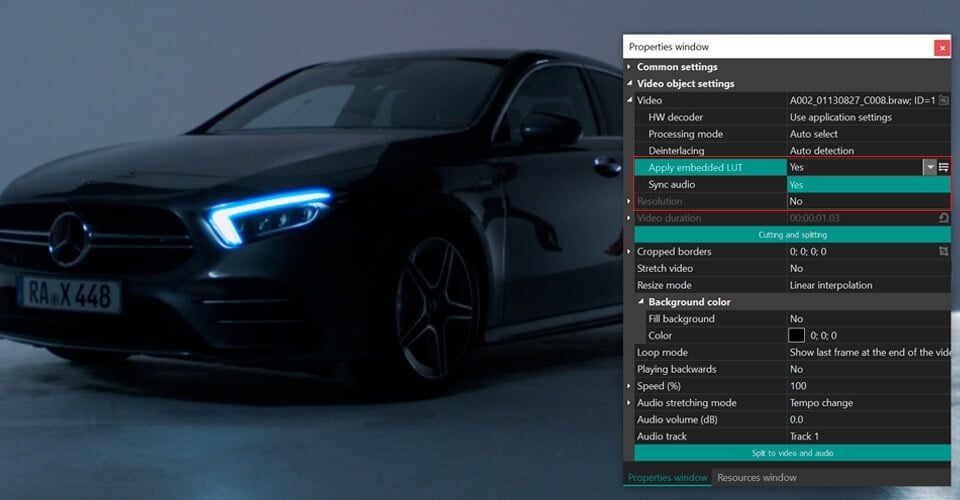
There’s another feature for VSDC PRO users who are seeking to refine their footage further and need to edit the original Blackmagic LUT. For this, click the Export embedded LUT button to save the LUT to PC in CUBE format. Then import it back into the Resources window for standard LUT editing. For a comprehensive guide on editing LUTs in VSDC, we recommend viewing our detailed video tutorial.
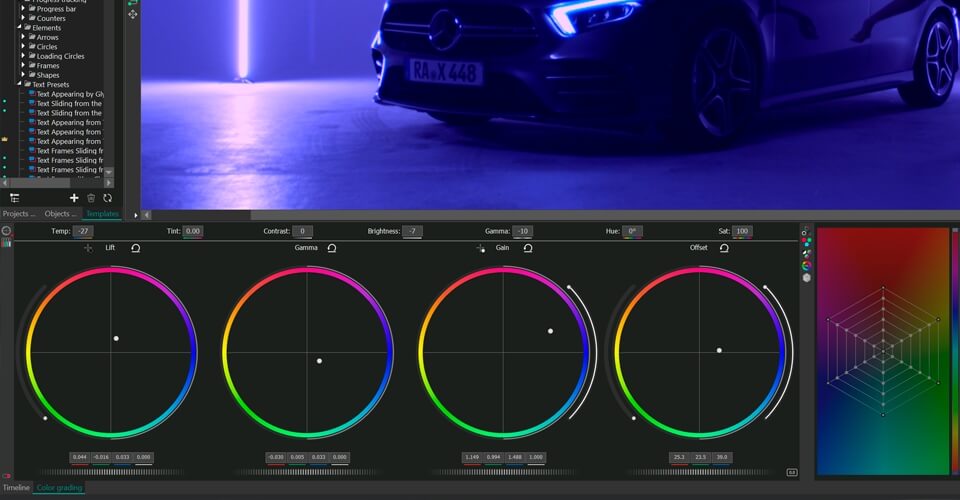
Color Grading RAW and BRAW Files
VSDC offers a wide range of instruments and features you can use for color correction that can be easily applied to RAW and BRAW files. These tools allow you to adjust color and lighting of your footage to enhance its overall appearance.
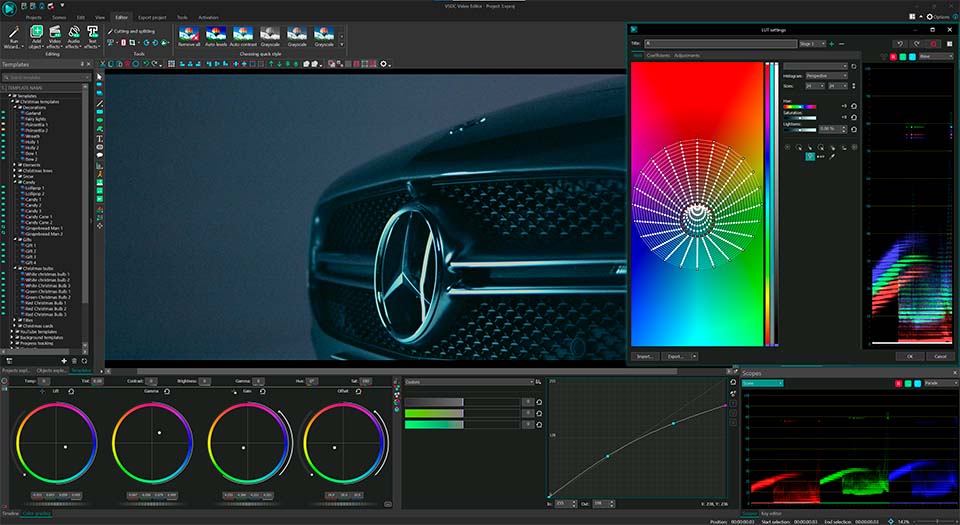
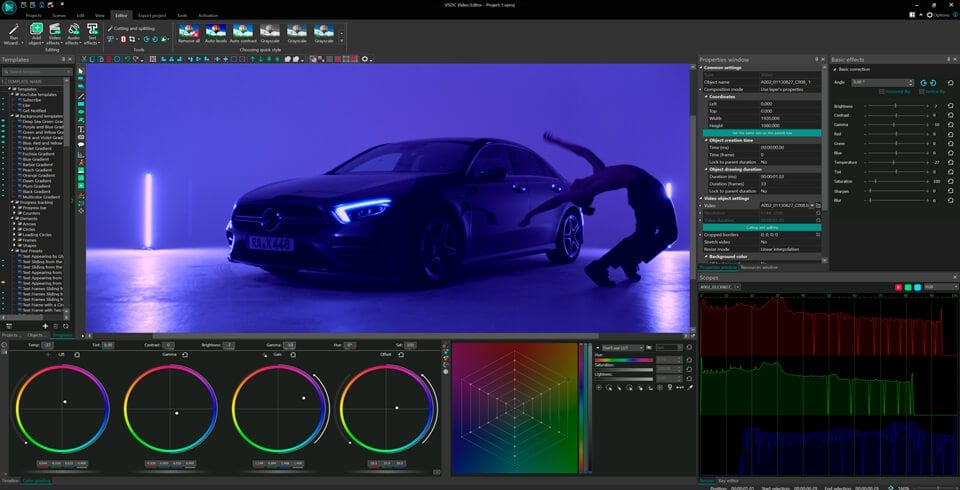
If you want to edit video colors manually by adjusting its brightness, temperature, contrast, and other parameters, simply go to the Video Effects menu on the Editor tab, scroll down to Adjustments and select the set of parameters you need to change. E.g, you want to change hue or saturation levels. Once you select the option Hue/Saturation/Value from the dropdown menu, you’ll notice a new tab with an HSV 1 layer on the timeline. Click the layer with the right mouse button and select Properties from the menu. The Properties window will slide in from the right-hand side. Find HSV effect settings and manually change the levels.
If you are new to VSDC color grading tools, learn how to work with Lift, Gamma & Gain color wheels and RGB curves, apply color correction or recreate stunning cinematic effects like in Barbie or Oppenheimer movies and other useful features that can be applied to RAW and BRAW files on our YouTube channel.
Converting RAW and BRAW to MP4
The BRAW format is advanced and new, and even though it offers high quality, you need to convert it e.g. to MP4 or other popular formats.
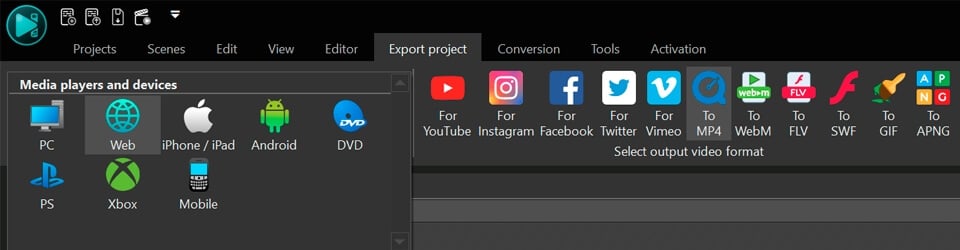
To do this, upload your file, make edits (if necessary) and go to the Export project tab on the ribbon command bar to choose one of the available formats and configure parameters. Here you can choose a device on which you want to play the video, and a format supported by the chosen device. Click the arrow specified on the image above to see the whole list of supported devices.
After you have chosen a video format, you need to choose a profile which sets the quality of the resulting video. Click the arrow next to the Profile field below and select one of the available profiles from the drop-down list. You can configure your own profile by clicking the Edit profile… button and setting properties of video and audio codecs. Use the Apply profile button to save changes. You can also indicate the path to the resulting video on your computer. Finally, click the Export project button to start the exporting process. To see how it works, follow our video guide.
Wrapping Up
VSDC's incorporation of support for RAW and Blackmagic RAW marks a significant point in video editing, particularly for users of Blackmagic cameras. This integration not only simplifies the editing process but also enhances the overall post-production workflow, ensuring high-quality output consistent with the original footage. With VSDC, your possibilities of working with RAW and BRAW files are unlimited, so you can bring your most creative ideas to life and experiment with different tools and techniques that can help you develop a unique style and produce high-quality, engaging videos.
For any additional queries or assistance, VSDC support team is readily available via This email address is being protected from spambots. You need JavaScript enabled to view it. or through Facebook and Twitter. Stay tuned!
Get VSDC Free Video Editor - powerful non-linear editing software with advanced features. Perfect for YouTube creators, social media videos, and professional projects. Learn more about features.
Watch us on YouTube
 / @VSDCFreeVideoEditor
© 2011-2026, www.videosoftdev.com, FLASH-INTEGRO LLC. Privacy policy | Terms of use | About us
All trademarks referenced herein are the sole property of their respective owners.
Copying any materials from this site allowed only with written consent of Site Administration.