 User Help Manual
  Learn FAQ
  Send us feedback
 ")


Video Editor
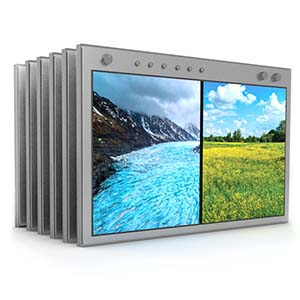
Download and use the free video software to create and edit videos of any complexity from a family greeting card to a company presentation. Apply vsdc free video editor for light edit hdr-video, any raw-video formats from cams - BRAW, ProRes RAW, any high resolution 4k or more due to video proxies technologies in the editor.
Cut, merge video files, apply visual and audio effects, use filtration and image correction, make slideshows and add an appropriate soundtrack. Use multi-color Chroma Key and advanced parameters settings to give your video a professional look.
All popular video and audio formats are supported.
Video Converter
This program is intended for converting video files from one format to another. Nearly all popular video formats are supported (both reading and saving). In addition, the program drastically simplifies the task of converting videos for playback on specific multimedia devices, such as iPhone, Samsung Galaxy or Huawei P30 Pro. The program is extremely easy to use, has a modern interface and all necessary video processing functions.
Audio Converter
The audio converter will help you convert audio files from one format to another. All key audio formats and codecs are supported. The program also allows you to manage playlists and meta tags, extract audio from video files and save these tracks on your computer in any format.
Audio CD Grabber
This audio tool is intended for grabbing audio tracks from compact discs and saving them to the user’s computer in any format. Nearly all popular audio formats and codecs are supported. The program can also extract track details from the FreeDB server for automatic file renaming and updating meta tags.
 Video Editor
 Video Converter
 Audio Converter
 Audio CD Grabber

Multifunctionality
A wide array of multimedia processing tools in one free video software suite.

High speed
Our programs use fast
and high-quality algorithms optimized for single and multi-core CPU’s.

Affordability
VSDC video software is freely available for download to Windows OS-based PCs and laptops.
News:
- published Amy Shao 6/10/25 The wait for something new and unusual is finally...
- This holiday season embraces new beginnings with the latest update of VSDC Video...
- Change is all about improvement, and this process wouldn't be possible without y...
- Intro In 2024 the options range for creating visual effects is incredibly dive...

VSDC
Store
VSDC Wipe Collection Pack
40 transition templates
$9
Buy
Description
The VSDC Wipe Collection Pack offers transitions that seamlessly blend scenes through a variety of directional wipes. It includes options for different borders or borderless designs, allowing for smooth and visually appealing scene transitions. Perfect for adding dynamics to any project.
Key Features
Aspect Ratio: 16x9
Resolution: Up to 4K
File size: 33MB
100% Fully Customizable
Number Of Items: 40
VSDC
Store
Additive Dissolve Collection Pack
16 transition templates
$9
Buy
Description
The VSDC Additive Dissolve Pack features light-based transition effects that create visually striking scene changes. It smoothly transitions by incorporating elements such as dipping into black or white, blurring, flashing, and more, resulting in visually stunning scene changes.
Key Features
Aspect Ratio: 16x9
Resolution: Up to 4K
File size: 12MB
100% Fully Customizable
Number Of Items: 16
VSDC
Store
VSDC Camera Rotate Pack
16 transition templates
$9
Buy
Description
The VSDC Camera Rotate Pack is a collection of innovative transition effects based on camera rotation, seamlessly swapping one scene element for another. This pack offers a diverse array of rotation options, providing various rotation styles quickly spinning objects at the center of the frame or smoothly pivoting them around.
Key Features
Aspect Ratio: 16x9
Resolution: Up to 4K
File size: 15MB
100% Fully Customizable
Number Of Items: 16


