Video Editor

Download and use the free video software to create and edit videos of any complexity from a family greeting card to a company presentation. Apply vsdc free video editor for light edit hdr-video, any raw-video formats from cams - BRAW, ProRes RAW, any high resolution 4k or more due to video proxies technologies in the editor.
Cut, merge video files, apply visual and audio effects, use filtration and image correction, make slideshows and add an appropriate soundtrack. Use multi-color Chroma Key and advanced parameters settings to give your video a professional look.
All popular video and audio formats are supported.

Read more about Video Editor...

Video Converter

This program is intended for converting video files from one format to another. Nearly all popular video formats are supported (both reading and saving). In addition, the program drastically simplifies the task of converting videos for playback on specific multimedia devices, such as iPhone, Samsung Galaxy or Huawei P30 Pro. The program is extremely easy to use, has a modern interface and all necessary video processing functions.

Read more about Video Converter...

Audio Converter

The audio converter will help you convert audio files from one format to another. All key audio formats and codecs are supported. The program also allows you to manage playlists and meta tags, extract audio from video files and save these tracks on your computer in any format.

Read more about Audio Converter...

Animated Intro & Title Templates

Explore the VSDC Template Store with ready-made video templates for intros, animated titles, lower thirds, logo reveals, slideshows, glitch transitions, LUTs, and color grading presets. Drop a template into the VSDC Video Editor timeline, edit text, timing, and colors, and finish professional video projects in minutes.

Choose from 300+ exclusive packs of video transitions, LUT packs, text effects, GPS telemetry widgets, animated elements, and animated backgrounds for VSDC. All templates are fully customizable, support up to 4K resolution in 16:9, and help you build intros, wedding slideshows, travel videos, and tutorials much faster.

Store catalog

VSDC Cloud - Online video management

Keep your work safe, organized and always accessible! Back up your video projects, store media files online and access them from any device. Enjoy collaboration, share project updates and exchange files easily.

Online video editing management capabilities

Multifunctionality

Multifunctionality

A wide array of multimedia processing tools in one free video software suite.

High speed

High speed

Our programs use fast
and high-quality algorithms optimized for single and multi-core CPU’s.

Affordability

Affordability

VSDC video software is freely available for download to Windows OS-based PCs and laptops.

VSDC Store logo

VSDC

Store
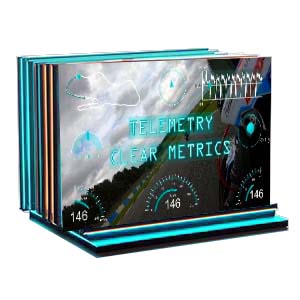
SegMentor Dash GPS telemetry template pack

SegMentor Dash GPS Telemetry Templates

For GoPro, DJI, drone and action videos
25 GPS telemetry templates

Description

Try segmented GPS telemetry overlays that divide every gauge into clear zones for instant readability. Speed, altitude and more are shown as distinct segments, creating a clean, modern dashboard look that is both stylish and functional.
Perfect for GoPro, DJI, drone footage, action cameras and other telemetry-based video projects.
Customize every widget freely and give your videos a sharper alternative to standard telemetry overlays.

Key Features

GPS Telemetry Templates for Video
Segmented Speed, Altitude & Data Widgets
SVG Vector Graphics
Full Color Customization
Individual Widgets & Full Suites
Number Of Items: 25
File Size: 125Mb
VSDC Store

VSDC

Store
AeroSense Dash GPS telemetry template pack

AeroSense Dash GPS Telemetry Templates

For DJI, GoPro, FPV drone and flight videos
23 aviation-style GPS telemetry templates

Description

Bring the cockpit experience to your footage with AeroSense Dash, a collection of aviation-inspired GPS telemetry templates for DJI, GoPro, FPV drone and flight videos. Every gauge is styled after a classic aircraft instrument panel, combining a clean technical look with precise data visualization.
Display speed, altitude, G-force and other telemetry data in authentic aviation-style widgets designed for aerial footage, drone racing, paragliding, skydiving and other flight-based video projects.
Customize the colors and individual widgets freely to create a telemetry dashboard that matches the style of your video.

Key Features

Aviation-Style GPS Telemetry Overlays
Speed, Altitude, G-Force & Data Widgets
SVG Vector Graphics
Full Color Customization
Individual Widgets & Complete Dashboards
Number of Items: 23
File Size: 95 MB
VSDC Store logo

VSDC

Store
Templates / Textures / Vintage Reel
VSDC Vintage Reel video effects pack

Vintage Film Effects and Reel Textures for Video

Film scratches, dust, frame jitter and retro color grading
10 customizable vintage film templates

Description

Give your footage the authentic character of an old film reel with scratches, dust, frame jitter and retro color grading combined in one creative pack. Each element works together to reproduce the imperfect texture and flickering movement of vintage film projection.
Create the nostalgic atmosphere of an old family movie, rediscovered archival footage or a forgotten independent film from the 1970s. The worn textures and aged colors add personality and cinematic depth to clean digital footage.
Whether your video was recorded in 4K, 6K or 8K, Vintage Reel helps transform modern, high-resolution footage into a stylish old-film edit for music videos, documentaries, travel films, short movies and social media content.

Key Features

10 Vintage Film Effect Templates
Film Scratches, Dust and Frame Jitter
Retro Color Grading and Aged Film Look
Fully Customizable
Resolution: 2560 × 1440
Number of Items: 10
File Size: 150 MB
VSDC Store logo

VSDC

Store
VSDC Grain Texture video filter pack

Film Grain Texture Filters for Video

Vintage film grain, noise, grit and halation effects
17 customizable video texture filters

Description

Give every frame the authentic texture of vintage film, faded photographs and weathered print. Subtle noise, organic grain, tactile grit and rich halation work together to create an imperfect cinematic finish that feels like footage recovered from a forgotten archive.
Each texture reacts differently to the colors, lighting and movement in your footage, giving every scene a distinctive handcrafted look that clean digital filters cannot reproduce.
Apply the filters to music videos, short films, documentaries, travel footage, retro edits and social media content to add depth, atmosphere and a timeless analog character.

Key Features

17 Film Grain Texture Filters
Vintage Noise, Organic Grit and Halation Effects
Fully Customizable
Resolution: 2560 × 1440
Number of Items: 17
File Size: 777 MB

A Comprehensive Guide on How to Use Keyframes in VSDC

In video editing, keyframes are markers that define the starting, intermediate, and ending points of a transition, effect or an animation applied to a video or an element within a video. These keyframes represent where changes occur, such as changes in position, scale, rotation, opacity, color, or any other attribute that can be altered over time.

An excellent illustration of this is the dynamic color change. In VSDC, we implement a distinct algorithm, detailed further in this tutorial. However, if your interest lies more with animation or effect customization, then proceed to the instruction below.

How to Access the Key Editor

To begin working with keyframes in VSDC, the first step is to select the effect or object you want to adjust. VSDC supports keyframe settings, always indicated by '...', across a broad range of video effects, filters, transitions, and even audio effects like Amplify for volume changes and Fade in/Fade out transitions. Keyframe modifications are also available for motion effects, such as movement animation in VSDC, described in detail in our guide accompanied by a video tutorial.

How to Start Working with Keyframes

Regardless of the effect chosen, the editing window for keyframes remains consistent across all options. In this guide, we'll use the popular Zoom effect as an example to demonstrate how to start working with keyframes:

  1. Create a New Project: To begin, create a new project by selecting the Blank Project option from the startup window. Once created, you can easily drag and drop your files onto the timeline. Alternatively, if you have a pre-existing video file, use the Import Content feature.
  2. Adjust the Object’s Parameters: Left-click the necessary file on the timeline, navigate to the Properties window and select Set the same size as the parent has. This step is crucial for creating the Zoom effect since it prevents possible pixelation when zooming a small object and allows to adjust other parameters correctly.
  3. Apply Video Effects: Right-click the necessary file on the timeline and in the context menu that appears, navigate to Video effects >> Transforms >> Zoom.
  4. Open Effect Options: The applied effect will appear on the timeline. Ensure that the effect is highlighted, then move to the Properties Window located to the right of the scene. If the Properties window is not visible, right-click on the effect and select Properties….
  5. Configure Keyframing for Effects: In the Properties window, look for the parameter that allows keyframing, indicated by "…". In our example we select the Levels parameter and click on the three dots icon next to it. Note: If there is a straight line next to the "…" parameter, you can right-click on it to set specific parameter changes:
    • Constant parameter value: The parameter value you set remains unchanged throughout the duration of your media. For example, setting the zoom of a clip to 50% will maintain that level until the end, with only one keyframe.
    • Linear parameter change: The parameter changes at a constant rate over time. For instance, gradually increasing the size of a clip from 0% to 100% over 10 seconds involves setting two keyframes at the beginning and end.
    • Linear parameter change along a trajectory: The parameter change follows a specified path or trajectory, with three or more keyframes applied so that the object changes its parameters several times during its visibility on the scene.
    • Parameter change along a curve: This involves altering a parameter along a curved path, allowing for more nuanced changes between keyframes, such as smoothly zooming in or out.
    • Parameter change along a Bezier curve: A Bezier curve is a specific type of curve defined by keyframes, allowing for even more precise control over the trajectory of changes.
    • Templates: This option allows you to choose from pre-made templates for time-changing effects. Notably, there is a template for the Edit the beat effect, which we cover in a separate guide.
  6. Go to the Key Editor Window As soon as you click the three dots icon next to a parameter or select the necessary template, the Key Editor window will open beneath the Properties window. You can adjust the location of this window as per your preference.

Working with Keyframes

In the Key Editor window, you'll see a timeline representing the duration of your object where you'll need to create key points to mark when the object should change. Above the timeline, there's a tab area, allowing you to open the Key editor for multiple objects simultaneously and switch between them using these tabs. Further above, there's a toolbar for adding, editing, and deleting key points on the timeline. Finally, there's a vertical panel on the right for scaling the area where the effect's change curve is located.

Let's create a simple Zoom in and out effect with a center offset, so the object transitions to the center of the scene from a corner upon zooming in and returns to another corner at the end, similar to video reactions often seen on YouTube.

  1. Set the object size to 40% for the initial point. Select it on the curve and enter the value in the Point field on the toolbar.
  2. Move the cursor to the position where the object should maintain the same Zoom value before changing. Double-click on the curve at this position to create a point and set the value for this point to 40%.
  3. Move the cursor again, double-click on the curve, and assign a value of 100% to mark that at this position, the frame should grow from 40% to 100%.
  4. Add another point with a value of 100%, indicating when the object should remain at this size.
  5. Add one more point marking when the object will decrease again to 40%.
  6. Set the value to 40% for the final point as well.

We now have a curve with a total of 6 points. You can enable project preview using the red button on the toolbar to see how the object changes over time. Next, let's change the center values so the object moves out from and back into the corner:

  1. Select the Zoom effect on the timeline and navigate back to the Properties window. Find the Center X/Y parameter and click on the three-dot icon next to either of them; the editor will adjust the parameters automatically.
  2. In the Key Editor window, click on the third icon Parameters in the tools section above the timeline and choose Levels from the dropdown menu. This will display the curve of that parameter with its key points, making it easier to adjust the center curve.
  3. Create the key points on this new horizontal curve placing them just below the previous ones.
  4. Place the red playhead cursor on the first point at the beginning of the curve and select the point, then move the object's center to the top-right corner of the scene, adjusting its position. Repeat this for the second and third points on the curve. Don’t forget to move the red playhead cursor each time to check the position of the object at each point.

    A quick tip: You can copy the Point value represented on the upper toolbar to keep the position of the object precisely as at the previous point.

  5. Position the cursor on the fourth point when the object's size is still 100% and should begin to change to 40%, and move the object's center to the top-left corner. Set the same position for the object for the fifth and sixth points. The effect is ready!

Tools Available for Editing Keyframes

Now that we have created a simple effect using keyframes, let's explore all the tools available in the Key Editor window so you can enhance your effect or control it as needed:

  • Copy points: Allows you to copy all points set on a curve.
  • Paste points: Allows you to paste previously copied key points onto a new curve.
  • Parameters: Displays the curve of another effect parameter in the background, which is useful for comparison.
  • Preview: Launches a preview of the project in a separate window with selected quality.
  • Play: Starts the project preview on the scene.
  • Path properties: Allows you to change point properties for Parameter change along a curve and Parameter change along a Bezier curve options. For example, you can make a selected point an intermediate point on the curve or the last point of the trajectory. Additional options become available only when selecting Parameter change along a curve, enabling you to calculate parameters for your selected point based on past or upcoming points to smooth the transition.
  • Lock point transition to the left edge: This option keeps the distance between key points on the curve when changing the duration of the effect on the timeline, altering only values between the last and the penultimate points on the curve.
  • Scale point positions: Allows you to evenly change the distance between key points on the curve when adjusting the duration of the effect on the timeline to maintain the original composition.
  • Lock point transition to the right edge: This option keeps the distance between key points on the curve when changing the duration of the effect on the timeline, altering only values between the first and second points on the curve.
  • Insert point: Adds a key point at the cursor's position on the curve.
  • Remove: Removes a selected key point or all points on the curve.
  • Show time/frame: Displays time or frame values on the timeline.
  • Point: Shows the current temporal location of a key point and allows its values to be set in percentages.
  • Templates: Offers a selection of pre-set templates for changing object values.

Wrap-up

Using keyframes offers a vast canvas to unfold and bring all your creative ideas to life. We've provided a general overview of how it works, but imagine the possibilities if you apply different offsets, create combinations, and synchronize everything—achieving truly incredible visuals!

Take a look at combined effects like the Shake Transition, the Smoke Trail Effect, or Transitions Using Bezier Curves — and these are just a few examples. We wish you success and are always delighted to assist you on our social networks on Facebook, YouTube, or at This email address is being protected from spambots. You need JavaScript enabled to view it..

News

VSDC 11.2: Smart search for lost files, GPS data and video sync, H.266 (VVC), accelerated proxy generation even for 4K/8K, keyframe support for shapes and brand-new designer templates

Published by Amy Shao on June 30, 2026 Meet the new major update to VSDC Free Video Editor: version 11.2! Remember how much time you used to spend hunting for lost files in your projects?...

VSDC 11.1 Adds Direct Insta360 Video Editing, GPS Overlays and Auto-Save

Published by Amy Shao on March 11, 2026 What is the best gift for a creative person? New possibilities, of course. With the VSDC 11.1 update, editing footage from Insta360 cameras becomes...

VSDC 10.2: GPS Gauges for GoPro and Other Action Cameras, Selective Export, Metadata Editing, Extended Codecs and Smarter Workflow

published Amy Shao 11/19/25 Meet the long-awaited VSDC 10.2 update: a new version packed with incredible features and significant enhancements designed to empower all of you, from hobbyists to professionals. GPS...

Major VSDC 10.1 Update: Advanced HDR, GPS Telemetry, New Effects, Great Variety of New Templates and Tools For Different Needs

published Amy Shao 6/10/25 The wait for something new and unusual is finally over! The update is here and it isn’t just another version: it’s VSDC 10.1! VSDC 10.1 Update: Advanced HDR, GPS Telemetry,...

VSDC Christmas Update 9.4: Enhanced Effect Management, 100+ Background Templates and Streamlined Editing

This holiday season embraces new beginnings with the latest update of VSDC Video Editor! We’ve listened to your feedback and decided to focus on enhancing the tools you love most—all while laying the...

How VSDC Free Became My Secret Weapon for Watermark (Free 4K Editing in 2025)

Hi, I'm Mattea Wharton, a travel videographer from Seattle. For three years I battled with video editors that slapped ugly watermarks on my videos until I found VSDC. This free no-subscription editor completely...

VSDC 9.3: 150+ Templates, Text Transformer, Sprite Auto-Detect and GUI Update

Change is all about improvement, and this process wouldn't be possible without your input. After carefully reviewing your feedback, we’ve addressed several key issues and introduced updates designed...

Best Special Effects Software

Intro In 2024 the options range for creating visual effects is incredibly diverse and it becomes more and more challenging to identify the top choices. Here you can find a guide to the top visual FX...

VSDC 9.2: AI Segmentation Models, 300+ Transitions, VSDC Cloud and New Templates Pack

Are you ready to explore new heights with the latest major VSDC update? Finally, Version 9.2 is here! Packed with groundbreaking features, including the new AI-powered Segmentation tool, this update offers...

How Black and White Movies Were Colorized

Are you a fan of classic black and white films? Ever been curious about how they would appear if they were in color? Many filmmakers have pondered the same, leading to numerous classic movies being colorized....
 

Screen Recorder Box

This program allows you to capture the video of your desktop and save it on your PC in various formats. Coupled with a video editor, the program is a great tool for creating presentations, tutorials and demo videos.

Read more about Screen Recorder...


Video Capture Box

The program captures video from external devices and records it to computer in a free format. You can save video from video tuners, webcams, capture cards and other gadgets.

Read more about Video Capture...

VSDC Video Editor Reviews & Ratings (Trustpilot, Capterra & Media)

VSDC Free Video Editor is rated 4.5/5 by real users on Trustpilot and Capterra. Here are a few reviews and quotes from creators and tech media.

Overall rating: 4.5/5 based on 200+ reviews on Trustpilot and 89 reviews on Capterra.

★★★★⯪

VSDC Free Video Editor is the best free video editor for Windows I’ve used, from color grading to picture-in-picture and cinematic results.

— Ejikeme Eloka Augustine

Source:Trustpilot

★★★★☆

Easy-to-use interface and quick export to social media make VSDC a versatile video editing tool for everyday projects.

— Karen C., E-Learning

Source:Capterra

★★★★☆

A feature-packed non-linear video editor for Windows that can compete with many paid video editing solutions.

— TechRadar

Source:TechRadar review

★★★★★

The free VSDC editor saved my YouTube channel – a powerful video editing software for chroma key, text effects and picture-in-picture.

— Paul Roberts

Source:Trustpilot

★★★★★

Fast and simple for YouTube videos with green screen, zoom, color tools and creative effects in one app.

— Marie R., Media Production

Source:Capterra

★★★★★

One of the best free video editor options for Windows users, ideal for GoPro, YouTube and family videos.

— VidProMom, YouTube creator

Source:Media reviews

★★★★★

I’ve been using VSDC for years; editing is easy and the final videos look great for my personal and professional projects.

— Long-time VSDC user

Source:Trustpilot

★★★★★

Great value and faster than many other free tools; I quickly create videos for YouTube, Instagram and Facebook with features my audience loves.

— Rabika B., Marketing & Advertising

Source:Capterra

★★★★★

VSDC offers many features you don’t usually find in free editors, including picture-in-picture, stabilization and modern codec support with no watermarks.

— Tech media review

Source:Media reviews