 User Help Manual
  Learn FAQ
  Send us feedback
 ")


Video Editor
Download and use the free video software to create and edit videos of any complexity from a family greeting card to a company presentation. Apply vsdc free video editor for light edit hdr-video, any raw-video formats from cams - BRAW, ProRes RAW, any high resolution 4k or more due to video proxies technologies in the editor.
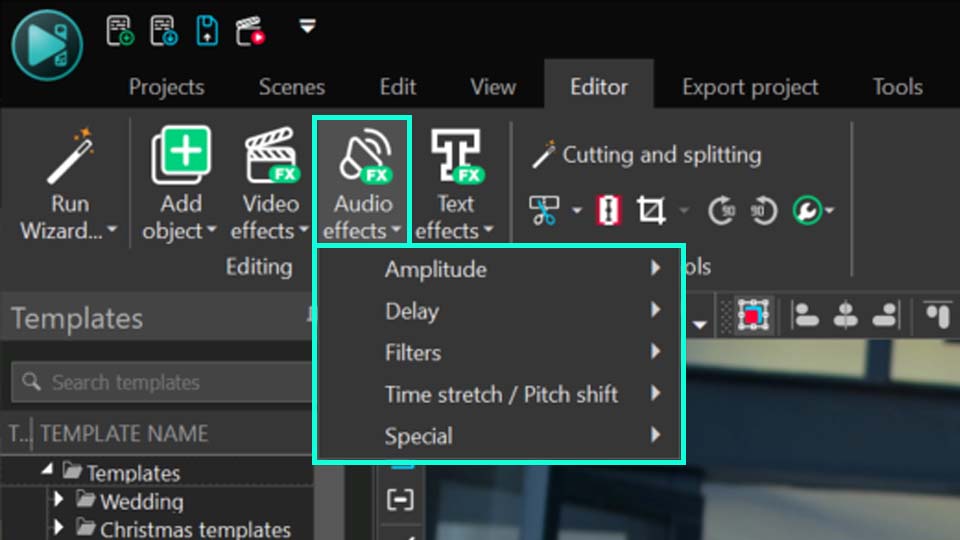
Cut, merge video files, apply visual and audio effects, use filtration and image correction, make slideshows and add an appropriate soundtrack. Use multi-color Chroma Key and advanced parameters settings to give your video a professional look.
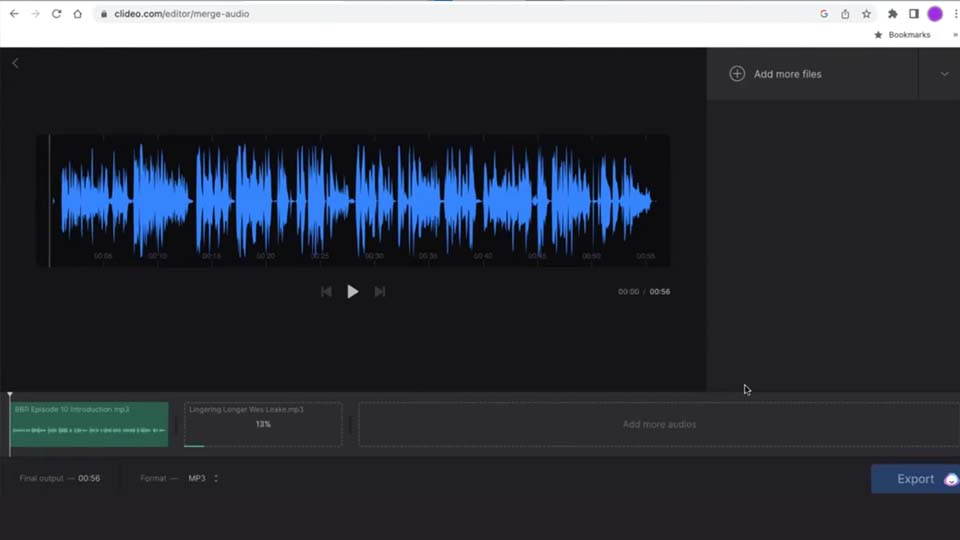
All popular video and audio formats are supported.
Video Converter
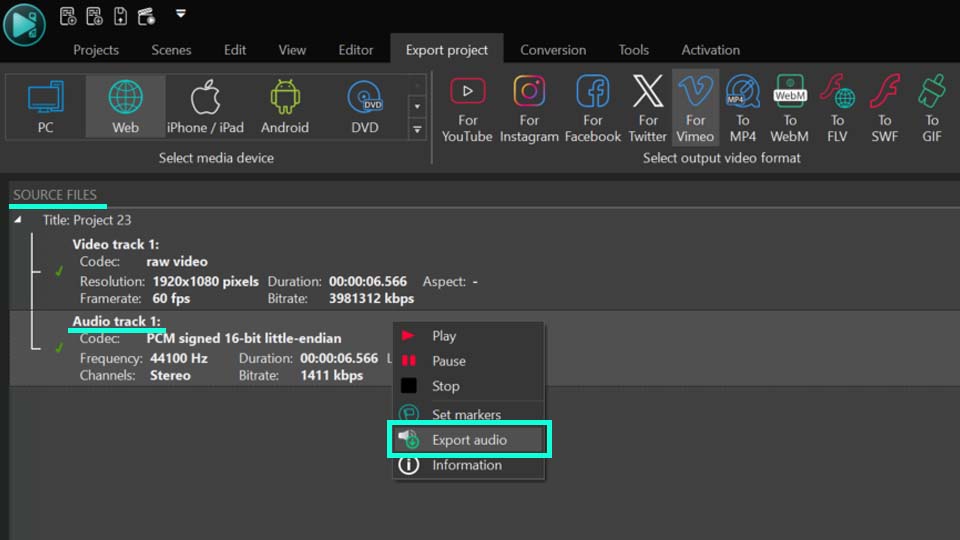
This program is intended for converting video files from one format to another. Nearly all popular video formats are supported (both reading and saving). In addition, the program drastically simplifies the task of converting videos for playback on specific multimedia devices, such as iPhone, Samsung Galaxy or Huawei P30 Pro. The program is extremely easy to use, has a modern interface and all necessary video processing functions.
Audio Converter
The audio converter will help you convert audio files from one format to another. All key audio formats and codecs are supported. The program also allows you to manage playlists and meta tags, extract audio from video files and save these tracks on your computer in any format.
Audio CD Grabber
This audio tool is intended for grabbing audio tracks from compact discs and saving them to the user’s computer in any format. Nearly all popular audio formats and codecs are supported. The program can also extract track details from the FreeDB server for automatic file renaming and updating meta tags.
 Video Editor
 Video Converter
 Audio Converter
 Audio CD Grabber

Multifunctionality
A wide array of multimedia processing tools in one free video software suite.

High speed
Our programs use fast
and high-quality algorithms optimized for single and multi-core CPU’s.

Affordability
VSDC video software is freely available for download to Windows OS-based PCs and laptops.
News:
- published Amy Shao 6/10/25 The wait for something new and unusual is finally...
- This holiday season embraces new beginnings with the latest update of VSDC Video...
- Change is all about improvement, and this process wouldn't be possible without y...
- Intro In 2024 the options range for creating visual effects is incredibly dive...
How to use VSDC cloud service
Looking to work on your VSDC projects from anywhere? The VSDC Cloud Service is designed for you. This platform allows you to store, upload, download, edit and share files wherever you are. You can access and manage your projects and media from any computer with an internet connection and VSDC Video Editor installed. And guess what? VSDC Cloud isn't just for desktops — it's also at your fingertips on iOS devices.
Getting Started with VSDC Cloud Service
Before you can start using the features of the VSDC Cloud Service, you’ll need to subscribe and set up an account.
Note: The iOS version does not support subscribing to the VSDC Cloud Service, creating an account, modifying account details and recovering passwords. These actions can only be done through the desktop version.
To subscribe, head over to the official VSDC website and choose one of the six available subscription plans that best fits your needs. Once you've selected a plan, complete the purchase form with your personal information and the email address you want to use for registration. Follow the on-screen instructions to finalize your purchase.
After subscribing you can create your account by visiting the VSDC Cloud Service page. Use the email address you provided during the purchase to register. Then set up your username and password, review and accept the Terms of Use and EULA and click on the registration button to finish setting up your account.
For more details refer to our updated Help User Manual.
Once your account is set up, you can sign in to it in both the desktop and iOS versions. To sign in to the cloud on your iOS device, simply open the VSDC Video Editor app, tap on "Settings" from the main screen and select "Cloud." Then enter the login credentials you created during registration.
Editing Your User Account (only in the Desktop Version)
To modify your account settings, click on the three-dot icon in the upper right corner of the webpage and select "Settings" from the dropdown menu.
In the "Profile" section you can update various details such as your password, avatar, username, first and last names, email and phone number. In the iOS version you can view your username and email under the "Account" tab, but modifications cannot be made there.
Additionally, here you can monitor all devices currently logged into your account in the "Sessions" section of the desktop version. To protect your account, you can terminate any session by clicking the "X" next to the device.
If you need to change language settings for the VSDC Cloud Service, you can do it on any page in the desktop version via the option located at the bottom of the screen. The iOS version is only available in English.
Main Tabs in the VSDC Cloud
In the desktop version of VSDC the menu bar features four main tabs. Below we'll explain each tab and where to find similar functions in the iOS version.
- Apps Tab
This tab lists all VSDC products that are available for download. To view detailed information about a specific VSDC product and its system requirements, click on the "More" button. To start installing an application, click on the "Install" button.
In the iOS version there is no such tab.
- Projects Tab
In the desktop version all your projects are located in this app. For convenience, they are divided into the following categories:
- My Projects: Displays all projects uploaded to the Cloud service.
- Shared: Shows projects that have been made publicly accessible through sharing links.
- Favorite: Contains projects marked as favorites (indicated by a "star").
- Recent: Displays the projects that were recently accessed.
- Trash: Contains projects that have been deleted.
Selecting one of these categories opens a list of all projects stored there. For each project the following information is displayed: date and time added, file name and size. In the "My Projects" group only the file name and size are displayed.
To view detailed information about a project (its project type, owner, upload date, last modification date and last access date), click on the icon "i" on the right to the desired project.
In the iOS version you can see the projects uploaded to the cloud on the “Remote” tab located on the main screen of the VSDC Video Editor app on iOS.
- Support Tab
If you experience any issues or have questions about the VSDC Cloud service, you can use the feedback form found under this tab to leave your message.
In the iOS version you can reach our support team by selecting the “Report a problem” option in the Settings. Besides, you can suggest new features by tapping on the “Suggest new features” option also located in the Settings.
Our support staff will respond to your inquiry via email within 72 hours.
- Files Tab
This tab organizes all your media files uploaded from VSDC Video Editor into categories for efficient management:
- My Files: Shows all files stored in the Cloud service.
- Shared: Displays only the files that have been shared via generated links.
- Favorite: Contains files marked with a "star" for quick access.
- Recent: Lists the most recently accessed files.
- Trash: Contains files that have been deleted.
For all categories, except My Files, you can see file name, size and date and time of creation. In the “My Files” category only file name and size are displayed.
To view more details about a file, click on the information icon “i” next to the file you are interested in. This will display details such as the file type, owner, upload date, last modification date and last access date.
In the iOS version your files are located on the dashboard and divided into two groups:
- Cloud Files: Shows all files stored in the Cloud.
- Local Files: Displays files downloaded from the Cloud.
Here you can see only file names, with no additional details.
Adding Files to the VSDC Cloud
To add files to the VSDC Cloud, click on the “Upload” button in the top left corner of the screen, then click on the upload window to select files from your computer or drag and drop them. Multiple files can be uploaded simultaneously. Once uploaded, the files will be marked with a checkmark and will appear in the “My Files” section.
In the iOS version you can add your files by tapping on the “+” icon in the right lower corner of the screen in the Home tab and selecting the “upload” option. After that you can add files from:
- Photos: device photo library.
- Files App: a tool for managing files stored on the device, iCloud and other cloud services.
- App’s folder: local storage in the VSDC app if you have previously saved files from Cloud.
Creating Folders in the VSDC Cloud
To better organize your files, you can create a new folder. In the desktop version simply click on the “New folder” button located in the top left corner of the screen. A pop-up window will appear where you can enter the folder name. Once you've done that, click on "Create" and your new folder will be added to the "My Files" section.
In the iOS version the process is just as simple. Tap the "+" icon in the bottom right corner of the Home tab, then select "Create folder". After naming your folder, choose the files you'd like to add.
Managing Files in the VSDC Cloud
You can manage each file by clicking on the three-dot icon next to it or by right-clicking on the file in the desktop version. A menu will appear with various options, including:
- Preview: Opens the file in a full-screen preview window, where you can flip the file horizontally or vertically, rotate the file clockwise or counterclockwise, reset any changes made, toggle the full screen mode, zoom in or out, download the file.
- Share: This option allows you to share files with platform users or non-registered individuals. To generate a shareable link, click on "Get link".
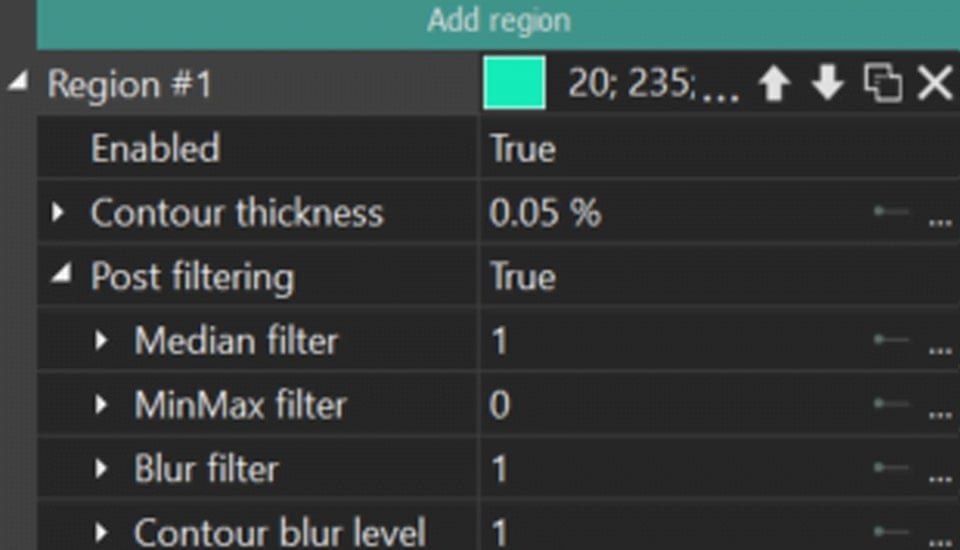
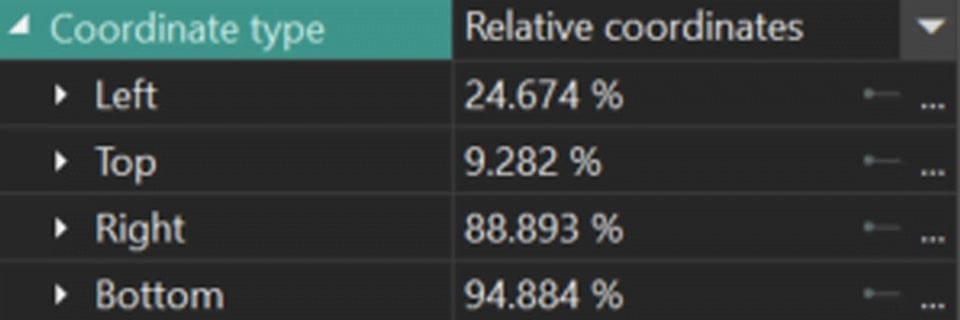
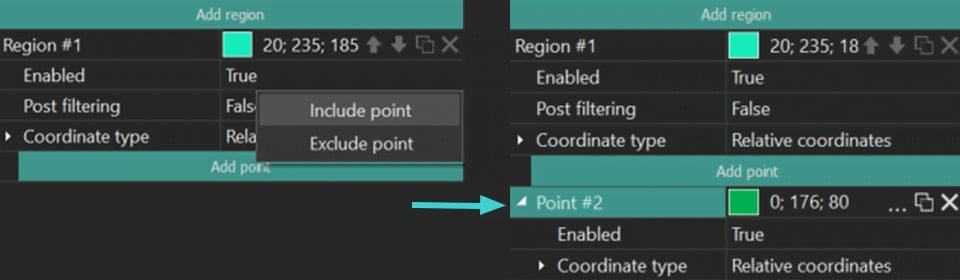
- Segmentation: This feature is used for partitioning an image into multiple regions based on object boundaries. Please note that this option is not available for .vproj project files. Learn more about the segmentation tool in VSDC Video Editor.
- Download: This option starts the process of downloading the selected file to your PC.
- Add to Favorite / Remove from Favorite: This feature is designed for quick access to frequently used or important files.
- Rename: Selecting this option from the dropdown menu opens a window where you can enter a new name for the file.
- Copy: This option allows you to create a duplicate of the selected file in one of your existing folders.
- Move: The "Move" option allows you to transfer the selected file to a different folder within the platform.
- Trash: This option is used to move the selected file to the Trash bin, removing it from the "My Files" list.
In the iOS version you have a slightly limited functionality compared to the desktop version. You can:
- View folder contents.
- Upload files to or from Cloud.
- Copy, move, delete, rename your files.
- Add to Favorite / Remove from Favorite.
Adding Projects to the VSDC Cloud
Adding projects to the VSDC Cloud service is directly connected to working in VSDC Video Editor PRO or FREE and requires an active internet connection. To add a project, follow these steps:
- Install VSDC Video Editor if you haven’t yet and open it on your PC or iPhone.
- Create a new project or open a previously created project in the video editor.
- After making all necessary changes, go to the “Projects tab” and save the project to the Cloud using the "Save to Cloud" or "Save as to Cloud" option if you need to rename the project.
- Enter your login and password for your VSDC Cloud account and click on "OK".
- In the "Save as" window that opens, select the folder for saving the project and, if necessary, change its name in the "File name" field. Then click on Save.
The project will be saved in the Cloud with all resources (videos, images, audio) used to create it.
Note: If a project is added to the Cloud service similarly to adding a media file, and not through the VSDC Video Editor, all resources used to create the project will be lost (they will not be displayed in VSDC Cloud).
A project created in the VSDC Video Editor app on iOS can also be uploaded to the Cloud and then imported to any other iOS device. Project formats between iOS and Windows are not compatible, so, remember, that you can open a project only on the device on which it was created.
To export a project to the Cloud in the iOS version, you need to:
- tap the project list icon on the VSDC Video Editor app's home screen.
- tap the three dots at the bottom right corner of the project tile.
- select “Save external”.
The projects uploaded to the Cloud can be seen on the “Remote” screen with names according to the “YYYYY-MM-DD_HH.MM.iosproject” template in the VSDC app.
Loading Projects from the Cloud to the Video Editor
To start working in VSDC Video Editor with a project saved in VSDC Cloud, follow these steps:
- Go to the Projects tab in the top horizontal menu of the editor and select the "Open from Cloud" option. Alternatively, click the program icon in the top left corner, then select Cloud >> Open Project.
- Enter your login and password for your VSDC Cloud account.
- In the "Open" window, select the desired project from the available folders. Once you've selected the project and clicked "Open," the project and all its resources will be loaded into the editor.
To import a project from the Cloud to VSDC Video Editor in the iOS version, you need:
- Open VSDC Video Editor app on your iOS device.
- Tap the “Video” option on the lower horizontal panel and select the “Cloud” option.
- Choose the project from the appeared Home screen and tap on the three dots next to it;
- Tap on “Select”;
- Once your project is loaded from the Cloud, it will be added to the timeline.
Importing Media Files from the Cloud to the Editor
Although project formats are not compatible between the desktop and iOS versions, making it impossible to work on the same project simultaneously on an iPhone and a PC, you can still use VSDC Cloud to transfer media files between any devices.
For example, if you capture photos or videos on your iPhone, you can easily upload them to the video editor on your PC without compression, avoiding the quality loss that often occurs when transferring files through social media (in case connecting via cable is not an option).
To do this, please follow these steps:
- Navigate to the Resources window.
- Right-click on an empty space in the window or click the plus icon at the bottom of the window and select the "Add from the Cloud" option.
- Choose the type of file you want to import: Videos, Images, Sounds or LUTs.
- Enter your login and password for your VSDC Cloud account.
- In the "Open" window select the file you wish to import.
- Drag and drop the file from the Resources window onto the Timeline to use it in your project.
In the iOS version this process is simpler, like loading projects from the Cloud to the Video Editor.
- Open VSDC Video Editor app on your iOS device.
- Tap the “Video” option on the lower horizontal panel and select the “Cloud” option.
- Choose the media file you wish to import from the appeared Home screen and tap on the three dots next to it.
- Tap on “Select”.
If you have any questions or encounter difficulties with VSDC Cloud, please contact us at This email address is being protected from spambots. You need JavaScript enabled to view it. or post your question on any of our social networks, for example, Facebook or X, where not only VSDC staff, but also users will be able to join your problem.


 Download VSDC Video Editor


This program allows you to capture the video of your desktop and save it on your PC in various formats. Coupled with a video editor, the program is a great tool for creating presentations, tutorials and demo videos.

The program captures video from external devices and records it to computer in a free format. You can save video from video tuners, webcams, capture cards and other gadgets.

"VSDC Free Video Editor is a surprisingly powerful, if unconventional video editor"
- PC Advisor

"This video editor gives you tons of control and editing power"
- CNet

"The editor handles many common formats and boasts a good deal of capabilities when it comes time to alter lighting, splice video, and apply filters and transitions in post production"
- Digital Trends