")


 動画編集
動画編集 ビデオ変換器
 オーディオ変換器
 Templates store
 Cloud
Cloud


クイックスタート:
- 動画をインポート
- テレメトリーを追加(GoProから抽出、またはGPXをインポート)
- テンプレートを選択(地図/速度/高度のダッシュボードなど)
- 動画と同期し、必要なら Time shift を調整
- 書き出し
互換性
カメラ/デバイス:GoPro / Insta360 / Garmin / スマホのGPXエクスポート
VSDC 10.1で登場し、10.2以降でさらに強化されたGPS可視化ツールを使えば、アクション映像を見応えのあるトラベルログに変えられます。 VSDCなら、他のエディターでは見つけにくいGPS機能を活用できます。
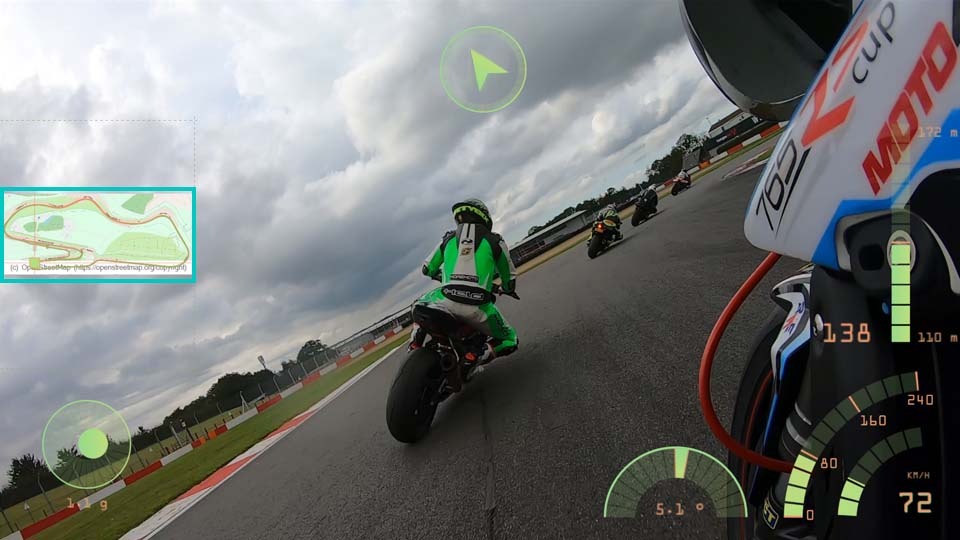
ルートの追加、地図への重ね表示、コンパス、カスタムゲージによる速度表示、標高(高度)グラフなど――すべてVSDC内で完結。 操作は直感的で、作業時間も多くかかりません。
では、具体的な手順と設定を見ていきましょう。まず最初に重要なポイントです:
VSDC Video Editor は必ず 10.2 以上をインストールしてください。
GPSデータファイルを追加する
最初に、GPSデータ(テレメトリー)をVSDCに取り込みます。VSDCは柔軟で、主に2つの方法に対応しています。
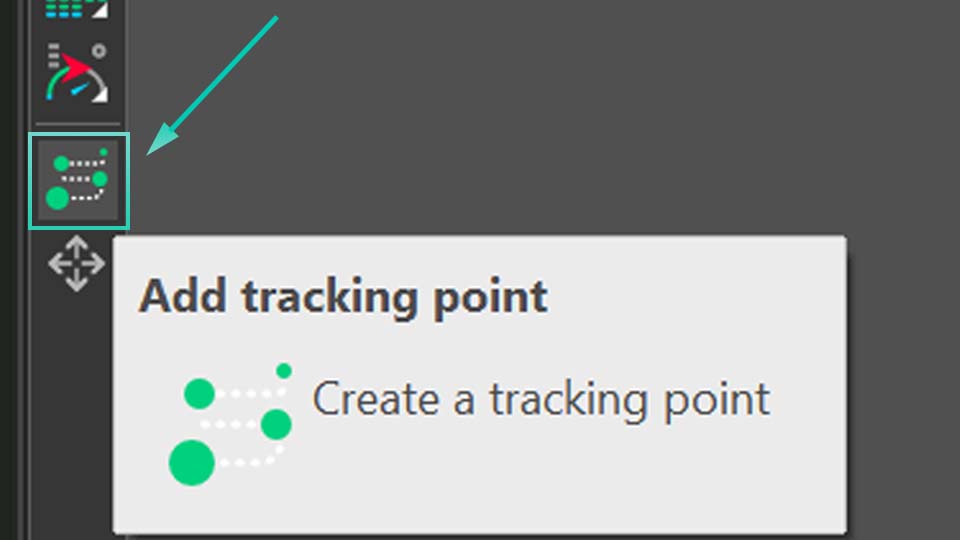
もしアクションカメラやGPSトラッカーから書き出した .GPX のようなGPSデータファイルがある場合は、直接読み込めます。 プレビュー画面左のツールバーで “Add telemetry” をクリックしてください。 メニューが開き、GPS path / Telemetry widget / Telemetry text values / Telemetry templates が表示されます。
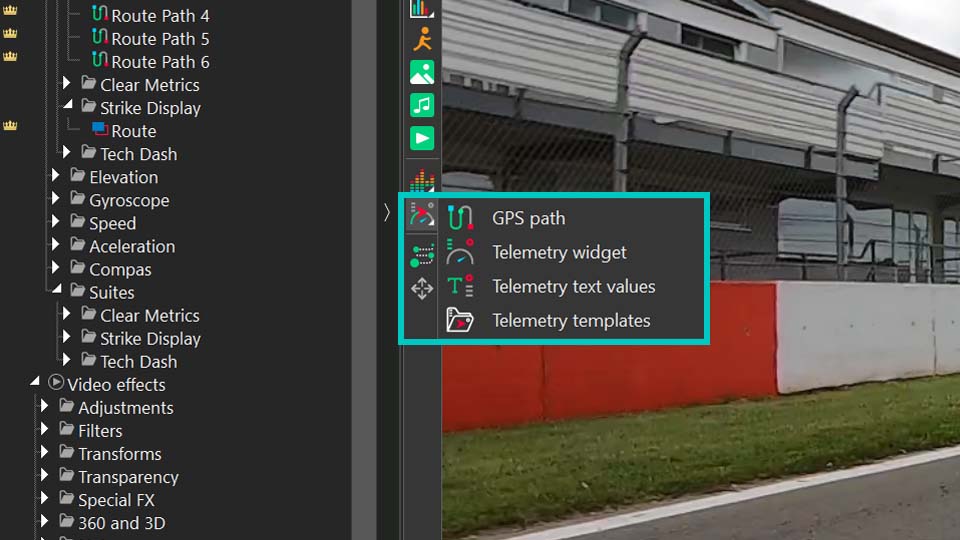
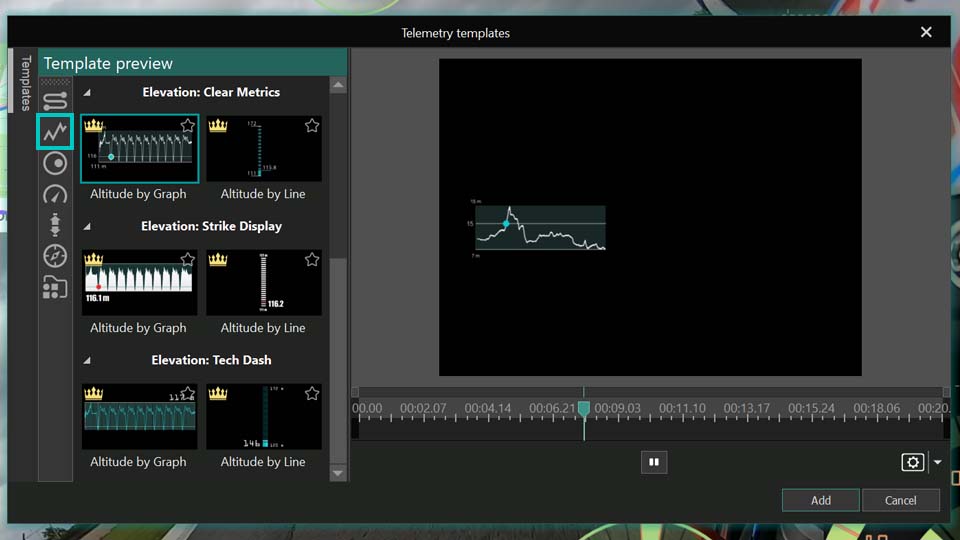
GPS path は、GPXファイルからルート(軌跡)を最もシンプルに可視化する方法です。ルート自体を表示し、パスのオーバーレイを中心に作業したい場合に適しています。 次の2つ(Telemetry widget と Telemetry text values)は、カスタムゲージや表示を作るための機能です(詳しい作り方は動画で確認できます)。 Telemetry templates は、あらかじめデザインされたスタイルのギャラリーを開きます。
テンプレートを使う場合は、まず Telemetry templates で見た目を選びます。 次に、生成されたオブジェクトをタイムラインでダブルクリックし、専用のGPSオブジェクトを選択してください。 プロパティウィンドウで Telemetry resource を使ってGPXファイルにリンクすると、テンプレートへデータが反映されます。
GoProなど、GPSが有効になっているアクションカメラの映像の場合はさらに簡単です。 VSDCは動画ファイルに埋め込まれたテレメトリーデータを自動検出し、抽出できます。 クリップを通常どおりインポートすると、GPSデータを抽出して Resources に保存するか確認が表示されます。確認するだけで完了です。
どちらの方法でも、取り込んだテレメトリーは独立した素材として扱えます。 Resources の「Telemetry」セクションで確認でき、アイコンでデータの由来が分かるようになっています。 このテレメトリーオブジェクトをResourcesからシーンへドラッグすると、VSDCが Telemetry templates ギャラリーを表示します。 ここで、ゲージ・グラフ・地図など、動画に重ねるスタイルを選べます。
マーカーを使って GPX を動画と同期する方法
編集中の動画と、GPX ファイルに含まれるテレメトリーデータを同期させる必要がある場合があります。GoPro や Insta360 のように動画とテレメトリーがネイティブに連携しているカメラではなく、テレメトリーを GPX ファイルとして記録する別のデバイスを使用している場合、映像とデータの間には直接の結び付きがありません。現在では、VSDC の新しい種類のマーカーを使用して、この接続を手動で作成できます。ただし、すべての情報がその GPX ファイルに保存されていることが条件です。
これらのマーカーは、テレメトリーデータが GoPro 動画内に記録されている場合でも、テレメトリーデータのトリミングに関する問題を解決します。動画と異なり、テレメトリーデータを切り取ったり短くしたりすると、内部タイムラインがずれてしまい、動画との同期が崩れます。ほとんどの場合、テレメトリーの長さは動画シーケンスよりも長くなります。そのため、特定の時間範囲だけを切り出す唯一の方法がマーカーです。したがって、マーカーを使って作業する際は、必ず次の点を覚えておいてください。テレメトリーは完全な状態のまま維持する必要があり、切り取ったり時間方向にスケーリングしたりしてはいけません。
このような場合に、マーカーがどのように役立つのか見ていきましょう。
まず、上で説明したように、動画ファイルとテレメトリーリソース(GPX ファイル)をシーンに追加します。次に、テレメトリーマーカーを使って、動画内のどの時点からテレメトリーデータを表示し始めるかを指定します。動画とテレメトリーデータの両方で明確に確認できるタイミング(たとえばカーブ、ジャンプなど)を選びます。これを行うには、動画ファイルを選択し、タイムラインカーソルを目的の位置に移動して、タイムライン上部のパネルにある「Create marker」をクリックします。表示されたダイアログで、マーカーの種類として「Telemetry marker」を選択し、OK をクリックします。すると、選択したマーカーが動画オブジェクト上に表示されます。
次に、同じ手順を繰り返して、テレメトリーデータファイル自体にも Telemetry marker を配置します。この場合、そのマーカーは実際に必要なテレメトリー区間の開始位置を示します。
その後、タイムライン上のテレメトリーオブジェクトをクリックし、プロパティウィンドウの「Sync to video」オプションで、先ほどマーカーを配置した動画を選択します。続いて、プロパティセクションの下にある青いオプションをクリックして、選択した動画と同期します。するとマーカー同士が接続され、オブジェクトが正常に同期されたことが示されます。
これらの手順に従うことで、映像とテレメトリーデータを正確に同期させることができます。
ウィジェットを設定する
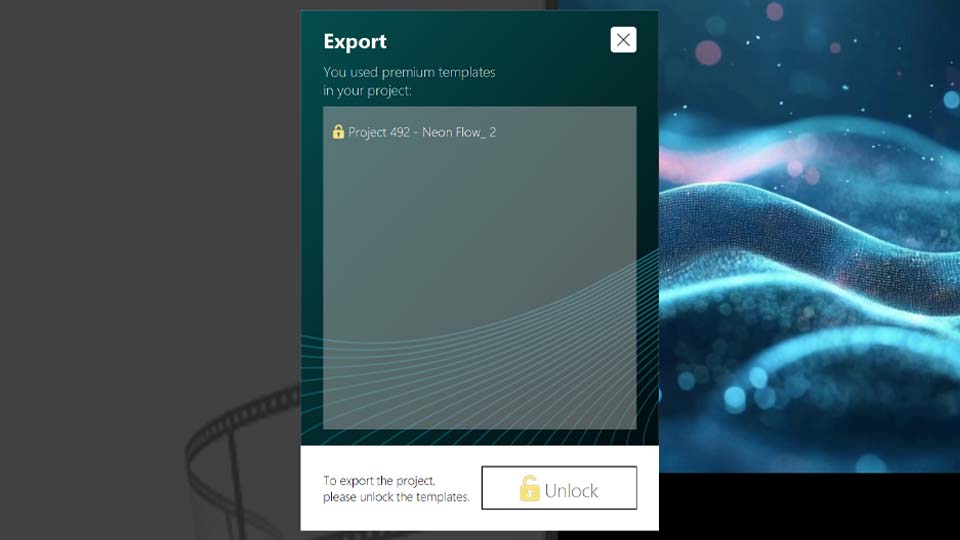
ここからは Telemetry templates ウィンドウで作業します。ルート追跡、速度、標高(高度)など、さまざまなテンプレートがあります。 なお、機能自体は無料で試せますが、テレメトリーオーバーレイ付きの動画を書き出すには VSDC Pro ライセンスが必要です。 また、Premiumパックを使う場合は、プロジェクトで使用しているパックの購入が必要になります。 パックは個別購入も、Bundle Offer でまとめて入手することもできます。
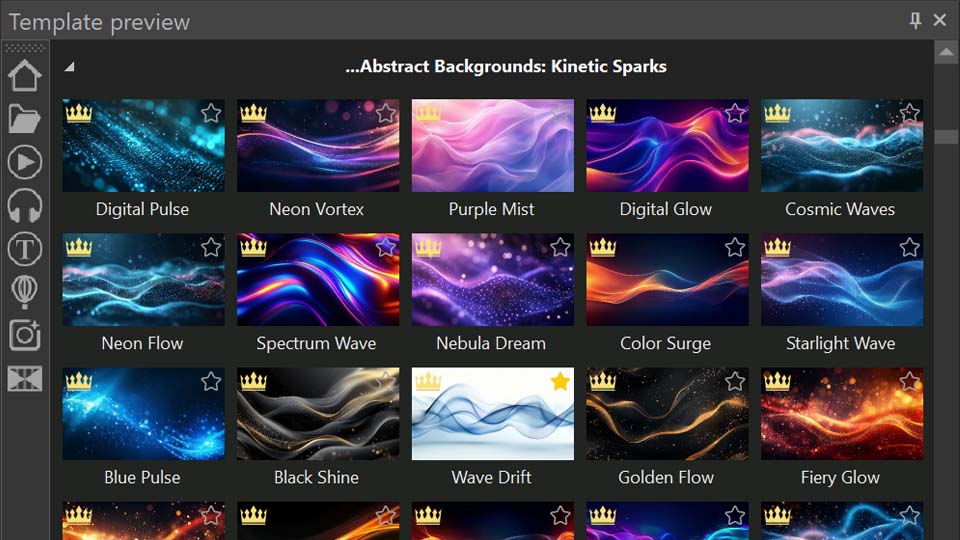
利用できるコレクションはStoreで確認できます。
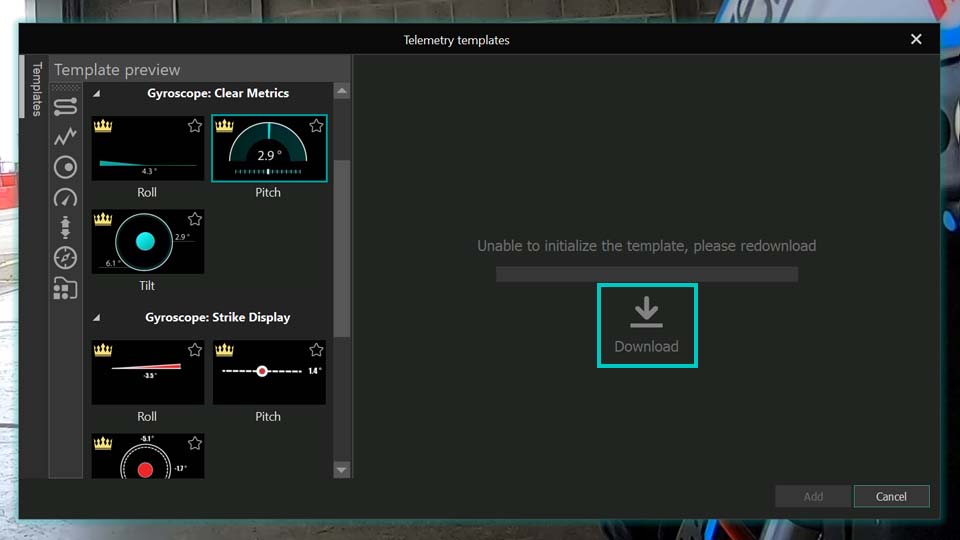
テンプレートを選んだときに “Add” が押せない、またはプレビューに何も表示されない場合は、テンプレート内の “Download” をクリックしてください。 ダウンロード後に追加できるようになります。見た目に問題がなければ、そのまま動画へ追加してください。
テンプレートは1つだけでなく、複数を組み合わせたダッシュボードとして追加することもできます。 ここでは設定を分かりやすくするため、ダッシュボードを使って説明します。
ダッシュボードは Telemetry templates の最後のカテゴリにあります。ここでは “Mint” スタイルを選びます。 シーン上に複数のセンサーが配置されますが、各センサーは Template オブジェクトの中にあり、実際のGPSオブジェクトはその中に入っています。 それぞれが正しいGPXファイルにリンクされているか確認してください。 テンプレートをダブルクリックして中のGPSオブジェクトを探し、プロパティの “Telemetry resource” で正しいソース(動画名/GPX)を選択・再割り当てします。
テンプレートの種類ごとに、カスタマイズできる設定があります。順に見ていきましょう。
GPS Path(ルート)
まずはPath(ルート)です。テンプレートをダブルクリックしてから、タイムライン上のGPSオブジェクトを選択し、プロパティウィンドウを開きます。 上部には長さや位置などの一般設定がありますが、重要なのはテレメトリー専用設定のセクションです。
Pathの見た目は細かく調整できます。最初の “Presets” では、ルート表示の既成スタイルを切り替えられます。
“Telemetry resource” はデータソースを選ぶ項目です。次に重要なのが “Sync to video” です。 動画やデータファイルをトリミングしたり、タイムライン上で移動したりした場合に、同期を取り直すのに役立ちます。 ただし、GPXファイル単体で作業している場合は動画情報がないため、このオプションが無効になることがあります。 タイミングにズレがある場合は、この項目を展開して “Time shift” を調整してください。 なお、Pathでは表示されない場合がありますが、他のウィジェットでは利用できます。
地図に関する設定もあります。撮影場所を確認するためのGoogle Mapsリンクを生成したり、地図を読み込んでルートの下に配置したりできます。 なお、一部の地図機能はAPIキーが必要になる場合があります。
次はルートの軌跡そのものを整える設定です。ここで見た目を大きく作り込めます。
“Path mode” では、ルートを単なる線として表示するか、標高を塗りつぶしグラフのように表示するかを選べます。 “Stretch image” は、ルート画像をフレームに合わせて伸縮するかどうかの設定です。
サイズ変更時にルート画像が歪むのを避けたい場合は、“Stretch image” をオフにしてください。
さらに、線の太さ、開始点、表示するルート全体の割合を調整できます。これらは“描画アニメーション”を作る際に特に重要です。
“Use embedded time” は、GPXにタイムスタンプが含まれている場合に便利です。 有効にすると、区間ごとの実際の速度に合わせてマーカーが移動します(遅い区間はゆっくり、速い区間は速く)。 無効の場合は一定速度で移動します。項目が表示されない場合は、GPXに時間情報がないか、使用しない設定にしている可能性があります。
“Enable gradient” を使うと、ルートにグラデーションを適用できます。時間に応じて変化させることも、標高に応じて変化させることも可能です。
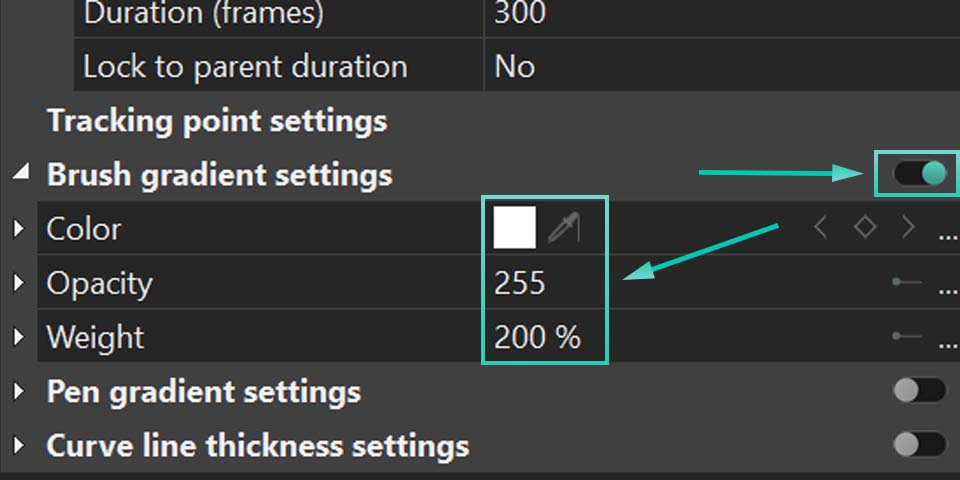
オプションの横にある小さな三角アイコンは、追加設定を開く合図です。色設定では透明度の調整などが展開されます。
“Enable gradient” が None のときは、Front color がルートの色を決め、Opacity が透明度を決めます(0=完全に透明、255=完全に不透明)。 Back color は “Start point of path” と “Length of path” で一部区間だけ表示する場合に、非表示部分(無効部分)を別の色で見せるために使えます。 不要なら Back color の Opacity を 0 にしてください。
“Enable gradient” が By time / By elevation の場合、Start color は開始時(By time)または低標高(By elevation)の色を定義し、 End color は終了時(By time)または高標高(By elevation)の色を定義します。
“Gradient settings” は別ウィンドウを開き、プリセットから選ぶか自作して適用できます。
“Marker settings” では、ルート上を移動するポイントのサイズ、形、位置などを調整できます。
さらに “text settings” もあります。GPXにウェイポイント名などの文字情報が含まれている場合、表示するテキスト内容と見せ方を設定できます。
これらの設定で、次のような表現が可能です:
より分かりやすい手順は、このツール専用のYouTube動画でも確認できます。
Altitude(標高/高度)
次はAltitude(標高/高度)です。ルートに沿った標高プロファイルをグラフとして表示します。
カスタマイズするには、テンプレートをクリックしてから、タイムライン上のGPSオブジェクトをダブルクリックするか、 シーン上の高度グラフをダブルクリックして設定ウィンドウを開きます。
一般設定は他のウィジェットと共通する部分が多く、操作に迷いにくい設計です。ここで注目したいのが “Use 4th-order filter” です。 記録が不安定だったりノイズがある場合に、データを滑らかにできます。
高度データ固有の設定もあります。“Brush” では、グラフ背面の空白領域の塗り方を選べます(透明/単色背景など)。
“Telemetry metric” は表示する項目を選ぶオプションです。高度テンプレートでも、速度など他の指標へ切り替えられます。 単位がある指標の場合は “Units” が表示され、メートル法/ヤード・ポンド法などを選択できます。
さらに、平滑化、しきい値の設定、グラフ品質の改善、重複データポイントの統合など、データを整えるオプションがあります。 また、データソースタイプも選べます(前処理済みのraw、GPSフィルターのみ適用したraw、元の記録データなど)。
追加で、エコーフィルターの微調整も可能です。ノイズや重複読み取りを抑え、グラフをより見やすくできます。
タイムライン上のテンプレート内には telemetry text オブジェクトもあります。クリックするとプロパティでテキストを調整できます。 単なるテキスト編集だけでなく、配置、表示精度(小数1桁/2桁など)、テキスト効果、curve binding を使った動的アニメーションも設定可能です。
速度計、コンパス、ジャイロ、加速度(Gフォース)
これらのウィジェットは基本設定が高度グラフと似ています。大きな違いはテンプレートの構成です。 テンプレートによって画像、テキスト、グラフィック要素の数が異なり、カスタマイズできるレイヤー(調整ポイント)も変わります。 ただし、どのテンプレートでも元のデザインを調整して“自分の映像に合う見た目”に作り込めます。
テンプレートに含まれる Zoom、Duotone などのエフェクトもカスタマイズできます。 実例として、GoPro映像をインポートしてゲージを重ねる流れを紹介した動画をご覧ください。 テンプレート内エフェクトの扱い方も確認できます。
表現の幅を広げよう
GPSツールの使い方はほぼ無限です。調整次第で見せ方は大きく変わります。まずはプリセットから始めて、 慣れてきたら自分だけの速度計やコンパスなど、オリジナルのカスタムゲージ作りにも挑戦してみてください。
YouTubeチャンネルではチュートリアル、ヒント、アイデアを定期的に紹介しています。ぜひチェックしてください。
サポートが必要な場合は、このメールアドレスはスパムボットから保護されています。閲覧するにはJavaScriptを有効にする必要があります。 までお気軽にご連絡ください。
よくある質問(FAQ)
Q1:GPSとテレメトリー機能はVSDCのどのバージョンで使えますか?
A:VSDC Video Editor 10.2以上が必要です。GPS可視化ツールは10.1で導入されましたが、10.2で機能が拡張されています。
Q2:GPSオーバーレイを使うのにProライセンスは必要ですか?
A:機能の試用は無料でできますが、GPS/テレメトリーを重ねた状態で動画を書き出すにはVSDC Proが必要です。Premiumパックのテンプレートを使う場合は、該当パックの購入も必要になります。
Q3:GPSルートの下に地図を表示できますか?
A:可能です。GPS Pathの設定で地図を背景として読み込めます。なお、動的なGoogle Mapsなど一部の高度な機能はAPIキーが必要になる場合があります。
Q4:テンプレートで表示するデータを変更できますか?(例:高度グラフで速度を表示)
A:可能です。高度グラフなどのウィジェットのプロパティで “Telemetry metric” を選び、表示する指標を切り替えてください。単位(Units)も指標に応じて切り替わります。
Q5:カスタムゲージやダッシュボードの作り方はどこで学べますか?
A:公式YouTubeチャンネルをご覧ください。本記事でも、ウィジェット作成やGoPro映像の扱い方に関する動画を案内しています。
 プロジェクトの寸法の正確な高さと幅を入力するためのガイド
 スナップショットツールを使用してグラデーションデザインの静止画像を作成する


 / @VSDCFreeVideoEditor