 User Help Manual
 ")


Editor Video
L'editor video consente di modificare file e creare video di qualsiasi complessità. Potete applicare effetti video e audio effects ad oggetti modificati, trasformarli, applicare filtri e correzioni d'immagini. Tutti i popolari formati video e audio sono supportati (sia lettura che salvataggio).
Convertitore Video
Questo programma serve a convertire video file da un formato ad un altro. Quasi tutti i popolari formati video sono supportati. Inoltre, il programma semplifica drasticamente il compito di convertire video da riprodurre su determinati dispositivi multimedia quali iPhone, Microsoft Zune oppure Archos. Il programma è semplicissimo da usare, dispone di una moderna interfaccia e di tutte le necessarie funzioni per processare i video.
Convertitore Audio
Il convertitore audio vi aiuterà a convertire file audio da un formato ad un altro. Tutti i formati audio e codec chiavi sono supportati. Il programma vi consente inoltre di gestire playlist e meta tags, di estrarre audio dai file video e di salvare queste tracce sul vostro computer in qualsiasi formato.
Audiograbber
Questo strumento audio serve a catturare tracce audio dai CD e di salvarle nel computer dell'utente in qualsiasi formato. Quasi tutti i popolari formati e codec sono supportati. Il programma è inoltre in grado di estrarre dettagli di tracce dal server FreeDB al fine di rinominare automaticamente il file e di aggiornare i meta tag.
 Editor Video
 Convertitore Video
 Convertitore Audio
 Audiograbber

Versatilità
Più strumenti contemporaneamente per elaborare file video e audio in una singola applicazione.

Alta velocità
I nostri programmi
impiegano rapidi algoritmi di alta qualità per processori singoli a multipli.

Accessibilità
I nostri prodotti sono disponibili per essere scaricati gratuitamente su tutti i computer e dispositivi che supportano i sistemi operativi Windows.
Notizie:
- published Amy Shao 6/10/25 L'attesa per qualcosa di nuovo e straordinario è ...
- Questa stagione festiva inaugura nuovi inizi con l'ultimo aggiornamento di VSDC ...
- Il cambiamento è sinonimo di miglioramento, e questo processo non sarebbe possib...
- Introduzione Nel 2024 la gamma di opzioni per creare effetti visivi è incredib...
Come Rallentare/Accelerare l'Audio nel Free Video Editor
Trovare una traccia audio adatta per il tuo video che aggiunga atmosfera può essere una vera sfida. Anche quando la traccia sembra perfetta, la musica risulta essere troppo veloce o troppo lenta e distorta. Ma fortunatamente, la magia della tecnologia moderna ti offre molti modi per cambiare la velocità del video, specialmente con il giusto software di editing video. Che tu stia cercando di migliorare l'atmosfera del tuo video, regolare il ritmo dei tuoi MP3 o semplicemente sperimentare con il timing, VSDC offre un insieme di strumenti che puoi padroneggiare senza sforzo. Continua a leggere mentre ti guidiamo nell'aumentare e diminuire la velocità dell'audio in VSDC Video Editor!
Punti Chiave
In questo articolo scoprirai:
- Tre metodi su come accelerare l'audio in VSDC;
- Tre metodi su come rallentare l'audio in VSDC;
- Idee utili per lavorare con i file audio in VSDC;
- Una breve guida FAQ.
Come Rendere l'Audio Più Veloce
Metodo 1: Il Parametro Velocità
- Crea un nuovo progetto e aggiungi il tuo file MP3 alla timeline trascinandolo dall'esploratore file o utilizzando l'opzione Aggiungere un oggetto nella scheda Editor.
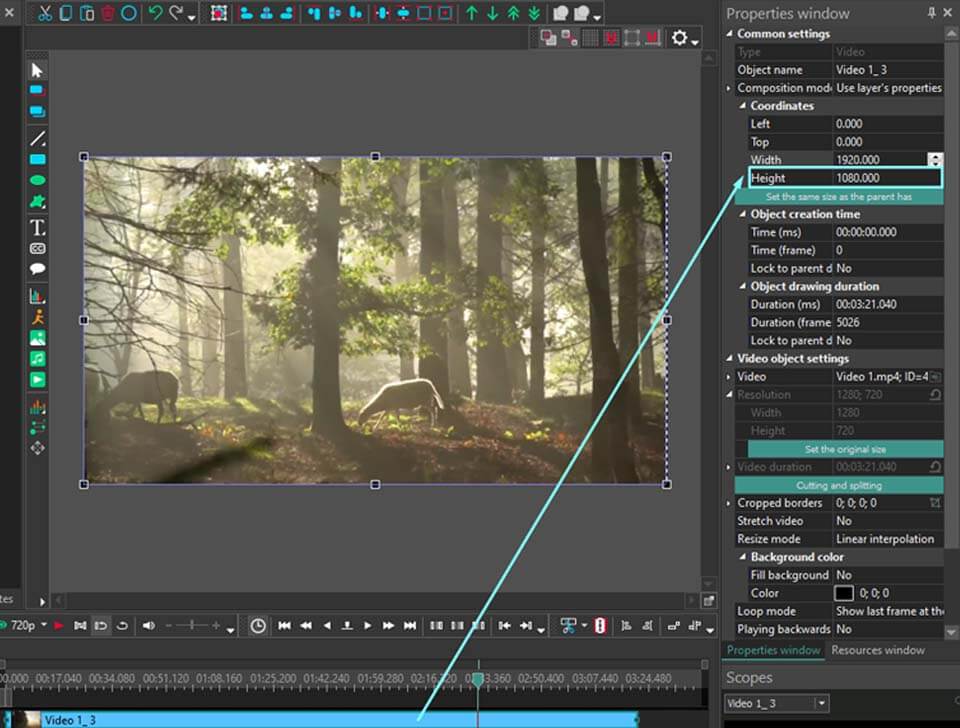
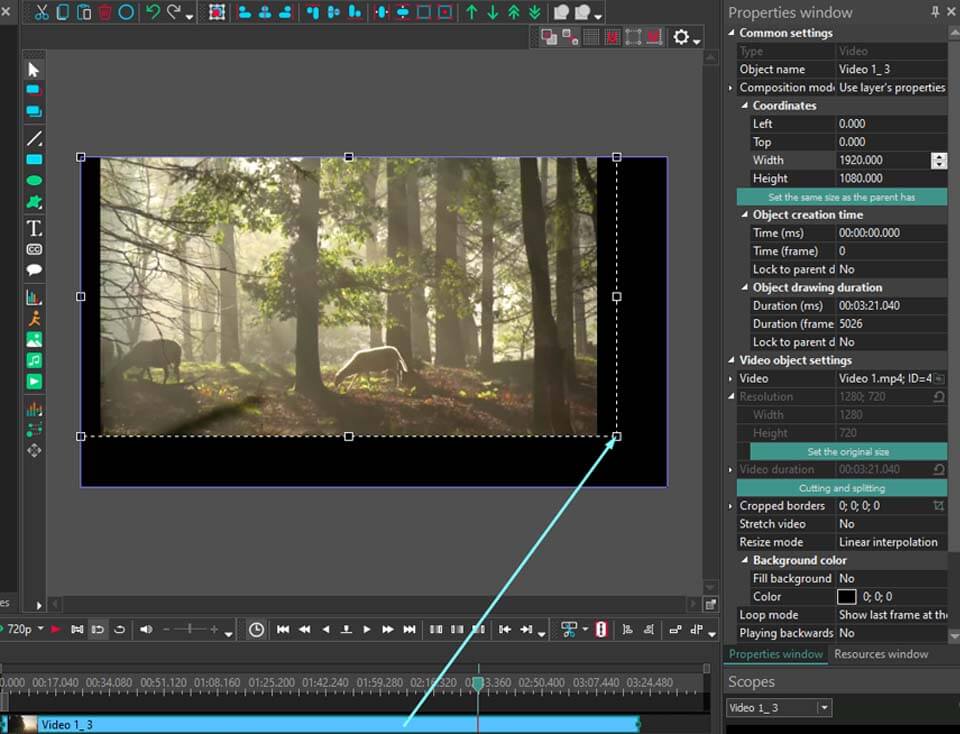
- Seleziona il tuo file audio sulla timeline e naviga alla Finestra delle proprietà. Troverai lì il parametro Velocità nella sezione Impostazioni oggetto audio, impostato di default al 100%. Aumenta questo parametro per accelerare il suono (ad esempio, per raddoppiare la velocità, impostalo al 200%). Si noti che, cambiando la velocità dell'audio, anche la durata complessiva del file diminuisce.
Metodo 2: Modalità di ripetizione
Questo metodo è utile quando devi accelerare il file audio fino a una durata specifica.
- Crea un nuovo progetto e aggiungi il tuo file MP3 alla timeline trascinandolo dall'esploratore file o utilizzando l'opzione Aggiungere un oggetto nella scheda Editor.
- Seleziona il tuo file audio sulla timeline e allunga la fine del file verso sinistra per accorciarlo alla durata desiderata.
- Naviga alla Finestra delle proprietà e trova il parametro Modalità di ripetizione nella sezione Impostazioni oggetto audio. Imposta Riprodurre audio intero affinché il suono si acceleri.
Metodo 3: Effetto Modifica del tempo
- Crea un nuovo progetto e aggiungi il tuo file MP3 alla timeline trascinandolo dall'esploratore file o utilizzando l'opzione Aggiungere un oggetto nella scheda Editor.
- Clicca con il tasto destro sul tuo file audio sulla timeline e seleziona Effetti sonori >> Tempo / Timbro >> Modifica del tempo.
- Regola la posizione e la durata dell'effetto Modifica del tempo sulla timeline e naviga alla Finestra delle proprietà. Trova il parametro Velocità nella sezione Parametri dell'effetto Modifica del tempo e accelera la musica al valore desiderato. Ricorda: l'effetto Modifica del tempo preserva la durata del file audio e, poiché la musica va più veloce, rimane del silenzio alla fine del tuo file audio, quindi potresti aver bisogno di accorciarlo spostando il bordo destro del file.
Come Rendere l'Audio Più Lento
Metodo 1: Il Parametro Velocità
- Crea un nuovo progetto e aggiungi il tuo file MP3 alla timeline trascinandolo dall'esploratore file o utilizzando l'opzione Aggiungere un oggetto nella scheda Editor.
- Seleziona il tuo file audio sulla timeline e naviga alla Finestra delle proprietà. Vedrai lì il parametro Velocità nella sezione Impostazioni oggetto audio, impostato di default al 100%. Diminuisci questo parametro per rallentare il suono (ad esempio, per ridurre la velocità di un fattore di due, impostalo al 50%). Si noti che, cambiando la velocità dell'audio, anche la durata complessiva del file aumenta.
Metodo 2: Modalità di ripetizione
Questo metodo è utile quando devi rallentare il file audio fino a una durata specifica.
- Crea un nuovo progetto e aggiungi il tuo file MP3 alla timeline trascinandolo dall'esploratore file o utilizzando l'opzione Aggiungere un oggetto nella scheda Editor.
- Seleziona il tuo file audio sulla timeline e allunga la fine del file verso destra fino alla durata desiderata.
- Naviga alla Finestra delle proprietà e trova il parametro Modalità di ripetizione nella sezione Impostazioni oggetto audio. Imposta Riprodurre audio intero per rallentare il suono.
Metodo 3: Effetto Modifica del tempo
- Crea un nuovo progetto e aggiungi il tuo file MP3 alla timeline trascinandolo dall'esploratore file o utilizzando l'opzione Aggiungere un oggetto nella scheda Editor.
- Clicca con il tasto destro sul tuo file audio sulla timeline e seleziona Effetti sonori >> Tempo / Timbro >> Modifica del tempo.
- Regola la posizione e la durata dell'effetto Modifica del tempo sulla timeline e naviga alla Finestra delle proprietà. Trova il parametro Velocità nella sezione Parametri dell'effetto Modifica del tempo e riduci la velocità al valore desiderato. Ricorda: l'effetto Modifica del tempo preserva la durata del file audio, e poiché la musica va più lentamente, la fine del tuo file audio verrà tagliata. Per evitare ciò, allunga il file audio sulla timeline per aumentare la durata.
Esporta il Tuo Progetto
Non appena hai finito, esporta il tuo progetto in uno dei seguenti modi:
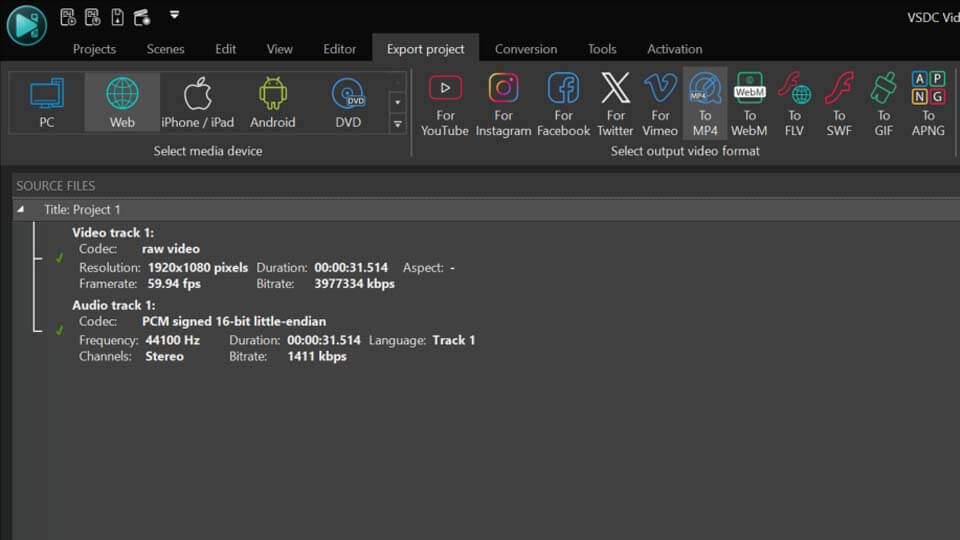
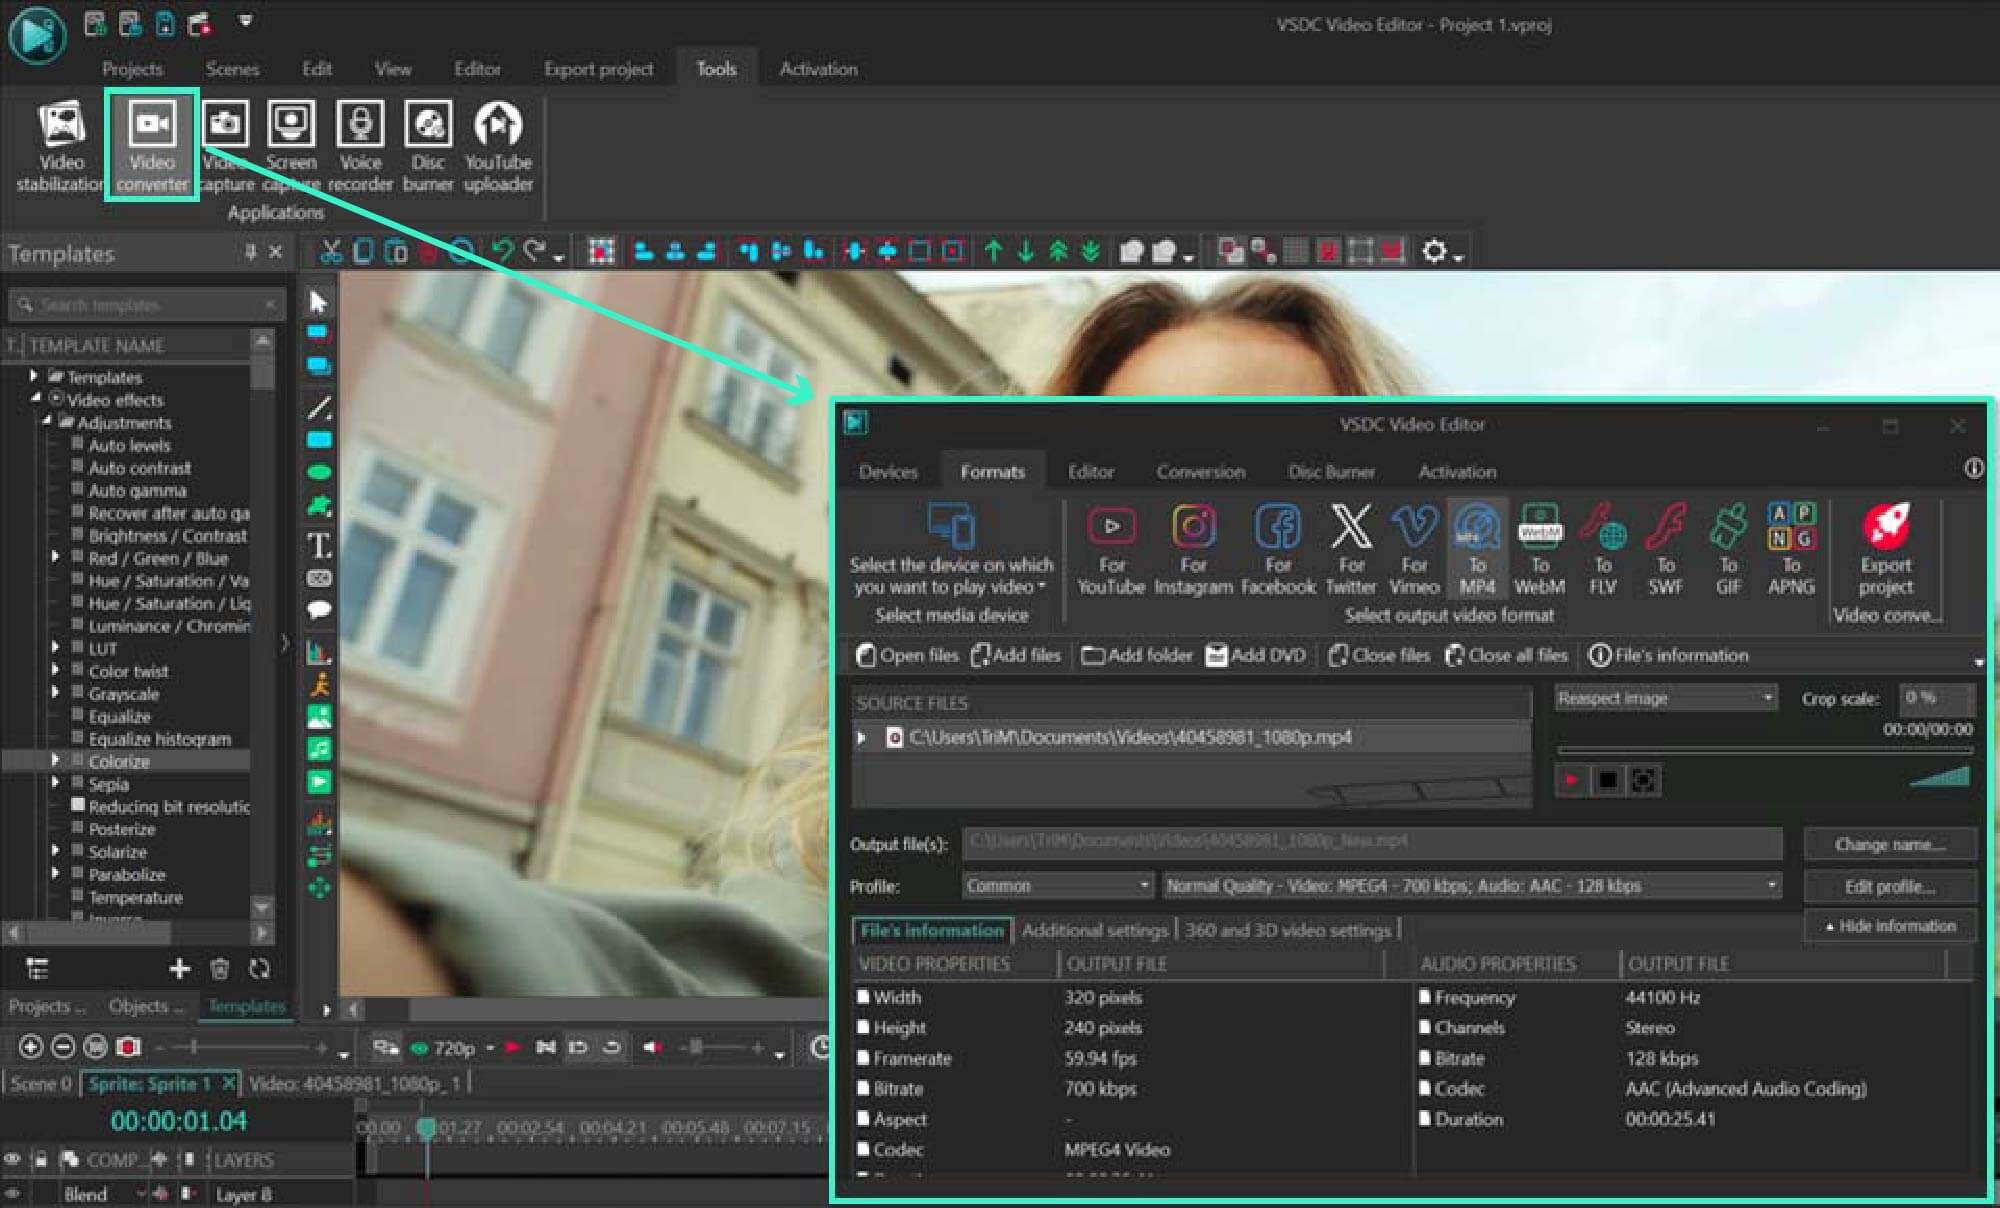
- Esporta come video: Vai alla scheda Esporta il progetto e seleziona il formato desiderato sulla Ribbon, poi scegli il Profilo e regola le impostazioni di esportazione (se necessario) e clicca sull'icona Esporta il progetto sopra la scena. Per saperne di più sulla personalizzazione delle impostazioni avanzate, consulta la nostra guida per creare file MP4.
- Esporta come audio: Vai alla scheda Esporta il progetto e trova la tua traccia audio nella finestra FILE SORGENTE. Clicca con il tasto destro su di essa e seleziona Esportare l'audio, regola le impostazioni e premi Esportazione.
Migliorare i Tuoi Progetti: Metodi Creativi per Lavorare con l'Audio in VSDC
VSDC offre molte opzioni per lavorare con i file audio che vanno ben oltre la semplice regolazione della velocità. VSDC fornisce un kit di strumenti esteso progettato per elevare le tue capacità di editing audio. Per iniziare a padroneggiare le tue abilità, considera la nostra guida generale, e poi esplora alcune idee interessanti:
- Come sostituire una traccia audio;
- Come Applicare Effetti Audio;
- Creare una Sincronizzazione Audio;
- Creare uno Spettro Audio Circolare;
- Sincronizzare Audio e Video;
- Trasformare la Forma d'Onda Audio in una Maschera;
- Ridurre/Rimuovere il Rumore dal tuo Audio;
- Come usare lo strumento Modifica il battito.
L'editing audio spesso accompagna la manipolazione video, poiché le tecniche per regolare la velocità di riproduzione — sia accelerando che rallentando — sono notevolmente simili. Pertanto, esplorare la nostra guida sulla regolazione della velocità potrebbe fornire alcuni consigli e strategie utili che sono applicabili anche all'editing audio.
Conclusione
Dall'amplificare l'atmosfera dei tuoi video all'alignamento perfetto delle tracce audio con gli elementi visivi, i metodi e gli strumenti descritti in questo articolo offrono soluzioni complete per accelerare o rallentare il tuo file MP3. Con VSDC hai la flessibilità di realizzare la tua visione. Esplorare modi creativi per lavorare con l'audio in VSDC, inclusa la sostituzione delle tracce audio, l'applicazione di effetti e la sincronizzazione dell'audio con il video, dimostra le vaste capacità del nostro software oltre le semplici regolazioni della velocità. Ti incoraggiamo a sperimentare queste tecniche per scoprire nuove dimensioni nei tuoi progetti video, rendendoli coinvolgenti e affascinanti.
FAQ
Posso accelerare o rallentare solo una parte di una traccia audio?
Certamente, puoi utilizzare lo strumento Suddividere in parti per creare una sezione separata, selezionarla sulla timeline e poi applicare l'effetto Velocità a essa.
Cambiare la velocità influenzerà l'altezza del tono del mio audio?
L'altezza del suono è direttamente correlata alla frequenza delle sue onde. Accelerare la riproduzione aumenta la frequenza, il che a sua volta eleva il tono. Tuttavia, se desideri modificare l'altezza tono della tua traccia audio, potresti considerare di utilizzare Modifica altezza tono, un effetto sonoro che aumenta o riduce il tono del tuo audio.
Quali sono alcuni usi comuni per accelerare l'audio?
Un esempio tipico sono i video di TikTok. Data la natura veloce di TikTok, gli spettatori hanno tipicamente un tempo di attenzione più breve, il che necessita l'accelerazione dei BPM [battiti per minuto] di una canzone per garantire che gli ascoltatori rimangano impegnati nelle parti più coinvolgenti di una traccia. Tuttavia, in realtà, la necessità di accelerare una traccia audio dipende dall'idea del tuo progetto video ogni volta che cambi la velocità della voce o di una canzone. Continua a creare!

 Scarica l'editor video per stretch


Con questo programma è possibile registrare i video dal desktop e salvarli sul computer in diversi formati. Insieme al video editor è ideale per creare presentazioni e demo.

Il programma serve per catturare video da dispositivi esterni e e per registrarli sul computer in qualsiasi formato video. Potete salvare il video da sintonizzatori video, webcam, schede di acquisizione e vari dispositivi.

"VSDC Free Video Editor is a surprisingly powerful, if unconventional video editor"
- PC Advisor

"This video editor gives you tons of control and editing power"
- CNet

"The editor handles many common formats and boasts a good deal of capabilities when it comes time to alter lighting, splice video, and apply filters and transitions in post production"
- Digital Trends
© 2011-2025, www.videosoftdev.com, FLASH-INTEGRO LLC. Tutela della privacy | Condizioni di utilizzo | Chi siamo
Tutti i marchi citati nel presente documento sono di proprieta esclusiva dei rispettivi proprietari.
La copia di qualsiasi materiale da questo sito e consentita solo con il consenso scritto dell'amministrazione sito.