 User Help Manual
  Learn FAQ
  Send us feedback
 ")


- Published by Amy Shao on March 11, 2026 What is the best gift for...
- published Amy Shao 11/19/25 Meet the long-awaited VSDC 10.2 update: a new ve...
- Hi, I'm Mattea Wharton, a travel videographer from Seattle. For three years I ba...
- published Amy Shao 6/10/25 The wait for something new and unusual is finally...
How to Edit Your Gameplay. Step-by-Step Guide, Best Practices, and Free Game Video Editors Reviewed
YouTube is full of raw, unedited gameplays nobody wants to watch. And that’s a shame because with just a little bit of time and effort, many of them could be turned into engaging clips and attract lots of viewers. (If you didn’t want views, you wouldn’t be uploading your gameplay videos to YouTube in the first place, would you?)
The truth is, sometimes people don’t want to watch your entire gameplay. Their attention span is short, and they either need to solve a specific problem when they’re stuck in a game or they just want to get entertained by the most epic moments. And how do you deliver that? By editing your gameplay video and making it helpful and enjoyable.
In this article, we’ll show you how to edit gaming videos for free. We’ll walk you through the preparation process step by step and show you how to perform basic gaming montage. Plus, we’ll give you a few tips for producing a better video. Finally, we’ll also review free game video editing software you can use for your project.
Which gaming video editor should you use?
Good news. There are a lot of decent free NLEs (non-linear video editors) out there that can become your game video editing software of choice.
For the purpose of this tutorial, we’ll be using VSDC Free Video Editor. It’s recommended by many gaming YouTubers because it’s free and lightweight (works even on low-spec PCs). Plus, it brings screen and webcam recorders on board which comes in handy if you want to record yourself while playing.
Note that VSDC works on Windows only. You can download it from the official website.
If you’re on Mac or Linux, we’ll provide you with alternative game video editing software in a few paragraphs. Stay tuned!
Before you get to edit your gameplay video: step-by-step preparation plan
If you want to create a Let’s Play or a walkthrough, there will be very little editing involved – mostly, cutting and merging. However, if you’re working on a guide or a supercut of the best moments in the game, you’ll need to go beyond basic editing.
The tips we’ve put together below should help you with any project, be it a walkthrough, a gameplay, a trailer, a gag with fun moments, or a Let’s Play.
Without further ado, let’s dive right in.
Step 1. Plan your gameplay production ahead
We know, we know. You probably can’t wait to start playing. But hold your horses – having a plan is key.
You might not need a detailed scenario with a script for voice commentaries, but you should have a clear idea of what you’re producing. Start by answering these questions:
Which genre will your gaming video be?
Are you recording a walkthrough or an LP? A gag or a game review? Once you make that choice, stay focused. Imagine a YouTuber promising to show you how to do something in a game and taking way too long to get to the point wandering around and talking off-topic. That’s annoying. Don’t be that guy.
What’s your goal?
Are you doing it for fun or you want to maximize the number of views? The answer to this question will help you decide which game to choose and what exactly to show in the video.
If you couldn’t care less about the views and getting found on YouTube – go ahead and just do what you love. But if your goal is to grow the channel and attract viewers, you might want to do a quick research and find out what people are actually looking for. By producing a gaming video that meets viewers’ requests, you get higher chances to be indexed by the YouTube search engine and show up among the first results where all the eyeballs are.
For keyword research, use free tools like Answer The Public (above), Online Keyword Tool, or just check related searches in Google. For example, you can type “name of your game of choice + walkthrough” and see what comes up at the bottom of the page.
What will you choose for a soundtrack?
This might sound like a simple question, but you should dedicate a couple of minutes to it before you start recording. For instance, if you’re planning to use voice comments, you should make sure your microphone works properly. And even if you’re planning to add background music, you might need the sounds of the game too. Forgetting to record the sound of the game is one of the most common rookie mistakes!
And that brings us to the next step: installing video capturing software and recording the game.
Step 2. Record the gameplay
Whether you’re using your gaming laptop, or you’re a lucky owner of the latest PlayStation, there are dedicated apps and devices to help you record gameplays.
Now, finding the right software for laptops is easy. OBS (Open Broadcaster Software) is a free screen capture program you’ve probably already heard of. Plus, there are many other screen recording tools for both Windows and macOS computers (including VSDC Free Screen Recorder, Apowersoft, Screencast-O-Matic, and others).
If you’re using a console though, you should consider buying a gameplay capturing device. It will help you connect your TV to the computer and record everything happening on the screen – to later upload the footage to a game video editor quickly and easily. Keep in mind that the ideal device should allow you to record both – the game sound and live commentaries via a microphone or a headset.
And in case you were wondering – no, recording your TV screen with a camera is rarely a good idea. Don’t do that.
Step 3. Get yourself a soundtrack or record voice comments
You’ve made it this far – good job! Now, before you upload the footage to the game video editor of your choice, there is one tiny detail left. The audio.
If you were recording the game and making voice comments in real-time with your headset – skip this part. But if you need to create a voiceover, you’ll need to do it separately either before or after editing the gameplay video.
Background music is also a great idea, it helps make videos more engaging. You can’t add just any music to your gameplay though because of the music copyright law. The easiest option will be to find a nice tune in the YouTube music library. All tracks there are royalty-free and available at zero cost. Plus, there are sound effects there too!
Step 4. Download game video editing software
Now you have everything to start editing the gameplay. Time to choose your tool.
Depending on which OS you’re using, here are the free gaming video editors to consider:
VSDC – free gaming video editing software for Windows
VSDC is a lightweight, newbie-friendly video editor for gameplay footage. It works even on PCs with limited RAM, allows for importing and exporting any video format, and brings all the essential features you’d expect from a gameplay video editor.
VSDC has a Pro version that boasts advanced tools like masking and motion tracking. However, chances are, the feature set of the free version will be sufficient for you at the beginning. In a couple of paragraphs, we’ll show you how to edit a gameplay video in VSDC.
iMovie – free gaming video editing software for macOS
iMovie is a great choice of a gaming video editor if you’re using Apple products. It’s available for free, and you can use it seamlessly across devices. That means you’ll be able to edit mobile gameplays right on your smartphone or tablet. Or you can start editing a video on your tablet and continue on your Mac (thank Apple for smooth synchronization!).
Kdenlive – free gaming video editing software for Linux
Kdenlive is an open-source, cross-platform program that works on any OS, but it has gained its fame by being the most popular video editor for Linux. Kdenlive is a user-friendly program with a minimalistic interface, fast project rendering, and a set of convenient keyboard shortcuts. Like any open-source project, Kdenlive has a lot of community support, so if you get stuck, there are dedicated forums and YouTube tutorials created by more experienced users.
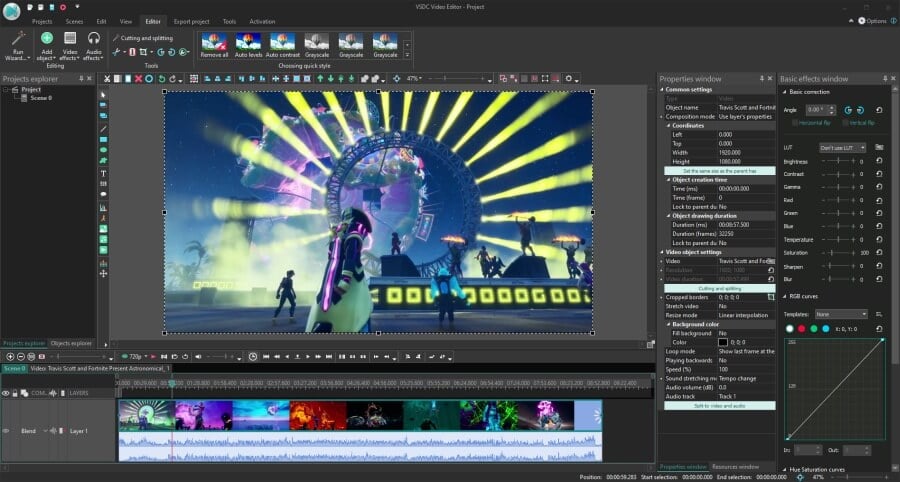
How to use VSDC, free game video editing software
Once you download VSDC Free Video Editor to your PC, launch it and use the Import content button to upload your gaming footage. When you use this option, the software automatically detects the settings of your video and adjusts the project settings accordingly.
1. Cut out the boring stuff
The first step is to get rid of all the unnecessary footage. If you’re aimed at creating a clip with the best (the funniest, the most epic) moments, make sure those are the only ones you leave. At times, you’ll be tempted to keep more footage than needed, but that’s exactly when your script comes in handy. Remember your initial idea and stick to the course.
To cut your gameplay video in VSDC, place the cursor where you want to make the cut and hit the razor icon at the top.
The footage will split into two parts. Repeat the action as many times as needed to cut out the unwanted pieces. Then click anywhere on the scene to unselect the entire file.
Finally, select the pieces you want to remove and hit “Delete”.
2. Merge what’s left and add transitions (or don’t)
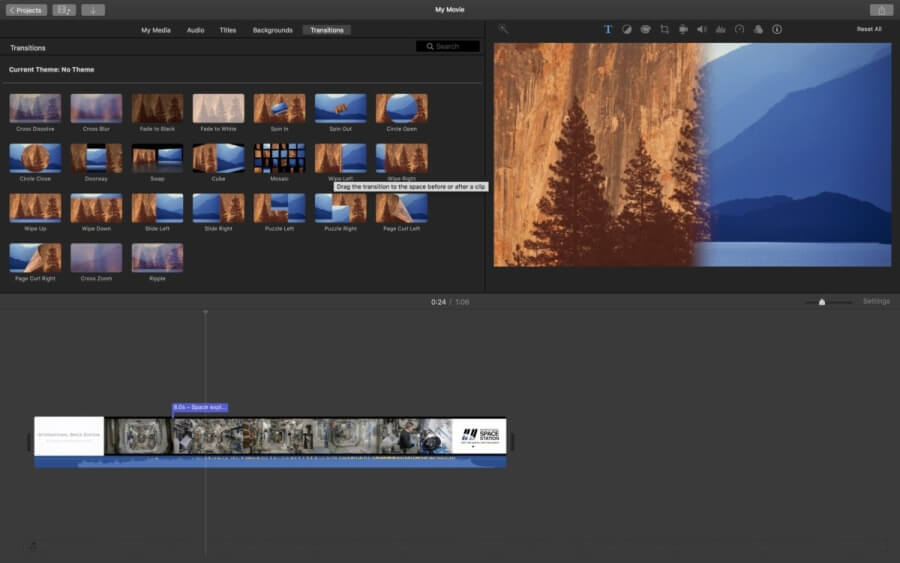
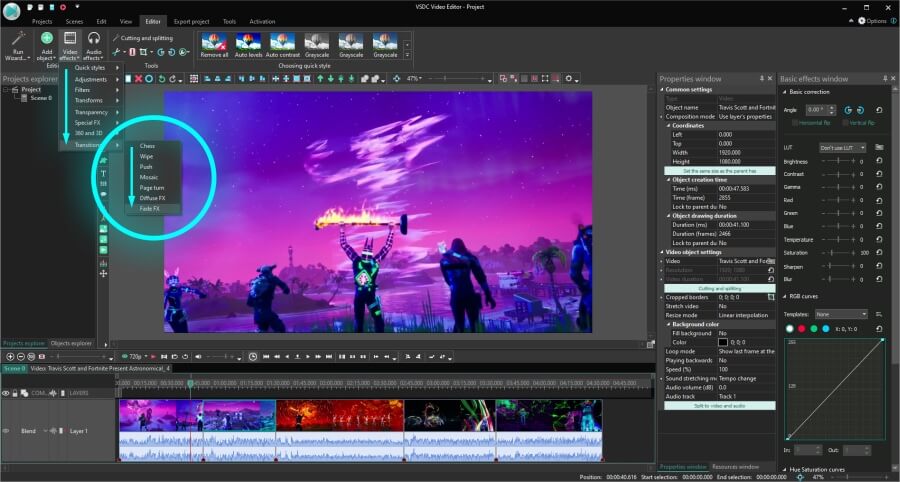
In VSDC, you can merge videos just by dragging them and docking together. The program also offers a few transitions, but the truth is, gaming videos don’t need fancy effects between scenes. There is a lot happening on the screen already!
That’s why the best option will be either to use no transitions at all or to apply minimalistic transitions like FadeFX. To apply FadeFX, place the cursor at the end of a scene (make sure that the piece of the video you want to apply the transition to is selected on the timeline). Open the Video Effects menu, proceed to Transitions, and select FadeFX.
3. Add audio to your gameplay footage
To add an audio file to the project, either hit the Shift+A combination or use the Add object button and choose Audio. Then select the desired file from your computer.
You’ll be able to edit your audio track to make sure it sounds the way you want. Cut out unwanted pieces, change the volume of the audio, or apply audio effects, such as Fade in or Fade out.
4. Add yourself to the video (picture-in-picture effect)
If you’re wondering how to make your gameplay video more engaging, consider bringing yourself to the picture (quite literally). With the picture-in-picture effect, you can place the footage of yourself playing or commenting over the gameplay video.
This is what it’s going to look like:
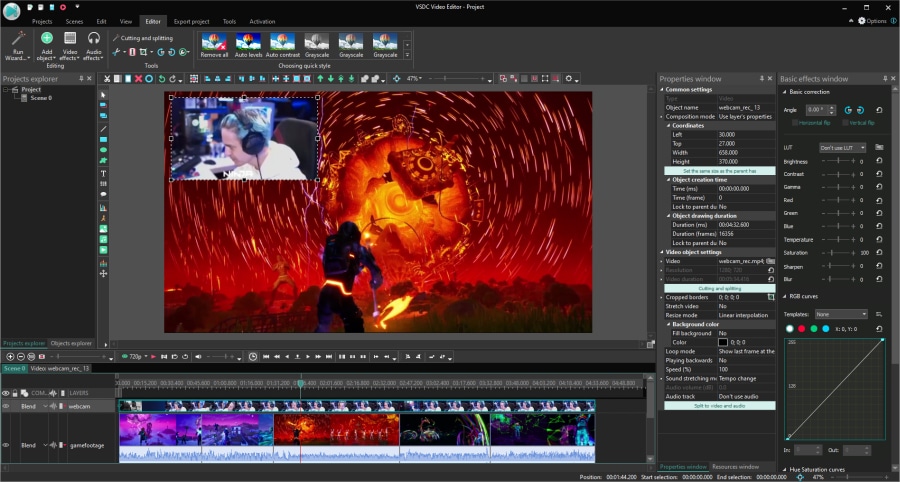
To recreate this, you can either record yourself while playing or capture yourself watching and commenting on the resulting gameplay video – similarly to how reaction videos are created.
Once you have the footage of yourself ready, import it to the project using the Shift + V hotkey combination or use the Add object menu and select Video. Make sure to place the footage of yourself above the gameplay video layer on the timeline, then resize it and drag it to the corner.
If you need more detailed guidance, check our picture-in-picture effect tutorial.
5. Add titles and captions
VSDC brings a full-featured text editor on board, so you can easily add a title, a tooltip, or captions. You can also make them appear at the right moment and stay in sight for as long as you need.

To add text to a video, place the cursor at the moment on the timeline when you want the title to appear. Then open the Add object menu and select Text. An editing menu will open at the top – use it to adjust the style of the text to your liking. Next, stretch or cut the text layer on the timeline to change its duration in the scene.
To create a smooth appearance, make a right mouse click on the text layer, go to Video effects, select Transparency >> Fade In.
If you want the text to follow an object in a video, check out the motion tracking module available in VSDC Pro. Motion tracking is very helpful if you need to create captions for various objects in a video and make sure they stay attached even when the objects are moving.
6. Highlight the best moments
Earlier we said that video effects are redundant when it comes to editing gameplay videos. However, they might look appropriate if you want to emphasize particular moments in the game or drive viewers’ attention to an object in the scene. This is clearly optional, but if you’re planning to turn gameplay montage into a hobby, you might eventually want to add a few cinematic effects here and there.
Here is what you can try:
- Create suspense with a freeze - frame effect. The freeze-frame effect involves taking snapshots of the selected frames and using them to “freeze” the video for a second for creating suspense or adding written comments. The effect is unbelievably easy to apply. Check this tutorial if you’d like to master it.
- Change colors to set the mood. A drastic change of colors – when the video becomes black-and-white, for instance – will help create a dramatic effect and make a visual emphasis on the scene.
- Focus on an object. If you want to create precise focus on an object in a video, you can apply the crop zoom approach or the blurred background approach – depending on what type of a gameplay video you’re working on.
7. Create intro for your gameplay video
Before you upload your masterpiece to YouTube, we recommend going the extra mile and creating a short intro. Gaming intros don’t need to be fancy, but if you have one, it will help your video stand out. Plus, you can use it to add a call to action and encourage viewers to subscribe or follow you on social media.
You’ll only need to create an intro once. Then you’ll be able to save it as a template and use it whenever needed. There are many beginner-friendly intro tutorials available on the VSDC channel – make sure to check them out.
Wrapping up
By now, you should have an idea of how to edit gameplay videos.
Has at least one of these tips helped you with your goal of growing a gaming channel? If you’ve just answered yes – that’s epic.
Now, why stop there? Go ahead and spread the word about your launch, ask for feedback, and find fellow creative thinkers. If you aren’t a member of any community for gaming YouTubers yet, make sure to check out NewTubers, YouTube gaming, and Let’s Play subreddits. You’ll surely find a lot of support and inspiration there.
Watch us on YouTube
 / @VSDCFreeVideoEditor
© 2011-2026, www.videosoftdev.com, FLASH-INTEGRO LLC. Privacy policy | Terms of use | About us
All trademarks referenced herein are the sole property of their respective owners.
Copying any materials from this site allowed only with written consent of Site Administration.