 User Help Manual
  Learn FAQ
  Send us feedback
 ")


How to Make Glitch Text Effect in a Video
If you go online, you’ll find plenty of sources featuring glitched text effect templates. However, since templates may not always look exactly the way you need, in this tutorial, we’ll show you how to create your own glitchy text for a video – using VSDC, a free video editor for Windows.
Even if you’re a complete newbie, worry not. It’s a quick and easy trick that requires zero video editing experience. Once you get the hang of the effect, you’ll be able to apply it to text titles, logos, and images in your video. Feel free to watch the tutorial first, and then jump to the text description below, as it contains an extended version with a couple of animation tricks.
Download VSDC Free Video Editor.
Step 1. Add a piece of text to the scene
Launch VSDC on your computer and create a blank project. Then use Shift +T to add a piece of text to the scene, and design it to your taste using the editor at the top. Note that you can modify any aspect of the text including the font, size, thickness, color, alignment, and everything in between.
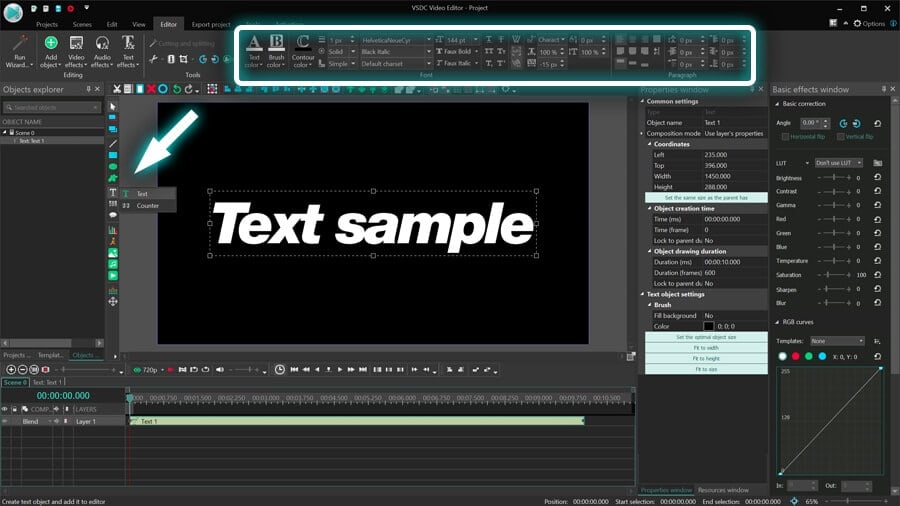
The duration of the text in the video is indicated on the timeline; you can stretch or shorten it manually using the handlers.
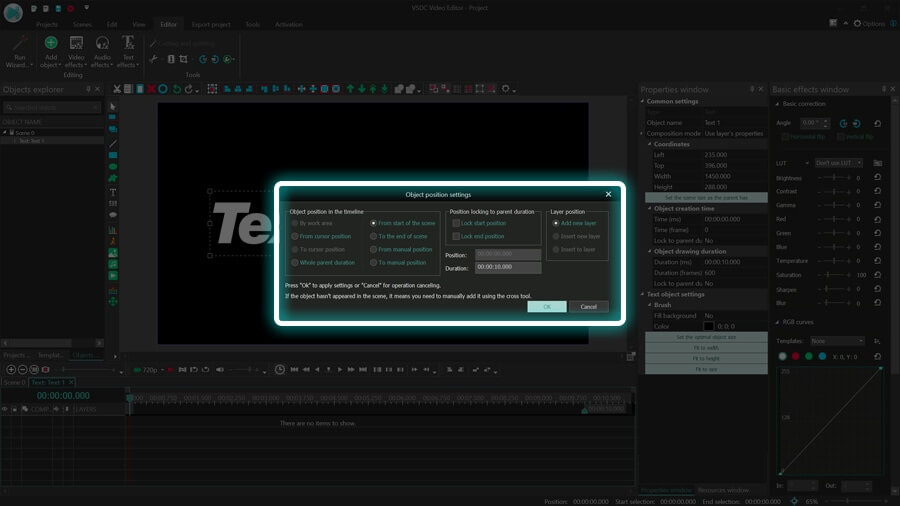
Before adding the text to the scene, you can import a background video or image using the Add object menu at the top. However, for the sake of this tutorial, we won’t do that. Once we’re done with the effect, we’ll export it as a text animation with transparent background, so that later we can use it as an overlay for any other project.
Step 2. Apply the glitch effect to the text
Once you’re done stylizing your text, double-click it on the timeline and open the Video effects menu. Proceed to Special FX ➝ Glitch. The pop-up window indicates that the effect will be applied from the playhead position on the timeline. This means you can make text glitchy from the moment it appears in the scene or from a certain moment later - based on where the playhead is.
When you hit OK, the Glitch effect layer will be added to the timeline. Go to the Properties window on the right to preview different effect presets and select the one you like the most. (If you can’t find the Properties window, make a right-mouse-button click on the effect layer, and select Properties from the menu).
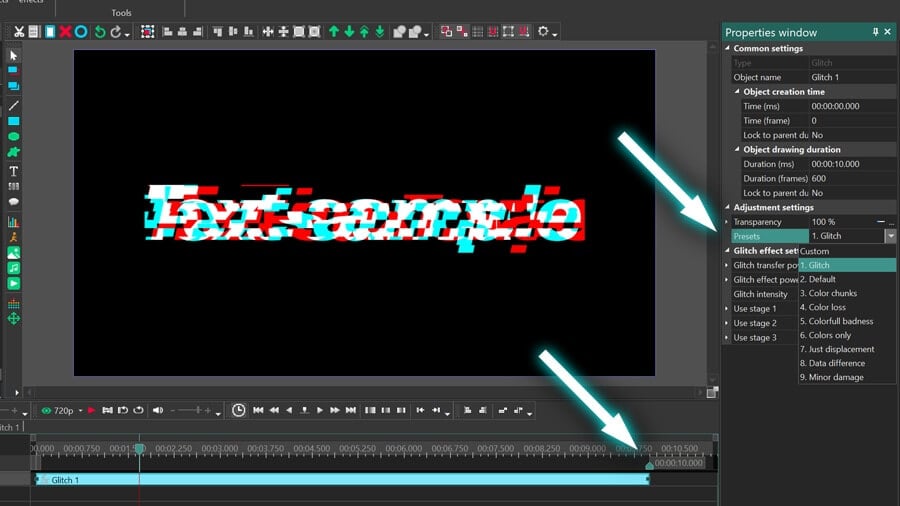
Each preset brings a different type of distortion. Feel free to try them all before making the decision, and keep in mind that you can apply several presets to the same piece of text as well. To do that, simply duplicate the effect layer on the timeline using the Ctrl+C; Ctrl+V hotkeys, place the duplicate under the original, and select a different preset for it.
You can also place multiple glitch presets on the same track so that one distortion type turns into another.
Adjust the glitch effect intensity
Presets are the quickest way to customize the Glitch effect in VSDC. However, you can perform much deeper customization and precisely achieve the look you want. For example, you can make the distortion gradually intensify as the video goes on. Just expand the Glitch effect power parameter in the Properties window and type 0% for the Initial value (leave 100% for the Final value).
As a result, glitching will be light at the beginning and come to its full power by the end of the effect’s duration.
Similarly, you can use the Transparency parameter to make the distortion effect gradually appear in the scene, while keeping it at full intensity. To learn more about other parameters, read a detailed guide to working with the Glitch effect in VSDC.
Step 3. Animate glitched text in your video
Most creators use glitched text for title intros or captions. Whatever the case is, it’s typically a brief appearance of the text in the scene. This means that apart from the glitch effect, you may want to apply some animation too. Let’s talk about the easiest options that can help you create a simple, yet full-fledged intro.
Add text movement
The free version of VSDC allows you to add a single-vector movement path which makes an object (a piece of text in this case) move from point A to point B. For example, suppose you want the text to slide in from the side of the scene like this:
To do that, place the text outside the scene, double-click on it, and hit Shift + M to apply the Movement tool. Next, using a mouse click, indicate where in the scene the text should stop moving.
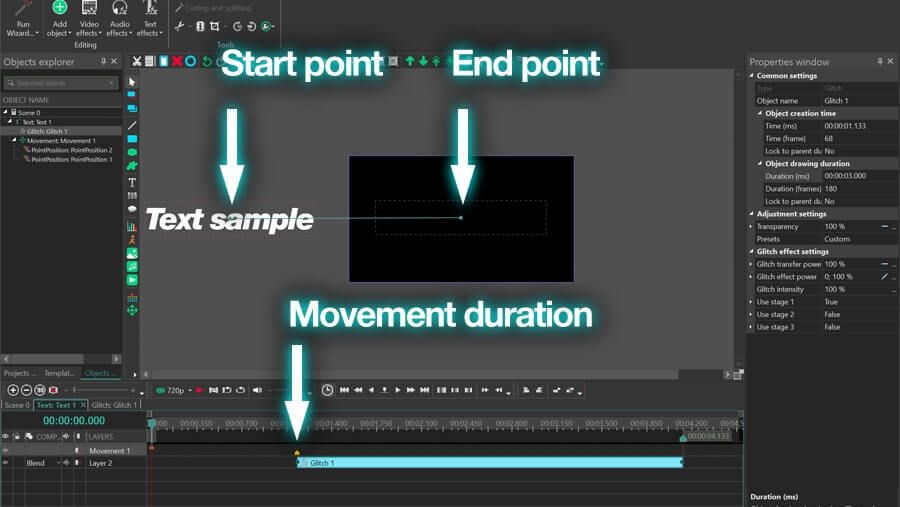
Keep in mind that the duration of the movement is indicated by the yellow marker on the timeline. The closer the marker is to the beginning of the timeline, the faster the movement will be. In our example, the movement duration is 2 seconds, and the glitch effect kicks in after the movement stops. Remember that you can manually change the duration of the effect on the timeline, as well as the moment when it appears.
Use text animation effects
In addition to movement, you may want to consider other animation effects designed specifically for text.
Under the Text effects menu at the top, you’ll find the following options:
- Recoloring – text color and opacity animation
- Shift position – symbols slide into the placeholder from a pre-selected area
- Glyph FX – symbols rotate or get zoomed in
Each effect is customizable, and if you’d like to learn how to use them, give a read to this guide.
Apply fade-in or fade-out transitions
Finally, to smoothen the appearance or disappearance of the text in the video, consider using transitions. There are plenty of them in the Video effects menu, however, for the sake of this tutorial, we’ll use the simple Fade out transition.
To apply the transition, go back to the main timeline tab and proceed to Video effects ➝ Transparency ➝ Fade Out.
By default, the Fade Out transition will be applied to the end of the text layer, but again, you can manually shift it on the timeline.
Export the glitched text animation
Ready to save your project? Then head over to the Export project tab and select the desired settings. The most popular option is Web ➝ YouTube, however, feel free to select whatever works for your goals.
If you need to export this animation with a transparent background, select PC ➝ MOV and hit the Edit profile button under the preview window. Then make sure to select the PNG lossless codec.
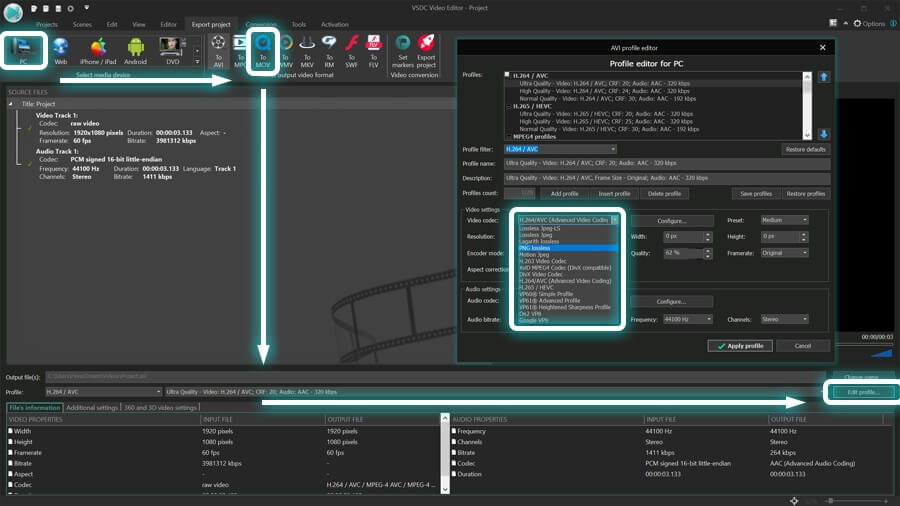
This way, you’ll be able to overlay your text animation using any video editing software supporting alpha channel, including VSDC itself.
And you’re done!
Searching for more ideas for your next project? Subscribe to our channel for weekly tutorials.
You can get more information about the program on Free Video Editor description page.
Watch us on YouTube
 / @VSDCFreeVideoEditor
© 2011-2026, www.videosoftdev.com, FLASH-INTEGRO LLC. Privacy policy | Terms of use | About us
All trademarks referenced herein are the sole property of their respective owners.
Copying any materials from this site allowed only with written consent of Site Administration.