")


News:
- Publicado por Amy Shao el 30 de junio de 2026 Descubre la nueva g...
- Publicado por Amy Shao el 11 de marzo de 2026 ¿Cuál es el mejor r...
- publicado por Amy Shao 19/11/25 Conoce la tan esperada actualización VSDC 10...
- Hola, soy Mattea Wharton, videógrafa de viajes de Seattle. Durante tres años luc...
Working with the Editor
Below is the scene editor window. It consists of the scene editor, scene control toolbars, the timeline and timeline toolbars. The scene editor allows you to adjust objects in space.
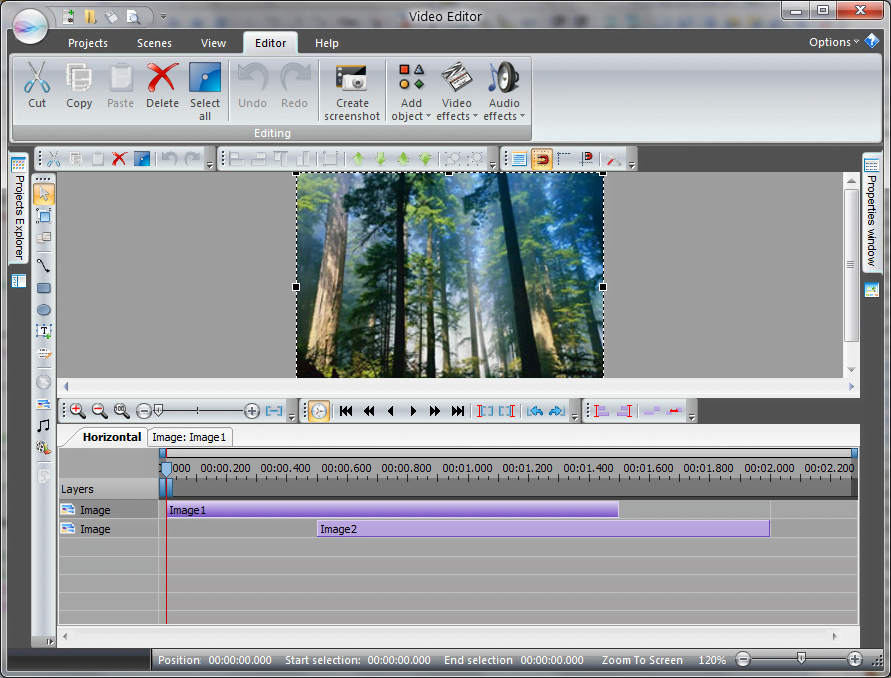
The scene editor contains all editable objects. You can select them, move, resize or remove from the scene. Double-clicking the object switches to the edit mode so you can add various effects to it. If it is a sprite, you can add other objects too. Double-clicking outside the borders of an object finishes the edit mode and switches to editing of the parent element.
Note that when you switch to the edit mode of an object, all other elements except child elements of that object become inaccessible. At the same time when you edit the scene, all child elements of the objects on this scene become inaccessible. This approach allows you to focus on objects while working with the scene, or on current object’s elements – when you are working with some object.
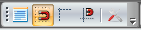
The “Editingtools” toolbar:

This toolbar allows you to add standard objects to the scene or apply a motion effect.
The “Standard tools” toolbar:

Allows you to cut, copy and paste objects from the clipboard. Also you can undo or redo changes.
The “Paper tools” toolbar:
This one allows you to turn on and off such options as: displaying the grid, snap objects to the grid, display borders, snap to borders, and also to specify grid spacing, type and color, and to adjust the border size.
The “Layout tools” toolbar:

The toolbar allows you to arrange objects by left, right, top or bottom border of objects. It also allows you to arrange object sizes and to change the display order. Additionally, you can group several objects together.
The “Zoom tools” toolbar:

The toolbar contains scene scaling controls. You can turn on automatic scaling to the size of the window (the working zone will automatically scale up or down to fit the size of the editor’s window; otherwise – scrollbars will be displayed). You can also set the scale manually with the slider.
You can show or hide these toolbars using the “View” tab and the corresponding elements.
The “Editor” tab:
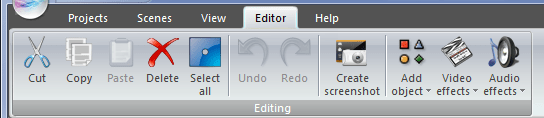
This tab includes all scene management elements. Using these buttons you can cut, copy, paste and remove objecs from a scene, and also add new objects and apply effects to them.
The “Create screenshot” button allows you to create a screenshot of the selected object. You can make a screenshot of an object with an effect applied to it too. To do this, switch to the object edit mode, select the desired effect and create a screenshot. After that, an image of the current object with all applied filters will be added to project’s resources.
The menu command “Add object - > Run files wizard…” runs the “File’s Sequence Wizard” that allows you to create a sequence of media files replacing each other one by one. You can read more about this Wizard in the “File’s Sequence Wizard ” section.
When you add any new object to the scene, a window appears asking you to specify the starting position of the object in the timeline and its duration.
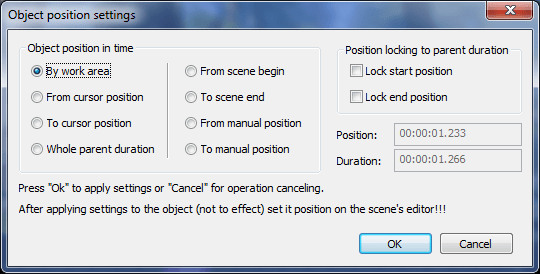
Possible options here are:
The last two options should make editing easier by automatically adjusting starting time and duration of child objects if their parent objects were changed. For example, you may want to apply some effect in the last seconds only regardless of the duration of an object. Another possible application is applying an effect to the entire object even if its duration changes, that is the duration of the effect should change as well.
This software can be downloaded from Free Video Editor description page.
Watch us on YouTube
 / @VSDCFreeVideoEditor
© 2011-2026, www.videosoftdev.com, FLASH-INTEGRO LLC. Privacy policy | Terms of use | About us
Todas las marcas comerciales mencionadas aquí son propiedad exclusiva de sus respectivos dueños.
La copia de cualquier material de este sitio solo se permite con el consentimiento por escrito de la Administración del sitio.