")


视频编辑器
使用免费软件制作和编辑从贺卡到公司简介等不同复杂程度的视频。可以剪切和合并视频文件,应用音效和视效,添加滤镜,进行图像校正,创建幻灯片秀、添加背景音乐。使用多彩色色键和高级属性设置可以将视频升级到专业水平。软件支持所有常用的视频和音频格式。
视频转换器
此应用程序针对转换视频文件的格式,支持几乎所有常用的视频格式(读取和保存均可)。此外,程序可以大大简化转码任务,使视频能兼容特殊的多媒体设备,如iPhone、Microsoft Zune或Archos。操作非常简单,软件具有现代化界面以及所有处理视频必须的功能。
CD音频截取器
此音频工具用于从CD截取音频轨迹并存为任何格式。支持几乎所有常用的音频格式。此应用程序也能够从FreeDB服务器中获得音频轨迹的信息,并自动改名及更新文件的标记。
 视频编辑器
视频编辑器 视频转换器
视频转换器 音频转换器
音频转换器 CD音频截取器

多功能
一套免费视频软件包含丰富处理工具的种类。

高速
应用程序采用高速高效算法,适合于单核和多核处理器

实惠
VSDC视频软件可年免费下载到Windows系统操作的PC和笔记本。
News:
- published Amy Shao 6/10/25 等待全新非凡体验的日子终于结束了!这次更新不只是又一个版本——而是VSDC 10.1! V...
- 这个节日季,迎接全新的开始!VSDC视频编辑器带来了最新的9.4版本。我们倾听了您的建议,专注于优化您最常用的工具,同时为明年更多创新功能奠定基础。 增強的...
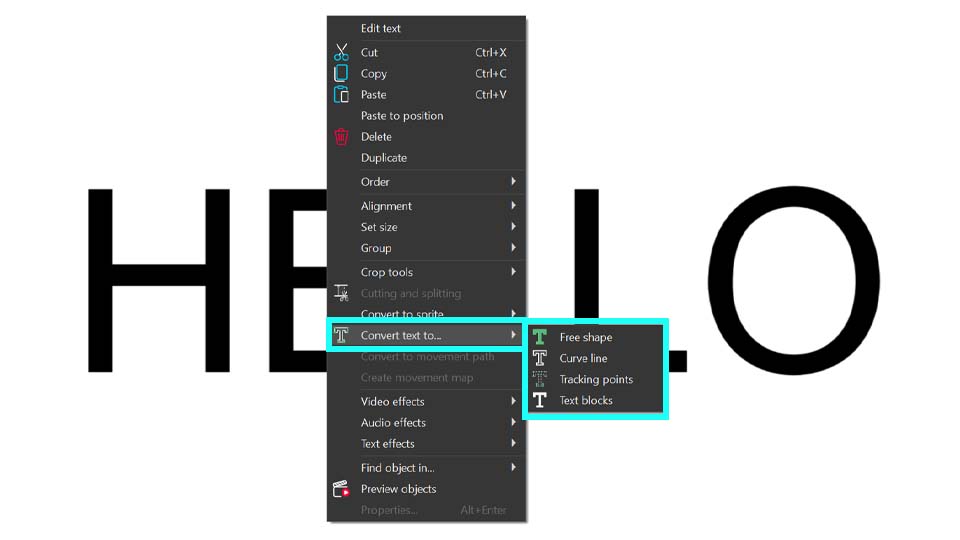
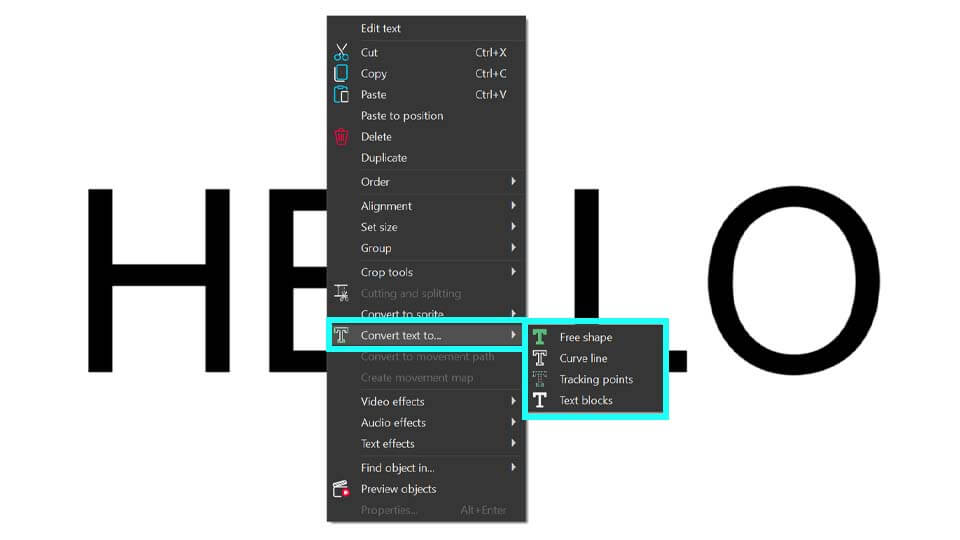
- 改变就是进步,而这个过程离不开您的参与。在仔细审阅您的反馈后,我们已经解决了多个关键问题,并引入了旨在提升您编辑体验的更新。 150+模板、文本转换工具...
- 简介 2024年,用于创建视觉特效的选择范围极其多样化,越来越难以确定顶级选择。 在这里,您可以找到一份关于顶级视觉FX软件的指南,帮助您为项目增添原创...
Instantly Add GPS Stats to Your Track Videos - Just One Click!
Your Track Video + GPS Telemetry: Easy One-Click Overlay!
 Download Video Editor 10
If you’re a PRO user who loves capturing adventures with GoPro, Insta360, Suunto, Garmin or TomTom devices or any smartphone tracking app, you’ll love the latest VSDC Video Editor 10.1 update!
Thanks to full support for the popular GPX format (GPS Exchange Format), VSDC now makes it easy to display your GPS route, speed, altitude, acceleration, tilt angle and more. Whether you're tracking a mountain hike with your Garmin watch or capturing a drone flight path, chances are you're working with a GPX file. This lightweight format stores tracks, waypoints and routes, making it incredibly versatile across GPS devices, fitness apps and even action cameras. With just a few clicks you can import your telemetry file, choose a display style and enrich your footage with dynamic motion graphics!
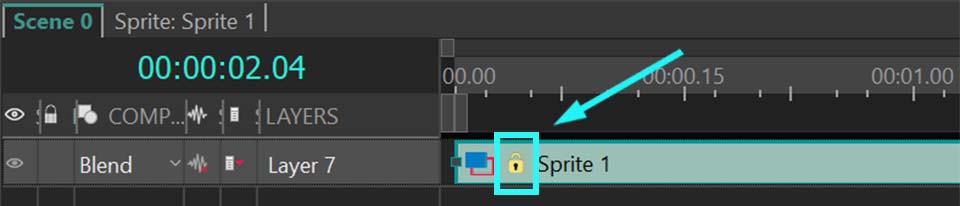
The settings for a trajectory created from this info in VSDC allow you to precisely control its appearance and animation. You can adjust the line thickness, select a brush style for the path and enable a gradient between two colors to visualize parameters like speed or altitude. The feature also includes options to display the current position along the route and automatically add text labels with point names. The timing of the route's appearance and the duration of its drawing animation can be manually adjusted, enabling synchronization with other elements in your project.
Why This Matters:
- Enhance storytelling by showing your journey’s data visually
- Perfect for athletes analyzing performance (cycling, drones, motorsports)
- Great for travel creators adding maps to adventures
- Ideal for educators explaining GPS concepts
This is a PRO feature but everyone can try it for free in VSDC! Download now and enhance your videos today.


"VSDC Free Video Editor is a surprisingly powerful, if unconventional video editor"
- PC Advisor

"This video editor gives you tons of control and editing power"
- CNet

"The editor handles many common formats and boasts a good deal of capabilities when it comes time to alter lighting, splice video, and apply filters and transitions in post production"
- Digital Trends
© 2011-2025, www.videosoftdev.com, FLASH-INTEGRO LLC. Privacy policy | Terms of use | About us
此处被引用的所有商标均为其各自所有者的专有财产。
只有获得网站管理员的书面许可,才能从本网站复制任何材料。