")


 视频编辑器
视频编辑器 视频转换器
视频转换器 音频转换器
音频转换器 Store templates
 Cloud
Cloud


快速开始:
- 导入视频
- 添加遥测(从GoPro提取或导入GPX)
- 选择模板(地图/速度/海拔仪表盘)
- 与视频同步,必要时调整 Time shift
- 导出
兼容性
设备:GoPro / Insta360 / Garmin / 手机GPX导出
VSDC 10.1 首次推出 GPS 可视化工具,并在 10.2 起进一步增强。借助它,你的运动/旅行片段可以变成更“有信息量”的旅行动感记录。 在 VSDC 中,你能获得许多剪辑软件里并不常见的 GPS 功能。
添加路线、叠加到地图、显示指南针、用可自定义仪表呈现速度、展示海拔高度曲线等——都能在 VSDC 内完成,操作直观、上手快。
下面我们详细看看具体用法。开始之前,有一个最重要的提醒:
请确保已安装 VSDC Video Editor 10.2 或更高版本!
添加 GPS 数据文件
首先将遥测数据(GPS 数据)导入 VSDC。流程很灵活,主要有两种方式。
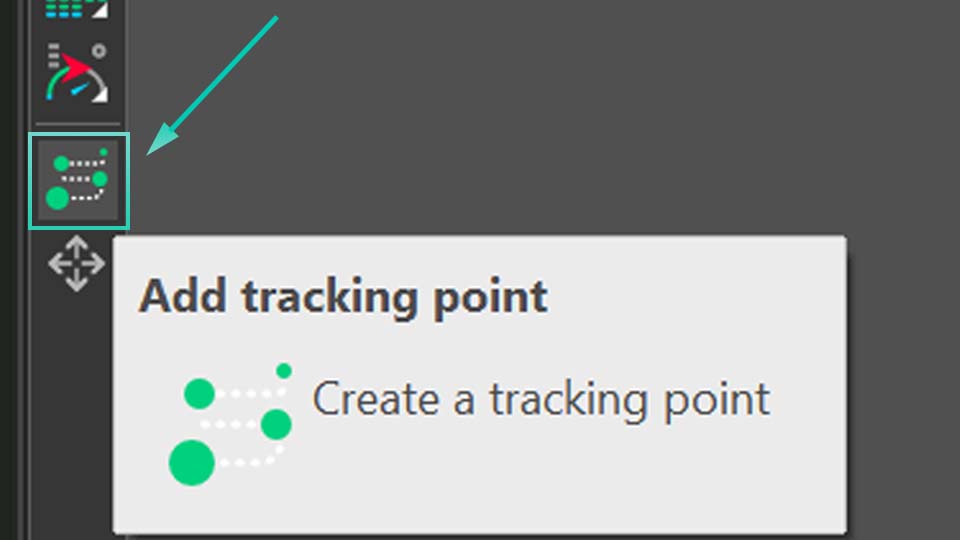
如果你有单独的 GPS 数据文件(例如运动相机或GPS记录设备导出的 .GPX),可以直接加载。 点击预览窗口左侧工具栏中的 “Add telemetry”,会打开菜单:GPS path、Telemetry widget、Telemetry text values、Telemetry templates。
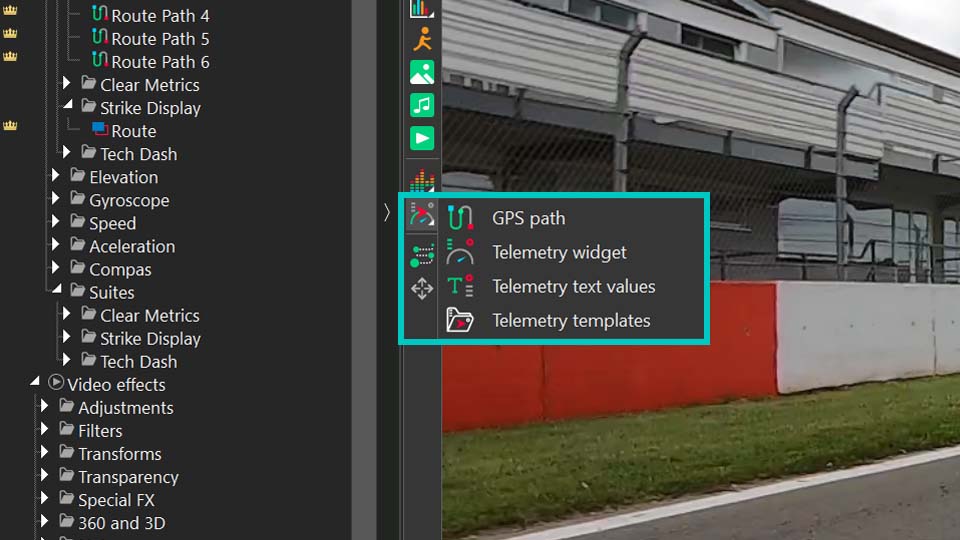
GPS path 是最直接的方式:从 GPX 文件可视化路线轨迹,适合只想展示路线本身并直接编辑路径叠加的场景。 接下来的 Telemetry widget 与 Telemetry text values 用于制作自定义仪表与数值显示(可参考相关视频演示)。 Telemetry templates 则会打开预设风格模板库。
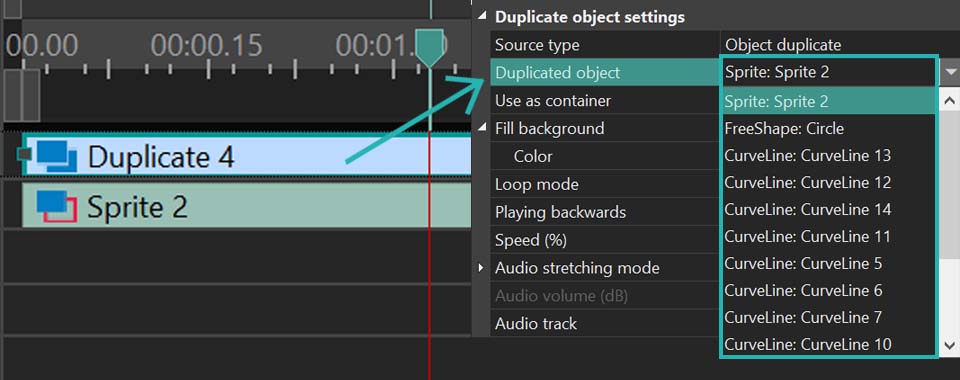
使用模板时,通常需要先在 Telemetry templates 中选择视觉风格,然后在时间线上双击生成的对象并点击其中的 GPS 对象。 在属性窗口里,通过 Telemetry resource 将对象关联到 GPX 文件,模板就会自动填充你的数据。
对于已开启 GPS 的 GoPro 等运动相机用户,流程会更简单:VSDC 能自动检测并提取视频文件中内嵌的遥测数据。 你只需正常导入视频,编辑器会提示是否提取 GPS 数据并保存到 Resources(资源)窗口,确认即可。
无论使用哪种方式导入,遥测数据都会成为一个独立资源。你可以在 Resources 的 “Telemetry” 区域找到它, 图标也会提示数据来源。将该遥测对象从 Resources 拖入场景后,VSDC 会打开 “Telemetry templates” 模板库, 你可以选择各种现成的仪表、图表和地图样式叠加到视频上。
设置遥测模板与仪表盘
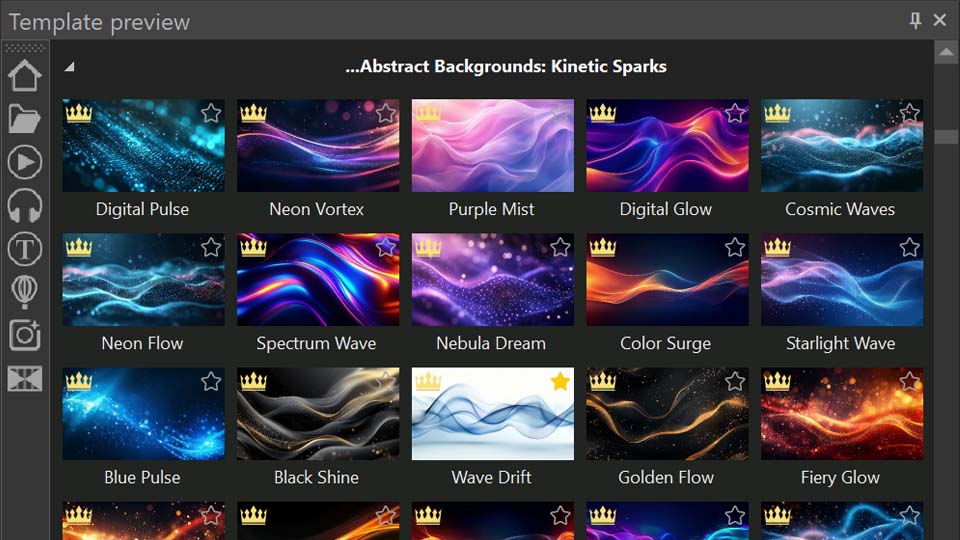
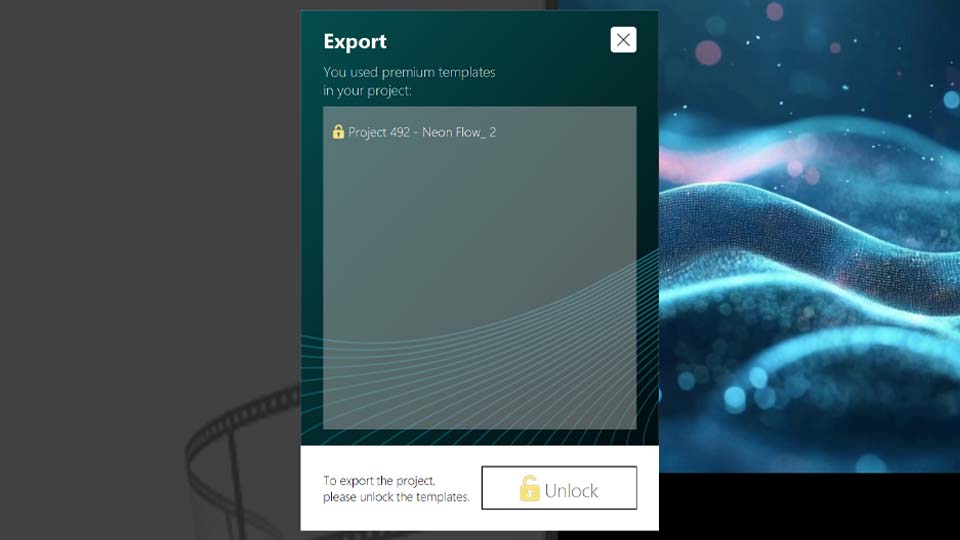
现在我们进入 Telemetry templates 窗口。这里有用于路径、速度、海拔等多种模板。 小提示:你可以在编辑器里免费体验这些功能,但导出带叠加效果的视频需要 VSDC Pro 许可。 如果使用 Premium 模板包,也需要购买项目中使用到的对应包。你可以单独购买,也可以通过 Bundle Offer 一次性获取全部合集。
访问我们的 Store 查看所有可用合集。
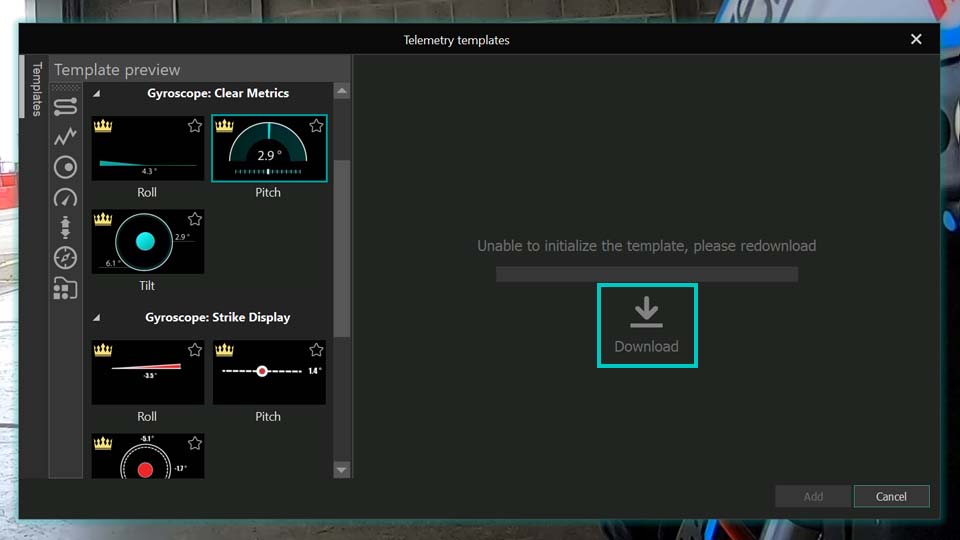
如果你选择模板后发现无法点击 “Add”,或预览中没有显示内容,请先点击模板里的 “Download”。 下载完成后即可添加到视频中。
你不必一次只添加一个模板——可以像前面提到的那样直接添加完整仪表盘。为了更清晰地展示不同设置, 下面我们使用一个仪表盘示例进行说明。
所有仪表盘都在 Telemetry templates 窗口的最后一个分类里。我们选择 “Mint” 风格。 你会看到多个传感器组件出现在场景中。请注意:每个组件都嵌套在 Template 对象内,而实际的 GPS 对象位于模板内部。 关键是确认每个 GPS 对象都链接到正确的 GPX 数据源:双击模板进入内部,找到 GPS 对象,在属性窗口里通过 “Telemetry resource” 检查/重新指定正确来源(你的数据/视频名)。
不同模板类型(速度表、路径等)都有可调设置。我们逐个看看。
GPS Path(路线轨迹)
首先是 Path。双击模板,再在时间线上选择 GPS 对象,打开属性窗口。 上方会有时长、位置等通用设置;我们重点看遥测相关设置区域。
你可以对路线外观做大量调整。第一项 Presets 可浏览不同的现成路径样式。
Telemetry resource 用于选择数据源。下一项很重要:Sync to video,用于把数据与视频同步, 尤其适合视频或数据在时间线上被裁剪/移动/编辑的情况。但如果你仅处理 GPX 文件本身(它不包含视频信息), 该选项可能被禁用。如果出现时间不匹配,请展开此项并调整 Time shift 以适配你的素材。 (Path 轨迹可能不显示 Time shift,但其他组件通常可用。)
接着是地图相关选项:你可以生成 Google Maps 链接定位拍摄地点,也可以加载地图并放在轨迹下方作为背景。 请注意,某些地图功能可能需要 API key。
之后是对路线轨迹本身的精细设置:Path mode 可选择显示为简单线条或填充图形;Stretch image 控制轨迹图像是否拉伸以适配框架。
如果不想在缩放时拉伸变形,请关闭 “Stretch image”。
你还可以调整线宽、起点位置、显示比例等。这些设置对制作“轨迹绘制动画”非常关键。
Use embedded time 在 GPX 含时间戳时很有用:开启后,标记点会按真实时间节奏沿路线移动(某些路段慢、某些更快)。 关闭则会以固定速度移动。若该选项不可用,说明文件不含时间信息或你未启用该信息。
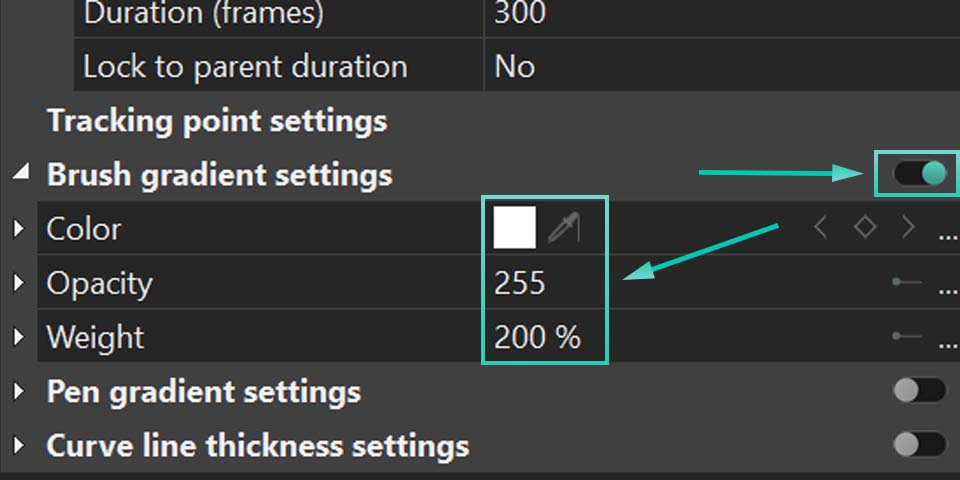
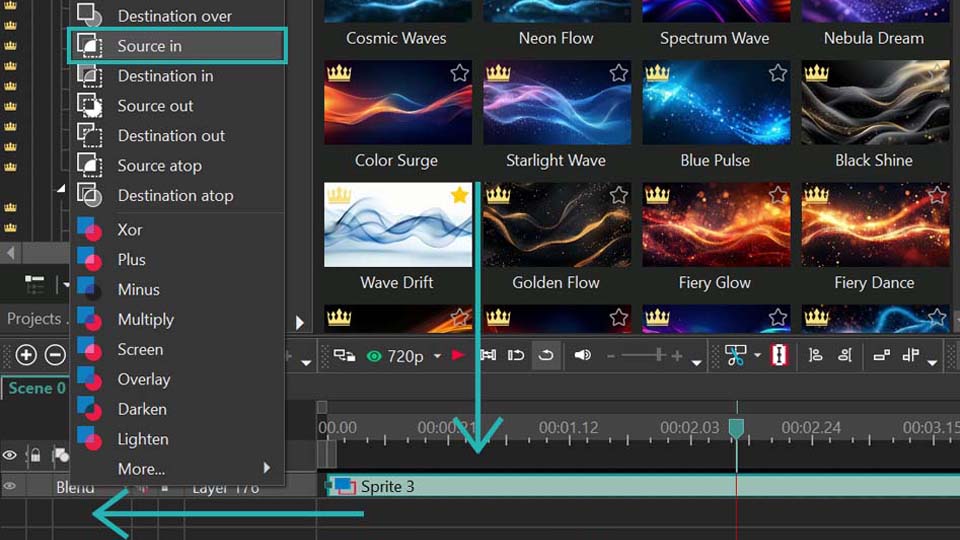
Enable gradient 可给路线添加渐变填充,并可按时间或海拔变化。看到选项右侧的小三角形时别忘了展开, 常常有额外设置(例如透明度)。
当 Enable gradient 为 None:Front color 控制路线颜色,Opacity 控制透明度(0 为完全透明,255 为完全不透明)。 Back color 适用于只显示部分路线(Start point of path + Length of path)时,为未激活部分设定颜色;不需要时把 Back color 的 Opacity 设为 0。
当 Enable gradient 为 By time 或 By elevation:Start color 定义起始(按时间)或低海拔(按海拔)的颜色; End color 定义结束(按时间)或高海拔(按海拔)的颜色。Gradient settings 可打开窗口选择预设或自定义渐变。
Marker settings 用于调整沿路线移动的标记点外观(大小、形状、位置等)。 如果 GPX 含航点名称等文本元素,text settings 可控制显示哪些文字以及显示方式。
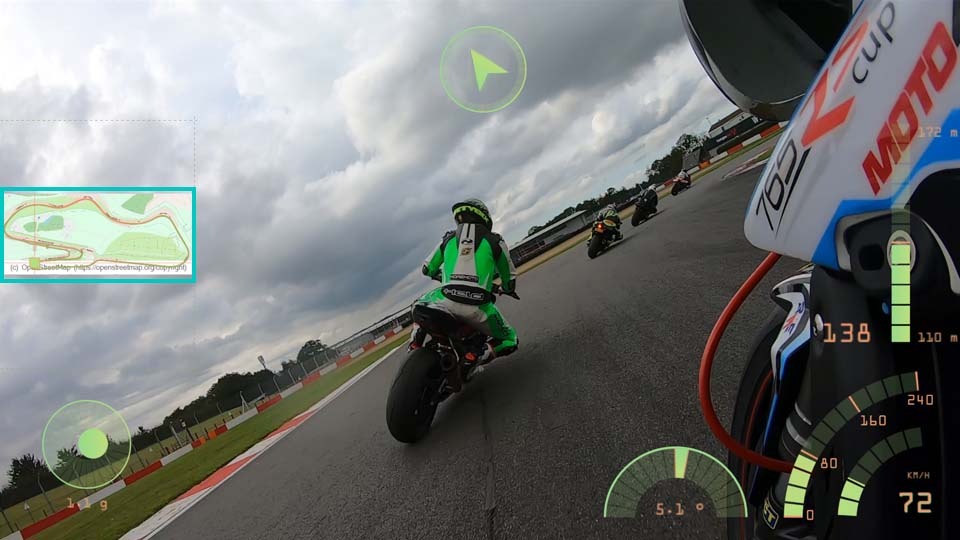
下面是这些设置能实现的效果示例:
想看更清晰的步骤演示,建议观看我们关于该工具的 YouTube 视频。
Altitude(海拔/高度)
仪表盘中的下一类模板是海拔。你会看到沿路线变化的高度曲线图。
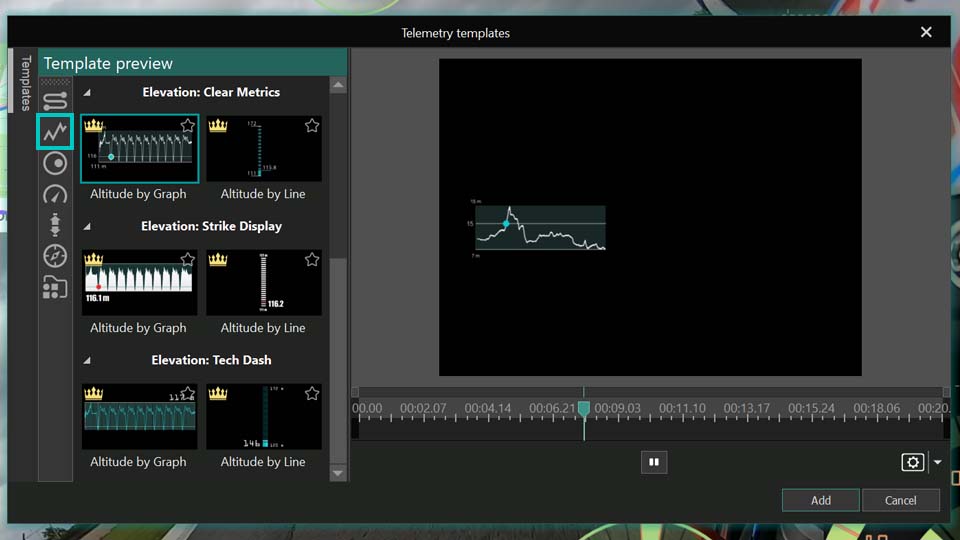
要进行自定义,点击模板后,双击时间线上的 GPS 对象,或直接双击画面中的高度图,打开其专用设置窗口。 许多通用设置与你之前看到的一致,便于快速上手。其中 Use 4th-order filter 可在数据记录不稳定时帮助平滑曲线。
Brush 可选择图表背景填充方式(透明或实色等)。 Telemetry metric 用于选择显示的指标:虽然该模板默认是海拔,但也可切换成速度等其他指标。 对于带单位的指标,Units 会出现,供你选择单位系统。
你还可以进一步处理数据:平滑、阈值设置、提升曲线质量、合并重复点等。 同时可选择数据源类型:预处理(raw)、仅应用 GPS 过滤的 raw,或原始记录数据等。 另外还可微调 echo filter,用于减少噪声或重复读数,让图表更干净。
在时间线上的遥测模板中,你还会看到 telemetry text 对象。点击后可在属性窗口中调整模板文字。 不仅是改文字:你还能调整位置、控制数值显示精度(小数一位/两位等)、启用文字效果,甚至使用 curve binding 做动态动画。
速度表、指南针、陀螺仪、加速度(G-force)
这些组件的核心设置与海拔图类似,差异主要在模板内部构成。 不同模板包含的图片、文本和图形层数不同,有的可自定义层级更多,但每个模板都能让你充分调整外观,做出符合你风格的仪表效果。
你还会注意到模板自带的一些特效(如 Zoom、Duotone 等)——它们同样可以调整。 想看完整示例,可查看我们的视频:演示如何导入 GoPro 素材并叠加仪表,以及如何编辑模板内置特效。
释放更多创作可能
这些 GPS 工具的玩法几乎没有上限。只要愿意尝试,调整组合就能做出很多不同效果。 建议先从预设开始,熟悉后再尝试制作你自己的速度表、指南针或任意自定义仪表盘。
想获取更多灵感?欢迎订阅我们的 YouTube 频道,获取教程、技巧与创意。
如需帮助,可随时联系 该Email地址已收到反垃圾邮件插件保护。要显示它您需要在浏览器中启用JavaScript。。
常见问题(FAQ)
Q1:哪些版本的 VSDC 支持 GPS 与遥测功能?
A:需要 VSDC Video Editor 10.2 或更高版本。GPS 可视化工具在 10.1 首次推出,10.2 提供了更丰富的功能。
Q2:使用 GPS 叠加功能需要 Pro 吗?
A:你可以在编辑器内免费体验所有 GPS/遥测功能,但导出带叠加效果的视频需要 VSDC Pro。部分 Premium 模板包也可能需要单独购买或通过合集获取。
Q3:可以在路线轨迹下方叠加地图吗?
A:可以。在 GPS Path 的设置中可以加载地图作为背景。某些高级地图功能(例如动态 Google Maps)可能需要你提供 API key。
Q4:能更改模板显示的数据吗?例如在高度图里显示速度?
A:可以。在高度图等组件的属性窗口中找到 “Telemetry metric”,即可切换显示指标(如从海拔切换为速度),“Units” 也会随之变化。
Q5:在哪里能学习制作自定义仪表与仪表盘?
A:请访问我们的官方 YouTube 频道。本文也引用了相关视频,介绍如何创建自定义组件以及处理 GoPro 素材。

 輸入項目尺寸的精確高度和寬度的指南
 使用快照工具創建漸變設計的靜止影像
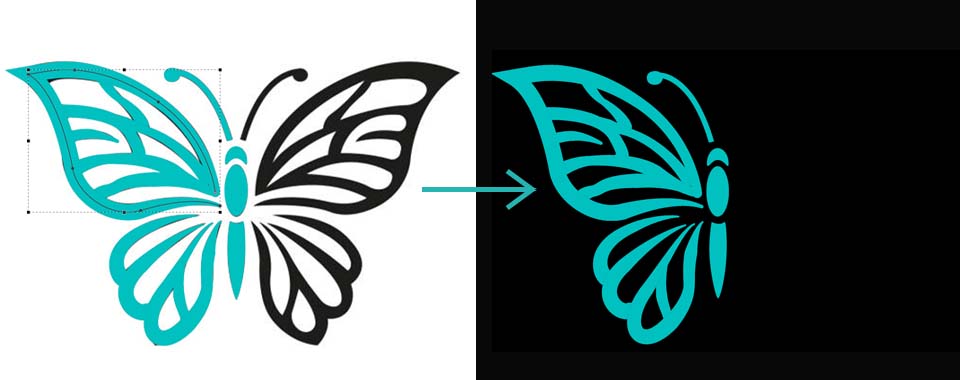


 / @VSDCFreeVideoEditor