视频编辑器

使用免费软件制作和编辑从贺卡到公司简介等不同复杂程度的视频。可以剪切和合并视频文件,应用音效和视效,添加滤镜,进行图像校正,创建幻灯片秀、添加背景音乐。使用多彩色色键和高级属性设置可以将视频升级到专业水平。软件支持所有常用的视频和音频格式。

解更多关于编辑器…

视频转换器

此应用程序针对转换视频文件的格式,支持几乎所有常用的视频格式(读取和保存均可)。此外,程序可以大大简化转码任务,使视频能兼容特殊的多媒体设备,如iPhone、Microsoft Zune或Archos。操作非常简单,软件具有现代化界面以及所有处理视频必须的功能。

解更多关于视频转换器…

音频转换器

音频转换器针对转换音频文件的格式,支持几乎所有关键的视频格式。应用程序也助于管理歌单、标记、能从视频文件中提取音频,并保存它为任何格式。

解更多关于音频转换器…

CD音频截取器

此音频工具用于从CD截取音频轨迹并存为任何格式。支持几乎所有常用的音频格式。此应用程序也能够从FreeDB服务器中获得音频轨迹的信息,并自动改名及更新文件的标记。

解更多关于CD音频截取器…

Multifunctionality

多功能

一套免费视频软件包含丰富处理工具的种类。

High speed

高速

应用程序采用高速高效算法,适合于单核和多核处理器

Affordability

实惠

VSDC视频软件可年免费下载到Windows系统操作的PC和笔记本。

How to use VSDC cloud service

Looking to work on your VSDC projects from anywhere? The VSDC Cloud Service is designed for you. This platform allows you to store, upload, download, edit and share files wherever you are. You can access and manage your projects and media from any computer with an internet connection and VSDC Video Editor installed. And guess what? VSDC Cloud isn't just for desktops — it's also at your fingertips on iOS devices.

VSDC cloud video services

Getting Started with VSDC Cloud Service

Before you can start using the features of the VSDC Cloud Service, you’ll need to subscribe and set up an account.

Note: The iOS version does not support subscribing to the VSDC Cloud Service, creating an account, modifying account details and recovering passwords. These actions can only be done through the desktop version.

To subscribe, head over to the official VSDC website and choose one of the six available subscription plans that best fits your needs. Once you've selected a plan, complete the purchase form with your personal information and the email address you want to use for registration. Follow the on-screen instructions to finalize your purchase.

After subscribing you can create your account by visiting the VSDC Cloud Service page. Use the email address you provided during the purchase to register. Then set up your username and password, review and accept the Terms of Use and EULA and click on the registration button to finish setting up your account.

For more details refer to our updated Help User Manual

Once your account is set up, you can sign in to it in both the desktop and iOS versions. To sign in to the cloud on your iOS device, simply open the VSDC Video Editor app, tap on "Settings" from the main screen and select "Cloud." Then enter the login credentials you created during registration.

Editing Your User Account (only in the Desktop Version) To modify your account settings, click on the three-dot icon in the upper right corner of the webpage and select "Settings" from the dropdown menu. In the "Profile" section you can update various details such as your password, avatar, username, first and last names, email and phone number. In the iOS version you can view your username and email under the "Account" tab, but modifications cannot be made there. Additionally, here you can monitor all devices currently logged into your account in the "Sessions" section of the desktop version. To protect your account, you can terminate any session by clicking the "X" next to the device. If you need to change language settings for the VSDC Cloud Service, you can do it on any page in the desktop version via the option located at the bottom of the screen. The iOS version is only available in English.

Main Tabs in the VSDC Cloud

In the desktop version of VSDC the menu bar features four main tabs. Below we'll explain each tab and where to find similar functions in the iOS version.

  1. Apps Tab

    This tab lists all VSDC products that are available for download. To view detailed information about a specific VSDC product and its system requirements, click on the "More" button. To start installing an application, click on the "Install" button.

    In the iOS version there is no such tab.

  2. Projects Tab

    In the desktop version all your projects are located in this app. For convenience, they are divided into the following categories:

    • My Projects: Displays all projects uploaded to the Cloud service.
    • Shared: Shows projects that have been made publicly accessible through sharing links.
    • Favorite: Contains projects marked as favorites (indicated by a "star").
    • Recent: Displays the projects that were recently accessed.
    • Trash: Contains projects that have been deleted.

    Selecting one of these categories opens a list of all projects stored there. For each project the following information is displayed: date and time added, file name and size. In the "My Projects" group only the file name and size are displayed.

    To view detailed information about a project (its project type, owner, upload date, last modification date and last access date), click on the icon "i" on the right to the desired project.

    In the iOS version you can see the projects uploaded to the cloud on the “Remote” tab located on the main screen of the VSDC Video Editor app on iOS.

  3. Support Tab

    If you experience any issues or have questions about the VSDC Cloud service, you can use the feedback form found under this tab to leave your message.

    In the iOS version you can reach our support team by selecting the “Report a problem” option in the Settings. Besides, you can suggest new features by tapping on the “Suggest new features” option also located in the Settings.

    Our support staff will respond to your inquiry via email within 72 hours.

  4. Files Tab

    This tab organizes all your media files uploaded from VSDC Video Editor into categories for efficient management:

    • My Files: Shows all files stored in the Cloud service.
    • Shared: Displays only the files that have been shared via generated links.
    • Favorite: Contains files marked with a "star" for quick access.
    • Recent: Lists the most recently accessed files.
    • Trash: Contains files that have been deleted.

    For all categories, except My Files, you can see file name, size and date and time of creation. In the “My Files” category only file name and size are displayed.

    To view more details about a file, click on the information icon “i” next to the file you are interested in. This will display details such as the file type, owner, upload date, last modification date and last access date.

    In the iOS version your files are located on the dashboard and divided into two groups:

    • Cloud Files: Shows all files stored in the Cloud.
    • Local Files: Displays files downloaded from the Cloud.

    Here you can see only file names, with no additional details.

Adding Files to the VSDC Cloud

To add files to the VSDC Cloud, click on the “Upload” button in the top left corner of the screen, then click on the upload window to select files from your computer or drag and drop them. Multiple files can be uploaded simultaneously. Once uploaded, the files will be marked with a checkmark and will appear in the “My Files” section.

In the iOS version you can add your files by tapping on the “+” icon in the right lower corner of the screen in the Home tab and selecting the “upload” option. After that you can add files from:

  • Photos: device photo library.
  • Files App: a tool for managing files stored on the device, iCloud and other cloud services.
  • App’s folder: local storage in the VSDC app if you have previously saved files from Cloud.

Creating Folders in the VSDC Cloud

To better organize your files, you can create a new folder. In the desktop version simply click on the “New folder” button located in the top left corner of the screen. A pop-up window will appear where you can enter the folder name. Once you've done that, click on "Create" and your new folder will be added to the "My Files" section.

In the iOS version the process is just as simple. Tap the "+" icon in the bottom right corner of the Home tab, then select "Create folder". After naming your folder, choose the files you'd like to add.

Managing Files in the VSDC Cloud

You can manage each file by clicking on the three-dot icon next to it or by right-clicking on the file in the desktop version. A menu will appear with various options, including:

  • Preview: Opens the file in a full-screen preview window, where you can flip the file horizontally or vertically, rotate the file clockwise or counterclockwise, reset any changes made, toggle the full screen mode, zoom in or out, download the file.
  • Share: This option allows you to share files with platform users or non-registered individuals. To generate a shareable link, click on "Get link".
  • Segmentation: This feature is used for partitioning an image into multiple regions based on object boundaries. Please note that this option is not available for .vproj project files. Learn more about the segmentation tool in VSDC Video Editor.
  • Download: This option starts the process of downloading the selected file to your PC.
  • Add to Favorite / Remove from Favorite: This feature is designed for quick access to frequently used or important files.
  • Rename: Selecting this option from the dropdown menu opens a window where you can enter a new name for the file.
  • Copy: This option allows you to create a duplicate of the selected file in one of your existing folders.
  • Move: The "Move" option allows you to transfer the selected file to a different folder within the platform.
  • Trash: This option is used to move the selected file to the Trash bin, removing it from the "My Files" list.

In the iOS version you have a slightly limited functionality compared to the desktop version. You can:

  • View folder contents.
  • Upload files to or from Cloud.
  • Copy, move, delete, rename your files.
  • Add to Favorite / Remove from Favorite.

Adding Projects to the VSDC Cloud

Adding projects to the VSDC Cloud service is directly connected to working in VSDC Video Editor PRO or FREE and requires an active internet connection. To add a project, follow these steps:

  • Install VSDC Video Editor if you haven’t yet and open it on your PC or iPhone.
  • Create a new project or open a previously created project in the video editor.
  • After making all necessary changes, go to the “Projects tab” and save the project to the Cloud using the "Save to Cloud" or "Save as to Cloud" option if you need to rename the project.
  • Enter your login and password for your VSDC Cloud account and click on "OK".
  • In the "Save as" window that opens, select the folder for saving the project and, if necessary, change its name in the "File name" field. Then click on Save.

The project will be saved in the Cloud with all resources (videos, images, audio) used to create it.

Note: If a project is added to the Cloud service similarly to adding a media file, and not through the VSDC Video Editor, all resources used to create the project will be lost (they will not be displayed in VSDC Cloud).

A project created in the VSDC Video Editor app on iOS can also be uploaded to the Cloud and then imported to any other iOS device. Project formats between iOS and Windows are not compatible, so, remember, that you can open a project only on the device on which it was created.

To export a project to the Cloud in the iOS version, you need to:

  • tap the project list icon on the VSDC Video Editor app's home screen.
  • tap the three dots at the bottom right corner of the project tile.
  • select “Save external”.

The projects uploaded to the Cloud can be seen on the “Remote” screen with names according to the “YYYYY-MM-DD_HH.MM.iosproject” template in the VSDC app.

Loading Projects from the Cloud to the Video Editor

To start working in VSDC Video Editor with a project saved in VSDC Cloud, follow these steps:

  1. Go to the Projects tab in the top horizontal menu of the editor and select the "Open from Cloud" option. Alternatively, click the program icon in the top left corner, then select Cloud >> Open Project.
  2. Enter your login and password for your VSDC Cloud account.
  3. In the "Open" window, select the desired project from the available folders. Once you've selected the project and clicked "Open," the project and all its resources will be loaded into the editor.

To import a project from the Cloud to VSDC Video Editor in the iOS version, you need:

  • Open VSDC Video Editor app on your iOS device.
  • Tap the “Video” option on the lower horizontal panel and select the “Cloud” option.
  • Choose the project from the appeared Home screen and tap on the three dots next to it;
  • Tap on “Select”;
  • Once your project is loaded from the Cloud, it will be added to the timeline.

Importing Media Files from the Cloud to the Editor

If you want to import a media file from VSDC Cloud Service into a project in VSDC Video Editor, you need to:

  1. Navigate to the Resources window.
  2. Right-click on an empty space in the window or click the plus icon at the bottom of the window and select the "Add from the Cloud" option.
  3. Choose the type of file you want to import: Videos, Images, Sounds or LUTs.
  4. Enter your login and password for your VSDC Cloud account.
  5. In the "Open" window select the file you wish to import.
  6. Drag and drop the file from the Resources window onto the Timeline to use it in your project.

In the iOS version this process is simpler, like loading projects from the Cloud to the Video Editor.

  • Open VSDC Video Editor app on your iOS device.
  • Tap the “Video” option on the lower horizontal panel and select the “Cloud” option.
  • Choose the media file you wish to import from the appeared Home screen and tap on the three dots next to it.
  • Tap on “Select”.

If you have any questions or encounter difficulties with VSDC Cloud, please contact us at 该Email地址已收到反垃圾邮件插件保护。要显示它您需要在浏览器中启用JavaScript。 or post your question on any of our social networks, for example, Facebook or X, where not only VSDC staff, but also users will be able to join your problem.

学习如何从视频中提取音频

如果您需要从视频中提取音频,这个过程可能比您想象的要简单。在这份详细指南中,我们将逐步向您展示如何使用各种可用工具完成此任务。

为了方便您快速导航,我们已经包含了一个菜单,您可以直接跳转到您需要的部分。

关键要点:

Arrow 从视频中提取音频的步骤

Arrow 音频提取的最佳工具

  • VSDC Free Video Editor
  • Adobe Audition
  • Audacity
  • FFmpeg
  • CapCut
  • VLC Media Player
  • QuickTime

Arrow 在线音频提取工具

  • Clideo
  • Audio Extractor
  • Kapwing

Arrow 结论

Arrow 常见问题

  • 我可以使用哪些类型的视频文件进行音频提取?
  • 提取音频时会丢失音质吗?
  • 我可以只提取视频中的一部分音频吗?

从视频中提取音频的步骤

首先,下载并安装 VSDC Free Video Editor。这款应用是适用于任何版本的 Windows 用户的绝佳选择。它不仅可以轻松从视频中提取音频,还提供了额外的功能,如如果音频包含多个流,则分离轨道,允许您将音乐与对话分开。此外,您还可以创建音频可视化,同时从多个文件中提取音频,并将音频转换为单一轨道或多个轨道。导出的音频可以保存为 WAV、M4A、OGG、MP3、AAC 和 AMR 等格式,还可以自定义输出参数,包括比特率、频率和通道。

安装 VSDC Free Video Editor 后,打开程序并通过选择空的项目开始一个新项目。在新场景中,有几种方式可以添加并从视频中提取音频。

How to create a new project in VSDC
  • 使用左侧垂直工具栏:在场景的左侧,找到添加声音选项。在弹出窗口中,选择您的视频或多个视频并点击打开。编辑器将自动提取音频并添加到场景中。 How to add audio in VSDC Positioning audio on the timeline
  • 使用功能区菜单: 在顶部功能区菜单中,转到添加对象并选择音频。在打开的窗口中,选择您的视频或多个视频,编辑器将立即提取音频并添加到场景中。 Adding audio manually in VSDC Selecting an audio file on the timeline
  • 拖放方法: 将您的视频拖放到场景中。右键单击它,选择切割和分开,并选择写出音鱼。如果您不需要编辑文件并希望将多个视频添加到场景中,将每个转换为单独的轨道,这种方法很有用。 Opening the window for exporting audio Location of the option to export audio in the Cutting and Splitting window

在场景右侧的属性浏览器中,您可以调整时间线上选定音频的各种设置,如速度、音量、播放方向,并可以通过循环樘式将文件拉伸到所需长度。如果文件包含多个轨道,您可以在属性窗口中选择所需的轨道。

Properties of the audio file selected on the timeline

VSDC 编辑器还提供了单独的音频效果,您可以应用它们来修改左右声道的声音。此外,还有一个音频可视化工具,可以帮助在场景上以各种形式显示音频节拍。如果文件中有不需要的部分,您可以切割分割它们。

List of available audio effects in VSDC

一旦对结果感到满意,转到顶部的导出项目标签。在源文仵字段中,右键点击音頻轨道并选择导出音频。选择您的设置,就完成了。

Exporting audio at the project export stage

注意: 如果场景上有多个文件,导出将把它们合并成一个文件。如果您需要将它们分开,请参考上述第三种添加文件到场景的方法

音频提取的最佳工具

VSDC Free Video Editor

如前所述,VSDC 是一款适用于 Windows 用户的优秀工具,适用于需要在一个或多个文件中分离视频和音频的用户。这款软件的优势包括其免费提供,支持几乎所有已知格式的导入和导出(包括 WAV、M4A、OGG、MP3、AAC 和 AMR),以及能够编辑文件、应用音频效果或创建独立音乐视频。所有这些功能都在一个地方提供。唯一的缺点是它不适用于 macOS。

Exporting audio from a video file

Adobe Audition

Adobe Audition 是另一个很棒的工具,兼容 macOS 和 Windows。它可以从单个或多个视频文件中提取音频,支持多种导入格式,并将它们转换为 WAV、MP3、AIFF、AAC、FLAC、OGG、WMA,还可以调整设置,如比特率、采样率和声道数量。主要缺点是它是一款付费工具,需要订阅 Adobe Audition 或整个 Adobe Creative Cloud 套件。

Exporting audio in Adobe Audition

Audacity

第三个有用的工具是 Audacity,适用于 macOS、Linux 和 Windows。它是免费的开源软件。然而,它有一个缺点:要将视频文件转换为音频,您需要首先使用第三方工具如 FFmpeg 将视频文件转换为音频格式。这里有一个快速指南:转到“文件” > “导入” > “音频”。选择您的视频文件,Audacity 将自动使用 FFmpeg 提取音频。要保存音频文件,请转到“文件” > “导出”,然后选择您想要的格式(WAV、MP3、AIFF、OGG Vorbis、FLAC、MP2、WMA)和设置。

Exporting audio in Audacity

FFmpeg

接下来,我们有 FFmpeg,像前一个工具一样,它是免费的开源软件,适用于 macOS、Linux 和 Windows。使用这个工具从视频中提取音频,您需要使用命令行:ffmpeg -i input_video.mp4 -q 0 -map a output_audio.mp3,其中 -input_video.mp4 是输入的视频文件,-q 0 表示音频的高质量,-map a 选择仅音频轨道,output_audio.mp3 是输出音频文件的名称。这种方法可能会让一些喜欢使用图形界面轻松选择选项的用户望而却步,但对其他人来说,这可能被视为一个优势。它支持多种导出格式,包括 MP4、AVI、MKV、MOV、FLV、WMV、WebM 和 MPEG。

Exporting audio in FFmpeg

CapCut

值得一提的另一款软件是 CapCut。它是免费的,可用于 Windows、macOS、iOS 和 Android,使其方便在 PC 和移动设备上编辑。像 VSDC 一样,您创建一个项目,将视频文件上传到时间线上,点击文件,并选择“提取音频”选项。然后,删除视频部分并将项目导出为 MP3 文件。主要缺点是它只支持一种导出格式。

Exporting audio in CapCut

VLC Media Player

VLC Media Player 是免费的开源软件,适用于包括 macOS、Linux、Windows、iOS 和 Android 在内的所有设备。要在 VLC 中从视频分离音频,请转到“媒体”菜单并选择“转换/保存”。在打开的窗口中,点击“添加”并选择您的视频文件。再次点击“转换/保存”,并选择转换设置(MP3、FLAC、OGG、WAV、AAC)。虽然易于使用,但主要缺点是转换设置选项有限,且无法编辑文件。

Exporting audio in VLC Media Player

QuickTime

最后一个工具是 QuickTime,它非常适合 macOS 用户。要在 QuickTime 中从视频中分离音频,请打开视频文件,转到“文件”菜单,选择“导出为”,然后选择“仅音频”。保存音频文件。缺点是只有 M4A 格式可用于导出,其他格式只在不再支持的 QuickTime Pro 中可用。此外,Windows 版本的 QuickTime 也不再支持。

Exporting audio in QuickTime

在线音频提取工具

Clideo

当涉及到在线从视频中提取音频时,我们首先要讨论的工具是 Clideo。这个过程很简单:在网络浏览器中打开 Clideo 网站,选择“提取音频”工具,上传您的视频文件,点击“提取”,等待过程完成。然后,您可以下载结果,格式包括 MP3、WAV、M4A、FLAC 和 OGG。然而,像所有在线工具一样,性能取决于您的互联网速度。此外,Clideo 的免费版本会在文件中添加水印,有文件大小限制,如果需要更广泛的功能,您可能需要 Pro 版本。

Exporting audio in the online tool Clideo

Audio Extractor

第二个工具是 Audio Extractor,这是一项完全免费的在线服务。要从视频中分离音频,只需将视频文件上传到 Audio Extractor 网站,选择导出格式(MP3、WAV、M4A、FLAC、OGG、MP2、AMR、WMA),点击 “提取音频”,然后等待处理完成即可。唯一的缺点是上传的文件大小有限制,而且由于文件是在服务器上处理的,因此可能会有数据隐私方面的顾虑。

Exporting audio in the online tool Audio Extractor

Kapwing

我们要介绍的最后一个在线工具是 Kapwing。Kapwing 提供免费版本和付费订阅。免费版本功能有限,并且在导出的视频中添加水印。要从视频中提取音频,请从您的设备上传您的视频文件或通过 URL 添加,进入编辑器,选择时间线上的视频,点击“音频”,选择“分离音频”选项。音频轨道将作为单独的元素出现在时间线上。然后,您可以以您希望的格式导出音频文件,尽管只有 MP3 和 WAV 可用。此外,在免费版本中,文件持续时间不能超过 7 分钟。

Exporting audio in the online tool Kapwing

结论

在考虑了各种工具和方法来从视频中提取音频,并评估了每个应用程序的缺点之后,我们选择了 VSDC Free Video Editor 作为最便利的工具,它具有许多额外功能。然而,最佳选择取决于您的具体需求以及您是喜欢在线工作还是离线工作。

如果您有任何进一步的问题,请随时通过 该Email地址已收到反垃圾邮件插件保护。要显示它您需要在浏览器中启用JavaScript。或我们在FacebookX上的社交媒体渠道联系我们

常见问题

些类型的视频文件进行音频提取?

这取决于您用于从视频中提取音频的应用程序。例如,VSDC Free Video Editor 支持几乎所有已知的视频格式导入。

提取音频时会丢失音质吗?

VSDC Free Video Editor 在从视频中提取音频时不会影响文件质量。只有当您将比特率设置得比原始文件低时,才会发生质量损失。

我可以只提取视频中的一部分音频吗?

是的,您可以使用 VSDC Free Video Editor 仅提取视频中的一部分音频。您可以使用切割和分割工具或直接在时间线上操作来实现这一点。

ai models segmentation

VSDC Segmentation AI Models

The segmentation feature in VSDC is a free tool designed to cut out or highlight static and moving objects in video. By using AI models, it accurately defines the boundaries of one or multiple objects. As a result, you can cut out an object and insert it into another video, perform color correction within its area, draw contours around characters in a Hollywood style, create individual masks, or apply them simultaneously with other editor options to create unique visual effects.

You can choose from 4 AI models:

  • FB-SAM: The standard model, characterized by high accuracy in recognizing objects in static images. However, it is more demanding on PC memory compared to other models and has lower performance.
  • SAM-HQ: The advanced model, which offers more precise recognition of small details. Compared to the first model, it works better with moving objects but also has low performance speed and high memory demands.
  • EdgeSAM: The enhanced model, which requires less RAM and has faster performance, making it suitable for working with long video files on PCs with limited resources. It provides good segmentation accuracy in most projects.
  • MobileSAM: Another enhanced model characterized by fast performance and low PC memory usage. It is a good alternative if EdgeSAM does not meet your needs.
    • Watch the tutorial below to learn how to use Segmentation AI models. Then, download one of them and try it for yourself.

如何在VSDC中使用AI视频分割

How to Use AI Video Segmentation in Free Video Editor

什么是视频分割?

AI视频分割是一种创新的视频内容管理方式,通过将视频划分为较小的片段或镜头来提取有意义的信息和特征。VSDC提供了基于AI模型的免费视频分割工具:AI可以准确识别一个或多个对象的边界并捕捉它们,以隔离或突出显示静态和移动元素。这样,您可以剪切对象并将其插入另一个视频,进行颜色校正,绘制人物轮廓,创建面具或应用其他编辑选项以创建独特的视觉效果。

今天我们将向您展示如何使用这个创新工具并提供示例。所以,下载VSDC视频编辑器,让我们开始吧!

添加分割

  1. 要开始使用分割功能,请将您的媒体文件添加到场景中。通过在时间轴上点击文件来选择该文件,并通过以下方法之一添加分割:
    • 右键点击选定的对象并选择 视频效果 >> 特效 >> 分割;
    • 前往編辑器标签页,导航至 视频效果 >> 特效 >> 分割.
  2. 然后您将看到对象位置的设置窗口。调整参数(如有必要)并按确认。
  3. 接下来,前往属性浏览器,在这里您可以调整下面描述的参数。

Adding the Segmentation effect.

分割的参数

在属性浏览器中有三个主要的参数组:

  1. 通用设置: 允许您指定添加对象的名称、对象创建时间、对象绘制持续时间以及是否绑定(或不绑定)到父对象。这些是可以应用于任何对象或效果的基本设置。
  2. 调整效果的设置: 对于分割工具不起作用。
  3. 分段参数: 本节允许您配置分割的独特参数。在本文下面,我们将使用这些参数。让我们在下一部分详细考虑它们。

How to find the segmentation parameters.

开始使用分割

  1. 如果您是第一次使用分割工具,在分段参数部分您最初将只看到两个选项:下载数据模型 和 导入数据模型。点击下载数据模型选项以进入一个网页,在那里您可以选择下载4种模型:
    • FB-SAM: 这是一个基础模型,在识别图片中静态对象方面具有高精度。请注意,与其他AI选项相比,它可能对PC内存的要求较高,并且运行较慢。
    • SAM-HQ: 这是一个高级模型,提供对小元素的精确识别。与移动对象的性能更好,尽管速度较慢且需更多内存。
    • EdgeSAM: 这是一个增强模式,内存要求较低,性能更快,非常适合在性能较弱的PC上处理长视频文件。它在大多数项目中提供良好的分割精度。
    • MobileSAM: 这是另一个增强模型,具有快速的性能和低PC内存使用率,是EdgeSAM的良好替代品。
  2. 下载所需的AI模型后,使用导入数据模型按钮将其导入程序。此操作将更新分段参数菜单,列表中的第一个选项现在将包括一个模型字段。此字段允许您通过点击右侧的图标选择、下载或导入新的AI模型。
  3. 下一步是选择处理方式。它决定在使用分割工具时是利用您的显卡(硬件)还是PC的资源(软件)。为了优化性能,我们建议设置硬件以减轻PC的负载。更多信息,请参阅故障排除指南

Reducing PC load when working with the segmentation effect.

要继续处理分割参数,您需要设置分割区域。下面是如何操作:

添加分割区域

  1. 选择属性浏览器中的添加区域按钮,并选择包含区域选项,以在场景中标记包含用于分割的对象的区域。
  2. 接下来,您将在预览窗口中看到定义分割区域的区域。如有必要,通过拉伸标记更改此区域的大小或通过鼠标拖动移动它。根据需要重复这两个步骤以创建多个分割区域。

    Adjusting the segmentation region.

  3. 如果添加的区域显示应该被排除的区域,请再次点击属性浏览器中的添加区域按钮并选择排除区域。将这个新区域放置在不需要的对象上以移除它。注意这个排除区域必须始终位于包含区域内并且比它小

添加区域 >> 包含区域 添加区域 >> 排除区域 Fine-tuning segmentation results.

精细调整分割结果

  • 输出: 定义分割结果的显示方式:
    Arrow综合: 在不修改对象本身的情况下,遮盖分割对象背后的所有内容。此外,它启用了反向蒙版选项,该选项显示背景,同时将分割对象变为不可见。
    Arrow阿尔法通道: 将分割对象高亮显示为白色,对象外的所有区域显示为黑色。它还具有反向蒙版选项,通过将对象涂成黑色和周围区域涂成白色来逆转这种效果。可以使用遮草颜色和背景颜色字段自定义蒙版的颜色。

    Switching between segmentation view modes.

    Applying a mask on the segmentation result.

  • Aspect correction: can be found in the 方面修正: 可在模型参数中找到。细化分割对象的轮廓以获得更精确的结果。

    Unadjusted segmentation edges.

    Aspect correction. Improving segmentation edges.

    正如您从上面的示例中看到的,当方面修正参数设置为是时,程序更精确地确定分割区域内对象本身的轮廓。如果结果没有改变或变得更糟,将其设置为否,并使用下面描述的工具来细化分割对象的轮廓。
  • 轮廓风格: 自定义分割的轮廓。这里可用的选项包括:
    Arrow: 不显示轮廓

    Cutting out the source object.

    Cutting out objects in a black and white mask.

    Arrow轮廓和对象 (适用于输出 = 综合): 显示分割结果及其轮廓。
    Arrow仅轮廓: 只显示轮廓。

    Viewing only the contour of the segmentation object.

    Setting contour on the alpha channel.

    Arrow轮廓覆盖 (适用于输出 = 综合): 在原始对象上显示分割的轮廓,轮廓将在预览窗口中显示。

    Adding a contour to the segmentation object.

  • 组合模式 (适用于轮廓风格 = 轮廓覆盖, 轮廓和对象): 提供各种轮廓显示风格,包括Destination over,在分割边缘建立轮廓而不越过对象边界,Source atop,轮廓直接覆盖在分割上,Darken,沿边缘构建轮廓并在内部创建一个较微妙的重复等。尝试这些风格,找到您喜欢的外观!
    Destination over

    Applying composition mode on the contour.

    Source atop and Darken:

    Working with source atop and darken composition modes on the contour.

  • 颜色 (适用于轮廓风格 = 轮廓覆盖, 轮廓和对象): 设置场景中所有分割区域的轮廓颜色,并包括两个额外参数:

    ArrowRGB 值: 帮助识别确切的颜色代码或将其修改为新的颜色。
    Arrow不透明度: 调整轮廓的透明度:如果设置为255,表示完全不透明的轮廓,如果设置为0—完全透明。您还可以在显示开始/结束时设置轮廓透明度的初值/最终值。

    Changing the opacity of the contour.

  • 厚度(适用于轮廓风格 = 轮廓覆盖, 轮廓和对象, 仅轮廓): 设置轮廓的厚度(以被编辑对象长度的百分比计算,范围从0%到10%)。您还可以在显示开始/结束时设置轮廓厚度的初值/最终值。

    Adjusting contour thickness.

  • 填充背景 (适用于轮廓风格 = 仅轮廓, 轮廓覆盖): 用轮廓颜色填充轮廓内的区域。

    Filling an object inside the contour with color.

  • 区域的轮廓: 单独为每个区域单独调整轮廓厚度。当设置为是时,单个区域设置中会出现额外的轮廓厚度选项。

    Activating the Contour thickness option.

    注意: 如果您之前已经使用前面描述的厚度选项调整了轮廓厚度,在修改单个区域设置时,它将使您的值翻倍。因此,建议将其设置为零

    Showing the contour for each region separately.

  • 显示所有轮廓: 启用为所有找到的区域绘制轮廓,否则只为最大的区域绘制。使用此参数时,建议切换到阿尔法通道以获得更精确的分割。
    此工具确保精确分割:当显示所有轮廓 = 是时,程序会突出显示/覆盖分割区域中未在分割过程中移除的原始编辑对象的所有最小点。识别这些细节后,您可以通过特殊点排除它们来精细化分割。有关这些点的更多详情,请参阅设置点以精细化分割区域的部分。

    Enabling drawing of contours for all areas found.

  • 后滤镜: 调整所有区域的分割轮廓。设置为是时,以下工具变为可用: Arrow中值滤镜: 通过去除噪声来平滑轮廓。您还可以在显示的开始/结束时设置轮廓滤镜的初值/最终值。此参数的值越高,轮廓越平滑。

    Smoothing the contour by removing noise.

    Arrow最小最大滤波器: 以像素为单位调整分割区域的大小。正值增加分割区域周围的面积,而负值减少它。轮廓的初值/最终值可以在显示的开始和结束时调整。

    Adjusts the size of the segmentation area in pixels.

    Arrow模糊滤镜 (适用于轮廓风格 = 无/轮廓和对象): 模糊分割区域的边缘。您还可以在显示的开始/结束时设置轮廓滤镜的初值/最终值。此参数的值越高,模糊轮廓越宽。

    Blurring edges of the segmented region.

    Arrow轮廓模糊等级 (适用于轮廓风格 = 轮廓和对象): 仅模糊分割区域的轮廓线而不影响边缘。在显示的开始和结束时可以调整初值/最终值以控制模糊级别。

    Blurring only the contour of the segmented area without the edges.

调整分割区域

本节允许使用添加区域按钮下的以下图标精确管理分割区域。主要选项是区域,允许您一次修改多个分割设置:

  • 颜色: 一个方形的彩色图标,为特定的分割区域设置颜色值,显示在区域的中心。

    Setting a region color.

  • 区域级别: 两个箭头(上和下),调整分割序列以将区域在列表中上移或下移。

    Changing the region level.

  • 更改区域模式: 一个带有两个方块的图标,为每个分割区域切换排除区域和包含区域模式。

    Switching between region modes.

  • 删除区域: 一个带有十字的图标,移除不必要的分割区域。

    Option for removing a region.

展开区域菜单会显示额外的选项,每个选项如下详述:

  • 启用: 激活或停用特定的分割区域。
  • 轮廓厚度 (适用于区域的轮廓 = 是): 调整选定区域的轮廓厚度。它还包含一个隐藏菜单,用于分别修改初值/最终值。
  • 后滤镜: 精细调整特定区域的分割结果轮廓。选项包括中值滤镜、最小最大滤波器和模糊滤镜,以及两个额外选项:
    Arrow轮廓模糊等级: 对轮廓应用模糊效果,可设置初值/最终值。
    A full list of region settings. Arrow门限: 为特定分割区域中的像素设置阈值。如果选定模式下的像素值低于此门槛,程序将“排除”该像素从特定区域的分割结果中。

    门限模式包括:

    • : 门限参数被禁用。
    • 数值: 设置精确的门限值,并根据需要调整门限的初值/最终值。
    • 量程: 一种更精细的模式,使用开始值选项限制分割对象中的每个像素,从而影响对象检测的有效性。开始值越低,对象检测越好,因为它本质上指示了找到对象的颜色。Delta值参数在设置了开始值的明显限制时平滑像素之间的过渡。 Value and Range threshold modes.
  • 坐标类型:
    • 相对坐标系: 定义如何为特定分割区域设置坐标:
      • 左方/ 右侧: 将垂直侧面设置为对象长度的百分比。
      • 上方 / 底部: 将水平侧面设置为对象宽度的百分比。
        在此,您还可以在显示的开始/结束时设置垂直/水平值的初值/最终值。
    • 整个图像: 对整个对象应用分割,不调整坐标,通过添加点按钮添加点来寻找分割对象。在这种模式下使用点的工作过程与下面描述的相同,而对象的搜索将围绕包含点进行,并借助排除点可以“切除”不必要的/有缺陷的区域。 Setting relative coordinates.

设置点以精细化分割区域

用于精细化特定分割区域的另一个工具是细化点。开始使用它们,请前往您想要实施细化的分割区域的属性浏览器,点击添加点按钮。在下拉菜单中,选择以下位置之一:

Arrow包含点: 添加点周围的区域将被包括在该区域的分割结果中。
Arrow排除点: 程序将从该区域的分割结果中剪切掉添加点(包括点本身)周围的区域。

Adding refinement points. Include and exclude segmentation points.

在出现的菜单中,您将看到点字段,您也可以调整设置,如更改点的颜色、修改其模式或删除它。如果展开点菜单,您可以访问额外的设置,例如: 启用:允许启用(=是)或禁用(=否)特定的细化点。

  • 启用: 允许启用(=是)或禁用(=否)特定的细化点。
  • 坐标类型:

    Arrow相对坐标系: 手动调整X和Y轴上特定细化点的坐标,其中初值/最终值 X / Y 是显示开始/结束时的坐标值。
    Arrow追踪点: 在某个视频片段中对对象进行分割。下面我们将详细考虑这个选项:

如何使用追踪点进行分割

  1. 首先,在时间轴上定位分割对象,并使用位于显示对象左侧的眼睛图标将其隐藏,以显示对象的原始状态。
  2. 从场景左侧的垂直工具栏菜单中选择添加跟踪点选项,并在您想要跟踪的对象上设置此点。 Creating a tracking point for adjustments.
  3. 右键点击预览屏幕打开下拉菜单并选择创建移动路径。在出现的窗口中,为未来的动作图命名并保存。 Tracking object motions.
  4. 在新的追踪窗口中选择您想要跟踪的对象所在的区域。然后点击开始分析按钮,程序将创建选定对象的动作图。如果您对结果满意,请点击应用编辑。 Starting motion tracking.
  5. 双击时间轴上的追踪点对象,前往编辑器标签并点击添加刈家 >> 动作 >> 移动路径。这将应用您创建的移动图到该点。 Linking the movement map to the tracking point.
  6. 通过将左侧图层上的眼睛图标返回,使时间轴上的分割对象可见。然后前往分割属性浏览器,找到您想要应用追踪点的点,并在坐标类型中设置追踪点。 Making segmentation points follow the motion of the tracking point.

导出您的项目

一旦您对分割的结果感到满意,前往导出项目标签并在Ribbon上选择所需格式。选择简介并根据需要调整导出设置,然后点击场景上方的导出项目图标。要了解更多关于导出文件的信息,请查看我们的视频指南

注意: 分割功能非常消耗资源,因此我们建议在导出阶段使用硬件加速。为此,您需要升级到VSDC Pro

结论

AI分割是一种旨在增强您的视频项目的创新工具。通过升级到VSDC视频编辑器的9.2版本来体验它。关注我们在FacebookX上的最新消息,并订阅我们的Youtube频道。如需任何帮助,请通过该Email地址已收到反垃圾邮件插件保护。要显示它您需要在浏览器中启用JavaScript。联系我们——我们始终在这里为您提供帮助!

VSDC

Store
Templates / Wedding Pack #1

Wedding pack #1

20 intro templates

Description

Access 20 unique wedding video templates that will help you combine your magical day's memorable moments into one masterpiece, preserving the day forever. Customize each template by adjusting colors, sizes, and animations, and incorporate your favorite elements into the main video.

Design details

Resolution: 3840x2160
File Size: 10.3MB
Text Placeholders: 74
100% Fully Customizable
Colors: Full-Colored
Duration: Up to 15 seconds

第1页 共31页

News

最佳特效软件

简介 2024年,用于创建视觉特效的选择范围极其多样化,越来越难以确定顶级选择。 在这里,您可以找到一份关于顶级视觉FX软件的指南,帮助您为项目增添原创性。不管您是在寻找高级合成工具、强大的3D动画功能,还是用户友好的界面,这篇文章将帮助您导航各种选项,找到最适合您需求和偏好的软件。 每个程序都根据其功能、易用性和适合不同水平用户的情况进行评审。您将了解到像

VSDC 9.2:AI 分割模型、300+ 转场、VSDC 云和新模板集

VSDC 9.2 已发布,带来了突破性的功能,例如新的AI 辅助分割工具,它能精确地移除对象、进行高级颜色校正,并提供多种效果以增强您的视频。此外,我们还推出了我们的最新服务...

黑白电影是如何上色的

您是经典黑白电影迷吗? 有没有好奇过如果它们是彩色的会是什么样子?许多电影制作人都曾有过同样的疑问,这也导致许多经典电影被彩色化。多年来,为黑白电影添加色彩的技术有了长足的进步--从手动为每个画面上色,到使用尖端软件自动为每个像素上色,大大加快了整个过程。今天,我们将了解彩色化的工作原理,探索我们喜爱的黑白电影是如何以饱满、生动的色彩重新呈现的,并学习如何在

2024年最佳在线视频编辑器:优点和缺点

July 15, 2024 published by Amy Shao 如今,视频内容的普及势头越来越猛,许多用户都面临着为个人和专业目的制作视频的需求。在从市场上提供的各种视频编辑器中选择一款合适的视频编辑器时,许多用户更倾向于免费的在线视频编辑器,因为这些编辑器可以实时处理媒体文件,而且与桌面版编辑器不同,不需要使用个人电脑的内部资源,几乎可以在任何设备上使用。 但是,在线视频编辑器的世界里是否存在陷阱呢? 我们的团队收集了...

添加转场效果的新方法、支持 RAW 和 BRAW 文件以及免费音频可视化

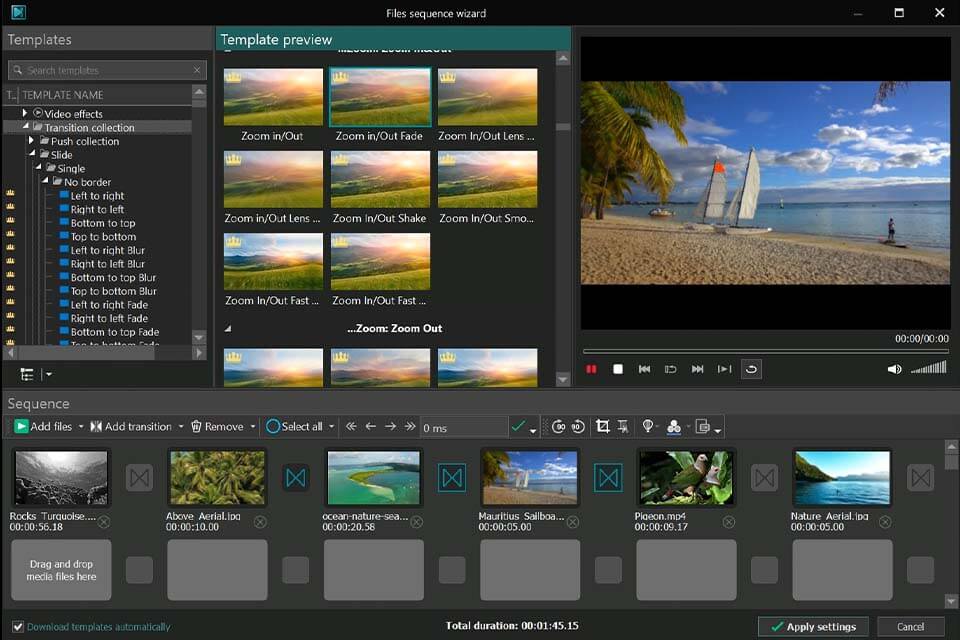
时刻已到:我们很高兴向您介绍期待已久的VSDC 9.1更新!新版本的增强功能将加速视频编辑,并使编辑过程更加便捷。 新的轉換添加方法、RAW/BRAW 支援和自由波形 本次更新有什么新鲜事?新的工作过渡方式将帮助您快速轻松地创建高质量的视频序列,而支持RAW和BRAW文件将确保视频的最高质量。 VSDC...

VSDC 8.3 – 100+ 个新模板,关键编辑窗口,AV1 和增强的 GUI

我们很高兴为您提供最新的 VSDC 8.3 更新!我们的团队一直在积极开发新版本,现在我们可以向您介绍所有变化,这些变化将使 VSDC 的工作更加方便。 VSDC...

2024 年免费视频编辑: 无需花太多钱即可释放您的创造力

May 7, 2024 published by Tom Shinat 在当今的数字世界中, 创造力占据主导地位。 它为个人和品牌提供了无限的可能性来吸引受众并留下持久的印象。 随着社交媒体平台处于沟通和产品消费的最前沿,...

2024年试用的6种Windows的iMovie替代品

June 15, 2024 published by Amy Shao 在Mac的所有视频编辑工具中, iMovie 是我们最喜欢的工具, 我们在此博客上多次推荐使用 iMovie。 iMovie 是大多数 Apple 设备上预装的软件,...

6 款最佳免费 3D 动画软件

三维动画制作是当代艺术中要求最高的技能之一,不仅需要了解三维模型,还需要对镜头构图、游戏引擎、渲染器和动画软件有深刻的理解。 在本文中,我们将重点介绍六款适用于初学者和专业人士的、与...

VSDC 8.2 - 支持代理文件, 彩色关键帧和矢量镜

我们很高兴地公布了备受期待的 VSDC 视频编辑器 8.2 更新。 我们的团队一直在努力工作, 确保这个版本充满了令人兴奋的功能和改进, 以提升您的编辑体验。...
 

免费屏幕截取器 Box

此应用程序能从桌面截取视频并用各种格式保存在电脑上。带着视频剪辑器,此应用程序作为创建PPT、教材和简介视频的神器。

解更多关于免费屏幕截取器


VSDC免费视频捕获器 Box

应用程序从外部设备捕获视频,并在电脑上存为自由格式。从视频调谐器、网络摄影机、撷取卡等均可捕获视频。

解更多关于免费视频捕获器…


Reviewed by


"VSDC Free Video Editor is a surprisingly powerful, if unconventional video editor"

- PC Advisor


"This video editor gives you tons of control and editing power"

- CNet


"The editor handles many common formats and boasts a good deal of capabilities when it comes time to alter lighting, splice video, and apply filters and transitions in post production"

- Digital Trends