")


- Publicado por Amy Shao em 11 de março de 2026 Qual é o melhor pre...
- publicado por Amy Shao 19/11/25 Conheça a tão aguardada atualização VSDC 10....
- Olá, eu sou Mattea Wharton, videomaker de viagens de Seattle. Durante três anos ...
- published Amy Shao 6/10/25 A espera por algo novo e incomum finalmente acabou!...
Como Criar um Efeito Fantasma Profissional com Modos de Mesclagem no VSDC Free Video Editor
Usando 'Modos de Mesclagem' você pode criar seus próprios efeitos visuais e filtros. Por exemplo, vamos ver como criar o chamado Efeito Fantasma.
Adicione um vídeo onde você gostaria de aplicar um Efeito Fantasma. Para que ele se ajuste perfeitamente à cena, selecione "Sim" na opção "Esticar Vídeo".
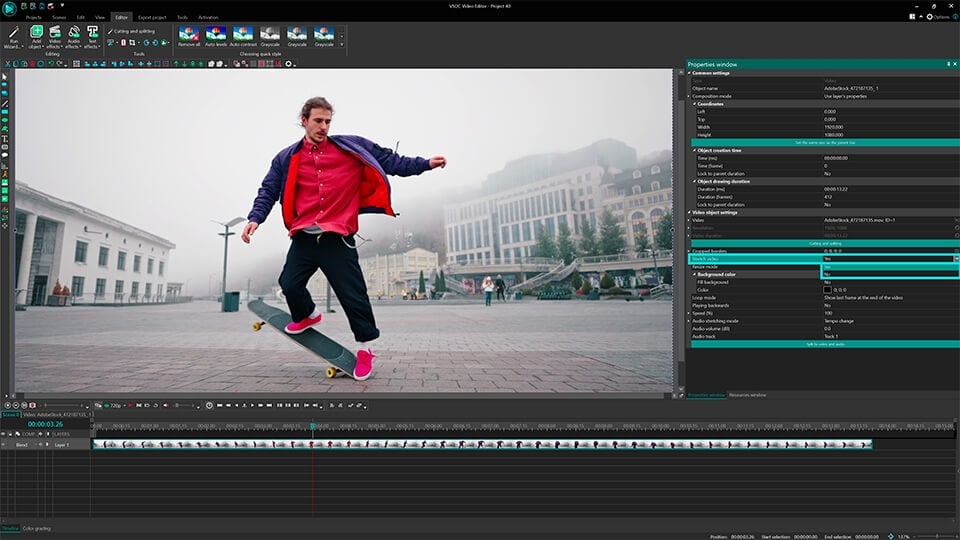
Dica: para fazer um vídeo se ajustar perfeitamente ao tamanho da cena, adicione o vídeo com a ajuda da opção Importar Conteúdo
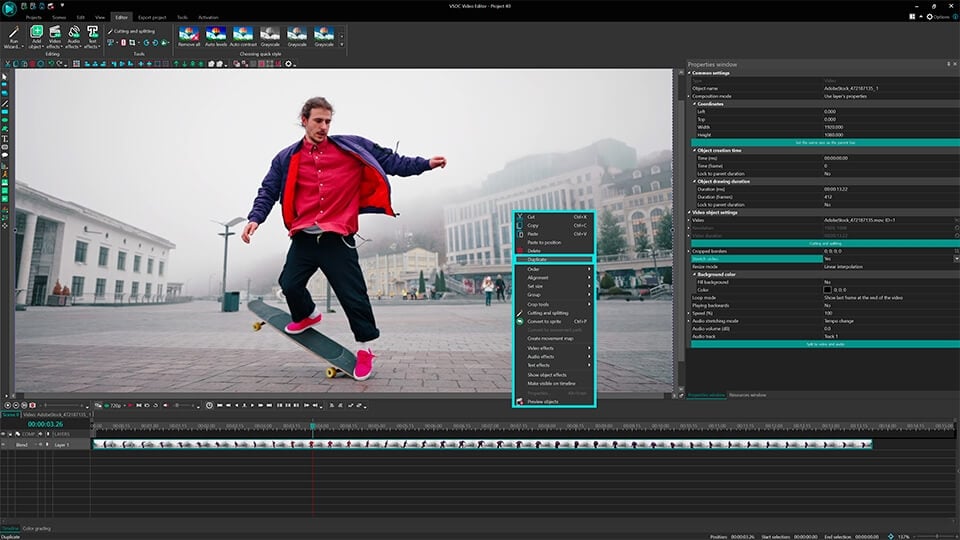
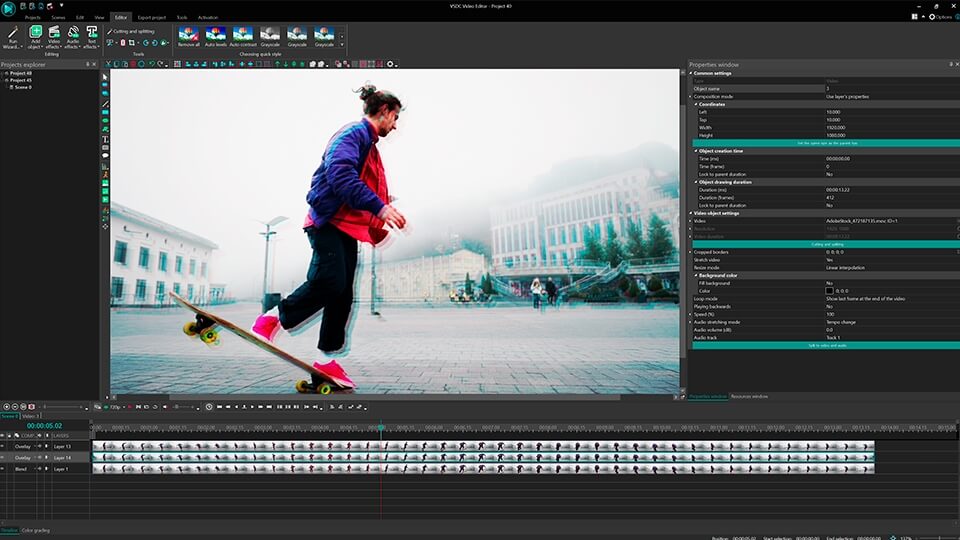
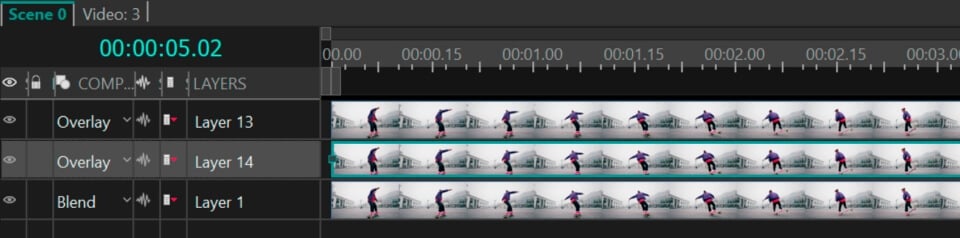
Devido a um efeito fantasma, um objeto obtém vários contornos de diferentes tipos e cores. Para alcançar este efeito, precisamos adicionar tantas camadas de vídeo idênticas quantas quisermos para que nosso objeto tenha contornos.
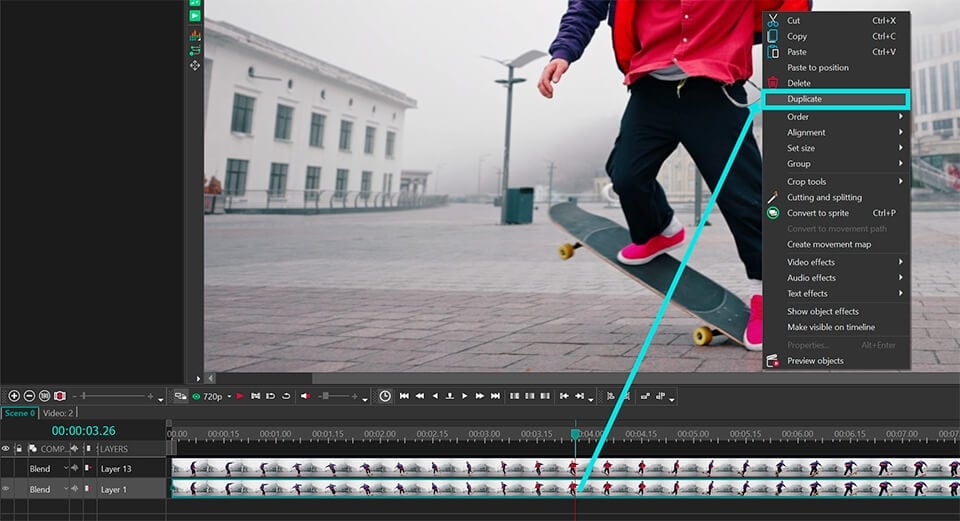
Todos os vídeos adicionados devem ser exatamente do mesmo tamanho. Por esta razão recomendamos fazer uma duplicata de cada vídeo inserido. Clique no vídeo original na cena com o botão direito do mouse e selecione a opção "Duplicar". A camada duplicada aparecerá instantaneamente na linha do tempo.
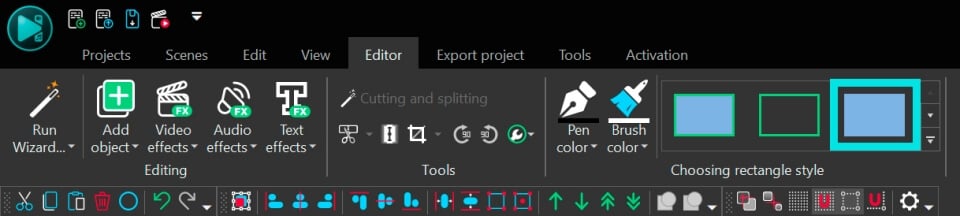
Agora vem a parte mais interessante: vamos aplicar um modo de mesclagem a uma de nossas camadas de vídeo. Clique duas vezes na camada à qual você vai aplicar um filtro (na linha do tempo) e selecione a ferramenta "Retângulo".
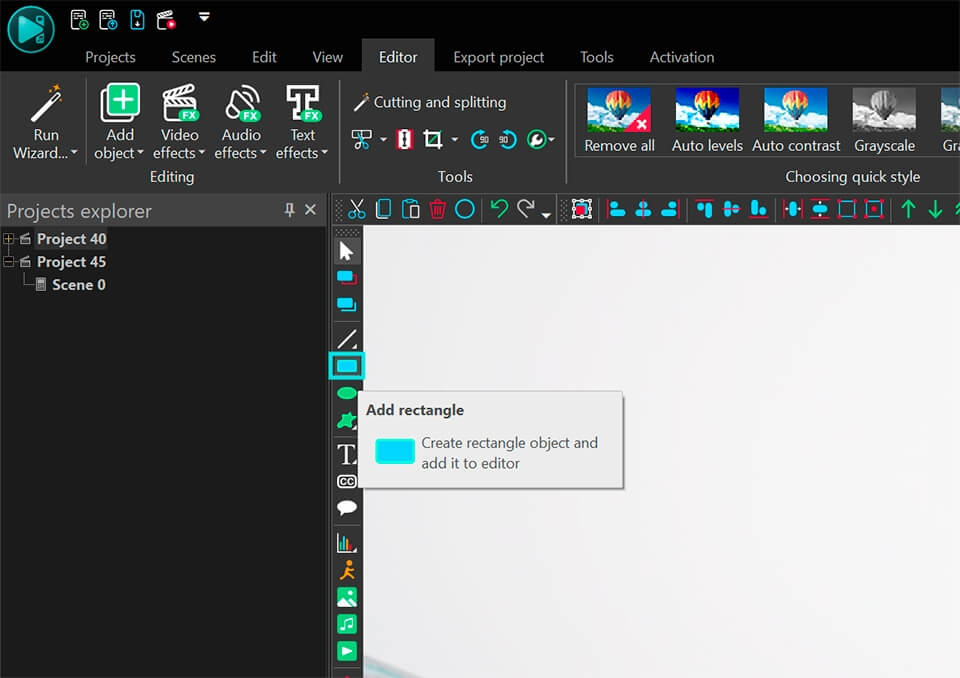
Posicione o retângulo sobre toda a cena
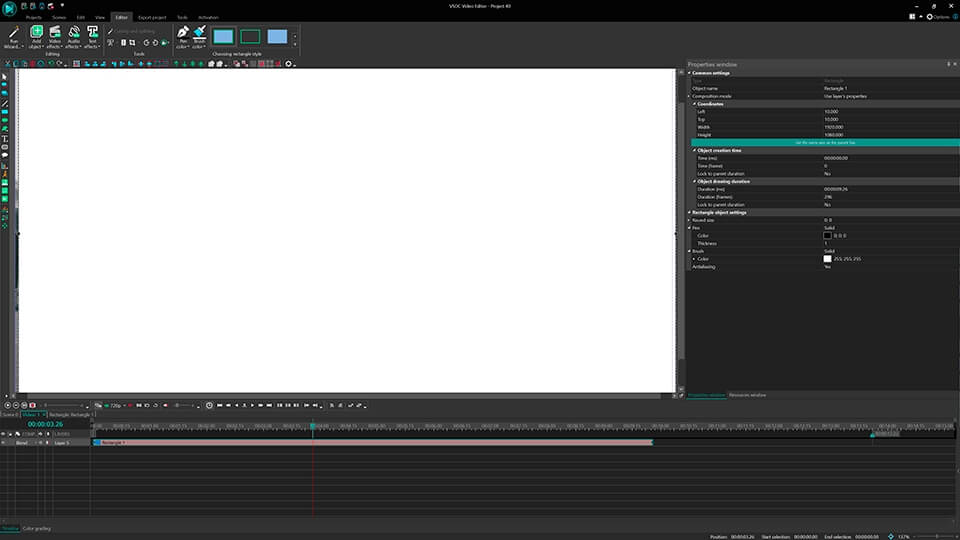
Dica: Escolha um retângulo sem molduras e preenchido com uma cor (3º tipo):
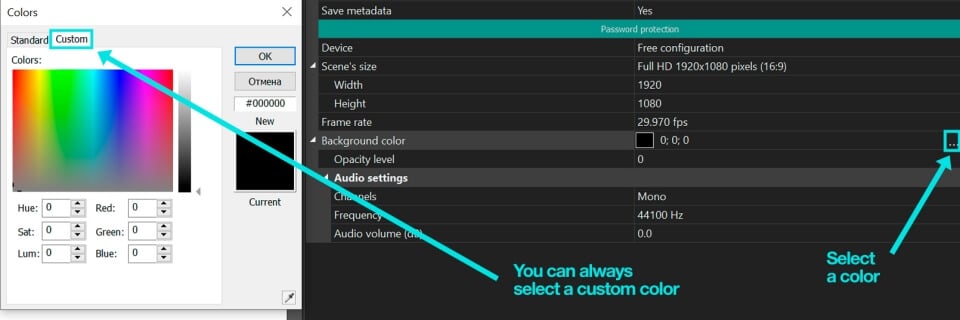
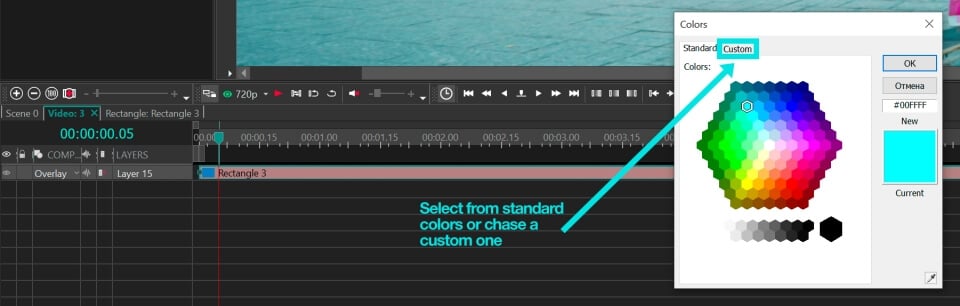
Vá para a janela "Propriedades" e escolha uma cor para seu retângulo.
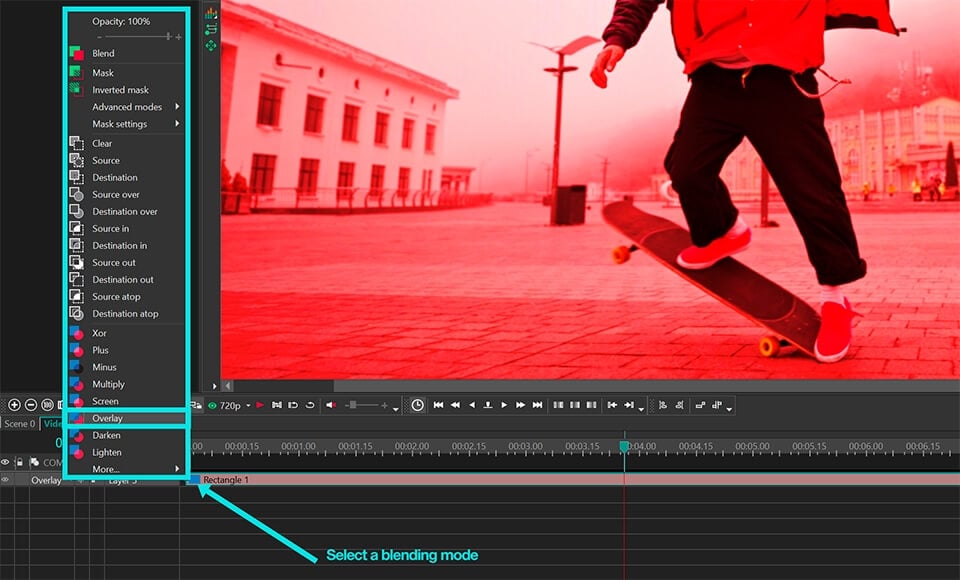
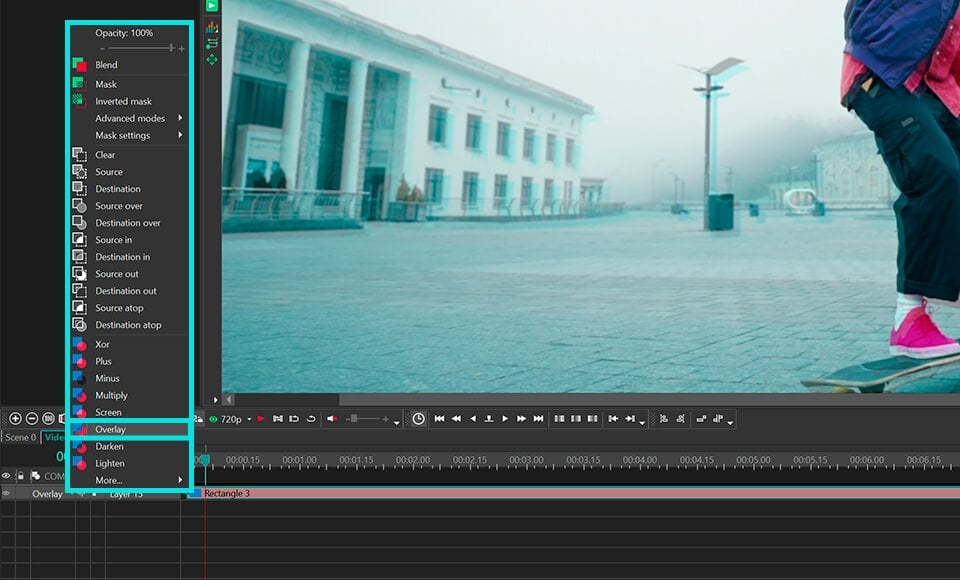
Para alterar o tipo de modo de mesclagem, selecione o tipo apropriado na aba "Modo de Composição".
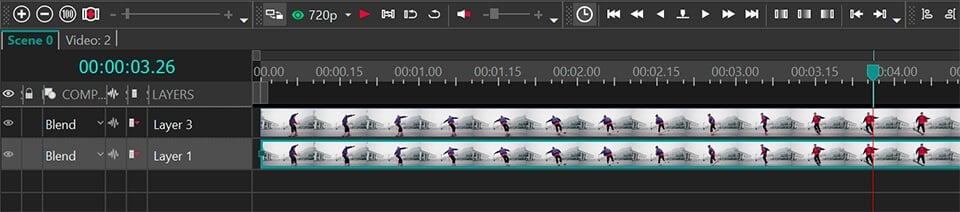
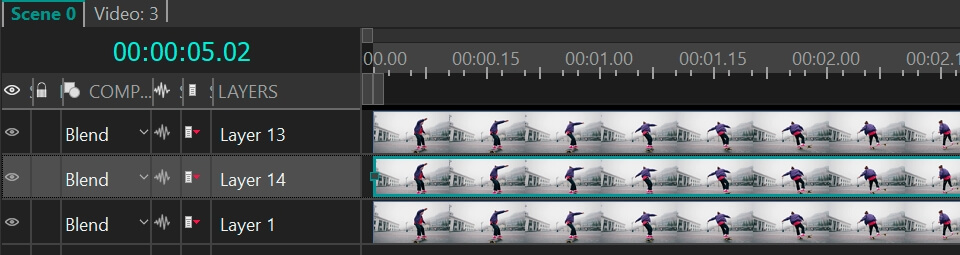
Para tornar o efeito fantasma mais impressionante, vamos adicionar mais uma camada (contorno). Vá para a cena principal, faça uma duplicata da camada mesclada e estique-a seguindo o tamanho da cena.
Clique duas vezes na camada duplicada e mude a cor do retângulo. (Por que temos um retângulo aqui? É simples - fizemos uma duplicata da camada mesclada onde adicionamos anteriormente um retângulo)
Dica: tente usar cores contrastantes para diferentes camadas para alcançar o melhor efeito
Selecione um dos modos de mesclagem do menu "Modo de Composição" na linha do tempo:
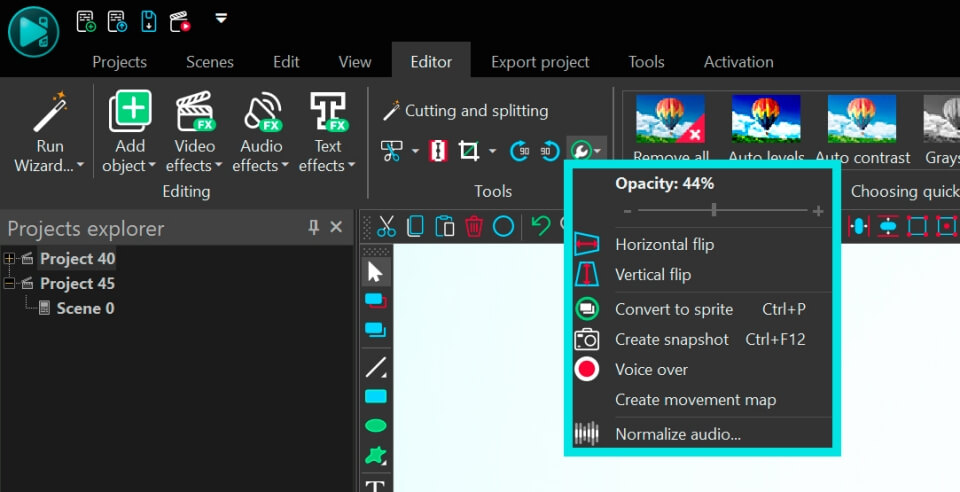
Para tornar nossas camadas mescladas mais fantasmagóricas, vamos ajustar sua transparência. Clique duas vezes em uma das camadas mescladas e diminua a opacidade do retângulo.
Agora vamos deslocar nossas camadas mescladas para alcançar um efeito multi-contorno do vídeo principal. Vá para a cena principal e mude as posições das camadas simplesmente arrastando e soltando as camadas com o mouse.
Dica: Varie os modos de mesclagem e a opacidade na cena principal para alcançar o melhor resultado.
Perguntas Frequentes
1. O que é um modo de mesclagem?
Um modo de mesclagem é um efeito especial que determina como as cores de um objeto na camada superior irão interagir (mesclar) com as cores de um objeto na camada inferior. Sem um modo de mesclagem, o objeto na camada superior simplesmente cobriria o objeto abaixo dele.
Para clareza, considere um exemplo com tintas: desenhamos um sol amarelo, depois desenhamos um céu azul sobre o sol. Com um modo de mesclagem, a tinta amarela do sol se misturará com a tinta azul do céu. Como resultado, o sol se tornará verde. Sem um modo de mesclagem, o céu azul simplesmente cobriria o sol amarelo, e o sol não seria visível.
2. Qual é a diferença entre Opacidade e Modo de Mesclagem?
O parâmetro Opacidade é usado quando você precisa tornar um objeto na cena transparente ou semi-transparente. Neste caso, as cores do objeto transparente e do objeto visível através dele não interagem de forma alguma.
O Modo de Mesclagem é usado quando você precisa que as cores dos objetos interajam entre si, criando no processo uma nova cor ou efeito. Trata-se menos de transparência e mais de mistura de cores entre as camadas.
3. Onde exatamente fica o modo de mesclagem no VSDC?
Para encontrar o modo de mesclagem e aplicá-lo a um objeto (camada), siga estes passos:
Opção 1: Para um objeto
- Selecione o objeto na linha do tempo ao qual você quer aplicar o modo.
- Vá para a janela de propriedades deste objeto e encontre o parâmetro "Modo de Composição".
- Defina o parâmetro "Modo de Composição" para o valor desejado.
Opção 2: Para uma camada
- Localize o parâmetro "Modo de Composição" para a camada desejada na linha do tempo. Por padrão, ele está definido como "Blend" (Mesclar).
- Clique com o botão esquerdo na seta ao lado de "Blend" para abrir o menu suspenso.
- Selecione a opção desejada no menu suspenso.
4. Apliquei um modo de mesclagem, mas nada mudou. Por quê?
Os modos de mesclagem só funcionam quando os objetos se sobrepõem. Se seu objeto está em um fundo vazio ou transparente, você não verá o efeito. Certifique-se de que há outra camada com vídeo ou imagem sob seu objeto.
Obtenha o VSDC Free Video Editor - software de edição de vídeo poderoso com recursos avançados. Perfeito para criadores do YouTube, vídeos para redes sociais e projetos profissionais. Saiba mais sobre os recursos.
Watch us on YouTube
 / @VSDCFreeVideoEditor
© 2011-2026, www.videosoftdev.com, FLASH-INTEGRO LLC. Política de privacidade | Termos de uso | Sobre nós
Todas as marcas comerciais mencionadas neste documento são de propriedade exclusiva de seus respectivos proprietários.
A cópia de qualquer material deste site é permitida apenas com o consentimento por escrito da Administração do Site.