Como Transformar e Animar Texto com VSDC
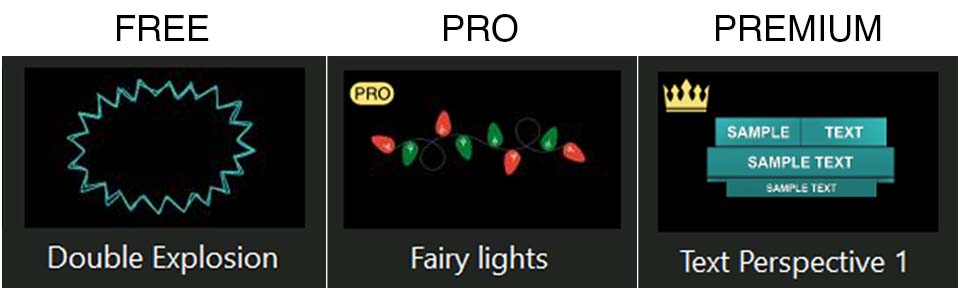
Se seus títulos precisam de um impulso visual para chamar a atenção, este artigo é para você. Mostraremos como alcançar resultados impressionantes com nossa ferramenta de conversão de texto, introduzida pela primeira vez no VSDC 9.3. Com esse recurso poderoso, você pode criar uma variedade de animações de texto, incluindo transformação de letras, revelação de texto, efeitos de contorno, animações de luz e muito mais. As possibilidades são infinitas, dependendo da sua criatividade e de como você ajusta as configurações. Prefere um caminho mais rápido? Experimente nossos presets e pule os ajustes completamente.
Pronto para se aprofundar? Continue lendo para descrições detalhadas.
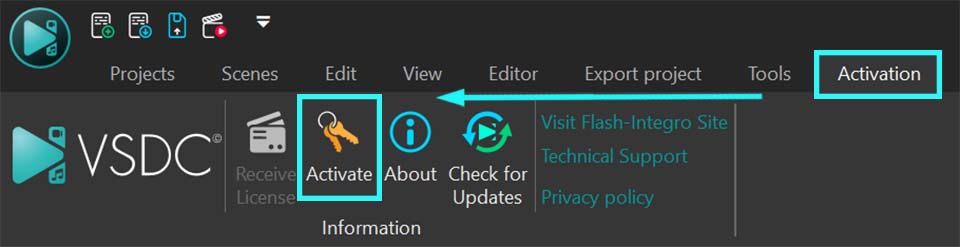
Certifique-se de ter a versão mais recente do VSDC Video Editor instalada!
Primeiros Passos
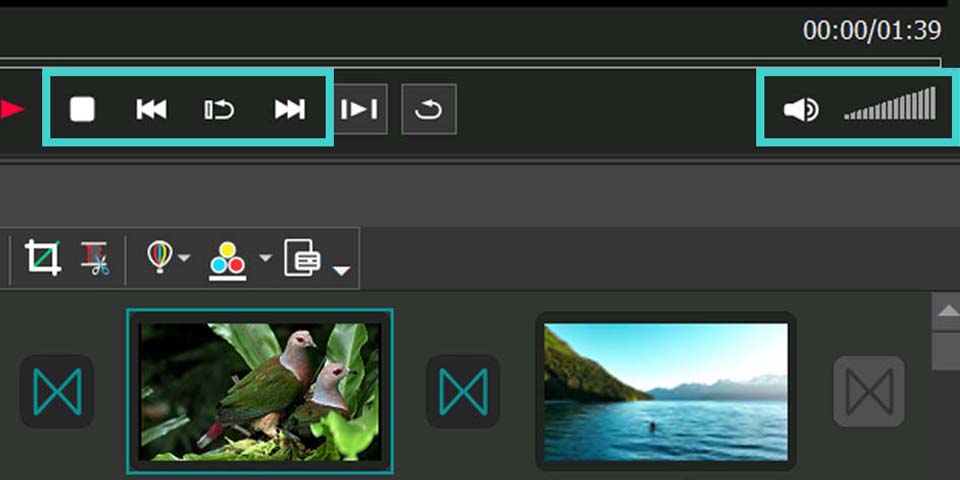
Para começar, abra o VSDC Video Editor e crie um novo projeto selecionando a opção "Projeto vazio" na página inicial ou escolhendo "Novo projeto" no menu horizontal superior. Uma janela pop-up aparecerá, permitindo que você defina a resolução e a taxa de quadros desejadas. Você também pode renomear seu projeto, se necessário. Depois de configurar todas as opções, clique em "Terminar" e comece a adicionar um objeto de texto.
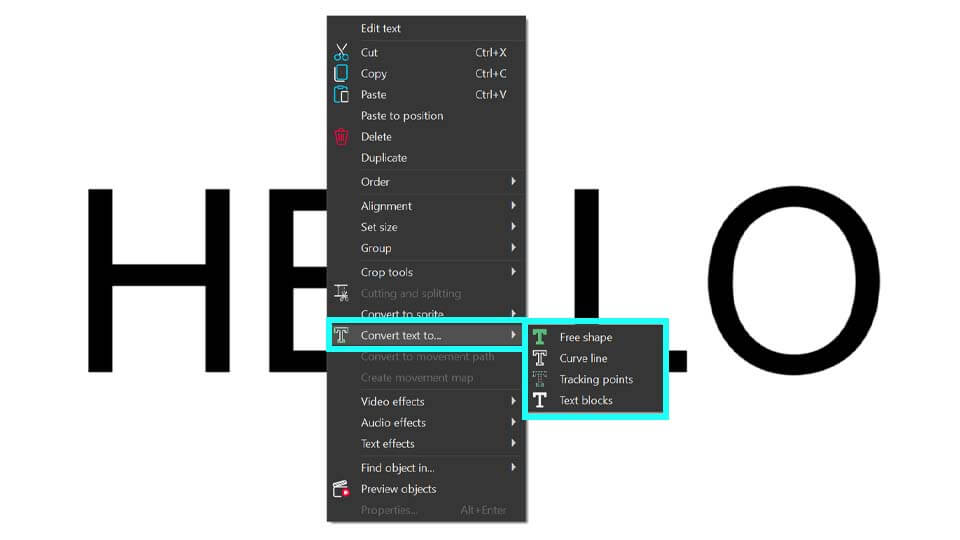
Pressione a tecla ESC para remover o cursor de texto piscante e, em seguida, clique com o botão direito do mouse no texto, na cena ou na linha do tempo, e navegue até “Converter texto para...”. Aqui você encontrará quatro opções de conversão:
- Forma livre
- Linha curva
- Pontos de rastreamento
- Blocos de texto
Depois de escolher o modo de conversão desejado, uma janela de configurações específica para esse modo aparecerá. Detalhes sobre essa janela são fornecidos no próximo parágrafo.
Janela da Ferramenta de Conversão de Texto
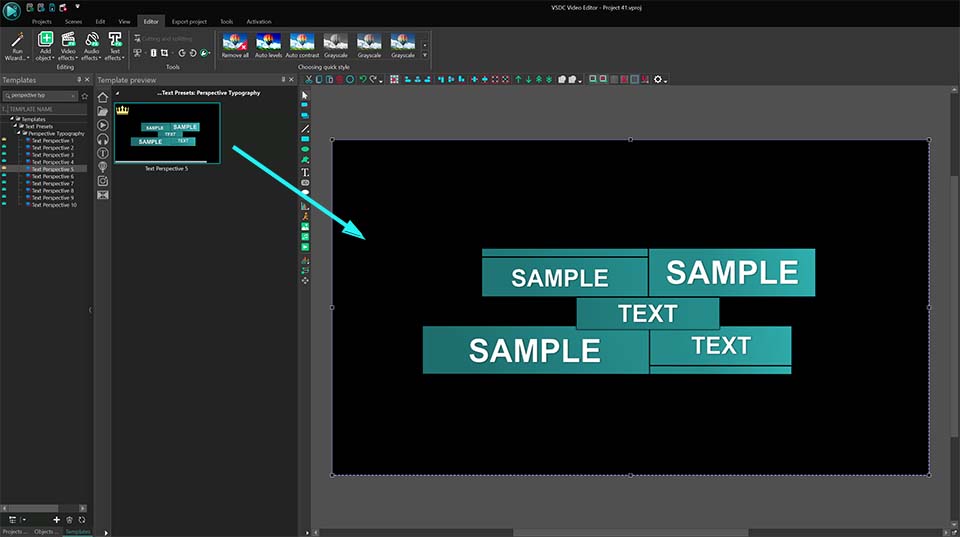
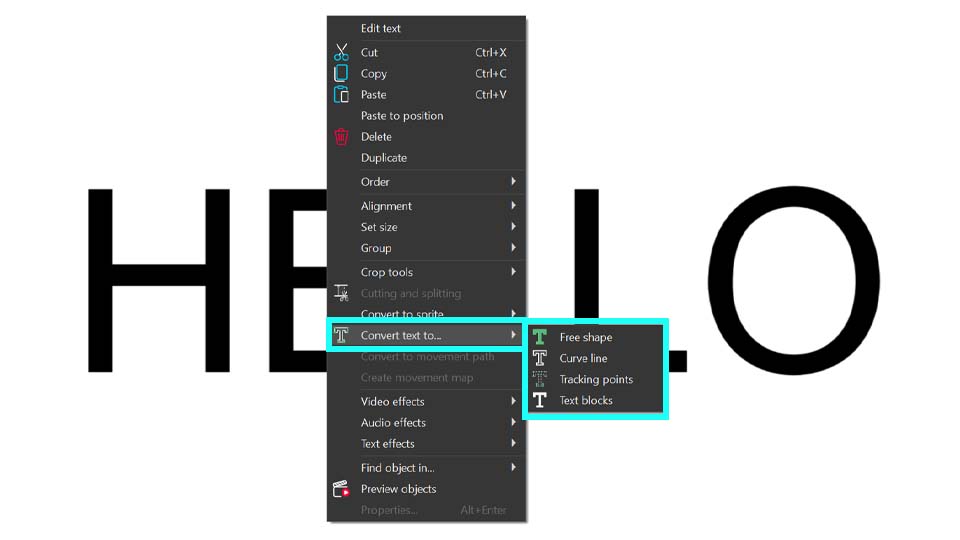
Vamos explorar a interface da Ferramenta de Conversão de Texto. Embora as configurações específicas variem de acordo com o modo selecionado, a disposição da janela permanece praticamente a mesma em todos eles. Por exemplo, vejamos o modo "Blocos de texto". Para acessá-lo, clique com o botão direito no objeto de texto (certifique-se de que não há um cursor piscando — pressione ESC se necessário), vá até "Converter texto para..." e selecione "Blocos de texto". A janela de configurações será aberta, exibindo sua interface.
No centro, você encontrará todas as configurações necessárias para os efeitos de texto. Nos próximos parágrafos, explicaremos como trabalhar com elas. À esquerda, há a janela de modelos, onde são listados os modelos aplicáveis ao seu texto. Lembre-se de que essa janela está disponível apenas para os modos "Blocos de texto" e "Forma livre".
À direita, há a janela de pré-visualização, que permite ver como sua animação de texto e os modelos da janela de modelos funcionam. Ao selecionar um modelo, ele será exibido automaticamente na pré-visualização. O texto com os modelos e configurações aplicados só será visível após clicar no botão "Visualização", localizado no canto esquerdo da janela central. Caso feche a área de pré-visualização acidentalmente, basta clicar nesse botão para reexibi-la.
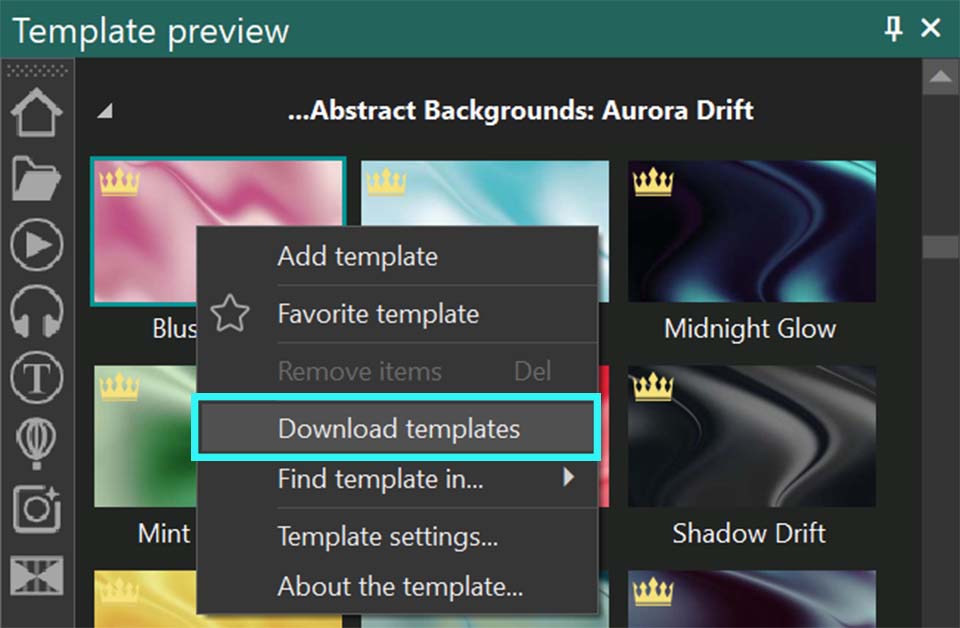
Nota: Para acessar rapidamente os modelos mais utilizados, você pode adicioná-los à sua lista de favoritos. Para isso, clique com o botão direito no modelo desejado e selecione a opção "Modelo favorito" na janela principal de modelos. Ele será então exibido na seção "Mostrar Favoritos", no canto superior direito, marcado pelo ícone de estrela.
Ao clicar no mesmo ícone de estrela na janela de conversão de texto, os modelos escolhidos (efeitos ou transições) que podem ser aplicados ao texto serão exibidos lá.
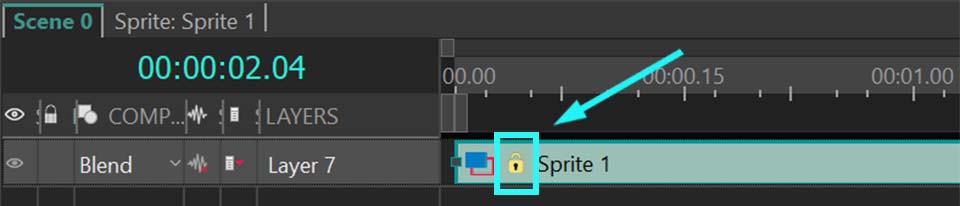
Ao lado da opção "Visualização", você verá três botões. O primeiro, "Mover para o sprite", agrupa automaticamente todos os objetos criados durante a conversão em um único sprite. Isso é muito útil ao trabalhar com grandes quantidades de texto, pois impede que novos objetos ocupem muito espaço na linha do tempo e dificultem a navegação. Se precisar que os objetos permaneçam na linha do tempo principal, basta clicar no botão do meio, "Aceitar". Caso decida não converter o texto, clique no terceiro botão, "Cancelar", ou simplesmente feche a janela.
Outra opção importante é a caixa de seleção "Ocultar texto depois". Se marcada, sua camada de texto original será ocultada após clicar em "Aceitar" ou "Mover para o sprite", finalizando o processo de conversão. Se preferir mantê-la visível, basta desmarcar essa opção. Se você já fechou a janela de configurações e deseja ajustar isso, pode restaurar a visibilidade da camada clicando no ícone de "olho" no lado esquerdo da linha do tempo.
Agora, vamos nos aprofundar nas configurações específicas de cada modo, guiá-lo pelo processo de configuração e demonstrar como criar animações de texto simples.
Revelação de texto com o modo “Blocos de texto”
Depois de selecionar o modo "Blocos de texto" na seção anterior, continuaremos trabalhando com ele. A janela de configurações para esse modo já está aberta, então vamos explorar o propósito de cada opção.
A primeira delas é a função "Predefinição", projetada para usuários que preferem não ajustar várias configurações manualmente. Basta selecionar um preset clicando na seta ao lado dessa opção. Por exemplo, escolha "Paint Brush - Words" no menu suspenso.
Se quiser visualizar todos os presets um por um, certifique-se de que a caixa de seleção "Pré-visualização automática" está ativada. Dessa forma, você poderá ver cada preset sem precisar clicar no botão "Predefinição" a cada vez.
Quando estiver satisfeito com o resultado, escolha entre "Mover para o sprite" ou "Aceitar", dependendo de como deseja organizar os objetos na linha do tempo.
Se você deseja criar suas próprias animações de texto, é essencial entender como funcionam as diferentes configurações. Dominar essas opções permite criar milhares de animações únicas, incluindo o popular Efeito Máquina de Escrever, que exige o ajuste de apenas dois parâmetros nesta janela: "Dividir por" e "Fade in".
Se você já experimentou as predefinições anteriormente, será necessário limpar os valores aplicados automaticamente nos campos antes de inserir suas próprias configurações. Para isso, basta fechar e reabrir a janela de conversão de texto.
Vamos analisar a opção "Dividir por", localizada abaixo de "Predefinição". Ela permite especificar os elementos em que o objeto de texto pode ser dividido:
- Caracteres: Divide o texto em letras.
- Palavras: Divide o texto em palavras.
- Sentenças: Divide o texto em frases.
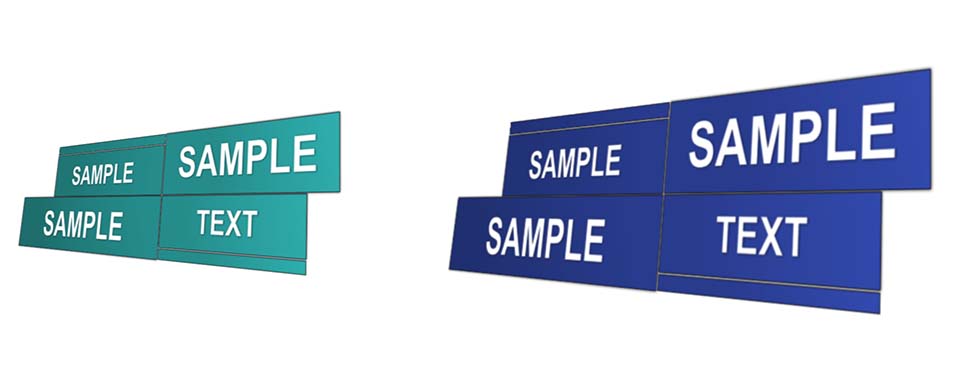
Selecionar "Caracteres", por exemplo, transformará cada caractere em um objeto de texto separado na linha do tempo, permitindo que você os posicione e aplique efeitos individualmente. Para visualizar como os objetos são distribuídos na linha do tempo, clique em "Aceitar" para sair da janela de conversão de texto.
Um resultado melhor pode ser alcançado em combinação com outras configurações. Por exemplo, com a opção "Fade-in", que configura como seus blocos de texto irão aparecer na cena. Existem várias variantes:
- Não usar: Nenhum efeito de fade-in é aplicado.
- Tudo de uma vez: Todos os blocos de texto aparecem simultaneamente.
- Um por um: Os blocos de texto aparecem sequencialmente do primeiro ao último.
- Um por um invertido: Os blocos de texto aparecem sequencialmente do último ao primeiro.
- Ordem aleatória: Os blocos de texto aparecem em uma sequência aleatória.
Vamos escolher "Um por um" e ver o resultado. Os objetos de texto são automaticamente posicionados na linha do tempo para que apareçam na cena um após o outro. O resultado não é semelhante ao Efeito Máquina de Escrever?
Se o fade-in parecer muito rápido, você pode melhorá-lo com a opção "Duração do fade-in", que define o intervalo de tempo durante o qual todos os blocos de texto aparecem. Esta configuração pode ser ativada quando os valores de Fade-in "um por um", "um por um invertido" ou "ordem aleatória" são selecionados.
Por exemplo, se configurarmos "Fade-in" para "um por um" e "Duração do fade-in" para 3000 ms (3 segundos), todos os blocos de texto devem aparecer em três segundos, um por um. A linha do tempo ajustará automaticamente o momento de aparição de cada bloco de texto, e você obterá esseс resultado:
Se você deseja que o primeiro caractere não apareça imediatamente na tela, mas sim um pouco mais tarde, por exemplo, um segundo após o início do vídeo, você pode usar a opção "Sobreposição do fade-in". Essa opção permite um deslocamento simultâneo do início da exibição de todos os blocos de texto na linha do tempo. Este parâmetro funciona em conjunto com a "Duração do fade-in".
- Se definirmos a "Sobreposição do fade-in" com um valor maior que 0, todos os blocos de texto serão deslocados para a esquerda na linha do tempo, o que significa que começarão a aparecer mais cedo.
- Se definirmos a "Sobreposição do fade-in" com um valor menor que 0, todos os blocos de texto serão deslocados para a direita na linha do tempo, o que significa que começarão a aparecer mais tarde.
Como queremos que nosso texto comece um pouco mais tarde, precisamos definir esse parâmetro para um valor abaixo de 0 para atrasar o início da aparição do texto, deslocando-o para a direita. Vamos configurá-lo para -1000 ms, para que o texto apareça um segundo após o início do vídeo. Clique em "Visualização" para conferir o resultado e ver como isso se reflete na linha do tempo.
O destaque desse processo é o Efeito de fade-in, que dá vida ao seu texto de forma elegante. Você pode selecionar um modelo na lista suspensa ou arrastá-lo da janela de modelos para a célula dedicada "Arraste e solte o modelo aqui" (disponível apenas para "Blocos de texto" e "Forma livre"). Quando você seleciona um modelo na janela de modelos, a pré-visualização aparece automaticamente à esquerda da janela de conversão de texto. Para ver como essa transição se aplica ao seu texto, basta clicar no botão "Visualização".
Por exemplo, vamos escolher o efeito "Paint Brush: Top-Right Corner" e ver o resultado—impressionante, não é?
Se achar que o texto aparece rápido demais, você pode ajustar a "Duração do efeito de fade-in" para controlar o tempo de exibição. Por exemplo, ao definir a duração para 3000 ms, você perceberá que a animação se torna muito mais suave e gradual.
Agora que exploramos as configurações de Fade-in, vamos passar para os parâmetros de Fade-out.
O Fade-out é semelhante ao parâmetro Fade-in, mas controla o desaparecimento (fim da exibição) dos blocos de texto:
- Não usar: Nenhum efeito de fade-out é aplicado.
- Tudo de uma vez: Todos os blocos de texto desaparecem simultaneamente.
- Um por um: Os blocos de texto desaparecem sequencialmente, começando pelo primeiro.
- Um por um invertido: Os blocos de texto desaparecem sequencialmente na ordem inversa.
- Ordem aleatória: Os blocos de texto desaparecem em uma sequência aleatória.
No vídeo, você pode ver o efeito da opção "um por um invertido" em combinação com todas as configurações anteriores. Todas as letras do seu texto desaparecerão rapidamente.
Se você adicionar o valor para "Duração do fade-out", que é semelhante ao "Duração do fade-in", mas especifica o intervalo de tempo durante o qual todos os blocos de texto devem desaparecer da cena, o desaparecimento do texto será mais suave.
Por exemplo, se "Fade-out" estiver configurado como "um por um invertido" e "Duração do fade-out" como 2000 ms, todos os blocos de texto desaparecerão dentro de dois segundos ao final da reprodução.
Vamos passar para a próxima opção na janela de configurações, Sobreposição do fade-out, que é semelhante à Sobreposição do fade-in, mas ajusta a mudança de tempo simultânea do desaparecimento de todos os blocos de texto na linha do tempo. Esse parâmetro funciona em combinação com a Duração do fade-out.
- Se o valor desse parâmetro for maior que 0, o deslocamento será realizado para a direita em direção ao final da linha do tempo.
- Se o valor for menor que 0, o deslocamento será realizado para a esquerda, em direção ao início da linha do tempo.
Adicionar uma transição com o "Efeito de fade-out" é uma maneira certeira de cativar seu público! Você pode aplicar facilmente o mesmo efeito usado no Fade-in clicando em "Copiar do fade-in", ou escolher um efeito diferente na lista suspensa. Como alternativa, também é possível arrastar e soltar um novo efeito da janela de modelos. Assim, você pode criar um toque final único para o seu texto.
Para o nosso exemplo, usaremos a transição "Paint Brush: Top-Right Corner". No entanto, sinta-se à vontade para selecionar qualquer outra transição que melhor se adapte ao efeito desejado.
Se o seu texto desaparecer rápido demais, você pode ajustar a "Duração do efeito de fade-out" para prolongar o tempo de desaparecimento. Para uma animação equilibrada, experimente definir o valor para 3000 ms, o mesmo da "Duração do efeito de fade-in".
Neste exemplo, criamos um efeito de revelação impressionante, onde o texto aparece com uma pincelada e desaparece da mesma forma. Ao explorar as diversas opções disponíveis, você pode combinar efeitos e desbloquear mais de mil animações de texto únicas!
Morfagem de texto com o modo "Forma livre"
Quando a opção "Converter texto para" está configurada no modo "Forma livre", o objeto de texto adicionado à cena é transformado em um grupo de formas livres. Esse tipo de conversão é especialmente útil para criar animações onde as letras se transformam em formas arbitrárias. Além disso, permite um controle mais detalhado sobre a cor de cada letra — agora tratada como um objeto de forma livre individual — possibilitando ajustes em gradientes de cor ou a definição de mudanças de cor usando keyframes.
Começamos da mesma forma que nos outros modos: clique com o botão direito no seu objeto de texto e vá até "Converter texto para". Aqui, selecione "Forma livre". Você pode escolher entre as mesmas predefinições disponíveis para "Blocos de texto" ou inserir valores personalizados para criar um efeito único.
Por exemplo, você pode replicar os valores mostrados no vídeo abaixo para criar um efeito impressionante de Revelação de Texto em Chamas, completo com um efeito de desaparecimento correspondente.
Mas ao converter nosso texto em formas livres, podemos fazer muitas outras coisas. Por exemplo, podemos criar uma animação de Morfagem de Texto. Vamos configurar o parâmetro "Dividir por" para "Caracteres", "Fade-in" para "um por um" e escolher a duração desejada do fade-in e sobreposição do fade-in (configuramos ambos para 3000 ms e -1000 ms, respectivamente).
Para concluir seu trabalho nesta janela, recomendamos clicar em "Mover para o sprite". O modo "Forma livre" geralmente cria muitos objetos na linha do tempo, por isso, organizá-los todos em um único sprite é a opção mais prática.
Para criar animações de transformação de letras (morphing), faça duplicatas de cada forma livre na linha do tempo e ajuste-as gradualmente para que a forma se transforme em uma letra reconhecível ao longo do tempo. Isso significa que, para cada caractere, você precisará criar várias formas livres posicionadas de maneira diferente na linha do tempo, permitindo que a transformação ocorra de forma progressiva. Dessa maneira, você obterá uma animação quadro a quadro, onde as letras surgem a partir das formas.
As possibilidades com formas livres não terminam aqui. Por exemplo, você também pode criar logotipos e textos com gradientes animados impressionantes. Para um guia detalhado sobre como criá-los e explorar as diversas configurações na janela de propriedades para experimentar com seu texto, assista ao nosso vídeo tutorial.
Texto Contornado com o modo "Linha Curva"
Quando o modo "Linha curva" é ativado para a opção "Converter texto para...", o objeto de texto que você adiciona à cena é transformado em um grupo de curvas. Essa conversão é ideal para criar animações que delineiam a aparência das letras.
Na janela de configurações de conversão, você encontrará parâmetros que diferem dos discutidos anteriormente. Antes de analisar essas configurações, observe que cada caractere pode consistir em múltiplas curvas, e o número delas pode variar dependendo da fonte e é determinado pelo criador da fonte, não pelo editor de vídeo.
Ao abrir esta janela, você perceberá imediatamente que a janela de modelos está ausente, ao contrário dos dois modos anteriores. Por esse motivo, você não encontrará transições nos campos dos efeitos Fade-in e Fade-out. Lembre-se de que essa funcionalidade não está disponível para este modo nem para o próximo, "Pontos de Rastreamento". Portanto, não se surpreenda se não visualizar essas opções enquanto trabalha com esses modos.
Vamos avançar para a janela de configurações deste tipo de conversão, começando pelo parâmetro "Predefinição". Aqui, você encontrará uma variedade de modelos específicos para este modo, diferentes dos dois anteriores. Entre as opções disponíveis, estão animações de traçado (Stroke animations), que permitem escolher como as letras aparecem — uma por uma, aleatoriamente ou todas de uma vez — além de possibilitar o controle da velocidade do efeito (lento, médio ou rápido).
Vamos para a janela de configurações para este tipo de conversão e começar com o parâmetro "Modo", que especifica quais curvas editar:
- Ambos: Manipula todas as curvas de cada letra no objeto de texto original.
- Par: Trabalha apenas com as curvas de número par de cada letra.
- Ímpar: Foca apenas nas curvas de número ímpar de cada letra.
Se você deseja trabalhar com todo o texto, a melhor opção é "Ambos", pois permite visualizar todas as curvas de seus caracteres. Escolher "Par" ou "Ímpar" mostrará apenas algumas curvas, que não representam completamente suas letras. No resultado, teremos nosso texto contornado:
Você pode adicionar a isso uma animação suave, fazendo com que cada letra apareça uma por uma na tela. Para isso, configure o "Fade in" para "um por um" e escolha a "Duração" para o Efeito de fade-in. O tempo dos parâmetros de Fade-in e Duração do efeito dependerá de quanto tempo você quer que o texto completo leve para aparecer. Nós configuramos ambos para 3000 ms.
Veja só! Após ajustar três configurações, sua animação de Texto Contornado está pronta!
Animações de Texto com Luz usando o Modo "Pontos de Rastreamento"
O quarto tipo de conversão, "Pontos de Rastreamento", é usado para criar animações que destacam letras ao longo de seus contornos, como um efeito de luz em movimento.
Antes de mostrarmos o efeito, observe que, ao contrário de outros tipos de conversão, os objetos de conversão neste modo são criados dentro do texto original na linha do tempo, o que significa que o próprio objeto de texto permanece visível. Por esse motivo, as opções "Mover para o sprite" e "Ocultar texto depois" estão desativadas.
As configurações deste modo também apresentam algumas diferenças importantes: parâmetros relacionados ao desaparecimento do objeto, como "Fade-out", "Duração do fade-out" e "Sobreposição do fade-out", não estão disponíveis. Além disso, a opção "Tudo de uma vez" não está disponível para "Fade-in", e as configurações relacionadas tanto ao "Efeito de fade-in" quanto ao "Efeito de fade-out" estão ocultas. Os predefinições também estão desativados. Essas alterações destacam as características específicas deste modo.
Aqui, assim como na seção anterior, as linhas curvas são essenciais porque o número de curvas determina quantos efeitos são aplicados ao texto. Quaisquer reflexos que você adicionar seguirão as linhas curvas definidas pela forma da fonte. Portanto, é importante configurar o parâmetro Modo, que, como na seção anterior, inclui as seguintes opções:
- Ambos: Todas as curvas de cada letra no objeto de texto original são usadas para criar o efeito de destaque.
- Par: Apenas as curvas de número par de cada letra são destacadas.
- Ímpar: Apenas as curvas de número ímpar de cada letra são destacadas.
Apenas neste tipo de conversão o parâmetro Efeito se torna ativo e determina o efeito usado para destacar os contornos das letras. As opções disponíveis são:
- Nenhum: Nenhum efeito é aplicado.
- Reflexo da luz: Aplica um efeito de brilho solar para destacar os contornos das letras.
- BokehGlare: Utiliza um efeito de brilho bokeh para destacar os contornos das letras.
Ajustando todas essas configurações, você obterá uma animação de Luz perfeita.
Por exemplo, vamos configurar "Modo" para "Ambos", "Efeito" para "Reflexo da luz", "Fade-in" para "Um por um" e "Duração do fade-in" para 10000 ms. Esse valor alto para a duração é necessário porque a frase de exemplo abaixo é bastante longa, e a animação precisa de tempo suficiente para ser reproduzida. Configurar um valor menor deixaria a animação muito rápida.
Como resultado, teremos o seguinte:
Para criar uma animação mais misteriosa, podemos alterar alguns parâmetros na janela de propriedades dos objetos Reflexo da luz que temos dentro do nosso objeto de texto. Para fazer isso, selecione todos eles na linha do tempo e vá para a janela de propriedades. Aqui você pode ajustar a intensidade do brilho, a fonte de luz, o tom de cor dos reflexos, a área visível, entre outros, para aumentar o impacto visual.
Ao diminuir o valor da opção "Área visível", criamos um texto que é destacado com um brilho no escuro.
Isso é apenas um pequeno exemplo do que pode ser feito com essa ferramenta!
Não hesite em explorar esses modos e a janela de propriedades para descobrir uma variedade de animações e efeitos adicionais.
Esperamos que você tenha achado este artigo útil e que tenha explorado todos os recursos vinculados para entender completamente esta nova ferramenta. Para descobrir mais possibilidades, não deixe de conferir nosso vídeo tutorial em nosso canal do YouTube.
Você ainda tem dúvidas?
Sinta-se à vontade para entrar em contato conosco por e-mail em O endereço de e-mail address está sendo protegido de spambots. Você precisa ativar o JavaScript enabled para vê-lo. ou nos encontrar nas nossas redes sociais Facebook, X, Reddit ou Discord.
")


 Editor de vídeo
 Conversor de vídeo
 Conversor de áudio
 Gravador de CD de áudio


 Download Video Editor 10