Solved: Learn how to properly activate your VSDC premium templates and remove export restrictions.
Understanding the Premium Template Activation Process
Have you purchased a VSDC premium pack but still can't export your project? Are you seeing the warning message again during export? This usually means the activation process wasn't fully completed.
But don't worry, things like this happen. Let's walk through the entire process step-by-step to ensure everything is set up correctly.

Initial Setup: Using Premium Templates
It all starts when you use a premium template in your project. A notification will appear, informing you that the content you used in the project requires a purchase. This happens in both the Free and Pro versions of VSDC, as these templates are a separate category created by our designers to speed up your editing.
When you see this message, you have two options: remove the premium template from your timeline or purchase the pack by clicking the "Unlock" button in the warning message that appears when you want to export your project.

Receiving Your License Key
When making a purchase, you fill in a short form. Following a successful transaction, an email containing your license key in the format X-XXXXXX-XXXXXX-XXXXXX-XXXXXX and activation instructions is sent to the address you provided.
Therefore, at this stage, it is crucial to ensure you have access to the email address you use for the purchase.

Two Methods to Activate Your Premium Pack
Let's review the two activation methods mentioned in the email and walk through the suggested steps together.
After purchasing, you must enter the received license key into the editor, as without this final step, you will still be unable to export your project using the premium template(s)!
Method 1: Activation via the Application Menu
This method provides a direct path to the software's licensing system and is the recommended approach.
- Open VSDC Video Editor and initiate either a new project or an existing one.
- Access the Activation Tab from the top menu bar.
- Select the Activate option from the dropdown menu. This action will launch a dialog box requesting your key.
- Paste or type your key carefully.
- Confirm the entry and restart the application for the changes to take full effect.
Method 2: Contextual Activation from the Templates Window
This method offers a convenient way to activate your pack directly from the resource you intend to use.
- Open VSDC Video Editor and initiate either a new project or an existing one.
- Find and right-click on any template that is part of the premium pack you need via the Templates window.
- Choose the Activate template option.
- A prompt will appear for you to input your license key. Paste or type your key carefully.
- After submitting the key fully restart VSDC to complete the activation sequence.
Verifying Successful Activation
Once you restart the software, the activation is complete. The absence of the restriction window will be the main confirmation that the license key has been successfully applied. The program will no longer display warning messages for the previously locked templates, and you will be able to export your projects without any limitations.
Frequently Asked Questions (FAQ)
I purchased a pack and entered the key, but I'm still getting the warning on export. What should I do?
This is almost always because the application wasn't fully restarted. Please close VSDC and then reopen it. The activation is only finalized after a restart. If that doesn't work, double-check that you copied and pasted the entire key correctly, without any extra spaces.
Do I need the VSDC Pro version to use premium template packs?
No. Premium template packs are a separate product and can be purchased and activated in both the Free and Pro versions of VSDC. The warning and activation process is the same for both editions.
I'm getting an "Invalid Key" error. What does this mean?
This usually means the key was entered incorrectly. Please ensure you are typing or pasting the key in the exact format: X-XXXXXX-XXXXXX-XXXXXX-XXXXXX, have not confused similar characters (e.g., the number 0 for the letter O or the number 1 for the letter l) and have not included any extra spaces at the beginning or end of the key.
Will my premium pack activation expire?
Yes, each license key is valid for one year, after that you need to renew it.
Where can I see the full catalog of available template packs and their descriptions?
You can browse the entire collection of premium template packs directly on our official website. There you'll find high-quality previews, descriptions of what's included in each pack (e.g., intro scenes, transitions, etc.) and the current pricing. You can find the catalog here: View the full catalog here.
Need Additional Help?
Couldn't find the answer you were looking for? Then please don't hesitate to contact our team at O endereço de e-mail address está sendo protegido de spambots. Você precisa ativar o JavaScript enabled para vê-lo..


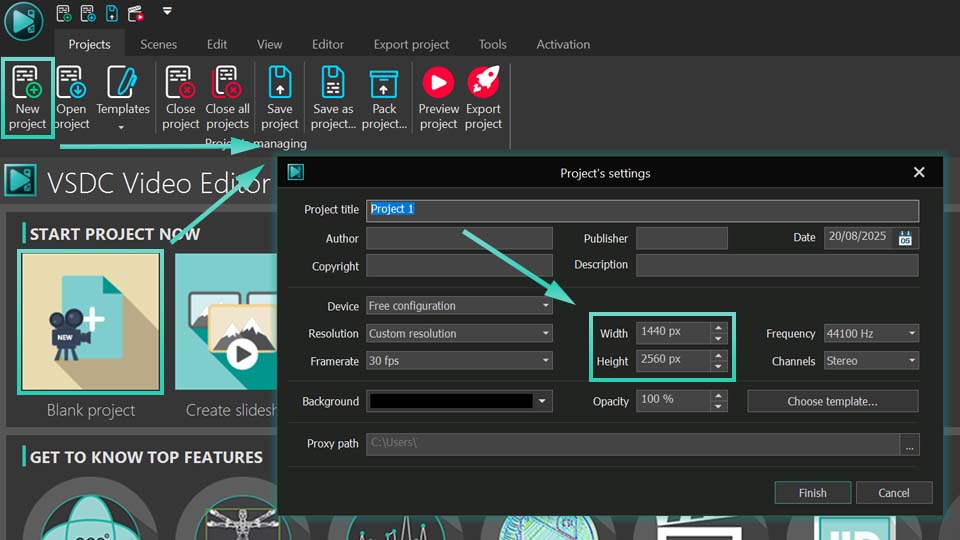 Um guia para inserir a altura e a largura exatas para as dimensões do seu projeto
 Usando a ferramenta de instantâneo para criar uma imagem estática do seu design de gradiente