 User Help Manual
 ")


Editor Video
L'editor video consente di modificare file e creare video di qualsiasi complessità. Potete applicare effetti video e audio effects ad oggetti modificati, trasformarli, applicare filtri e correzioni d'immagini. Tutti i popolari formati video e audio sono supportati (sia lettura che salvataggio).
Convertitore Video
Questo programma serve a convertire video file da un formato ad un altro. Quasi tutti i popolari formati video sono supportati. Inoltre, il programma semplifica drasticamente il compito di convertire video da riprodurre su determinati dispositivi multimedia quali iPhone, Microsoft Zune oppure Archos. Il programma è semplicissimo da usare, dispone di una moderna interfaccia e di tutte le necessarie funzioni per processare i video.
Convertitore Audio
Il convertitore audio vi aiuterà a convertire file audio da un formato ad un altro. Tutti i formati audio e codec chiavi sono supportati. Il programma vi consente inoltre di gestire playlist e meta tags, di estrarre audio dai file video e di salvare queste tracce sul vostro computer in qualsiasi formato.
Audiograbber
Questo strumento audio serve a catturare tracce audio dai CD e di salvarle nel computer dell'utente in qualsiasi formato. Quasi tutti i popolari formati e codec sono supportati. Il programma è inoltre in grado di estrarre dettagli di tracce dal server FreeDB al fine di rinominare automaticamente il file e di aggiornare i meta tag.
 Editor Video
 Convertitore Video
 Convertitore Audio
 Audiograbber

Versatilità
Più strumenti contemporaneamente per elaborare file video e audio in una singola applicazione.

Alta velocità
I nostri programmi
impiegano rapidi algoritmi di alta qualità per processori singoli a multipli.

Accessibilità
I nostri prodotti sono disponibili per essere scaricati gratuitamente su tutti i computer e dispositivi che supportano i sistemi operativi Windows.
Notizie:
- published Amy Shao 6/10/25 L'attesa per qualcosa di nuovo e straordinario è ...
- Questa stagione festiva inaugura nuovi inizi con l'ultimo aggiornamento di VSDC ...
- Il cambiamento è sinonimo di miglioramento, e questo processo non sarebbe possib...
- Introduzione Nel 2024 la gamma di opzioni per creare effetti visivi è incredib...
Come applicare effetto raggi divini in un video
Raggi divini anche chiamati raggi di luce 3D sono un’illusine bella che potete vedere nella natura quando la luce diretta perfora i divari nelle nuvole o una superficie che contiene buchi. Grazie al loro volume e alla loro forma questi raggi di luce assomigliano ai torci o alle colonne che vanno proprio dal cielo - per questo l’effetto artistico è chiamato così.
Se volete aggiungere l’effetto Raggi divini al vostro video VSDC Pro può aiutarvi di raggiungere questo entro qualche minuto. Sarete capaci di usare l’effetto sugli oggetti aggiunti come titoli, forme, logo e immagini con lo sfondo trasparente e anche video. Però è più importante che sarete capaci di fare l’effetto dinamico come se la fonte di luce muova intorno alla scena.
Ecco qui come sarà:
Nel tutorial sotto passeggeremo tra le impostazioni dell’effetto e vi mostreremo come cambiare la lunghezza, la luminosità e il colore dei raggi di luce. Più imparerete come raggiungere un aspetto splendido crescendo o diminuendo gradualmente l’intensità dell’effetto nel corso del tempo!
Prima di cominciare assicuratevi di scaricare l’ultima versione di VSDC editor video.
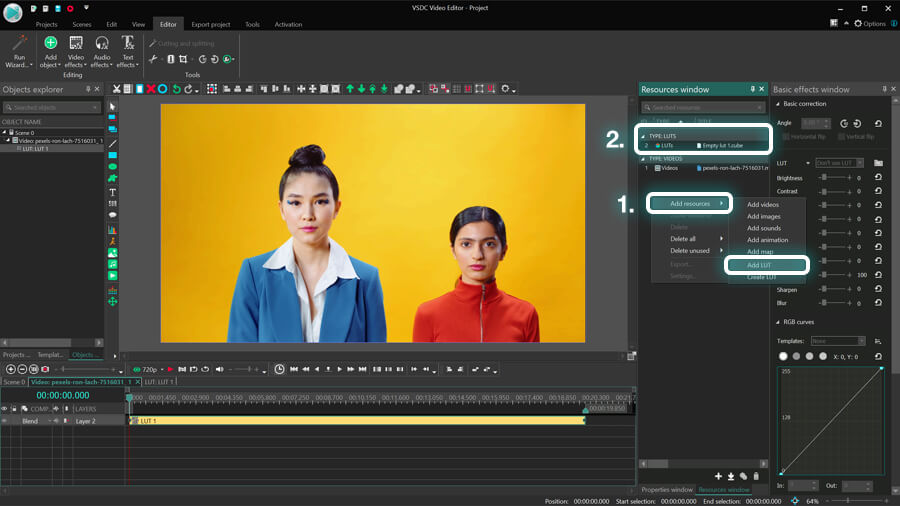
Applicate l’effetto Raggi divini all’oggetto
Per questo tutorial applicheremo l’effetto a un pezzo di testo - però i principi del lavoro con gli altri file con immagine o video sono esattamente eguali.
Per i principianti importate il vostro file multimediale all’editor o create un progetto vuoto e aggiungete un oggetto alla scena. Cliccate l’oggetto usando il pulsante destro del mouse e passate agli Effetti video. Scegliete Natura - Raggi divini.

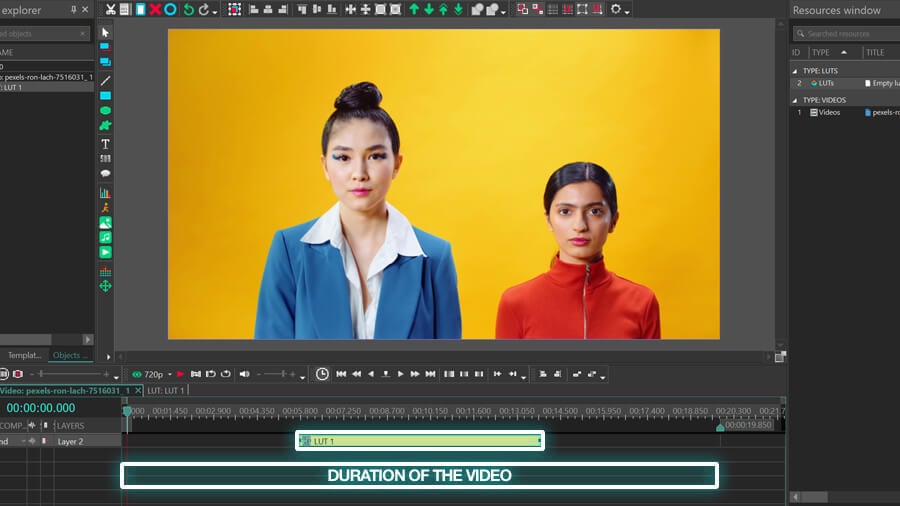
Quando avete fatto la selezione, una finestra Impostazioni della posizione dell’oggetto spunterà indicando che l’effetto sarà applicato al file cominciando dalla posizione del cursore. Più tardi sarete capaci di cambiare manualmente la durata dell’effetto e spostare la sua posizione sulla cronologia se volete.
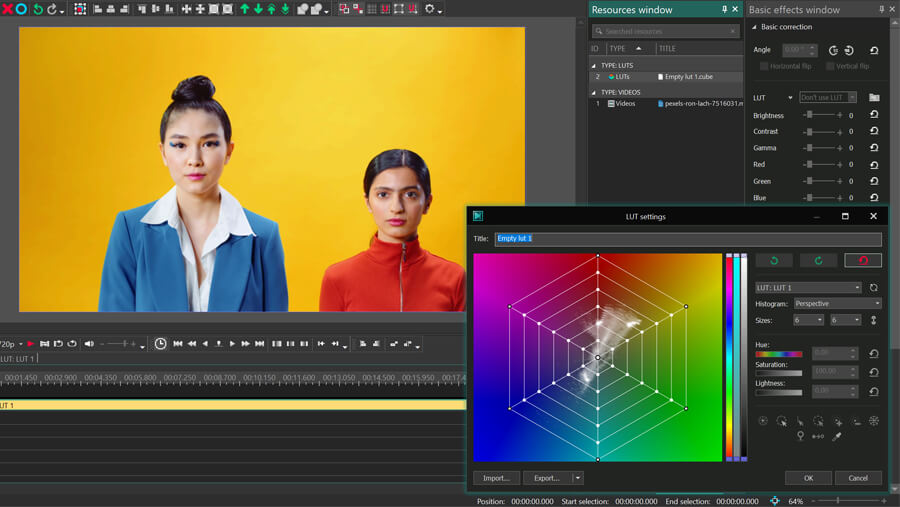
Accedete la finestra Proprietà
Quando applicate l’effetto sarete invitati alla tabella seconda della cronologia dove lo strato «Raggi divini» è situato. Fate un clic con il pulsante destro del mouse e scegliete Proprietà. La finestra Proprietà alloggia le impostazioni dell’effetto e scivola dal lato destro.

La finestra Proprietà contiene i tre gruppi delle impostazioni:
- Impostazioni comuni
- Impostazioni di regolazione
- Impostazioni dell’effetto raggi divini
Ogni gruppo vi permette di calibrare l’effetto ai livelli diversi. Diamo un’occhiata più approfondita che cosa potete fare a ogni livello.
Descrizione delle impostazioni comuni
Il primo gruppo è chiamato Impostazioni comuni e vi permette di fare il seguente:
- Cambiare il nome dello strato sulla cronologia
- Creare il momento quando l’effetto apparisce nella scena - scrivendo il secondo o il fotogramma esatto
- Definire quando lunga la durata dell’effetto deve essere - scrivendo il numero esatto dei secondi o dei fotogrammi
Se siete felici con le impostazioni predefinite dell’effetto sentite liberi di saltare questo gruppo e passare al prossimo.
Descrizione delle impostazioni di regolazione
Il gruppo secondo è chiamato Impostazioni di regolazione. Vi permettono di cambiare il livello della trasparenza dell’effetto, estendere i confini dell’area dell’effetto e scegliere preimpostazioni.
Il parametro Trasparenza definisce il livello della visibilità dell’effetto. Il valore più alto della Trasparenza causa che l’effetto diventa più visibile. Potete mettere un valore della Trasparenza costante o farlo cambiare nel corso del tempo usando i parametri chiamati il Valore iniziale e il Valore finale. Per darvi un’idea com’è sotto l’aumento della Trasparenza graduale da 0% a 100%.
Il parametro prossimo nel gruppo è chiamato Estendere confini e solo ha senso di cambiarlo se applicate l’effetto raggi divini all’oggetto più piccolo che la dimensione della scena - come un icona, un pezzo di testo o un immagine.
Automaticamente la lunghezza dei raggi di luce è definita dai confini dell’oggetto. Ad esempio, se li applicate a un pezzo di testo parliamo di fotogramma dove il testo è situato. In questo modo se il parametro Estendere confini è disattivato (messo a Falso), i raggi di luce saranno tagliati dal fotogramma. Se il parametro Estendere confini è attivato (messo a Vero), i raggi di luce estendono alla loro lunghezza naturale.

Finalmente il terzo parametro nel gruppo vi permette di scegliere una delle preimpostazioni dell’effetto dal menù. Per continuare con questa configurazione manuale, lasciate l’opzione «Personalizzare» scelta.
Descrizione delle impostazioni dell’effetto raggi divini
L’ultimo gruppo delle impostazioni è progettato per aiutarvi di raggiungere un aspetto più preciso, personalizzato dell’effetto. Vi mostreremo che cosa ogni parametro significa e come cambiare l’aspetto generale dei raggi.
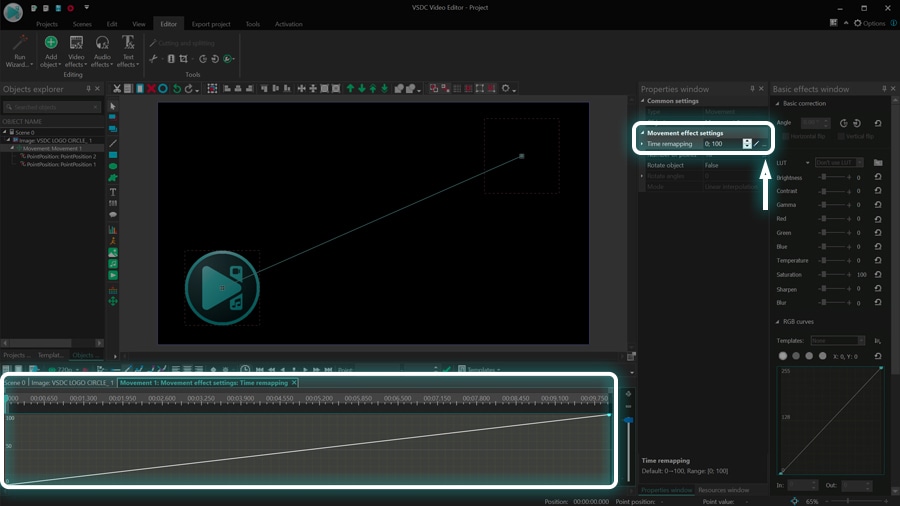
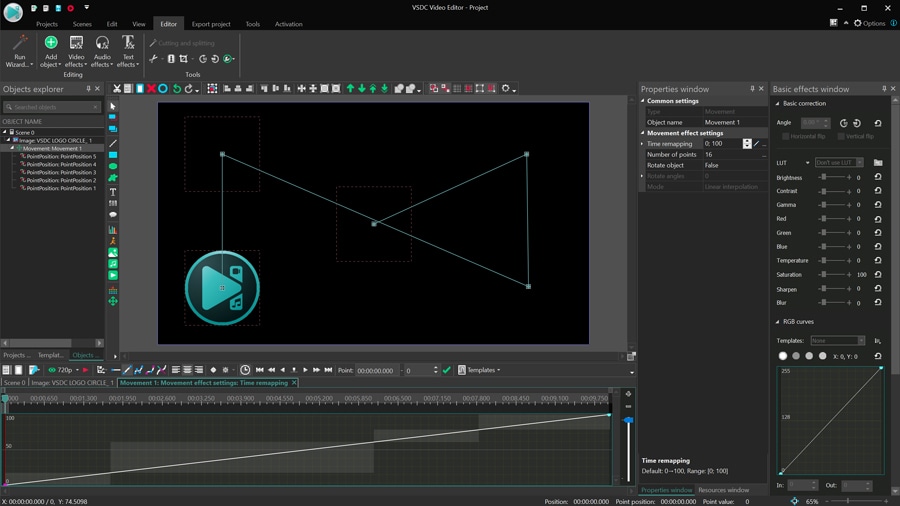
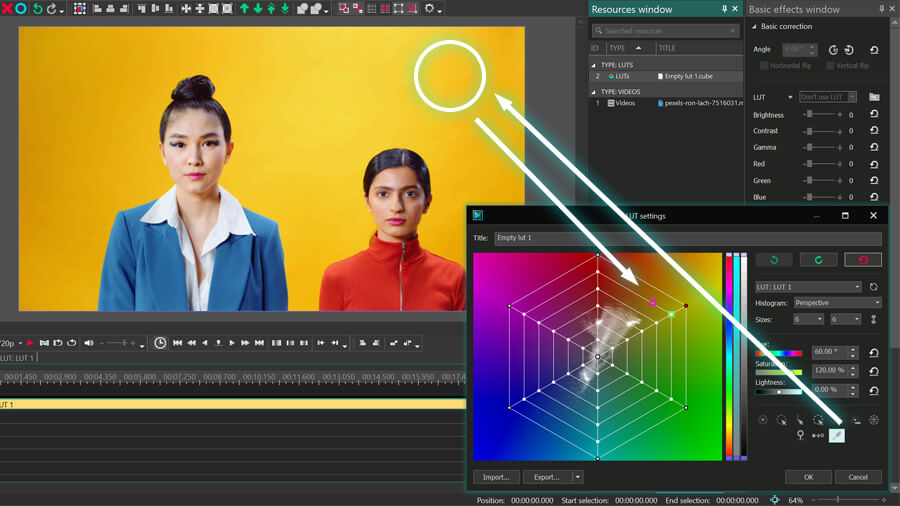
Coordinati polari
Il primo parametro è chiamato Coordinati polari e solo ha senso di prestare attenzione se create un effetto dinamico dove la fonte della luce muoverà. Se tenete la modalità Coordinati polari attivata (messa a Vero) sarete capaci di fare la fonte della luce muovere intorno al sistema polare dei coordinati.
Se disattivate la modalità (la mettete a Falso) sarete capaci di fare la fonte della luce muovere intorno al sistema XY dei coordinati.
In tutti i due casi per imitare il movimento della fonte della luce dovrete espandere i parametri e scrivere il Valore iniziale e il Valore finale per i coordinati. Ad esempio, se usate il sistema dei coordinati polari potete scrivere l’angolo della fonte della luce e la distanza dall’oggetto per l’inizio dell’effetto e la fine. Quando fate questo la fonte della luce muoverà dal punto iniziale al punto finale nel corso della durata dell’effetto come è illustrato sotto.

Allo stesso modo se usate il sistema XY dei coordinati sarete capaci di mettere i coordinati XY per l’inizio e la fine dell’effetto.
Mostrare/nascondere centro
Se volete tenere la posizione dell’effetto costante, ignorate il parametro precedente e cliccate il pulsante Mostrare/nascondere centro per fare il centro dell’effetto visibile e lo postate manualmente nella scena.
Consiglio: se usate i coordinati per creare un effetto dinamico, potete controllare la sua posizione in qualsiasi momento sulla cronologia muovendo l’indicatore di riproduzione e usando il pulsante Mostrare/nascondere centro.
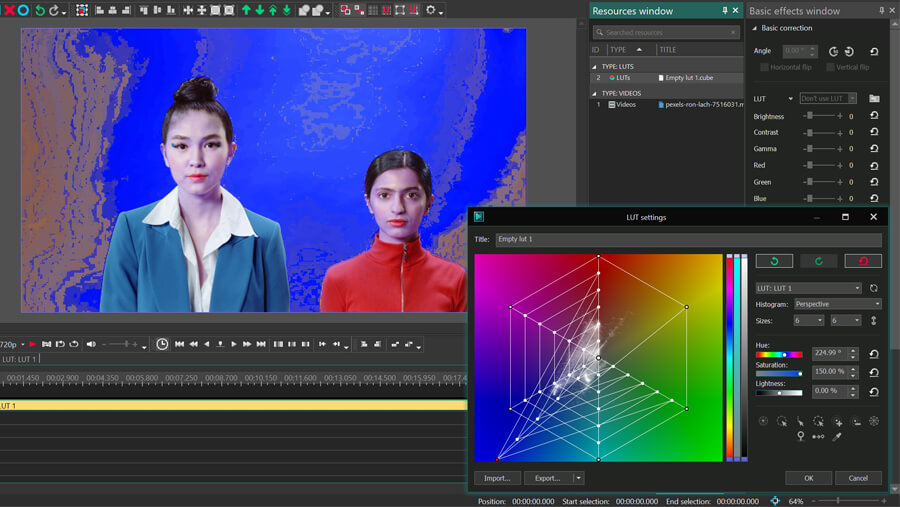
Intensità di luce e luminosità
Intensità di luce e Luminosità direttamente influenzano l’aspetto di raggi di luce. Come i nomi di questi parametri suggeriscono il primo definisce quanto è potente la fonte della luce e l’ultimo definisce la luminosità della luce.
Automaticamente tutti i due parametri sono messi a 100% e quando cominciate a diminuire questo valore noterete come l’aspetto dell’effetto cambia gradualmente. Vedete che cosa succede se cambiate da 100% a 0% per tutti i due parametri:
Come potete vedere per l’intensità della luce 0% significa l’assenza completa dei raggi di luce mentre per la Luminosità 0% significa l’assenza completa di luce (e quindi la scomparsa dell’oggetto).
Modalità
La modalità vi aiuta di lisciare i raggi di luce e farli più naturali. Per vedere la differenza tra le due modalità solo cambiate da «Normale» a «Liscio» e vedete come i raggi cambiano.
Tenete a mente che la modalità «Liscio» richiede un po’ più risorse del computer quindi può lavorare un po’ più lentamente sul vostro computer.
Lunghezza di raggi
Questo parametro è anche intuitivo. Quando cambiate il suo valore potete anche cambiare la lunghezza dei raggi di luce.
Anche se questo parametro direttamente influenza la lunghezza dei raggi di luce, è importante notare che altri parametri come l’intensità della Luminosità e della Luce possono influenzare anche indirettamente la lunghezza dei raggi di luce. Ad esempio, la luminosità alta o una fonte di luce molto potente estenderanno visualmente i raggi.
Potenza di rumore
Il parametro Potenza di rumore aggiunge il rumore frattale all’effetto e può essere configurato dinamicamente tra il Valore iniziale e il Valore finale.
Spostamento cromatico
L’ultimo parametro è progettato per aggiungere un tacco di colore all’effetto Raggi divini. Automaticamente è messo a 0% che significa i raggi di luce sono bianchi. Quando cominciate a crescere il valore Spostamento cromatico noterete come i raggi di luce cominciano a prendere il colore a base di Ordine di canale scelto nel menù a discesa sotto.
L’ordine di canale predefinito è RGB che significa l’effetto conterrà Rosso, Verde e Blu - in questa sequenza precisamente. Il resto dei canali sono abbreviati con la stessa logica: ad esempio, GBR significa Verde, Blu, Rosso; GB significa Verde e Blu, B significa Blue. In questo modo potete applicare un colore singolo o multiplo all’effetto.
Ora di praticare
Ora sapete come lavorare con l’effetto Raggi divini in un video, è ora di praticare. Andate avanti e provate di usarlo nel vostro progetto prossimo. È facile da applicare e funziona specialmente bene per le transizioni, le intro e le outro.
Avete qualche domanda dell’effetto? Inviaci una email a Questo indirizzo email è protetto dagli spambots. È necessario abilitare JavaScript per vederlo.
Cercate l’ispirazione per il vostro video prossimo? Guardate il nostro canale su YouTube.


Con questo programma è possibile registrare i video dal desktop e salvarli sul computer in diversi formati. Insieme al video editor è ideale per creare presentazioni e demo.

Il programma serve per catturare video da dispositivi esterni e e per registrarli sul computer in qualsiasi formato video. Potete salvare il video da sintonizzatori video, webcam, schede di acquisizione e vari dispositivi.

"VSDC Free Video Editor is a surprisingly powerful, if unconventional video editor"
- PC Advisor

"This video editor gives you tons of control and editing power"
- CNet

"The editor handles many common formats and boasts a good deal of capabilities when it comes time to alter lighting, splice video, and apply filters and transitions in post production"
- Digital Trends
© 2011-2025, www.videosoftdev.com, FLASH-INTEGRO LLC. Tutela della privacy | Condizioni di utilizzo | Chi siamo
Tutti i marchi citati nel presente documento sono di proprieta esclusiva dei rispettivi proprietari.
La copia di qualsiasi materiale da questo sito e consentita solo con il consenso scritto dell'amministrazione sito.