- Published by Amy Shao on March 11, 2026 What is the best gift for...
- published Amy Shao 11/19/25 Meet the long-awaited VSDC 10.2 update: a new ve...
- Hi, I'm Mattea Wharton, a travel videographer from Seattle. For three years I ba...
- published Amy Shao 6/10/25 The wait for something new and unusual is finally...
How to use the advanced settings of VSDC Video Editor?
The advanced settings available in the Pro version of the program are listed in this article along with instructions on how to use them.
1. Advanced sub-pixel resolution
The program uses this algorithm while applying various rotation and motion effects when some loss of information known as aliasing can occur. It removes aliasing and enhances the resolution of digital images.
![]()
2. Resizing
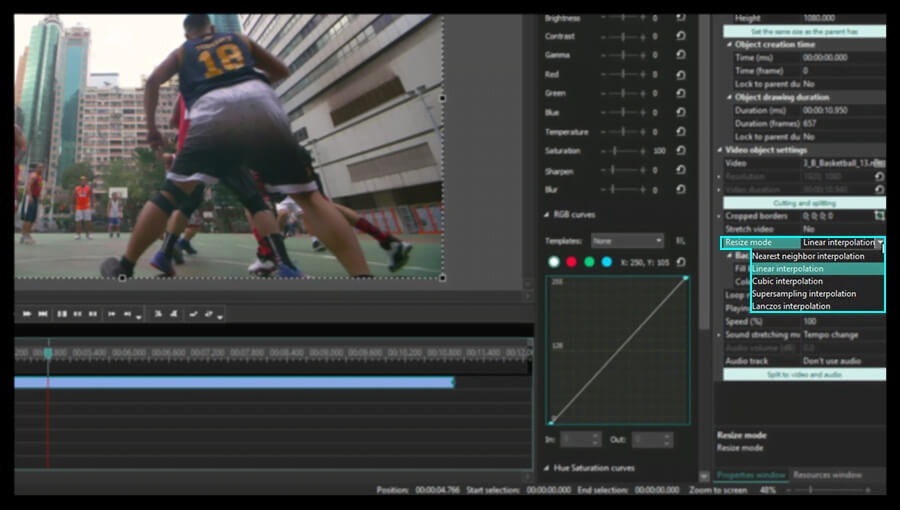
When you place a video or an image file to the scene saving the original resolution, you prevent the loss of image quality. Every time you resize the image so that it occupies only part of the screen, you lose its quality. The advanced resizing methods, such as Nearest neighbor interpolation, Cubic Interpolation, Supersampling interpolation and Lanczos interpolation are integrated in the Pro version of the program. To apply them to your image, please, follow these steps:
- Open your file in the program How to open video file or image for editing
- Select the position and the size of the object on the scene. Click the left mouse button and holding it down, set the size of the object, and then release the mouse button.
- Click the added file on the timeline to open the Properties window tab.
- Find the Resize mode line among the available parameters and select the appropriate method from the drop-down list.
3. Audio waveform
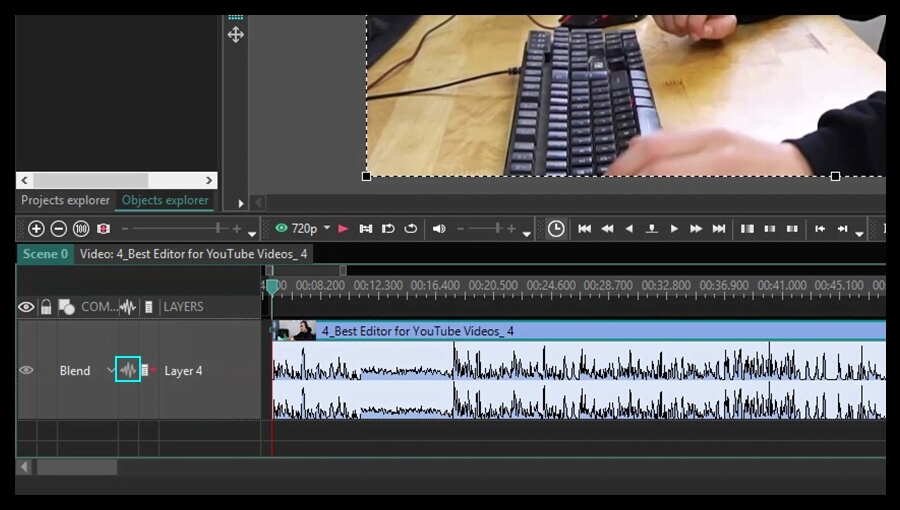
If your video contains an audio track, only Pro version of the program lets you show the audio waveform clicking the corresponding icon on the timeline. It can be very useful when you need to cut out some audio fragments or while applying available audio effects. This feature helps you process the audio easily with visual assistance. To see the audio waveform of the loaded video, click the appropriate icon on the timeline and select the Show waveform from the drop-down menu.
4. Advanced Chroma key
The Chroma key option allows you to remove the background of your video or photo and replace it with a new one. This technique consists in making the selected colors transparent. The Free version of the program offers you the Chroma key option based on one color only, but the Pro version allows removing an unlimited number of colors from the image background. Let’s see how it works.
- Open your file in the program (How to open video file or image for editing) and place it to the scene.
- Click the file on the timeline and go to the Editor tab.
- Click the Video effects button and select Transparency > Background remover.
- Set the position and the duration of the selected effect.
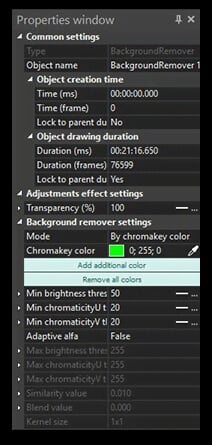
- Open the Properties window tab to adjust the effect parameters.
- Click the Picker icon next to the Chromakey color field to select a color to remove.
- Use the Add additional color to select more colors.
- Configure other available parameters to achieve the best result: set the True value of the Adaptive alfa, define Min/Max brightness threshold, Min/Max chromaticity threshold, Similarity and Blend values. Increase the Kernal size parameter to enhance the efficiency of your editing.
- Add an image file for a new background. Click it on the timeline, go to the Edit tab and click the To front button.

5. Hardware acceleration
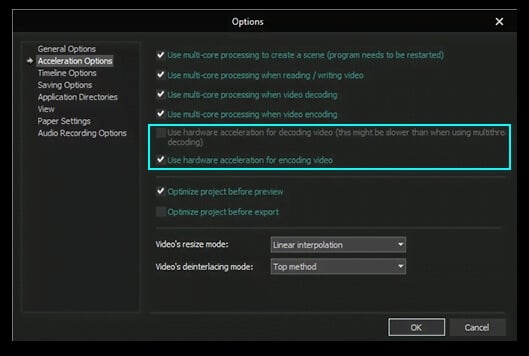
This feature will be very useful for those who work with HD video. There's no doubt that video with HD quality has a large size and its processing can be time consuming. The Pro version of the program can treat HD files using the capacity of the video card, only if your video card supports it, so that the decoding and encoding of the video data goes faster.
To enable this option, go to the program options and check the corresponding boxes in the Acceleration Options category.
6. Object motion
Sometimes you need to make a video with some moving objects. The Pro version of the program can create not only movement from one point to another, but a motion along spline and through a set of selected points .
- Open your file in the program (How to open video file or image for editing) and place it to the scene
- Add a Sprite object using the corresponding button
 on the toolbar, which will contain the Movement effect, and a moving object itself. The cursor will take the crosshair form allowing you to specify the position of a new object on the scene. You will see a black square representing a start position, it can be replaced by an image later.
 - Double click the Sprite line on the timeline.
- Add the Movement effect using the corresponding button
 on the toolbar or clicking the Add object button on the Editor tab and selecting the Movement option from the menu.
 - Indicate the end position of the object on the screen dragging the start point to a new position with a mouse. This effect will be displayed on the scene as a vector, which intercrosses centers of the object in its start and final positions.
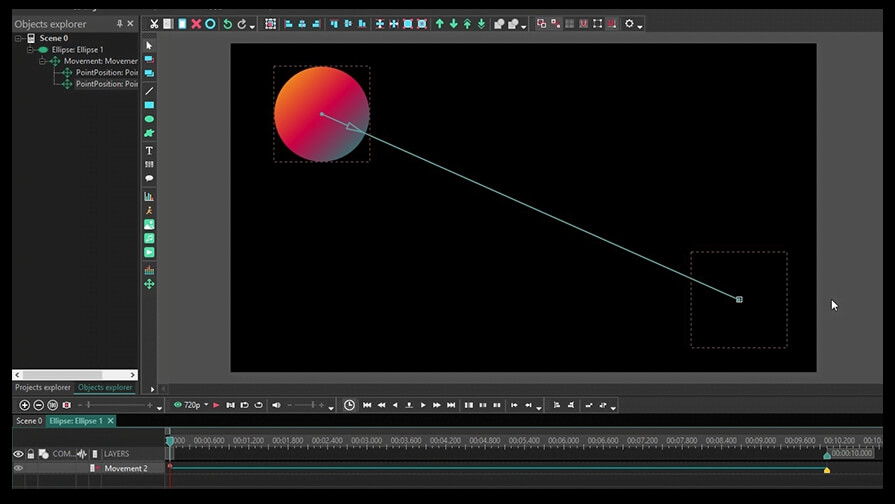
- Click the Start point or the End point icon appeared on the timeline to configure its parameters in the Properties window.
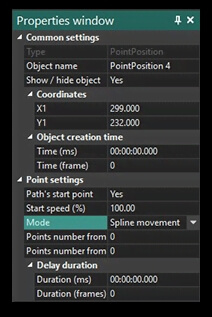
First, select the True value in the Path’s start point field. Then change the Mode type if necessary.
- To create a more difficult trajectory, click the Movement button once again and continue the trajectory placing the next point on the scene.
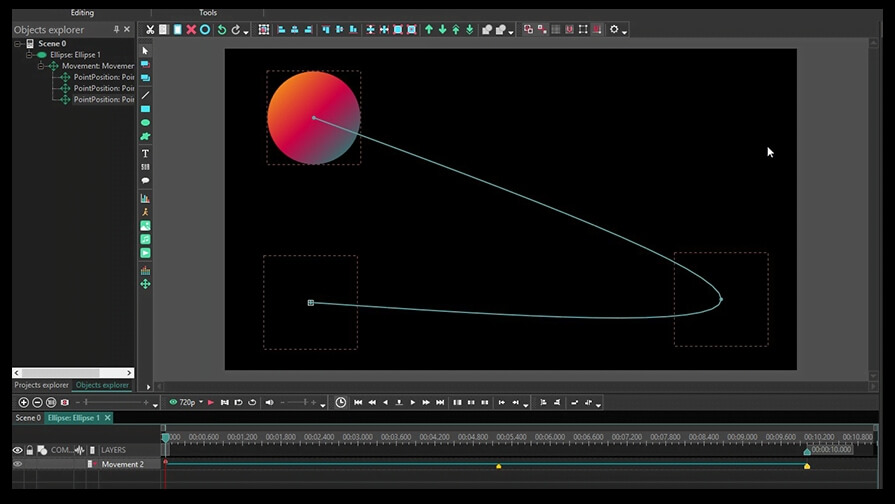
- Add an image or a video using the corresponding buttons on the toolbar and place it instead of the black square on the scene.
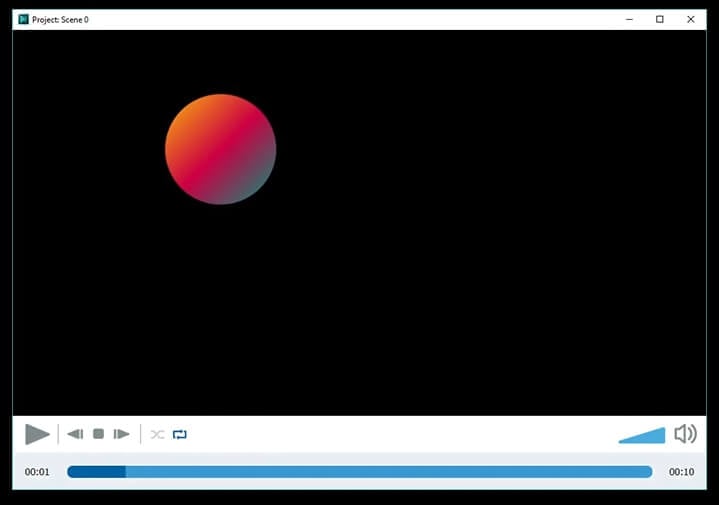
- Use the Preview to see the result of your editing.
You can get more information about the program on Free Video Editor' description page.