")


How to Stabilize Video in VSDC Video Editor – Guide on Setting Up the Best Parameters
So, you got a shaky footage, and now you’re looking for the way to fix it? You’re on the right page then. Watch this guide and read the instruction below to see how to quickly stabilize your video using VSDC Video Editor.
Truth be told, most videos shot on the go without special equipment (camera stabilizer mount) come out shaky – just in a varying degree. That happens when you’re holding a camera and your hands start making sporadic movements, or when it’s attached to a drone or a vehicle so that you’re shooting and moving at the same time. Yes, action camera owners, that is especially relevant for you.
Gladly, there is a way to easily remove jittering and achieve a perfectly stable image in the process of post-production. In fact, the Video Stabilization tool is among the most demanded features of VSDC video editing suite. And if you’re curious about how it works, the secret is in the ability to shift video frames. It allows for excluding the shaky effect while any gaps created in the process are being filled with the information from the previous frames.
In our inbox, we often see questions from users on what the best stabilization settings are. So, we decided to address this in a separate tutorial. Below, you’ll see a guide compiled with help one of our dear users who submitted the parameters that worked best for his footage. After being tested, they appeared to be efficient for most shaky videos, so we’re happy to share the secret setup with you.
The parameters used in this tutorial are 'Shakiness' and 'Smooth zoom'. Here is a step-by-step breakdown of the process:
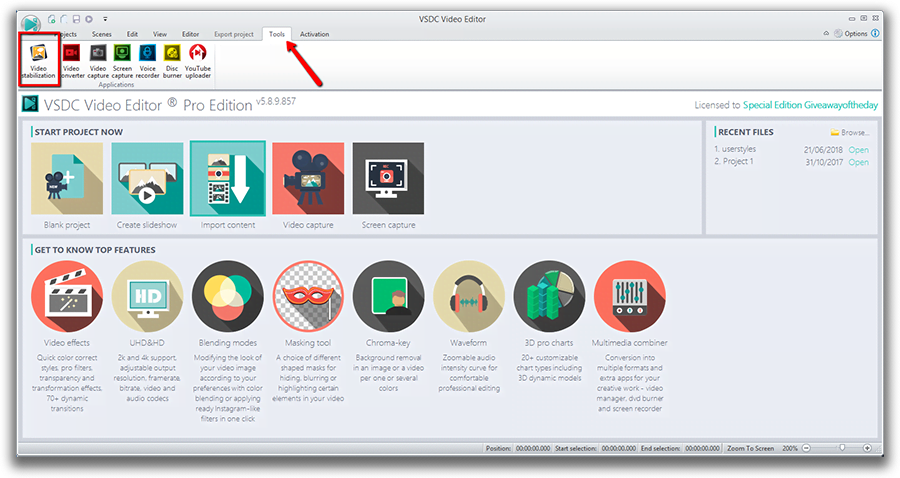
Open VSDC Video Editor and proceed to ‘Tools’. Select ‘Video stabilization’.
Click ‘Open file’ to add the footage you’re willing to stabilize.

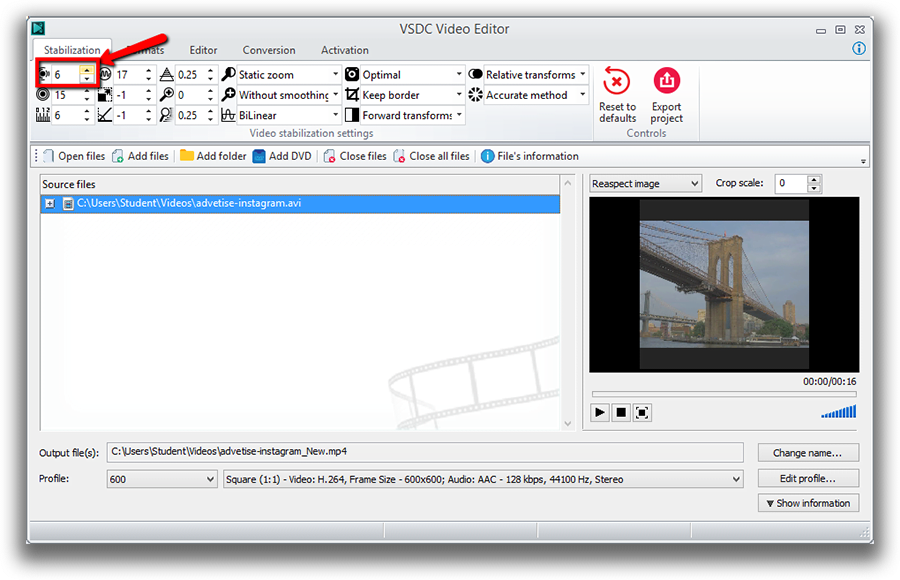
Find ‘Shakiness’ among available settings. This parameter detects how shaky a video is and how quickly your camera changes positions and takes control of these movements. Set the Shakiness rate to the maximum using the arrows.
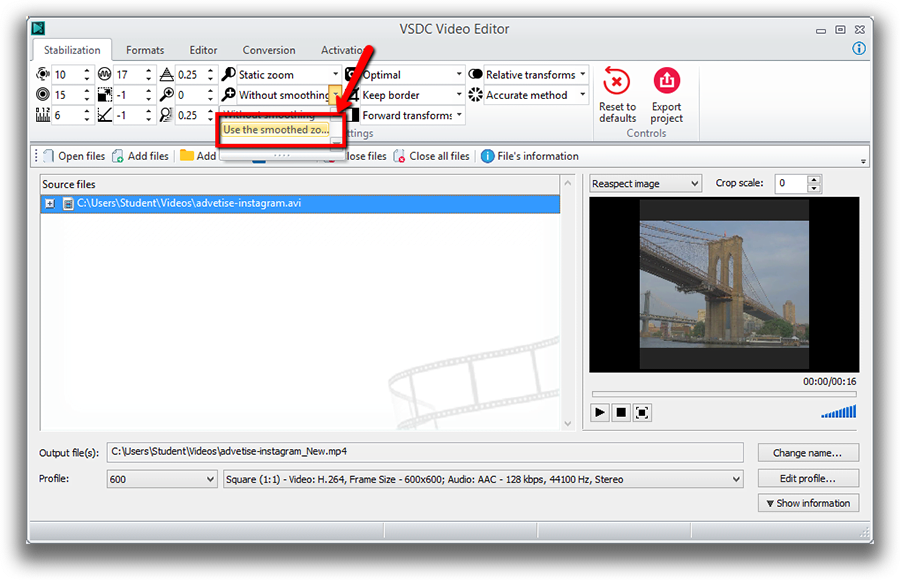
Once you’ve done that, find the ‘Smooth zoom’ dropdown menu in the upper toolbar. This setting allows you for smoothly zooming in the footage.
Select 'Use the smoothed zoom' as shown on the screenshot below.
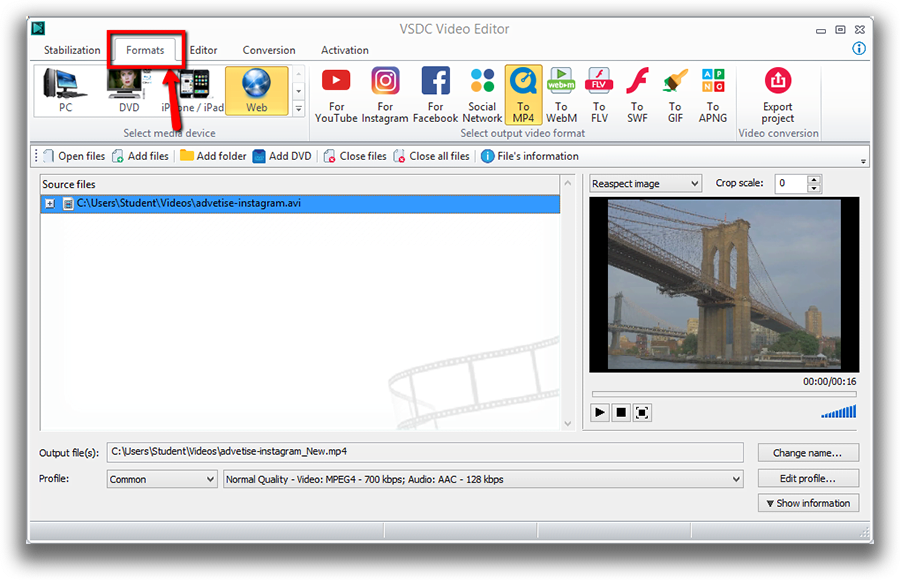
After performing these actions, you should get a stabilized video, no matter how shaky the original was. So, if there is nothing else you’d like to change in it, just proceed to the ‘Formats’ tab and choose the most appropriate output format. Remember that in VSDC, you can change export profile settings – format, codec, resolution, quality, width, and height - when necessary. If this is the case, click on the “Edit profile” button at the bottom right corner.
Once you’re done, click on the red ‘Export project’ sign.
To download VSDC Free Video Editor, please, proceed here - http://www.videosoftdev.com/free-video-editor/download
To subscribe for VSDC Pro annual license, please, place your order.
Got any questions? Drop us a line at Diese E-Mail-Adresse ist vor Spambots geschützt! Zur Anzeige muss JavaScript eingeschaltet sein! or send us a message via Facebook!
Find more awesome tutorials on our YouTube channel - https://www.youtube.com/user/FlashIntegro/videos
You can get more information about the program on Free Video Editor' description page.
Sehen Sie uns
 / @VSDCFreeVideoEditor
© 2011-2026, www.videosoftdev.com, FLASH-INTEGRO LLC. Datenschutz | Nutzungsbedingungen | Uber uns
Alle hier genannten Warenzeichen sind das alleinige Eigentum ihrer jeweiligen Inhaber.
Kopieren von Materialien dieser Webseite ist nur mit schriftlicher Genehmigung der Webseite-Verwaltung gestattet.