")


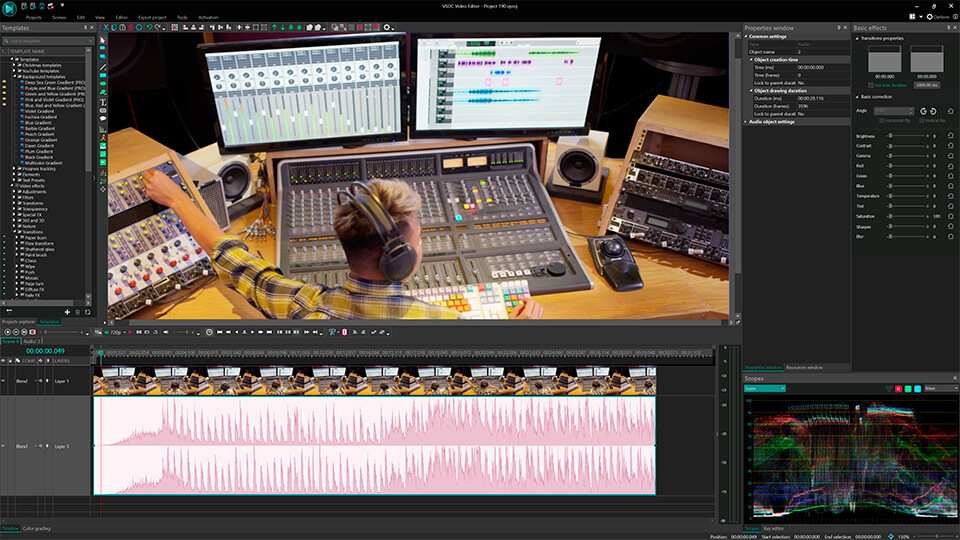
视频编辑器
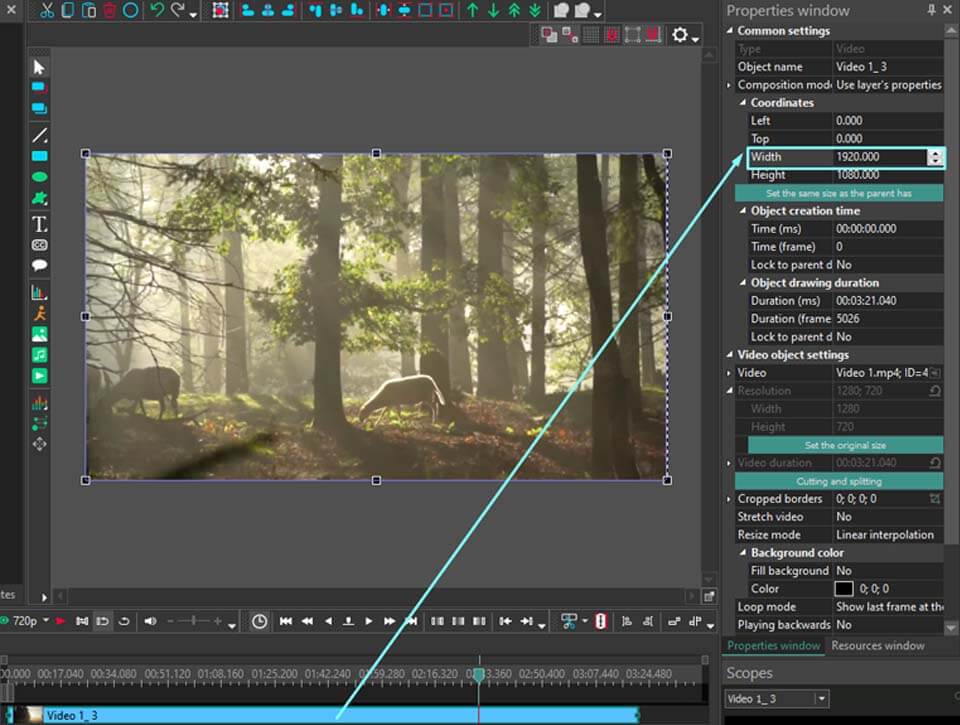
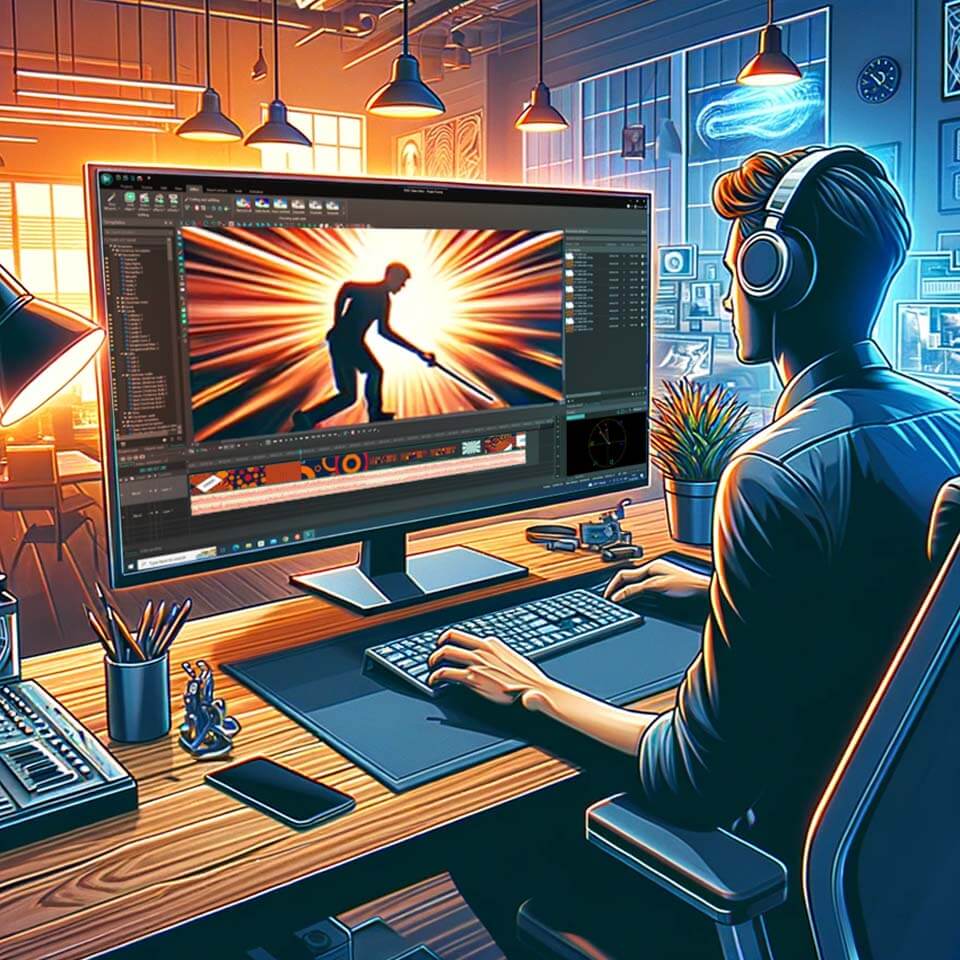
使用免费软件制作和编辑从贺卡到公司简介等不同复杂程度的视频。可以剪切和合并视频文件,应用音效和视效,添加滤镜,进行图像校正,创建幻灯片秀、添加背景音乐。使用多彩色色键和高级属性设置可以将视频升级到专业水平。软件支持所有常用的视频和音频格式。
视频转换器
此应用程序针对转换视频文件的格式,支持几乎所有常用的视频格式(读取和保存均可)。此外,程序可以大大简化转码任务,使视频能兼容特殊的多媒体设备,如iPhone、Microsoft Zune或Archos。操作非常简单,软件具有现代化界面以及所有处理视频必须的功能。
CD音频截取器
此音频工具用于从CD截取音频轨迹并存为任何格式。支持几乎所有常用的音频格式。此应用程序也能够从FreeDB服务器中获得音频轨迹的信息,并自动改名及更新文件的标记。
 视频编辑器
视频编辑器 视频转换器
视频转换器 音频转换器
音频转换器 CD音频截取器

多功能
一套免费视频软件包含丰富处理工具的种类。

高速
应用程序采用高速高效算法,适合于单核和多核处理器

实惠
VSDC视频软件可年免费下载到Windows系统操作的PC和笔记本。
News:
- 时刻已到:我们很高兴向您介绍期待已久的VSDC 9.1更新!新版本的增强功能将加速视频编辑,并使编辑过程更加便捷。 New Transition Addit...
- 我们很高兴为您提供最新的 VSDC 8.3 更新!我们的团队一直在积极开发新版本,现在我们可以向您介绍所有变化,这些变化将使 VSDC 的工作更加方便。 V...
- 如今,视频内容的普及势头越来越猛,许多用户都面临着为个人和专业目的制作视频的需求。在从市场上提供的各种视频编辑器中选择一款合适的视频编辑器时,许多用户更倾向于免...
- 在当今的数字世界中, 创造力占据主导地位。 它为个人和品牌提供了无限的可能性来吸引受众并留下持久的印象。 随着社交媒体平台处于沟通和产品消费的最前沿, 制作...
9 Best Color Grading and Color Correction Software
If you’re a video creator, there are three reasons why it’s crucial to learn color correction. First, it helps you to enhance your videos and make them look professional. Second, it allows you to color-match several clips so they look more consistent. And finally, color correction can help you fix overexposed, underexposed, and washy footage — all three being the result of poor lighting conditions or wrong camera settings.
However, when you’re just getting started, you might not be ready to commit to purchasing expensive programs. Thankfully, there is free software you can use to practice.
For this article, we’ve reviewed 9 best color grading software. These video editors include all the essential tools for both primary and secondary color correction, as well as other features to help you create a beautiful movie.
Key Takeaways
We are going to consider 9 best free video editors with a rich set of color grading tools:
- VSDC Free Video Editor
- Adobe Premiere Pro
- iMovie
- Final Cut Pro
- Red Giant Magic Bullet Suite
- FilmConvert Nitrate
- Baselight
- ColorDirector
- SpeedGrad
What Makes Great Color Grading Software
There’s no short answer to this question, and here is why. Technically speaking, color correction tools – such as color wheels, black-and-white balance pickers, HSL curves, and contrast, brightness & gamma controls – are either very similar or the same, regardless of the video editing software. As long as you understand the main principles of color correction, and how each of these tools works, you can perform it in any program.
Importance of Color Grading
Even when using professional cameras for shooting, the resulting video doesn’t always satisfy us: the picture might be gloomy or overexposed, there happen to be some glares, flashes of light and the overall atmosphere doesn’t look cinematic at all. There can be many reasons why your footage comes out in poor quality: bad lighting, wrong camera settings or it’s just impossible to create some particular environment. But what really matters is whether it can be fixed. Luckily, most video editors offer a wide variety of color grading instruments to improve the picture, setting the tone and enhancing the visual storytelling of the movie.
Color Grading vs Color Correction
Although in both cases you get to work with the colors of the video and these two notions are often used interchangeably, color correction and color grading are different techniques. When you perform color correction, it typically means that you want to enhance your video by making it look more natural and vibrant. If you’re merging several pieces of footage shot in different lighting conditions, color correction also means color-matching clips and making sure they have the same level of brightness, contrast, and gamma.
Color grading is also aimed at enhancing your video, but this technique doesn’t mean just color balance adjustment. Instead, editors use color grading to create a certain mood and visual aesthetics, express their artistic vision, so that the colors in the video become a part of the story. Color grading often means using filters and changing color tones; it always comes after color correction.
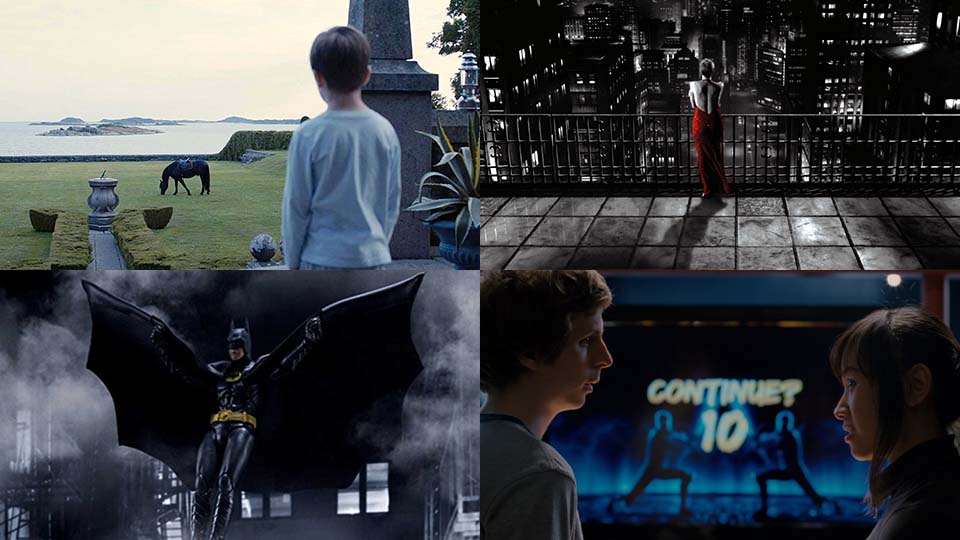
Some great examples of unique, memorable color grading works are Melancholia (dramatic cool color tones), Sin City (black-and-white effect, plus color isolation used to create a resemblance with a comic book), Batman (dimmed colors, dark tones), and, of course, movies like La La Land, Pirates of the Caribbean, and Scott Pilgrim.
Key Considerations Before Choosing
So how do you choose good color adjustment software? For starters, you can narrow your search by looking at system requirements. For example, if your computer is low on RAM, you may need to eliminate Adobe Premier because it requires a powerful machine to perform well; or if you’re a Mac user, you’ll have to eliminate VSDC because this video editing software only works on Windows PC (Though VSDC is definitely a compelling option with valuable features, accessibility and no need for powerful computers that makes VSDC a universal choice).
Next, think of other tools or effects you might need for your projects. For example, if you’re planning to use special effects a lot, no video editing software beats Final Cut Pro. If you need elaborate audio editing tools, iMovie might be an excellent choice.
Once you have 2-3 options left, go ahead and test the remaining programs. Only then will you be able to choose the software you’re comfortable with. And if you fail to find everything you need in a single program, it’s a common practice to use several solutions for video editing.
Best Top 9 Color Grading and Color Correction Software
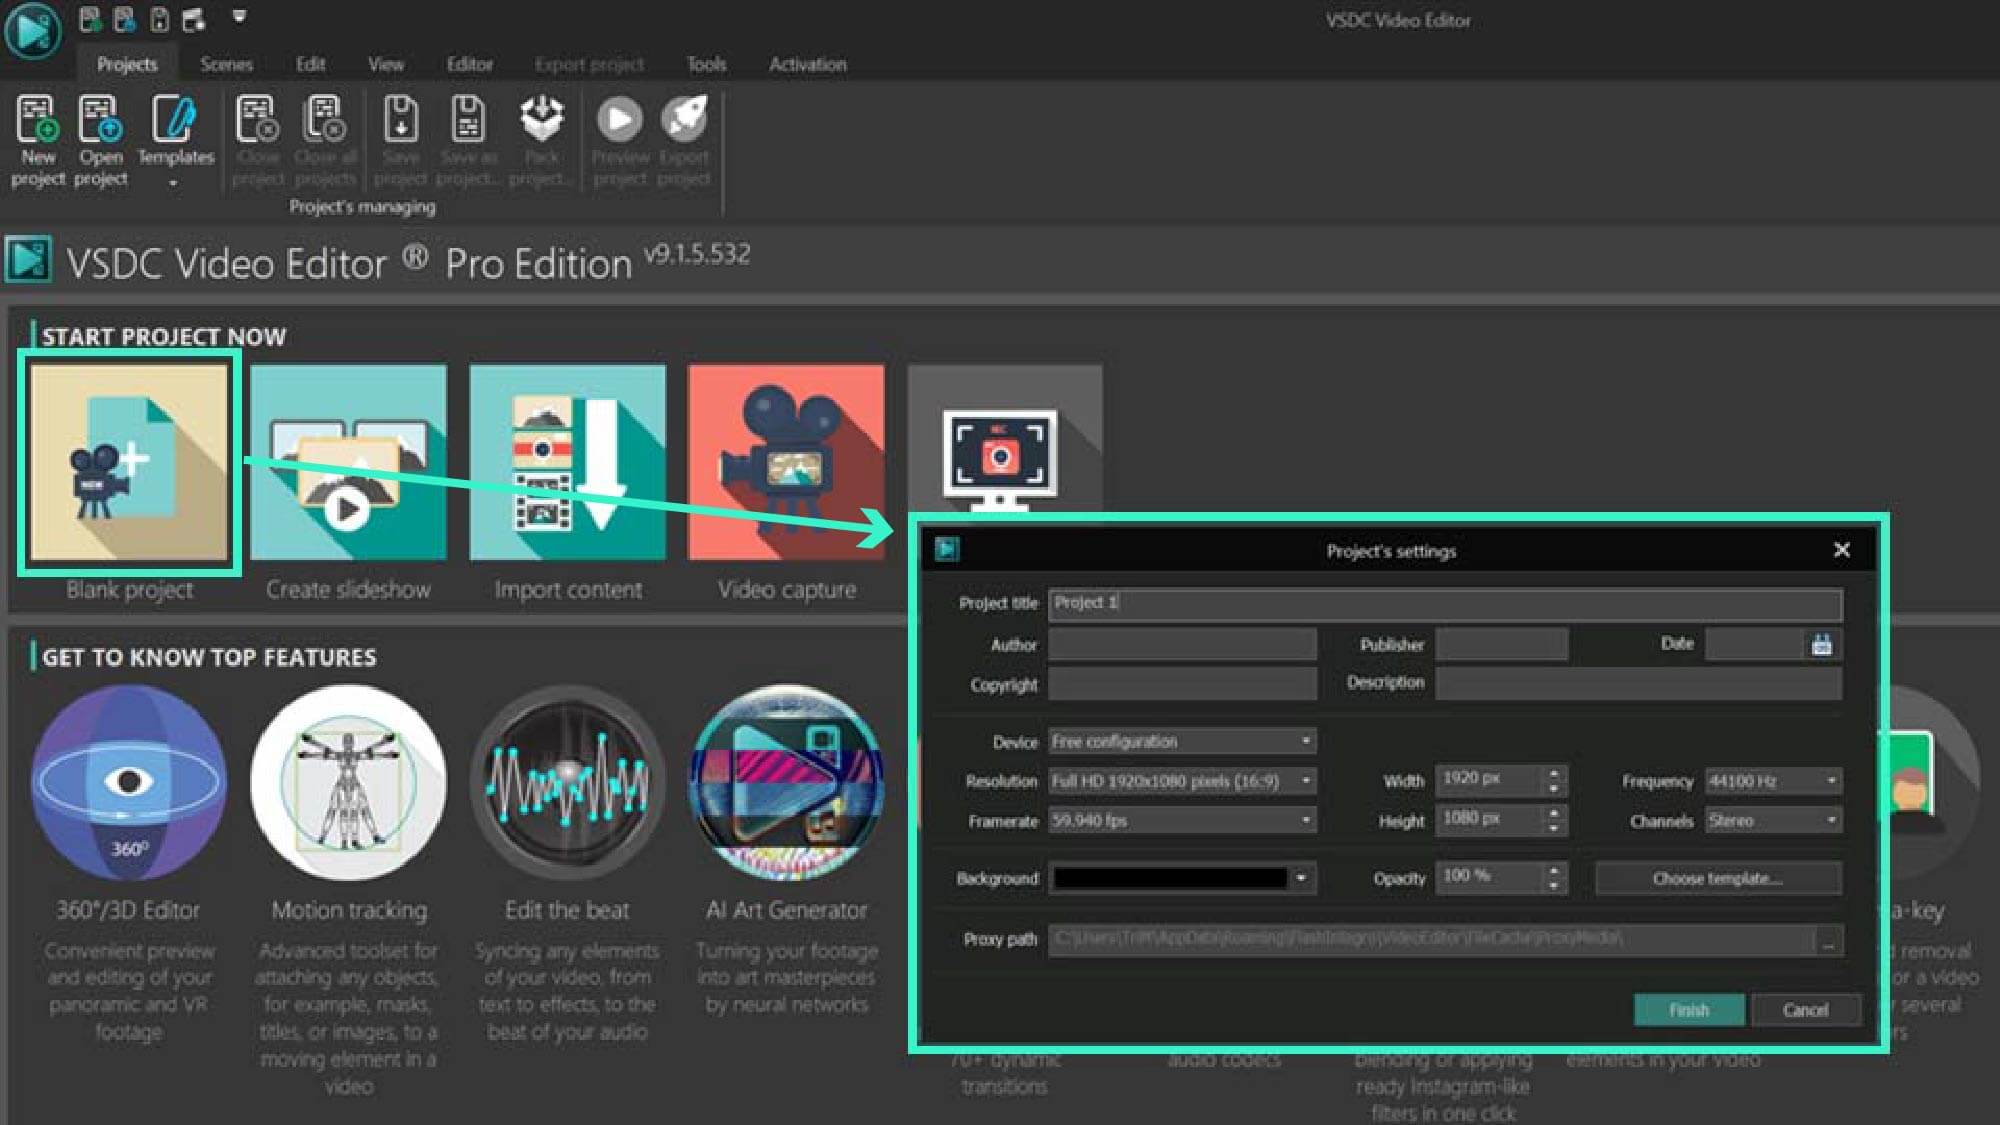
1. VSDC Free Video Editor
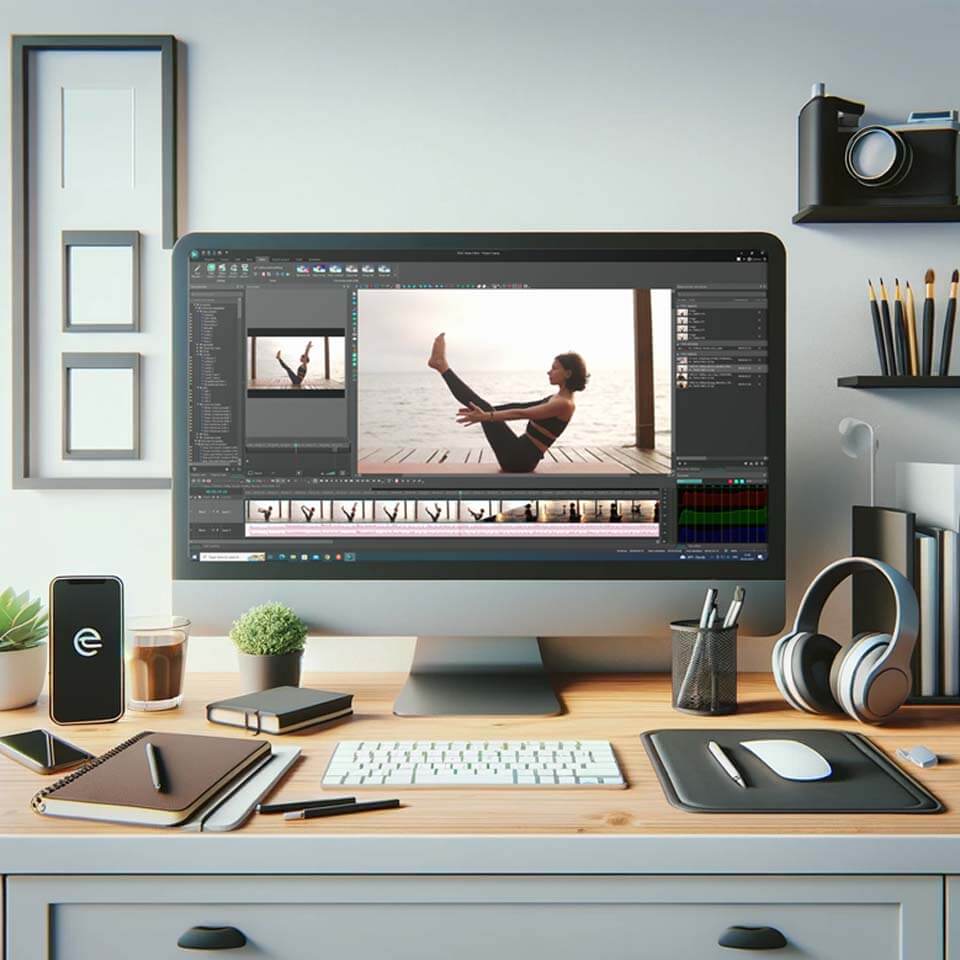
VSDC is a free video editor for Windows that has firmly established itself as a highly effective tool for both color grading and color correction, as well as a versatile video editing suite that goes far beyond. Whether you're looking to correct footage with lighting issues or aiming to achieve a particular artistic style, VSDC equips you with a broad range of tools to master your video editing skills.
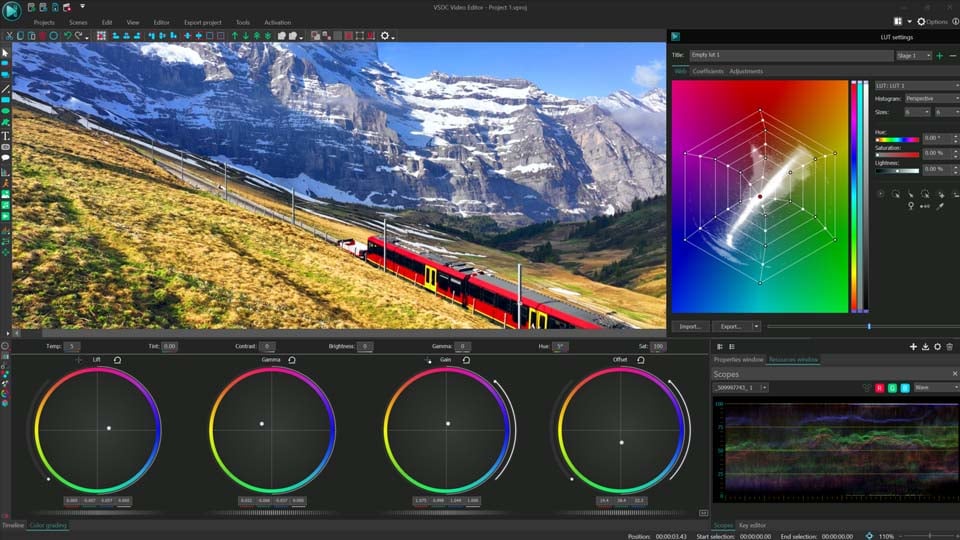
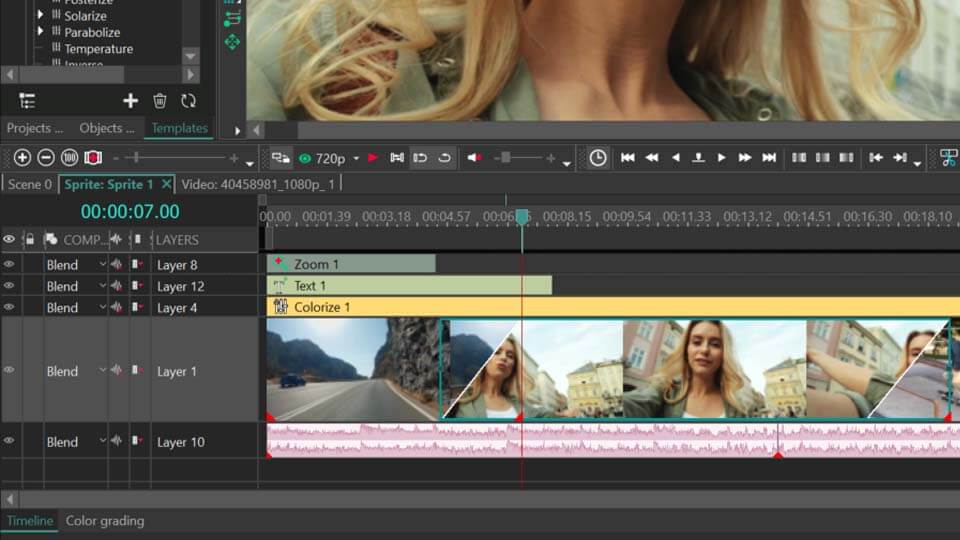
When it comes to color correction, creators usually refer to primary color correction and secondary color correction. Primary color correction implies “broad strokes,” or adjustments that affect the overall video aesthetics. Such adjustments include white balance, brightness and contrast levels, and color tone correction. In VSDC, you can perform primary color correction using the Lift, Gamma & Gain color wheels, black & white balance points, RGB and Hue & Saturation curves, as well as manual color controls (brightness, contrast, gamma, saturation, temperature, etc.). This means that you can fix overexposed or underexposed videos, correct highlights, midtones, and shadows, and just quickly enhance the way your video looks. To analyze the color distribution and perform clip color match, you can use the dedicated Color scopes window.
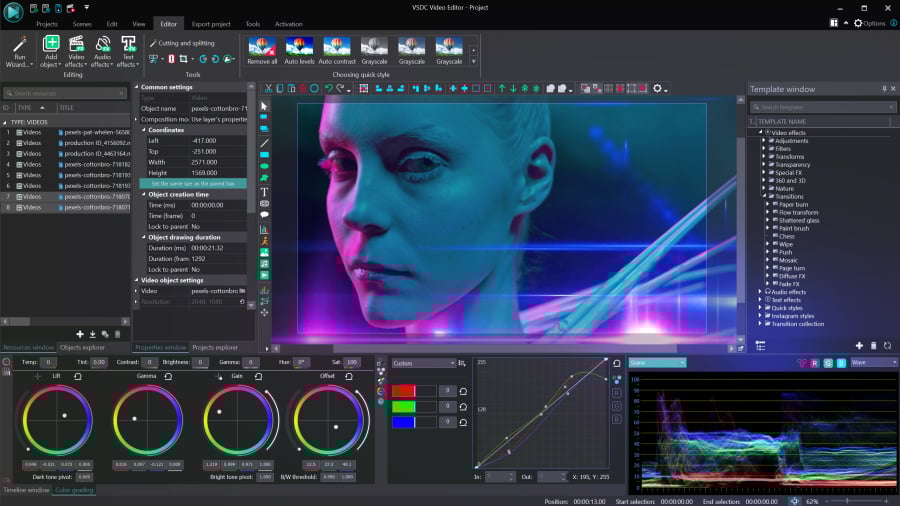
For secondary color correction, which implies correcting isolated colors or scopes of color tones, you can use the built-in LUT editor, which also allows for creation of custom LUTs. For example, you can adjust a specific color tone on the video by making it more saturated or less powerful — this works well for artifacts and skin tone correction. Also, you can entirely swap certain colors in the video or make them change dynamically and create cinematic effects like those in famous movies (check out to recreate Barbie or Oppenheimer look).
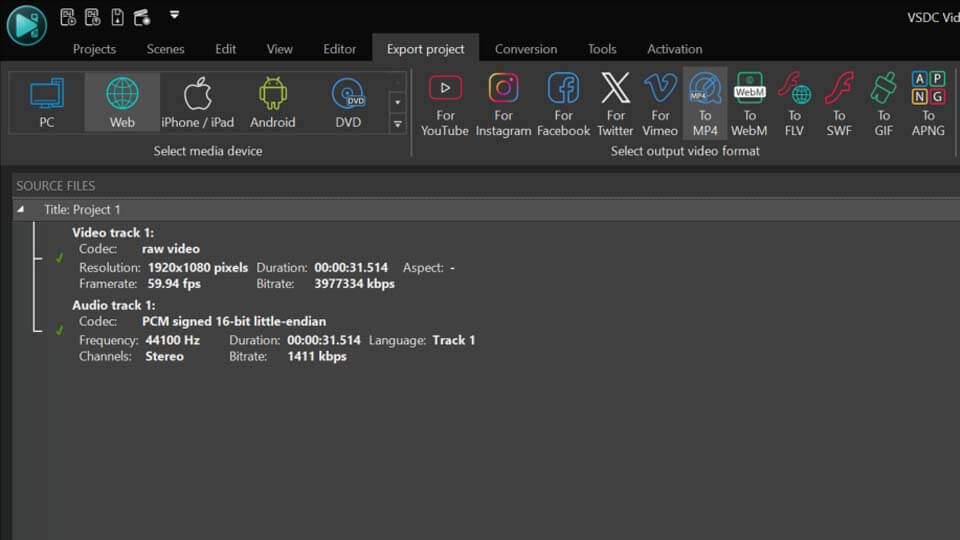
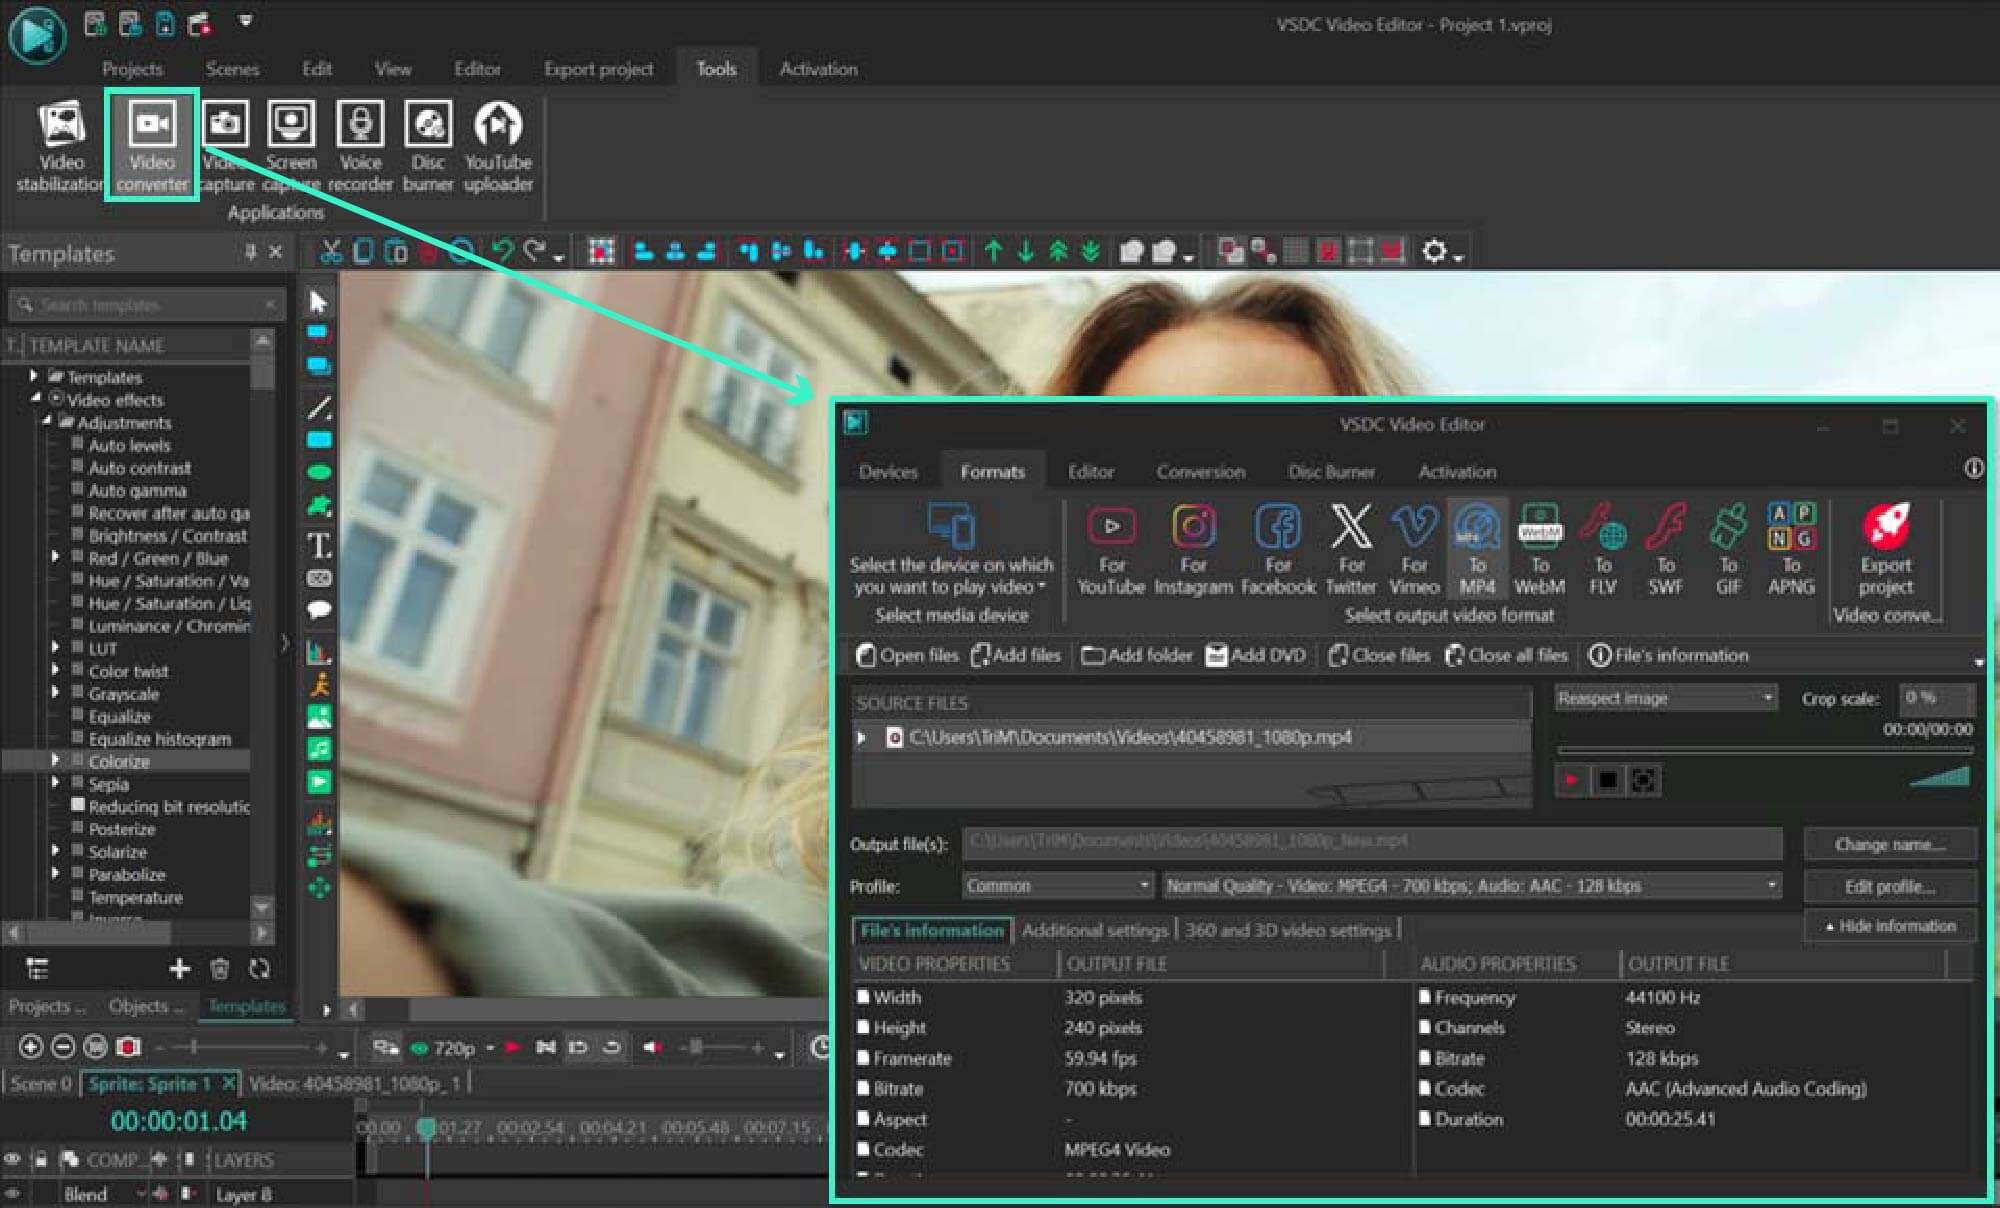
VSDC has a PRO version if you’re interested in using most popular video editing tools like masking, video stabilizer, or motion tracking. However, if you’re only looking for video color correction software, all the features are free, and you’ll be able to export your footage in up to 4K quality without format or duration limits. In addition to the video editing feature set, it includes add-ons like a video recorder, a screen recorder, and a voice recorder. All this makes VSDC a top choice — just download the program and see it for yourself!
Pros
- Primary and secondary color correction tools; - Lift, Gamma & Gain color wheels; - Black & white balance points; - RGB and Hue & Saturation curves; - Manual color controls; - Color scopes window for color analysis and matching; - Built-in LUT editor for custom adjustments; - Applying LUTs to BRAW Files; - 4K export without format or duration limits; - A wide variety of additional features; - Plenty of educational guides and tutorials on Youtube.
Cons
- Windows only.
2. Adobe Premiere Pro
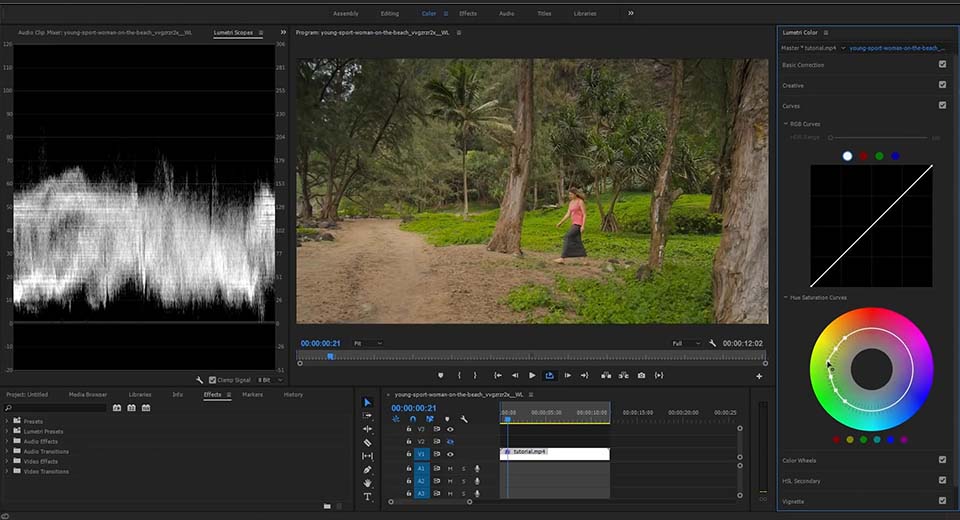
Adobe Premiere Pro is one of the most popular software worldwide that is truly appreciated for a wide array of professional-grade color correction tools designed to enhance video projects. Among the versatile color correction effects available, you'll discover such options as the Brightness & Contrast effect for adjustment of the tonal range of your video clip, enhancing highlights, shadows, and midtones simultaneously. Similarly, the Change Color effect provides control over hue, lightness, and saturation, allowing for targeted adjustments to specific color ranges within your footage, and achieving desired visual effects.
Moreover, Premiere Pro introduces advanced tools like the Lumetri color effect with comprehensive color grading and correction functionalities. With features like Basic correction for adjusting exposure and contrast, creative presets for quick stylistic adjustments, and curves for precise color manipulation, Lumetri Color empowers users to achieve professional-grade results efficiently.
Pros
- Channel mixer effect for advanced color adjustments; - Lumetri color for comprehensive grading and correction functionalities; - A built-in LUT editor; - Regular updates and improvements; - Integration within the Creative Cloud ecosystem.
Cons
- High system requirements; - A steep learning curve for beginners; - Only 7 days of free trial.
Download Adobe Premiere Pro3. iMovie
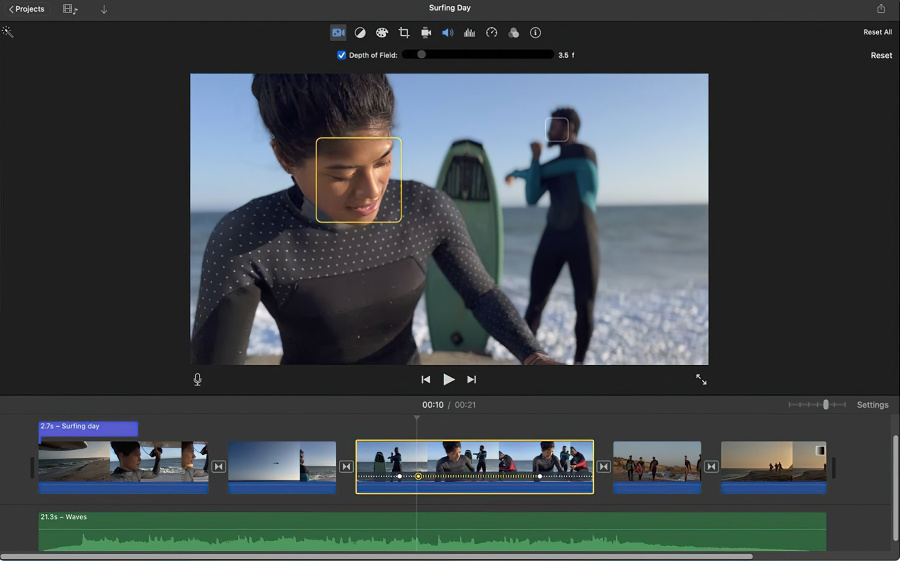
iMovie is an easy-to-use video color grading app for Mac OS. It provides basic color correction tools that will work if you’re getting started and need to quickly adjust the look of your video without dealing with RGB curves. iMovie comes preinstalled on Mac computers and it’s completely free.
Color correction tools in iMovie can be divided into two groups: automatic adjustment and manual adjustment. The automatic adjustment toolset allows you to enhance video colors based on the skin tone, use the white balance picker, and match color tones in several clips. This third option comes in handy if you’re merging multiple videos shot in dramatically different light conditions. iMovie helps fine-tune the contrast and brightness settings and match all videos to the clip of your choice.
Essentially, automatic color correction tools in iMovie improve the contrast and remove a color cast in the video to make it look more professional. Manual color correction tools allow you to adjust shadows, contrast values, highlights, color saturation, and temperature values using sliders.
While iMovie doesn’t include color wheels, curves, or LUTs, its automatic adjustment algorithm can be sufficient for basic-level color correction.
Pros
- Perfect for beginners without complicated tools like RGB curves; - Tools for both manual and automatic adjustments; - A great variety of preset filters; - Included with standard Mac OS; - Integrates easily with YouTube and Facebook.
Cons
- The program can slow down when working with large files; - A wide but basic toolset without professional color grading features; - Limited format compatibility.
Download iMovie4. Final Cut Pro
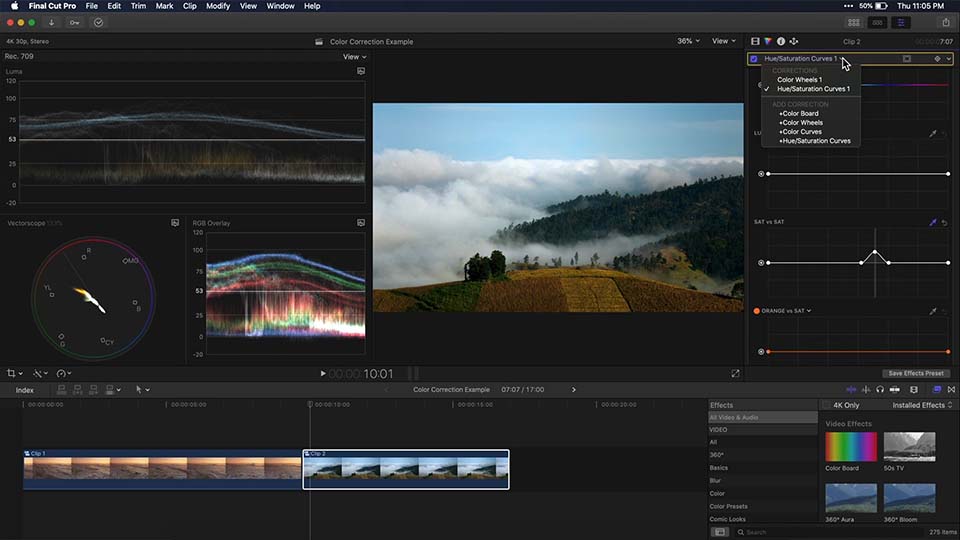
Final Cut Pro is a non-linear video editor invented by Apple, and it has been the next step for those who have outgrown iMovie. Many Mac owners prefer using Final Cut Pro because of its convenient interface and rendering speed. Just like in iMovie, Final Cut Pro offers tools for both manual and automatic color correction for enhancing video quality. The software's Analyze and fix feature automatically balances colors, exposure, and contrast during import, while the Balance color tool allows for clip-by-clip adjustments. Additionally, the Match color feature enables users to replicate the look of one video file onto another one to speed up the editing process.
For more precise adjustments, Final Cut Pro offers manual color grading tools such as the Color board, Color wheels, Color curves, and Hue/Saturation curves. These tools allow users to fine-tune highlights, midtones, shadows, and overall color balance. Masks can be applied to specific areas of clips for targeted corrections, and effects can be layered and timed using keyframes for advanced editing. With real-time updates and visual representations through Video Scopes, Final Cut Pro facilitates a comprehensive and intuitive color grading process for professional-level video editing.
Pros
- Ability to replicate color grades; - Automatic balance of colors; - Manual adjustment of color, saturation, and exposure; - Targeting specific colors or areas; - Support for masks and layering effects for targeted corrections..
Cons
- Non-traditional timeline; - Mac OS only; - Some advanced features are overly simplified.
Download Final Cut Pro5. Red Giant Magic Bullet Suite
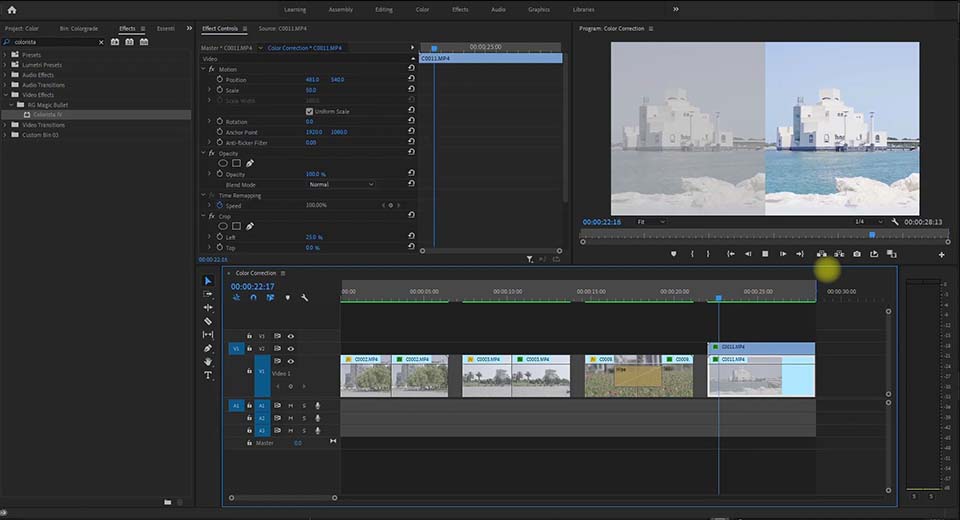
The Red Giant Magic Bullet Suite offers a comprehensive set of plugins designed to enhance the look of your footage directly on your editing timeline. Beyond simple color correction, Magic Bullet provides accurate simulations of lens filters and film stocks, allowing to achieve cinematic contrast and sophisticated color palettes reminiscent of big-budget movies. With customizable presets inspired by popular films and TV shows, you can achieve professional-quality results with Hollywood-like aesthetics.
Magic Bullet Suite excels in skin tone balancing and cosmetic cleanup, enabling you to quickly enhance the appearance of talent by reducing wrinkles and removing blemishes while maintaining a natural look.
The Magic Bullet Looks plugin offers over 300 fully customizable presets, allowing you to effortlessly apply professional-grade color grading to your footage. With support for over 30 new camera profiles and advanced color handling controls, Magic Bullet seamlessly integrates into high-end workflows, ensuring compatibility with any footage and editing process.
Pros
- Comprehensive plugin suite; - Powerful color adjustments; - Efficient skin tone balancing; - Effective noise reduction; - Customizable presets.
Cons
- Requires a powerful PC; - High price tag.
Download Red Giant Magic Bullet Suite6. FilmConvert Nitrate
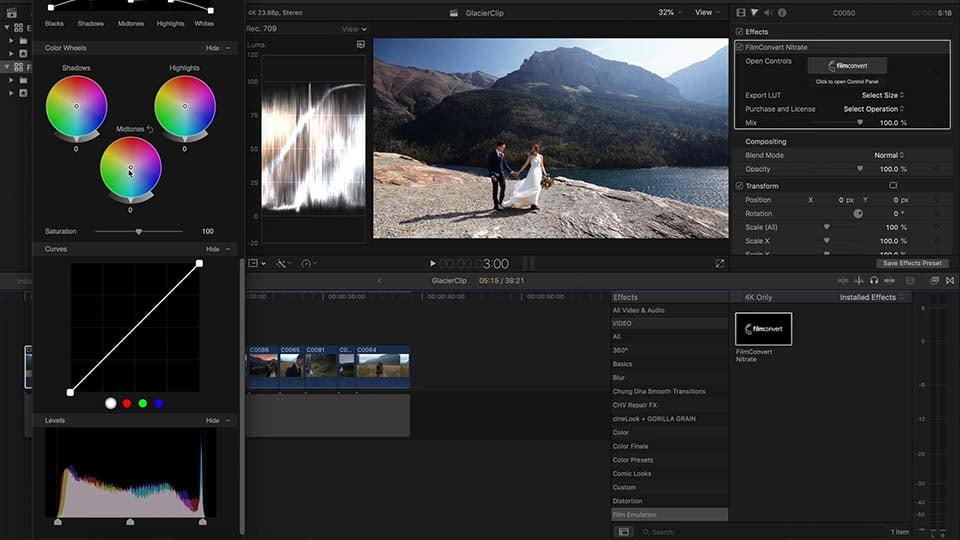
FilmConvert Nitrate is a powerful color grading plugin for enhancing a simple digital footage with the aesthetic and texture of real film. By selecting from an extensive range of film stocks and grain presets, users can achieve precise, filmic color with ease. Nitrate’s distinctive feature is its camera-specific profiling, which tailors the color grading process to the particular make, model, and profile of the camera used for shooting. This ensures that any color adjustment is accurately aligned with the camera’s characteristics for more convenience.
Additionally, Nitrate allows to manage exposure, temperature, tint, and saturation, while its film settings introduce a suite of film stock emulations based on the Cineon LOG standard, ensuring dynamic range preservation. Unique features such as Grain Settings and Halation effects add depth and authenticity, simulating the physical properties of film. Furthermore, Nitrate’s Level option, Color Correction tools, and the capability to export LUTs offer comprehensive control over the grading process, making FilmConvert Nitrate an valuable tool for achieving cinematic color grades.
Pros
- Authentic film emulation; - Comprehensive camera profiles; - Grain customization; - LUT export capability.
Cons
- Lacks comprehensive manuals; - Limited NLE Compatibility.
Download FilmConvert Nitrate7. Baselight
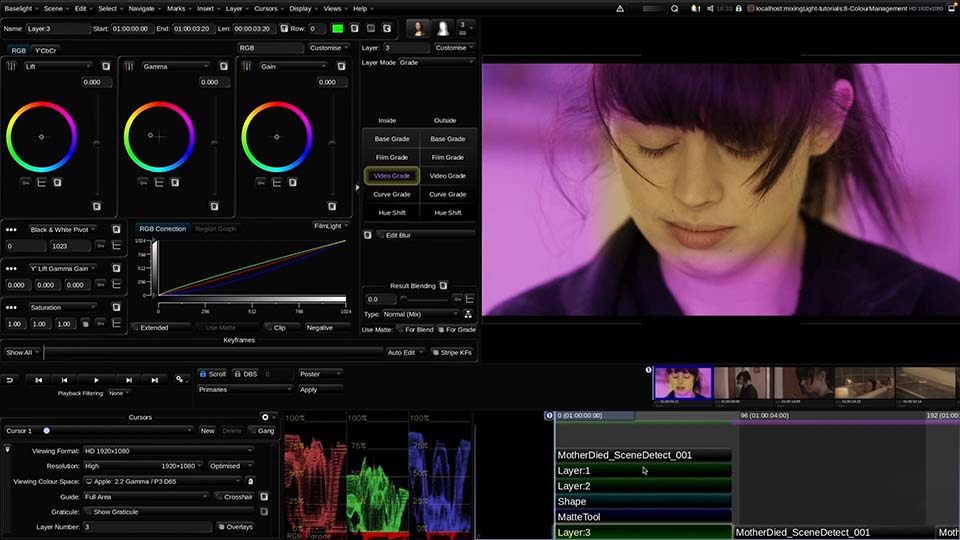
Baselight 6.0 introduces a broad spectrum of innovative features for color grading and correction. Key highlights include the revolutionary X Grade tool, which streamlines the selective color work process, enhancing productivity by simplifying interactions with imagery. It enables colorists to execute multiple localized and complex corrections in a single layer, eliminating the need for keys or mattes. Additionally, Chromogen allows for the adjustment and repair of parts of a LUT without "breaking" the footage, perfect for modern wide-dynamic-range camera data. The Face Track technology also transforms beauty work by offering precise facial tracking capabilities, significantly improving the efficiency of color correction tasks.
Pros
- Extended creative palette; - Unique layer architecture; - X grade tool; - Face track technology; - Customizable presets; - Educating resources.
Cons
- High price tag.
Download Baselight8. ColorDirector
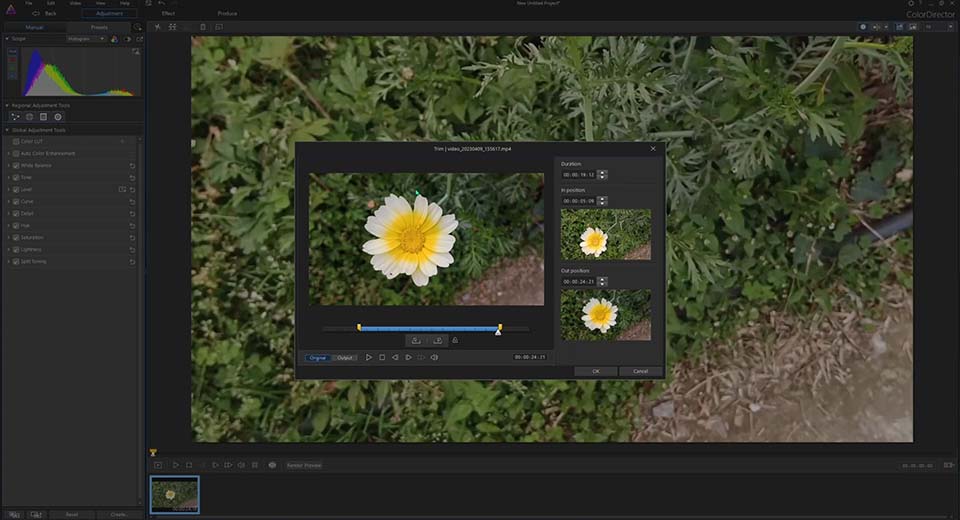
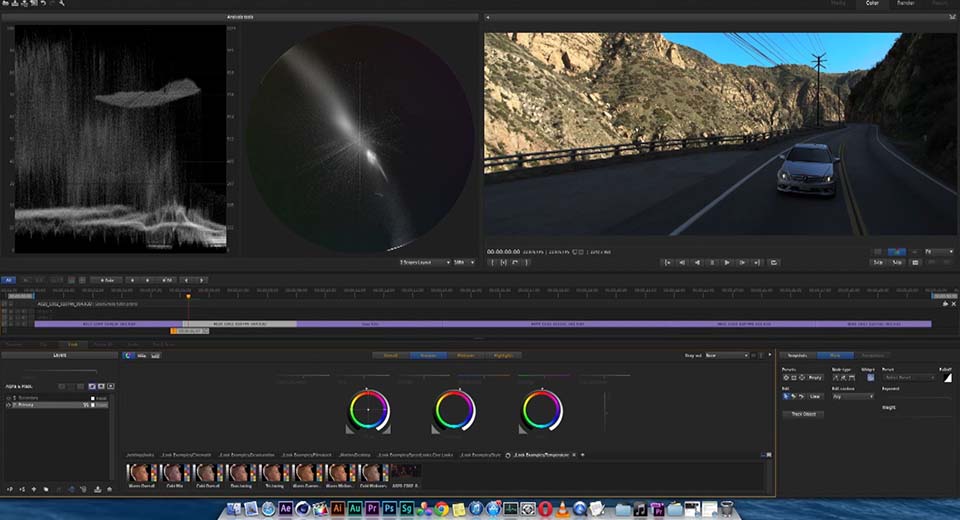
ColorDirector offers a comprehensive suite of tools for transforming any video footage into a cinematic production. It enables seamless color correction, enhancement, and styling to achieve the perfect color effect. Users can create multiple color variations within a single clip using keyframe controls and masks, export LUTs, reproduce color styles from reference clips and ensure color harmony across their videos. The platform supports automatic light source detection to enhance footage with customizable sparks, dynamic lighting effects like sunlight and lens flares, and atmospheric effects such as glow, bokeh, and black mist to add depth and texture to scenes.
ColorDirector also introduces advanced stylized visual effects, including grain, glitch, blur, vignette, and HDR, to add artistic textures or atmospheres to videos. Its professional color tools enhance productivity with features like histograms, RGB parades, waveform monitoring, and AI-powered motion tracking for targeted adjustments. The software includes a green screen maker, access to royalty-free stock assets, and AI color enhancement for precise control over the visual appearance.
Pros
- Support for many different file formats; - Keyframe controls and masks; - LUTs Support; - Customizable presets; - AI-powered motion tracking.
Cons
- Hardware acceleration doesn't operate for color and pixel adjustment; - Lack of tutorials.
Download ColorDirector9. SpeedGrade
Adobe SpeedGrade is a powerful color grading tool that offers features for stylizing digital video projects. SpeedGrade provides with the ability to correct colors, match colors between shots, and apply unique, stylized looks to footage. Additionally, SpeedGrade is equipped with several film stock effects to achieve the look of traditional film on digital video, further enhancing the cinematic quality of projects.
Starting with Premiere Pro 2015.3, Adobe discontinued the Direct Link workflow between Premiere Pro and SpeedGrade, urging users to adopt the Lumetri color tool in Premiere Pro for color grading tasks. Despite this change, the legacy of SpeedGrade lives on through the Lumetri tool, allowing users to save and apply looks as Lumetri effects and offering a broad selection of export formats for various platforms, including YouTube and Vimeo.
SpeedGrade's capabilities, such as the Shot Matcher tool for applying consistent looks across clips and the ability to send graded projects back to Premiere Pro with all adjustments intact, highlight its significance in the evolution of color grading software.
Pros
- Integration with Premiere Pro; - Multiple layers of grading, masks, and effects; - Robust tools for correcting colors; - Color grades edited sequences from Premiere Pro; - Advanced 3D stereographic editing.
Cons
- Limited updates; - Interface is not not intuitive for beginners.
Download SpeedGradeConclusion
Color grading and color correction stand out as crucial artistic mechanisms that shape the mood and style of your video, directly influencing audience reaction manipulating with light and color to evoke specific emotions. Mastery of these techniques can evoke emotions, engage the audience, and establish a unique, recognizable style in your work.
There’s a great variety of color grading and correction tools, each offering its own set of advanced features. Our choice is VSDC Free Video Editor as the best program for color grading for both beginners and professionals: its various color correction tools, including Lift, Gamma & Gain color wheels, black & white balance points, and a built-in LUT editor, make it exceptionally versatile for any color grading needs. Unlike other software that may require powerful hardware or come with a steep learning curve, VSDC offers a straightforward and user-friendly interface, ensuring that users can achieve professional-grade color grading without unnecessary complexity. Whether you're looking to fix lighting issues or create cinematic effects reminiscent of iconic films, VSDC provides all the necessary tools free of charge, making it the ultimate choice for enhancing the visual storytelling of your videos.
FAQ
I'm new to color grading. Where do I start?
VSDC is a great starting point because it offers a comprehensive set of tools for both primary and secondary color correction, without overwhelming beginners. To help you get started with VSDC, there's a wealth of resources available: our YouTube channel is packed with tutorials tailored to new users, guiding you through the software's features step by step. Additionally, the VSDC website hosts how-to articles that cover a wide range of topics, from basic color grading techniques to more advanced strategies. By leveraging these tutorials and articles, you'll not only learn the fundamentals of color grading but also how to apply them effectively using VSDC, allowing you to bring your creative vision to life.
I'm on a tight budget. Are there powerful free options?
VSDC offers both Free and Pro versions of its video editing software: while the PRO version boasts a broader spectrum of capabilities, the Free version is fully equipped to teach you the basics of video editing and color grading. It's an excellent starting point for those new to the field, providing all the necessary tools to learn the fundamentals and create engaging video content without the initial investment.
My computer is old. Can I still do color grading?
Absolutely! One of the great advantages of VSDC is its compatibility with older computer systems. VSDC is designed to be lightweight and efficient, allowing it to operate smoothly without lags even on older PCs. This means you can dive into color grading and video editing without needing the latest hardware. So, even if your computer is showing its age, VSDC makes color grading accessible and achievable.
Can I try these editors before buying?
Certainly! Many video editing software options, including those for color grading, offer free trials allowing users to test their features before making a purchase. This is a great way to explore various editors and find the one that best suits your needs. What sets VSDC apart in this context is the generosity of its free version. Unlike typical trials or limited versions, VSDC's free version is truly unlimited. It provides users with a comprehensive set of editing tools without time restrictions, making it an exceptional option for those looking to dive into video editing and color grading without financial commitment.
 下載拉伸影片編輯器

更多文章...


"VSDC Free Video Editor is a surprisingly powerful, if unconventional video editor"
- PC Advisor

"This video editor gives you tons of control and editing power"
- CNet

"The editor handles many common formats and boasts a good deal of capabilities when it comes time to alter lighting, splice video, and apply filters and transitions in post production"
- Digital Trends
© 2011-2024, www.videosoftdev.com, FLASH-INTEGRO LLC. Privacy policy | Terms of use | About us
此处被引用的所有商标均为其各自所有者的专有财产。
只有获得网站管理员的书面许可,才能从本网站复制任何材料。