Video Editor

Use free video software to create and edit videos of any complexity from a family greeting card to a company presentation. Cut, merge video files, apply visual and audio effects, use filtration and image correction, make slideshows and add an appropriate soundtrack. Use multi-color Chroma Key and advanced parameters settings to give your video a professional look. All popular video and audio formats are supported.

Read more about Video Editor...

Video Converter

This program is intended for converting video files from one format to another. Nearly all popular video formats are supported (both reading and saving). In addition, the program drastically simplifies the task of converting videos for playback on specific multimedia devices, such as iPhone, Samsung Galaxy or Huawei P30 Pro. The program is extremely easy to use, has a modern interface and all necessary video processing functions.

Read more about Video Converter...

Audio Converter

The audio converter will help you convert audio files from one format to another. All key audio formats and codecs are supported. The program also allows you to manage playlists and meta tags, extract audio from video files and save these tracks on your computer in any format.

Read more about Audio Converter...

Audio CD Grabber

This audio tool is intended for grabbing audio tracks from compact discs and saving them to the user’s computer in any format. Nearly all popular audio formats and codecs are supported. The program can also extract track details from the FreeDB server for automatic file renaming and updating meta tags.

Read more about Audio CD Grabber...

Multifunctionality

Multifunctionality

A wide array of multimedia processing tools in one free video software suite.

High speed

High speed

Our programs use fast
and high-quality algorithms optimized for single and multi-core CPU’s.

Affordability

Affordability

VSDC video software is freely available for download to Windows OS-based PCs and laptops.

How to Add Logo to Video on Windows PC

If you’re using your own videos to promote your business, stamping them with a logo might be a good idea. Not only does it help you increase brand recognition, but it’s also a surefire way to protect your content from being used by someone else.

In this tutorial, we’ll show you how to quickly add a logo to a video in VSDC, free video editing software for Windows. VSDC is a non-linear editor which means you can display several videos and images in the same scene by blending and overlaying them.

Before getting started, make sure you have your logo in high quality at hand. You’ll first learn how to overlay it on a video file, then we’ll go over the ways to make it monochrome and semi-transparent.

Here is how to add a logo to a video in VSDC

If your logo was created by a professional designer, you probably had it delivered in one of the following formats: AI, EPS, PDF, SVG, PNG, or JPG. For our purposes, a .PNG logo with a transparent background will be the best option. Such logos look more natural as if they were initially embedded in the video. However, if you don’t have a .PNG file, it’s not a problem. You’ll be able to place any image over a video in VSDC.

Step 1. Launch VSDC and upload your footage using the Import content button on the start screen.

Step 2. Use the Add object menu and select Image. Then find the logo on your PC.

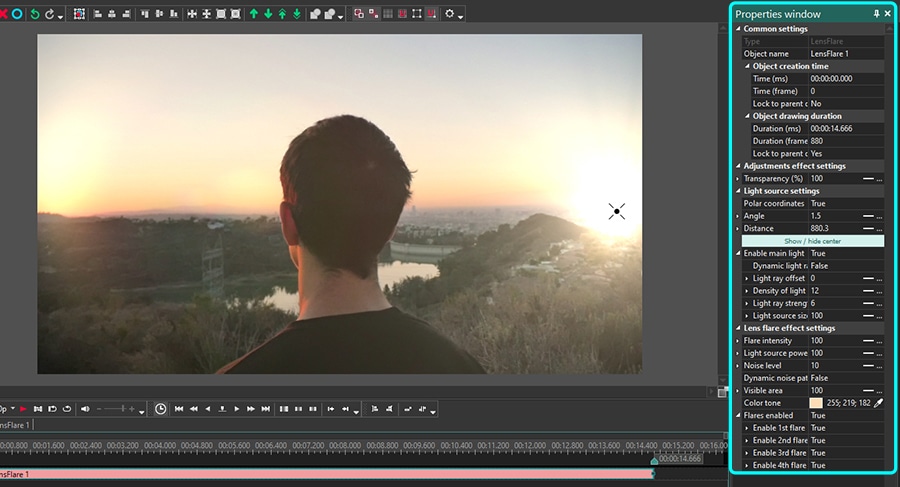
When you select the logo from your computer, the Object’s position settings window will pop up and prompt you to adjust the image position on the timeline. Make sure to select Add new layer. This way, the image will be placed one layer above the footage on the timeline, and it will be easier to tweak.

How to overlay a logo on footage in VSDC video editor for Windows

Step 3. Resize and place the logo wherever you want. For instance, you can place it in the corner or stretch it to the size of the scene and make it nearly transparent so it will look like a watermark.

Once you add the logo to the video, all you need is to make sure that the logo is visible throughout the entire clip. To achieve that, simply match the duration of the files in the scene. The easiest way to do that is by manually stretching the logo file on the timeline. If you want the logo to appear in the video for a short period of time, again, just manually shorten its duration and relocate the file on the timeline if needed. For example, sometimes, instead of displaying a logo non-stop, creators make it appear multiple times during the video.

How to make your logo semi-transparent or monochrome

To make the logo in your video semi-transparent, you need to decrease its opacity: it’s as easy as 1-2-3. Select the logo on the timeline and go to the quick Tools menu at the top. Next, select the wrench icon and toggle the Opacity control to achieve the desired effect.

You can also use color filters to adjust the logo or even make it monochrome by applying one of the quick styles from the menu.

No logo? Create a text watermark within seconds

Instead of a logo, you can add a text watermark to your video. Use this option to feature the name of your brand, your social media handle, or your website address.

Export your video with a logo

Once ready, open the Export project tab and select the desired format to export your video. Remember, you can change the video codec, quality, resolution, size, and other parameters before saving the file. You can also upload it directly to YouTube by selecting the Web >> For YouTube option.

Go ahead and try it for yourself! Download the latest version of VSDC to your PC and add a logo to your videos. VSDC is completely free, it reads all multimedia formats and places no unwanted watermarks on your video after export.

Planning to feature your brand in the video intro or outro? You can apply various effects to the logo and display it in a creative way! Check out this glitched logo intro tutorial as an example:

Download VSDC 8.1 now

How to Motion Track Text (Meme Example)

Motion tracking is a powerful feature that helps you apply a movement trajectory of any object in the video to any added object: it can be an image, a piece of text, a mask, or a shape. At VSDC, we’ve received a few questions about applying motion tracking to text (or, in plain English, “sticking text on a moving object”). To help you out with this task, we decided to publish this detailed tutorial.

If you’re new to VSDC, it is a lightweight and budget-friendly video editor for Windows with motion tracking on board. If you, for some reason, can’t afford the Adobe subscription or can’t use it because your computer isn’t powerful enough, VSDC is a fantastic alternative to rely on. It’s available for $19.99 per year and it requires as little as a couple of gigabytes of RAM on your PC.

In this tutorial, we’ll show you how to motion track text in a video. Then, we’ll show you how to make motion-tracked text look better by adding a perspective, shadow, and opacity.

How to apply text tracking effect in VSDC Pro

Before you get started, you need to have a clear idea of which object the text will be following in the video. Suppose you want a piece of text to be attached to a person, just like in the example above. In that case, you need to decide in advance which part of the person’s body the text should be following while moving.

We recommend watching the video version of the tutorial first and then, reading the text guide below.

Here is a step-by-step text version of the guide:

  1. Launch VSDC and upload your main video.
  2. Make a right-click on the video and select Create movement map from the context menu.
  3. You’ll be prompted to save that map on your PC. Later, when you need to apply the movement map to the text, you’ll pull it from the place on your computer where you’ve saved it.
  4. Place the tracking frame around the spot whose movement you want to track. In our case, it is a person’s head.
  5. Hit the Start analysis button and wait until the process is over.
  6. If the movement trajectory is correct, click Apply editing.
  7. Go back to the main timeline and add a text object using the toolbar on the left-hand side.
  8. Adjust the style of the text using the formatting menu at the top. Then make a double click on it.
  9. Open the Add object menu and select Movement >> Movement map.
  10. You’ll be prompted to select the map you’ve created earlier. Hit OK.

Your video meme is ready! Use the Preview feature to see if everything looks the way you expected. Below, we’ll cover a few tricks you can use to make the text look more professional.

How to make motion-tracked text look better in a video

Most video memes are made in a fast-paced style and contain very simple text captions. However, you can achieve a much better look if you do one of the following:

  • Highlight the text
  • Add a shadow
  • Increase opacity
  • Add perspective
  • Add an arrow

Notice how different the motion-tracked text looks with these adjustments in place.

You can apply just one effect or combine a few of them; below is the instructions to help you out.

How to highlight motion-tracked text

The “highlighter” effect is called “Brush” in VSDC, and it’s located in the text editing menu. To access it, make sure you’re in the main timeline tab and make a single click on the text object. Then select the Brush color and toggle the opacity control.

How to add a shadow to motion-tracked text

The shadow effect will help you add volume to the text. To apply it, select the text object by clicking on it, then open the Video effects menu, proceed to Special FX and select Shadow.

Notice that the Properties window will slide-in from the right-hand side. This is where you can tweak the settings of the effect: the size, angle, and color of the shadow, for example. You can also switch to the Long shadow option if you want it to be more prominent.

How to increase or decrease opacity of motion-tracked text

Alternatively, you may want to make the text less prominent or even opaque. To achieve that, select the text object, go to the formatting menu at the top, open Text color and toggle the Opacity control.

How to add perspective to motion-tracked text

Adding perspective to text means slightly turning or rather swaying it horizontally or vertically. To apply this effect, click on the text object, open the Video effects menu, proceed to Transforms and select Perspective.

Then go to the Properties window, select a vertical or horizontal perspective and adjust the angle.

How to add a pointing arrow to motion-tracked text

Finally, if your text is attached to a small object or if you have multiple captions that are assigned to different objects, you can add arrows pointing at those objects and moving along with the text. The best way to do that is by adding a .PNG arrow image with a transparent background to the scene and assigning the same movement map to it you assigned to the text earlier.

Time to experiment with motion-tracked text!

You now have all ins and outs of working with motion tracked text. Go ahead and try it for yourself. If you need inspiration, make sure to check out our YouTube channel.

Got questions about VSDC? Our DM is always open on Facebook.

How to Make a Picture Move in a Video – from Point A to Point B

If you want to make a piece of text or an image move in a video, you can do it for free using VSDC Video Editor. The aptly named Movement feature allows you to move any object from point A to point B, adjust the movement speed and apply various effects to the moving object to make it transform or disappear in the process.

There are lots of ways to use text or image movement in your videos creatively! For instance, you can put together a simple but stylish intro animation or imitate some special effects.

Below, we’ll show you how to apply movement to a .PNG image. You’ll be able to replicate this tutorial for any picture added to the scene, a shape, an icon, or even a mask. Remember to download the free version of VSDC Video Editor before getting started.


How to make a picture move in a video: tutorial

Launch VSDC and use the Import content button to upload your project background – video or image. Next, open the Add object menu at the top and select Image (or use Ctrl + I) to upload the image you’ll be applying the movement to. In our case, it’s a .PNG image with a transparent background. Feel free to use files of any other format!

Place the image at its starting point (point A) and follow these steps:

  1. Double-click on the image
  2. Find the Movement icon in the menu on the left-hand side
  3. In the pop-up window, leave the default settings and hit OK
  4. Point to where the image should be moving during the playback and make a click

How to use the Movement feature in VSDC Free Video Editor

Congrats! You’ve created a trajectory and when you use the Preview button, you’ll see how the image moves gradually from point A to point B, as the video progresses.


How to enhance the object movement effect in a video

Now that you’ve learned the basics, there are a few more things you can adjust to make the object movement effect look more impressive.

First, you can specify the moment when the movement starts and when it stops. By default, the movement effect continues as long as the image is visible in the scene. However, you can change the timing by dragging the movement control points on the timeline. In other words, if you want the image to stop moving at a certain time, make sure to place the second (yellow) point in that moment on the timeline. Naturally, it will affect the speed. The shorter the duration of the movement effect is, the faster your image will be moving in a video.

How to make an image move in a video faster by shortening the duration of the Movement effect

Second, you can apply various effects to the image as it moves. Consider the fade-in and fade-out effects as an example. If you apply them, the image will gradually appear at the beginning of the trajectory and gradually disappear at the end of it.

Or, let’s suppose you want the image to rotate briefly in the middle of the path. Then go to the Video effects menu and select Transforms —> Rotate. Adjust the duration of the effect on the timeline and preview the result to see how it looks. In the example below, we’ve applied both the Rotate and the Fire effects to the moving image.


Master the moving object effect with VSDC

The free version of VSDC only allows you to apply movement from point A to point B. That is one movement path. If you want to build a more complex trajectory consisting of more than two points, check out our guide to making objects move in a video – this feature is considered more advanced and available in VSDC Pro (which is $19.99 per year).

However, if you need an image to follow a moving object in a video, the best way to achieve that is by using motion tracking. It’s a powerful Pro-level tool that helps quickly apply a trajectory of any object in a video to a piece of text, image, or icon.

Ready to try it for yourself? Then it’s time to download VSDC Free Video Editor and start your first animated video!

How to work with the movement object in VSDC Free Video Editor?

How to turn Image to a moving object| image scrolling effect on VSDC free video editor

download window version iconDownload VSDC Video Editor

How to Make a Tutorial Video for Free in VSDC

Since we’ve launched our YouTube channel, many of you asked us to share tips for making video tutorials. Although it might be challenging to write a one-size-fits-all guide, we’ve decided to describe our methods in the post below.

This guide will be helpful for those who want to produce software tutorials in a video format, but generally, the same sequence of steps will work for any other type of video tutorials.

To get started, you’ll need the following (all tools are free):

- Video editing software – we recommend VSDC Video Editor for PC and iMovie for Mac

- Desktop screen recorder – we recommend VSDC built-in screen grabber or OBS

- Webcam video recorder – we recommend Bandicam or a built-in camera app on your computer

Note that you’ll only need the web camera and webcam video recorder if you want to place a video of yourself in the corner using the picture-in-picture effect. If you’re not planning to make a public appearance, you can record voice commentaries or even make do with subtitles only.

Now, without further ado, let’s review the steps we take when we make video tutorials for our YouTube channel.


How to make a tutorial video, step by step

You may already have an idea of the tutorial you want to record. If you do, jump to Step 2. If you don’t, there are plenty of tools to help you with the research – we’ll mention some of them below.

This is what a typical process of video tutorial creation looks like:

  1. Search for the idea and inspiration
  2. Break down the scenario into steps
  3. Perform a rough rehearsal with that scenario
  4. Write the final script (below, we share the structure we use for video tutorials)
  5. Record the video tutorial
  6. Edit the video tutorial
  7. Add audio: music, voiceover, or your talking head
  8. Add intro and outro
  9. Save and publish your tutorial

Now that you have a general idea, let’s look at this process in detail.


Step 1. How to find an idea for a video tutorial

If you aren’t quite sure what your tutorial should be about, there are plenty of platforms to help you find inspiration.

Let’s suppose you want to make a video tutorial about using GIMP. Instead of creating a long generic overview of the program, it might be better to angle your tutorial and teach viewers something specific. But how do you find out what people want to learn?

First, YouTube search and Google search can be helpful. Just start typing “GIMP how to…” and read the autofill options suggested by the engine. The autofill options are generated based on the most frequent search queries, which means these topics are in demand. Next, when you select any of the suggested topics on Google, scroll down and see the “Searches related to…” section. It may also help you come up with ideas for your video tutorial.

Second, you can use keyword research tools like Keywords.io, Ubersuggest, and Answerthepublic to find the most popular search queries on any given topic.

How to find ideas for a video tutorial using keyword research tools

If you choose to use one of these tools, it’s always better to select the searches with a lower volume of queries because there will be less competition for your tutorial in search results after you publish it.

Finally, feel free to get inspired by other bloggers. If you know a better, more efficient way to remove background in GIMP – go for it! If you want to come up with a new angle – go for it! If you can produce a tutorial in another language – go for it!


Step 2, 3, 4. Why you need to prepare a scenario

Here is the thing. You can go ahead and start recording the tutorial right away. But if you want to avoid the “Oh, snap, I forgot that!” moments and minimize editing, we recommend starting with an outline and expanding it to a full-fledged scenario describing what you will be doing and what you will be saying in the video.

Now, what should a video tutorial scenario look like? From our experience, the following structure works well:

  1. Tell the viewers what this tutorial will be about
  2. Give them a sneak peek of the result or the process
  3. Show the tutorial including your commentaries
  4. Encourage them to subscribe and comment on the video

The sneak peek will help engage the viewers from the beginning of the video, and the call to action at the end of the video will encourage them to connect with you. Want to know more about optimizing videos and growing on YouTube? We recommend learning from Brian Dean and his video marketing hub.


Step 5. How to record a video tutorial

If you know your subject well and you’ve prepared a scenario, this step will be the easiest one. Make sure to mute notifications on your computer, then hit the Record button and start your video tutorial. Don’t worry about bloopers – you’ll be able to cut them out later.

Most screen video recorders allow you to set the desired quality and frame rate. For the best results, we recommend using the following video parameters: 1080p and 60fps.

Another feature most video recorders have is a drawing toolset. The drawing toolset typically includes a highlighter or a pencil and a few shapes or arrows for you to point at the objects you’re talking about in the video. Many beginners try to incorporate these tools while recording the tutorial, but there is no need to do that. When you’re a beginner, they will only slow you down and ruin the flow of the script. If you decide to highlight any object in the video, you’ll be able to do it faster when you start editing.

Note, if you’re planning to record yourself using a webcam, you should do that simultaneously. Place the camera in front of you, connect it to your webcam video grabber, and hit the Record button before you start the tutorial.


Step 6. Video tutorials need very little editing

Most times, editing a video tutorial means cutting out “bloopers” or those seconds when your mouse freezes because you don’t know what to do or what to say next. You also might need to add transitions if your tutorial consists of several parts. Finally, text captions and lines will make your tutorial more informative and easier to understand.

You can easily add these elements using VSDC Free Video Editor. As a non-linear video editor, it allows you to place any object over the main video and fine-tune its appearance precisely.


Step 7. Time to add narration to the tutorial

If you have recorded a voiceover for your tutorial, it’s time to add it and synchronize the narration with the video. You might need to trim or split some parts of the audio, but overall, it’s a relatively easy task even if you have zero experience.

If you have recorded a video of yourself while doing the tutorial, you’ll need to apply a picture-in-picture effect (or a video-in-video effect in that case). Simply import the video of yourself to the editor and place it one track above the main video on the timeline. Next, resize the video of yourself and drag it to the desired spot - usually, the bottom right corner.

Watch the tutorial below to see how it works.

How to make a 'video-in-video' or 'picture-in-picture' effect

Pro tip: if you record yourself in front of a green background, VSDC will help you remove the background from the video and leave it transparent. The result will look something like that:


Step 8. Intro and outro will make your video tutorial complete

Typically, when you make a video tutorial, you want minimum effects because showcasing your editing skills is not the purpose – you want to focus on the content. However, you definitely should add a short intro and an outro at the beginning and the end of the video.

Use intros to highlight the name of your tutorial and talk about the lesson. Your intro can be short and simple – watch the video below to find out how to create one in VSDC:

How to create slide-in text intro for free in VSDC

The outro is the best place to add your call to action. This is where you can insert your website address, display your social media handlers, and encourage viewers to subscribe. If you’re planning to make more video tutorials, it’s a good idea to tell viewers why they should subscribe to your channel and what else you’re planning to publish.

Here is a quick tutorial to adding an animated subscribe button – the essential part of an efficient outro:

How to add custom subscribe button with a bell to your video


Step 9. Save and publish your video tutorial

Once the tutorial is ready, all you need is to publish it on your YouTube channel. Here are some of the best practices to help your video get noticed:

  1. Include the keyword you’ve found during the research to the video title, the first lines of the description, and tags.
  2. Select a relevant video category in the More options tab after uploading the video to YouTube. In your case, it will most likely be the “Howto & Style” or the “Education” categories.
  3. Upload subtitles. You can insert the text from your own script or use the automatic speech recognition tool provided by YouTube. Even if you’re the one narrating, for some people, subtitles will be more convenient - keep that in mind.
  4. Create a thumbnail using a free tool like Canva. The thumbnail will help your video stand out in YouTube search, so it’s worth investing a few extra minutes to produce one.
  5. Share your tutorial on social media using hashtags. Even if only a few people – your friends and your mom, of course – watch the entire video, for YouTube it will mean that your content brings value and it’s worth recommending.
download window version iconDownload VSDC Video Editor


Have fun making your video tutorials!

Stressing out about your first video tutorial? We’ve been there. Looking at what you’ve created thinking you could have done it better? We’ve been there. Doubting anyone will ever watch your tutorial? We’ve been there, too! And guess, what? None of these reasons should discourage you.

Video tutorials are a great genre to dive in. People are looking for video tutorials all the time choosing this format over text tutorials. And if you have something you want to teach a bunch of strangers all over the world – now is probably the best time to do that.

So, have fun and enjoy creating!

Got any questions about the video editing part? Shoot us a message on Facebook.

If you want to use tutorials to grow your business, check out this video marketing guide.

Need inspiration? Subscribe to our YouTube channel. We publish short weekly tutorials for video creators of all levels of experience.

Lens Flare Video Effect in VSDC: Settings Overview

The Lens flare video effect is essential for imitating the sunlight, creating a dreamy atmosphere in a video, and highlighting particular areas or objects in the scene. When used right, it can help you achieve a perfect film look.

In this tutorial, we’ll show you how to apply the Lens flare effect using VSDC Free Video Editor.

Before you get started, download the latest version of VSDC for Windows.

How to add Lens flare effect to your footage in VSDC

VSDC brings quite a versatile feature set that allows you to tailor the Lens flare effect precisely to your needs. To ensure that it looks realistic, the developers have included two levels of settings: one - to imitate the desired light source, and another one - to customize the flares it produces.

Without further ado, let’s see what the effect looks like when applied to footage.

To get started, follow these simple steps:

  1. Launch VSDC on your computer and import your footage using the Import content button on the start screen.
  2. Place the cursor at the moment on the timeline when you want the effect to appear in the video.
  3. Left-click on the video and proceed to Video effects. Then select OpenGL - Lens flare
  4. In the Object’s position settings window, click OK.

This is the default version of the Lens flare video effect. Once applied, you’ll notice a little cross in the center of the effect. Use it to “grab” the flare and move it around the scene or even out of the frame to achieve the desired effect.

If you’re happy with how your video looks, you might want to leave the effect as is.

If you want to explore the customization possibilities though, keep on reading this tutorial. Below, we’ll show you how to change the size of the flare, its intensity, the light source angle, the color tones, and much more.

Lens flare effect settings overview

To get started, make a double-click on your footage and left-click on the flare effect layer. Select Properties from the context menu – the Properties window will slide-in from the right-hand side.

In that window, the effect settings are broken down into four groups:

  • Common settings
  • Adjustment effect settings
  • Light source settings
  • Effect settings

Let’s take a closer look at each group.

Lens flare effect: common settings

Common settings allow you to add a title to the effect layer, set the moment when the effect will appear in the video (by seconds or by frames), and the duration of the effect (in seconds or frames).

How to apply page turn effect in VSDC

Lens flare effect: adjustment effect settings

Adjustment effect settings enable you to choose the transparency level for the Lens flare effect. You can have the same level of transparency for the entire effect duration or you can have it gradually increase/decrease to the desired level.

For the latter, the Initial value and the Final value of the Transparency parameter should be different. For example, here is what the effect will look like if we set the Initial value at 100% (completely non-transparent) and the Final value at 10%:

Lens flare effect: light source settings

The Light source settings are applied to the artificially added source of light that produces flare we see in the video. The key parameter of this group is called Polar coordinates.

This parameter allows you to use the polar coordinate system to locate the light source more precisely. If you activate Polar coordinates (switch the parameter to True), the pole (point with coordinates 0;0) will be located in the center of the preview window, and you’ll be able to set the Light source angle and the Light source distance.

When you change the light source angle, the produced flares appear in a new location based on where the light comes from.

The Initial value for this parameter will define the angle for the beginning of the video, and the Final value – for the end of the video. That means if the Initial and the Final values are different, the light source angle will be gradually changing over time.

The light source distance defines how far the center of the light source will be shifted from the center of the scene. Note that the light source is shifted toward the angle you’ve set in the previous parameter. For example:

  • If the light source angle is 90, the light source will be moving down.
  • If the light source angle is 180, the light source will be moving to the left.
  • If the light source angle is 270, the light source will be moving up.
  • If the light source angle is 360, the light source will be moving to the right.

When the Light source distance parameter is equal to 0, the light source will always be located in the center of the scene.

If you switch Polar coordinates to False (deactivate the parameter), the 0;0 point will be located in the top left corner. In that case, you can set the location of the light source using the X and Y axis. Again, by adjusting the Initial and the Final values, you can set different light source locations for the beginning and the end of the video.

The following parameter is called Enable main light. It activates and deactivates the main light source in the video. If the parameter is enabled (set as True), the main light source will be visible. If you disable it, only flares will be visible in the scene.

In addition, when the main light source is enabled, it activates the following parameters:

  • Dynamic light ray offset
  • Light ray offset
  • Density of light rays
  • Light ray strength
  • Light source size

The Dynamic light ray offset and the Light ray offset allow for controlling the rotation of the rays around the light source. If you activate the former parameter, the rays will be rotating automatically. If you activate the latter parameter, you’ll be able to set the rotation manually.Light ray offset can only be enabled if the Dynamic light ray offset is switched to False.

Light ray offset maximum value is 100, and that equals to a 360-degree rotation, or full circle.

Density of light rays, as the name suggests, defines how dense the light rays will be spread around the source of light. The higher the value is, the thinner and denser the rays are. If you want the density to gradually change over time, use the Initial and the Final values.

Light ray strength defines how sharp the light rays are. The higher the value of this parameter is, the sharper the rays are.

Light source size allows you to control the size of the light source.

Lens flare effect: effect settings

Now that you know how to achieve the desired light source appearance and the ray movements, it’s time to see how you can adjust the flares. The fourth group of settings – Effect settings –  helps you do exactly that. Below are the parameters you can work with, reviewed.

The Flare intensity is the parameter you can use to change the visibility of the flares. If you want the flares to gradually become more visible or less visible over time, use the Initial and the Final values.

For instance, look at the flares becoming more visible during the playback with the Initial value set at 100, and the Final value set at 300.

Light source power defines how powerful the light source is. For instance, this is what happens when at the end of the video the light source becomes five times more powerful than at the beginning of the video.

Now, Noise level should sound self-explanatory and it affects both the look and the visibility of the effect. The higher the noise level is, the less visible the light source becomes, and the more grainy the effect looks. When the Noise level is equal to 100, the light source and the flares are completely invisible.

Dynamic noise pattern, similarly to the Dynamic light ray offset, allows you to set an automatic pattern that will be dynamically changing the noise level as the video progresses.

Visible area is a really interesting feature that helps you change the visibility of the footage. For instance, you may want to gradually increase the visibility of the scene as the size of the light source increases. Basically, it’s a perfect way to create an illusion of a video shot during the night!

In the example below, the Initial value is set at 10, and the Final value is set at 100. Notice how the scene visibility gradually increases.

Moving on to the next set of parameters related to the flare color tones. Sometimes, video creators specifically look for yellow, blue, green, and red lens flare effects or overlays. In VSDC, you can create any of these variations manually.

To do that, find the Color tone parameter in the Effect settings group and change the flare color to the desired one. Note that the selected tone will be applied to both the flares and the original footage.

To control the number of lens flares, use the parameter named Flares enabled located below the Color tone. The maximum number of flares you can have in the scene is 4, and they all are visible by default. You can select Flare 1, Flare 2, Flare 3, or Flare 4 to adjust their parameters individually or disable any of them.

Now, each flare includes three color components: red, green, and blue. You can set up each color component individually and adjust the following parameters:

  • Component intensity
  • Component distance
  • Component size

Component intensity is the parameter that controls the brightness of the selected color component. For example, you can reduce the red tone in the selected flare, and by doing that you’ll automatically increase the blue and green tones for it.

Component distance allows you to decide how far the color component will be shifted from the center of the scene to the selected lens flare. For example, if you set the value for this parameter at 0, the color component will remain in the center of the scene. And if the value equals 100, the color component will be located right over the center of the flare.

In the example below, we gradually relocate the color component for the Flare 1 from the center of the scene to the flare location. In other words, the Initial value for the component distance is 0, and the Final value is 100.

Finally, the parameter named Component size enables you to change the size of the selected color component for a particular flare.

How will you use the Lens flare effect?

There are lots of ideas for using the Lens flare effect. If you pay attention, you’ll notice it in space videos, footage of nature, and even memes!

Need ideas? Then join us on Facebook and subscribe to our YouTube channel for your weekly dose of inspiration.

Download VSDC Free Video Editor

News

New Transition Addition Methods, RAW/BRAW Files Support and Free Waveform

Welcome to the next level of video editing with VSDC's latest release, Version 9.1! Packed with an array of fresh features and enhancements, this update is designed to make your video editing experience...

VSDC 8.3 – 100+ New Templates, Key Editor Window, AV1 and Enhanced GUI

Welcome to the latest VSDC update, Version 8.3! We've been working hard and we’re ready to present a feature-packed release for you to discover an exciting array of over 100 fresh free video templates,...

Free video editing in 2023: Unlock Your Creativity without Breaking the Bank

In today's digital world creativity reigns supreme. It offers endless possibilities for individuals and brands to captivate audiences and leave a lasting impression. With social media platforms at the...

The Best Online Video Editors in 2023: Benefits and Drawbacks

In today’s digital landscape, the popularity of video content is gaining momentum, with users increasingly turning to video creation both for personal advantage and professionally. When searching for...

VSDC 8.2 – Proxy File Support, Color Keyframes and Vectorscope

We are thrilled to unveil the highly anticipated VSDC video editor 8.2 update. Our team has been hard at work, ensuring that this release is packed with exciting features and enhancements to elevate your...

VSDC 8.1 Brings Multicam, Curve Line Object, Scrolling Text Effect, and More

We’re thrilled to introduce VSDC 8.1. The new version primarily caters to professional videographers, graphic designers, and artists, however, everyday video creators will benefit from the update as...

VSDC 7.2 Takes Its Color Correction Toolset to the Next Level (Plus, Other Updates)

It has been another productive couple of months for the VSDC team, and we’re thrilled to announce the release of VSDC 7.2 – the new version of our video editing suite. Although the majority of updates...

5 Free Pieces of Software for Video Color Correction

If you’re a video creator, there are three reasons why it’s crucial to learn color correction. First, it will help you enhance your videos and make them look professional. Second, it will allow you...

VSDC 7.1 Upgrades GUI and LUT Editor, Adds New Effects and Custom Shortcuts

The new version of VSDC includes two new video effects, expands the functionality of the LUT editor, and makes video editing more convenient by bringing an improved interface, optimized timeline, and custom...

10 Pieces of Truly Free Video Editing Software (with No Watermarks)

Seeing a watermark on your video after spending hours editing it feels infuriating. Yet a few video editing software developers are still using this practice to limit the free usage of their products....
 

Screen Recorder Box

This program allows you to capture the video of your desktop and save it on your PC in various formats. Coupled with a video editor, the program is a great tool for creating presentations, tutorials and demo videos.

Read more about Screen Recorder...


Video Capture Box

The program captures video from external devices and records it to computer in a free format. You can save video from video tuners, webcams, capture cards and other gadgets.

Read more about Video Capture...


Reviewed by


"VSDC Free Video Editor is a surprisingly powerful, if unconventional video editor"

- PC Advisor


"This video editor gives you tons of control and editing power"

- CNet


"The editor handles many common formats and boasts a good deal of capabilities when it comes time to alter lighting, splice video, and apply filters and transitions in post production"

- Digital Trends