 User Help Manual
  Learn FAQ
  Send us feedback
 ")


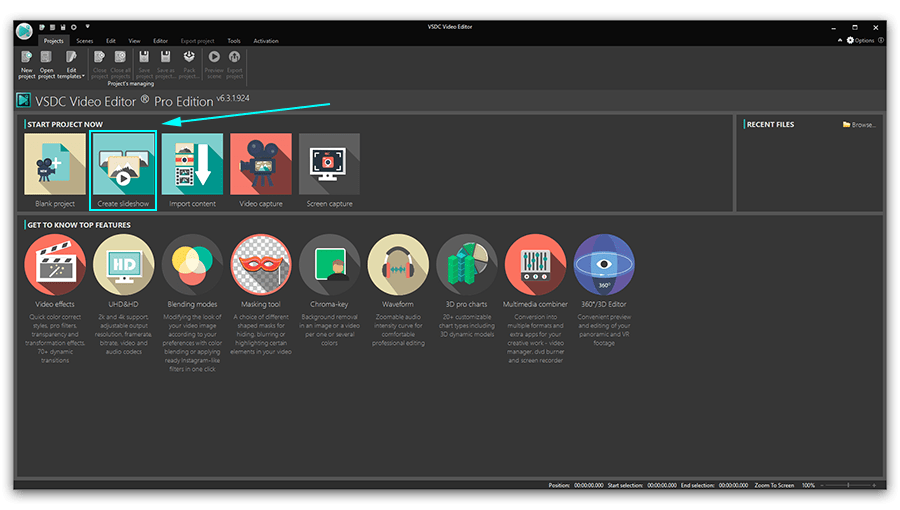
Video Editor
Use free video software to create and edit videos of any complexity from a family greeting card to a company presentation. Cut, merge video files, apply visual and audio effects, use filtration and image correction, make slideshows and add an appropriate soundtrack. Use multi-color Chroma Key and advanced parameters settings to give your video a professional look. All popular video and audio formats are supported.
Video Converter
This program is intended for converting video files from one format to another. Nearly all popular video formats are supported (both reading and saving). In addition, the program drastically simplifies the task of converting videos for playback on specific multimedia devices, such as iPhone, Samsung Galaxy or Huawei P30 Pro. The program is extremely easy to use, has a modern interface and all necessary video processing functions.
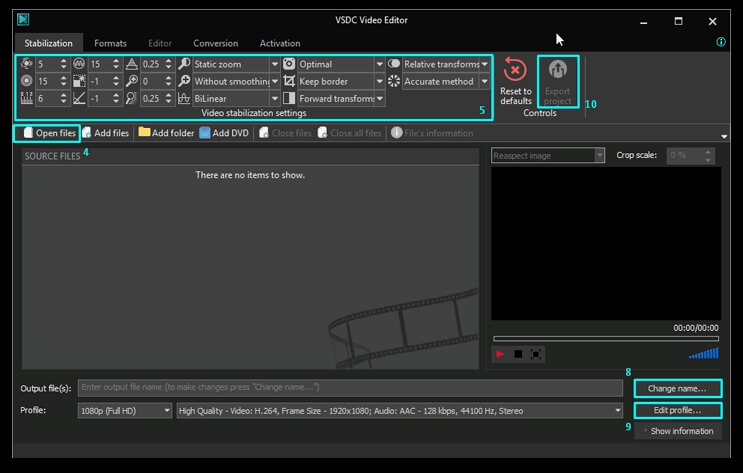
Audio Converter
The audio converter will help you convert audio files from one format to another. All key audio formats and codecs are supported. The program also allows you to manage playlists and meta tags, extract audio from video files and save these tracks on your computer in any format.
Audio CD Grabber
This audio tool is intended for grabbing audio tracks from compact discs and saving them to the user’s computer in any format. Nearly all popular audio formats and codecs are supported. The program can also extract track details from the FreeDB server for automatic file renaming and updating meta tags.
 Video Editor
 Video Converter
 Audio Converter
 Audio CD Grabber

Multifunctionality
A wide array of multimedia processing tools in one free video software suite.

High speed
Our programs use fast
and high-quality algorithms optimized for single and multi-core CPU’s.

Affordability
VSDC video software is freely available for download to Windows OS-based PCs and laptops.
News:
- Welcome to the next level of video editing with VSDC's latest release, Version 9...
- Welcome to the latest VSDC update, Version 8.3! We've been working hard and we’r...
- In today’s digital landscape, the popularity of video content is gaining momentu...
- In today's digital world creativity reigns supreme. It offers endless possibilit...
How to edit video colors in VSDC: a quick tutorial
Working with colors in a video is a huge and exciting topic. Typically, you would think of color correction either for practical reasons or for a creative calling. Sometimes you need a quick fix because the footage has been recorded with issues - poor light, gloomy day, wrong camera setup. Other times you might want to get artsy and just play with the colors, achieve a certain style or an atmosphere in your video.
There are solutions for each case. It all depends on your level of experience and the time you’re willing to invest in the process. In the tutorial below, we’ll show you how to quickly edit colors of a video using Instagram-style filters, LUTs, and standard manual color adjustments in VSDC – a free video editor for Windows OS. We’ll also teach you to change the color of an object in a video or a photo.
Download VSDC Free Video Editor
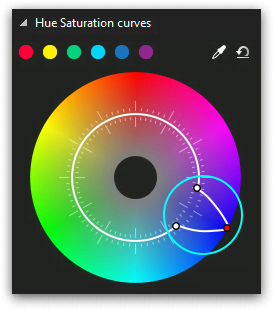
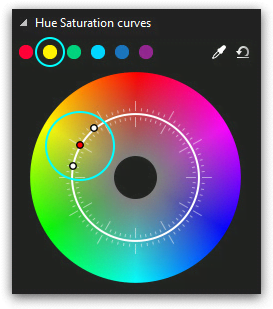
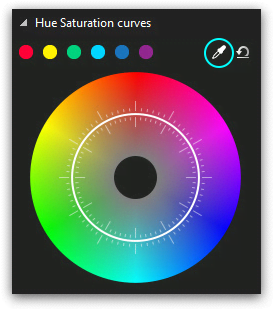
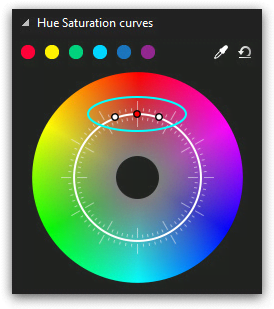
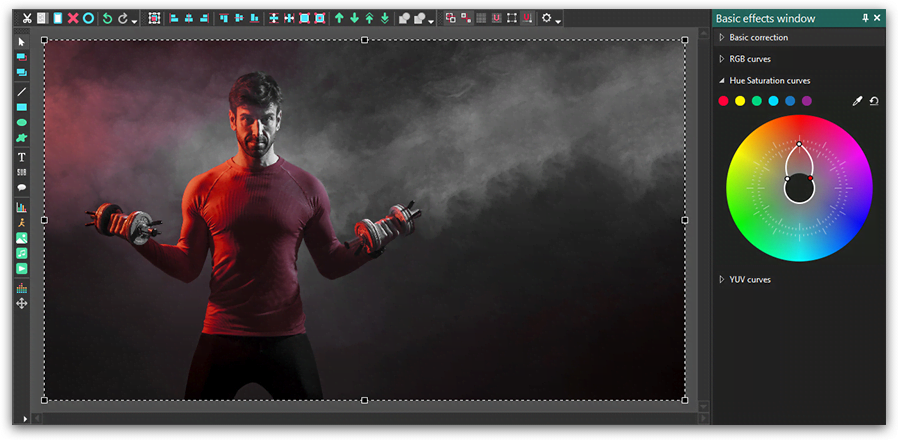
If you’re looking for more professional-level color correction techniques, check out our tutorials on working with RGB curves and Hue & Saturation color wheel.
How to edit video colors in one click: LUTs and Instagram-style filters
Let’s start with the easy part. If you have no particular color-related issues in the video and simply want to make it pop with a beautiful color combination, you’ll love quick filters available in VSDC.
Here is how to apply one-click Instagram-style filters to your video:
- Click on the video you want to correct.
- Open the Quick style menu at the top of the program interface.
- Click on any style to get real-time preview. Every applied style will be displayed in the menu in a light-gray frame confirming that the style has been selected.
- To deselect a chosen style, click on it once again. To remove all the applied styles, click on the corresponding button at the top left corner of the Quick style menu.
As you can see, there are 37 filters for you to play with including a selection of old movie styles and blurs. You can apply multiple styles to the same video and even create templates to apply the same combination to other files.
Next comes the set of LUTs. LUTs are one of those magic tools that make your poorly colored video look like a major motion picture. Technically, a LUT (look-up table) is a set of pre-selected color parameters the software will apply to your video or an image to make it look a particular way.
LUTs are widely used by videography professionals. There are 10 of them already configured and available in VSDC, plus you can find LUT packs online to download them to your computer and apply through the editor.
Here is how to find the corresponding menu:
- Click on the necessary video with the right mouse button.
- Select Video Effects --> Adjustments --> LUT.
- In the next tab on the timeline, you’ll find a LUT1 layer. Click on it with the right mouse button and select Properties.
- The Properties window will slide in from the right-hand side.
- Click on the LUT effect settings and select any of the available options while checking the result in the preview window.
How to change video colors by adjusting contrast, saturation, and other parameters
If you want to edit video colors manually by adjusting its brightness, temperature, contrast, and other parameters, you’re welcome to do so. Just go the Video Effects tab, scroll down to Adjustments and select the set of parameters you need to change.
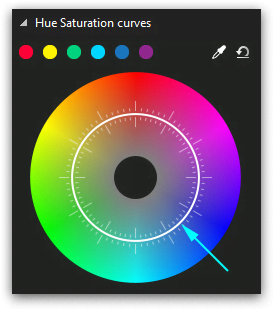
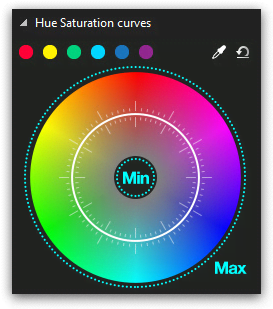
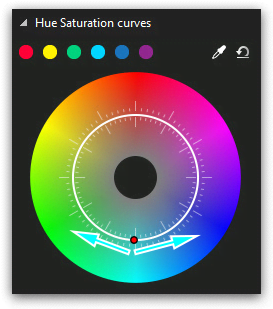
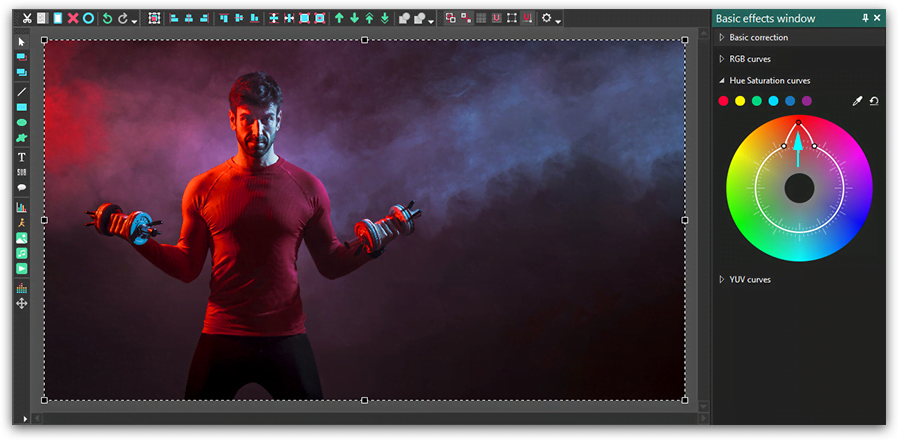
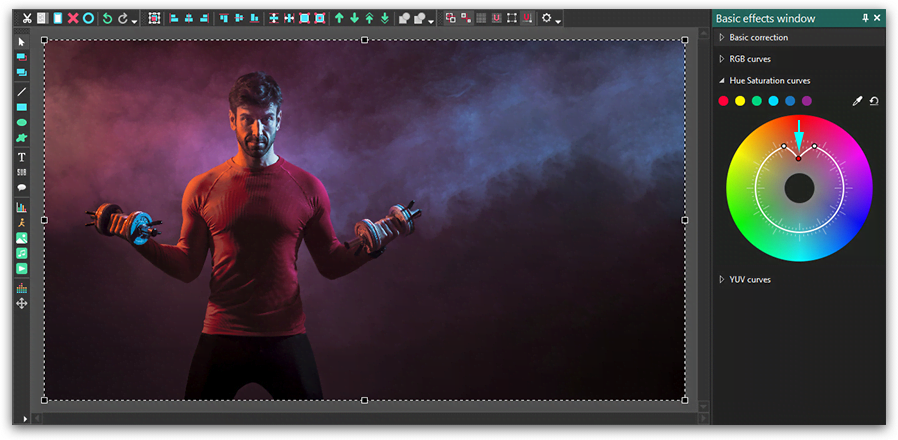
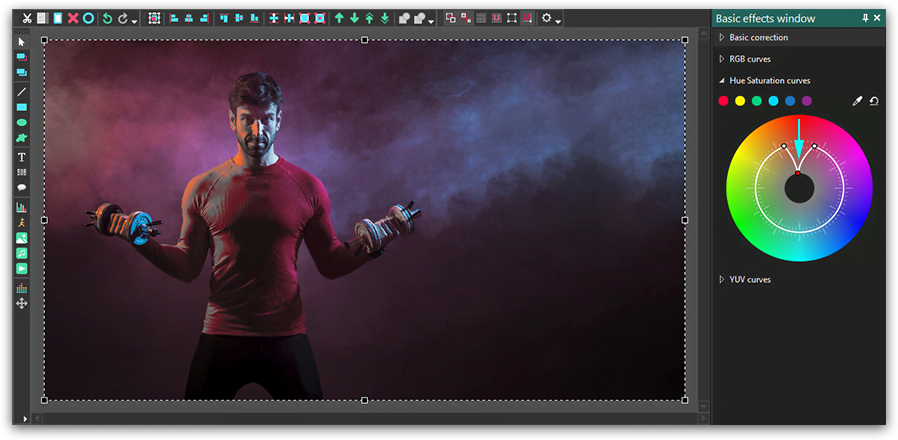
Say, you want to change Hue and Saturation levels. Once you select this option from the menu, you’ll notice a new tab with an HSV 1 layer on the timeline. Click the layer with the right mouse button and select Properties from the menu. The Properties window will slide in from the right-hand side. Find “HSV effect settings” and manually change the levels as it’s demonstrated in the video above.
How to change the color of an object in a video or in an image
In the last part of this tutorial, we’ll teach you to change the color of an object in a video using a tool called Gradient. Gradient allows you to make a gradual blend between various colors. Naturally, you can apply the same effect to photos as demonstrated below. Below, there is a video guide and text instructions for you to follow.
Step 1. Add an image or a video to the editor.
Step 2. Create a shape using the left-hand side menu and place it over the area you’re planning to edit. In this case, we use the Ellipse, but there is also a Rectangle and a “Free shape” adjustable to any form. The shape will serve as a mask and define the area color correction will be applied to.
Step 3. When you add a shape to the scene, go to the upper menu and select an ellipse style #3 - a colored one without borders.
Step 4. Make a double click on the ellipse layer and add one more ellipse to separate the area you’ll apply gradient color correction to – just like illustrated below.
Step 5. Go to the Properties window on the right and choose to paint background color black. Note: it’s the intersection of these two ellipses that will be visible in the end.
Step 6. Now go to the Blending menu on the left-hand side of the timeline and select “Inverted mask” – you’ll instantly see which area you’ll be working with.
Step 7. Go to the main scene (Tab “Scene 0”), highlight the ellipse and go to the Properties window to select Gradient from the dropdown “Fill background” menu.
Step 8. Open “Gradient settings” and select the appropriate gradient type. Try applying different colors and changing the direction of the gradient vector.
Step 9. Check different blending modes to get the result you had in mind.
Please note that the “Inverted mask” tool is only available in VSDC Pro version that is $19.99 per year. The rest of the video color changing tools and filters described in this tutorial are available for free.
You can get more information about the program on Free Video Editor' description page.


This program allows you to capture the video of your desktop and save it on your PC in various formats. Coupled with a video editor, the program is a great tool for creating presentations, tutorials and demo videos.

The program captures video from external devices and records it to computer in a free format. You can save video from video tuners, webcams, capture cards and other gadgets.

"VSDC Free Video Editor is a surprisingly powerful, if unconventional video editor"
- PC Advisor

"This video editor gives you tons of control and editing power"
- CNet

"The editor handles many common formats and boasts a good deal of capabilities when it comes time to alter lighting, splice video, and apply filters and transitions in post production"
- Digital Trends
© 2011-2024, www.videosoftdev.com, FLASH-INTEGRO LLC. Privacy policy | Terms of use | About us
All trademarks referenced herein are the sole property of their respective owners.
Copying any materials from this site allowed only with written consent of Site Administration.