How to Change a Color in a Video Using VSDC LUT Editor
If you want to change or replace a color in a video, you can do it using the free version of VSDC. Due to the built-in LUT editor, VSDC allows you to have full control of the video color scheme, so you can enhance the look of your footage, change its aesthetic, or add an artistic touch by replacing certain colors.
The best part about this color replacement trick? As long as your footage is of high quality, it’s surprisingly easy to replicate. As a matter of fact, you’ll be able to do it even if you have zero video editing experience. Moreover, you can replace a color in a video permanently (for the entire duration of the video) or temporarily as illustrated in the example above.
The only thing to keep in mind before getting started is that the color you want to replace should be unique and contrasting compared to the rest of the colors in the video (again, like in the example above). Otherwise, other objects in the video containing the same color tone might be affected by the changes.
Ready to start? Download the latest version of VSDC (Windows only) and follow the steps below.
Step 1. Import your footage to VSDC
Launch VSDC on your computer and hit Import content to upload your video. The program will automatically create a project with the parameters matching the parameters of your video. Just confirm the default selection in the pop-up window, and your footage will be added to the scene.
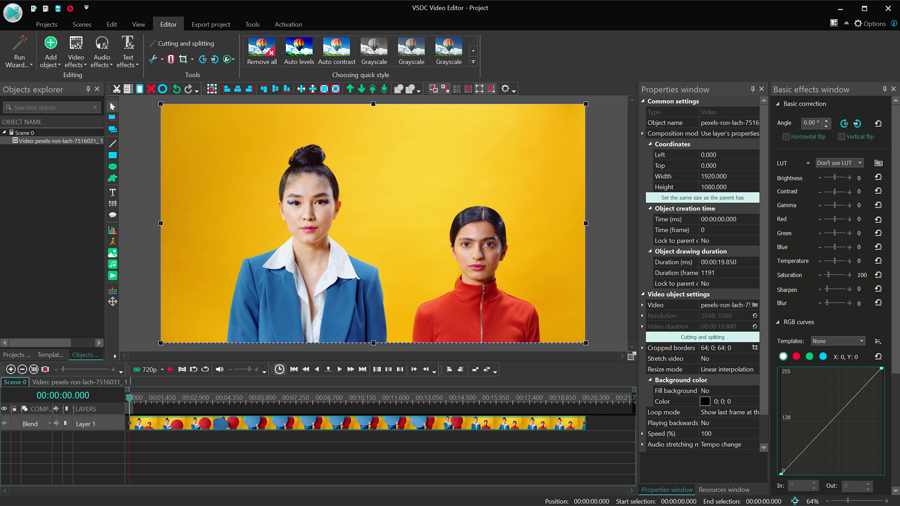
For this tutorial, we’re going to change the color of the background by replacing yellow with other colors.
Step 2. Create an empty LUT
The fastest and most efficient way to replace a color in a video is a custom LUT. To create one, switch to the View tab at the top and select Resources window. Then click anywhere in the Resources window using the right mouse button and select Add resources > Create LUT. A new empty LUT will be added to the list of resources.
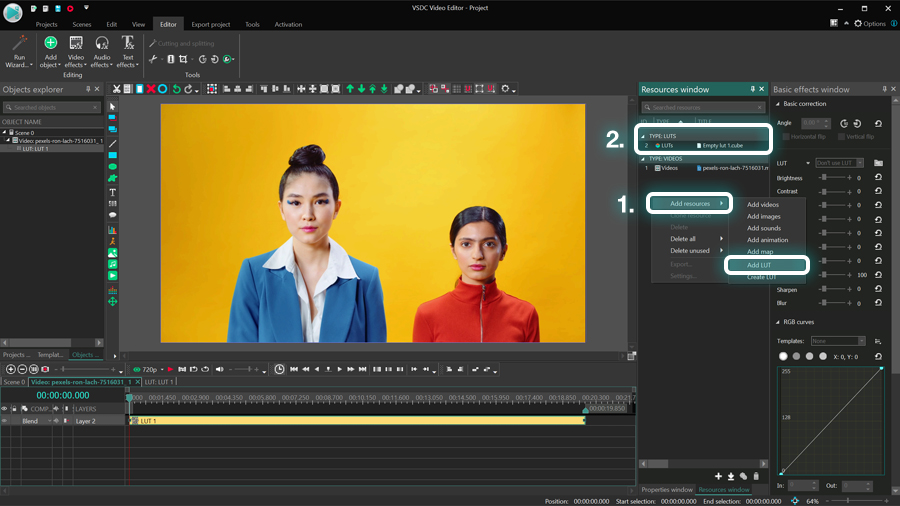
Double-click on the video and drag the LUT from the Resources window to the timeline. Notice that by default the LUT will be added to the timeline from the playhead position, but you can move it with the mouse, too.
Once the LUT is on the timeline, go back to the Resources window and double-click its cube-shaped icon to open the LUT settings.
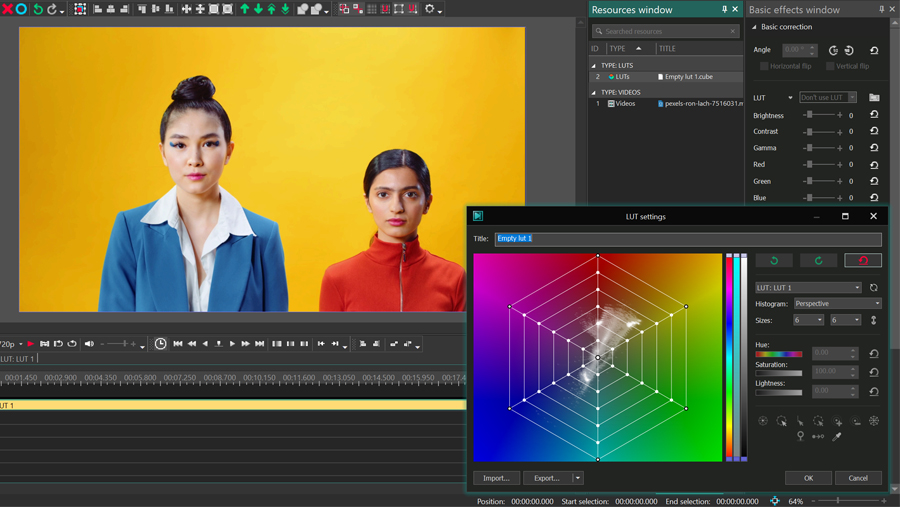
The gradient histogram represents all existing color tones, and the white spots visualize the color tones in that particular video. Using control points (the intersections of rays and circles), we can adjust any color tone in the video and change its saturation level or hue. The latter is exactly what we’ll do in the next step.
Step 3. Replace the color in your video
To replace color A with color B in a video, you need to select the corresponding control points in the color A section and drag them to the color B section on the histogram.
For our example, we can grab the brightest yellow tone control point and drag it to any other color section. You’ll be able to see the result immediately.
Notice that the entire ray of yellow color tones is dragged along. This approach produces an impeccable result and works well for most videos. In a moment, we’ll show you what happens if some of the tones remain unchanged.
How to find the right control point on the grid
Our footage makes it easy to tell which control point we should select. However, in your case, things might look different. Because of the spectrum of tones and shades, it may be unobvious how to find the right color on the gradient and which control points you should be working with.
For these cases, the eyedropper tool comes in handy. Select the eyedropper icon from the right-side menu and go to the preview window to click on the color you want to replace. The corresponding point on the grid will be selected automatically.
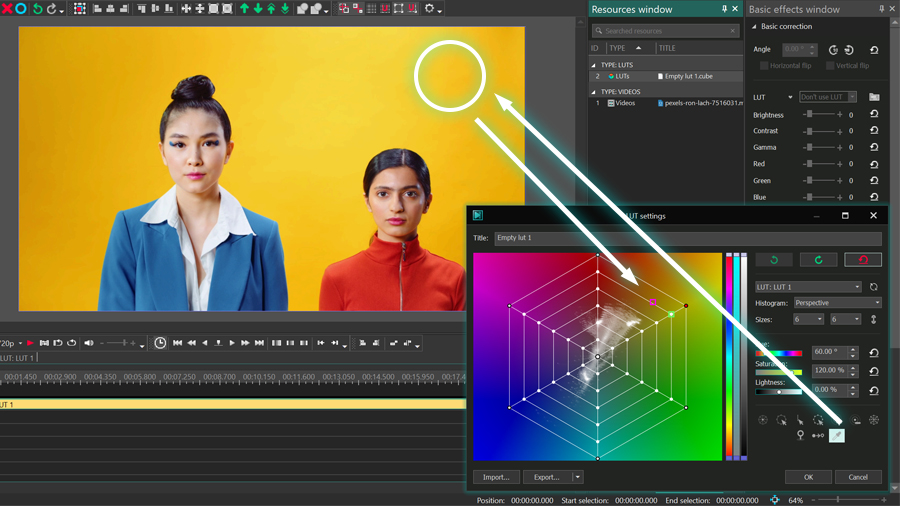
From there, you can try and work with the suggested control point. However, be prepared for further adjustments. In our example, the major part of the background has been replaced, however, there are noticeable artifacts in the areas where the yellow tone was brighter.
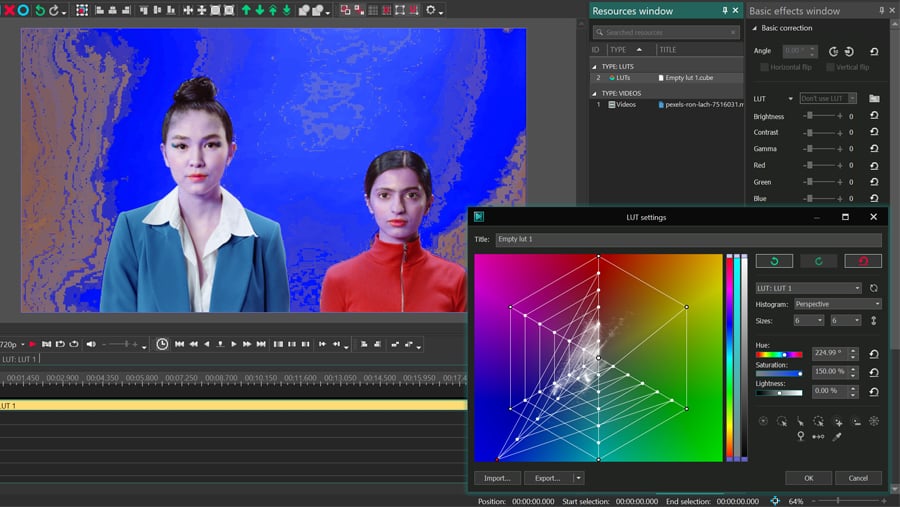
In our case, it’s an easy fix. All we need is to drag the remaining control point from the yellow section to the blue section.
Color tones can be tricky, especially if a video was shot with insufficient light. If things don’t look the way you expected right away, don’t get discouraged and try to toggle the controls a bit. For example, you may want to move control points of the same color section one by one to see how each of them affects the result. You may also want to increase the number of control points by changing the number of rays and circles on the grid.
Finally, we recommend reading this detailed guide to working with the LUT editor to better understand its toolset.
Step 4. Preview the result and export your video
Use the Preview feature, and if you’re happy with the look of the video, hit OK in the LUT editing window to close it. Next, before proceeding to export, make sure that the duration of the LUT on the timeline aligns with your goals.
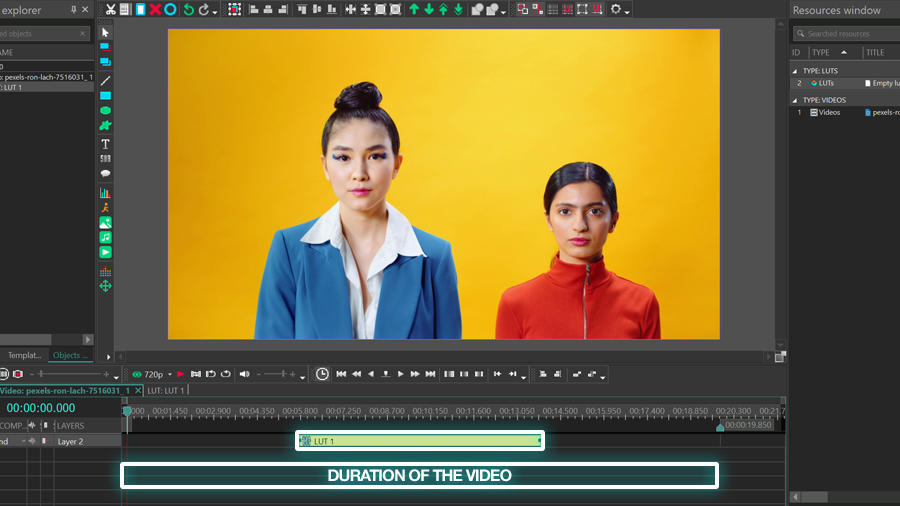
For example, if you want the selected color to be replaced for the duration of the entire video, the LUT layer should have the same duration as the video you’ve applied it to. However, if you need the color replacement to be temporary, shorten the LUT layer and place it accordingly on the timeline.
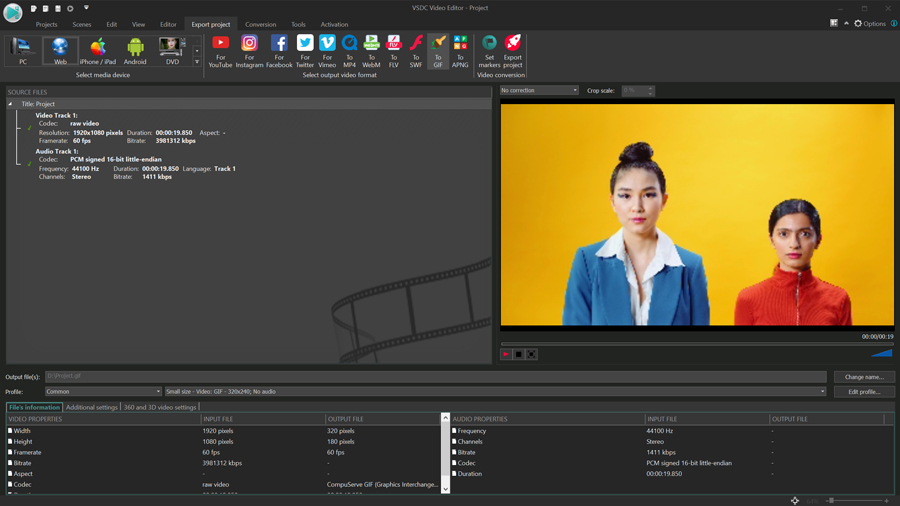
Once ready, go to the Export tab and save the video to your computer.
Bonus: how to change the color of the same object more than once
Now that you’ve learned how to use LUTs to change a color in a video, feel free to experiment! For example, you can try to replicate the popular “chameleon” effect and make an object in a video change color multiple times – just like at the beginning of this tutorial.
To achieve this effect, you’ll need to create as many empty LUTs as many times you want the object’s color to change. Adjust the settings for each LUT following the guidelines from above, then shorten their duration and merge them on the timeline.
In our example, there are 5 LUTs with different color replacement settings visible somewhere between the 3
Explore more color editing tricks with VSDC
If you like working with color, and you’d like to learn more tricks, go straight to the VSDC YouTube channel and browse through the videos. There’s much more to it than just color grading! For instance, if you always wanted to replicate the famous Sin City effect (which means dimming all tones in a video except for one color), below is a tutorial to help you achieve that. Enjoy!
Got any questions about the effect? Email us at This email address is being protected from spambots. You need JavaScript enabled to view it.
Looking for inspiration for your next video? Check our YouTube channel.
You can get more information about the program on Free Video Editor description page.